
"How to change screen timeout on Windows 11" is one of our most-asked questions on Laptop Mag as more people try to get accustomed to Windows 10's successor.
Some people are irked by their displays constantly falling asleep on them. Others may want to program their screen to time out after sitting idle for a certain period of time. Either way, we've got the scoop on how you can change your screen timeout on Windows 11. Simply follow the steps below and you're golden.
How to change screen timeout on Windows 11
1. Go to the Windows 11 taskbar on the bottom of your desktop and click on the search icon (magnifying glass).
2. Type in Control Panel in the search field and click on it.
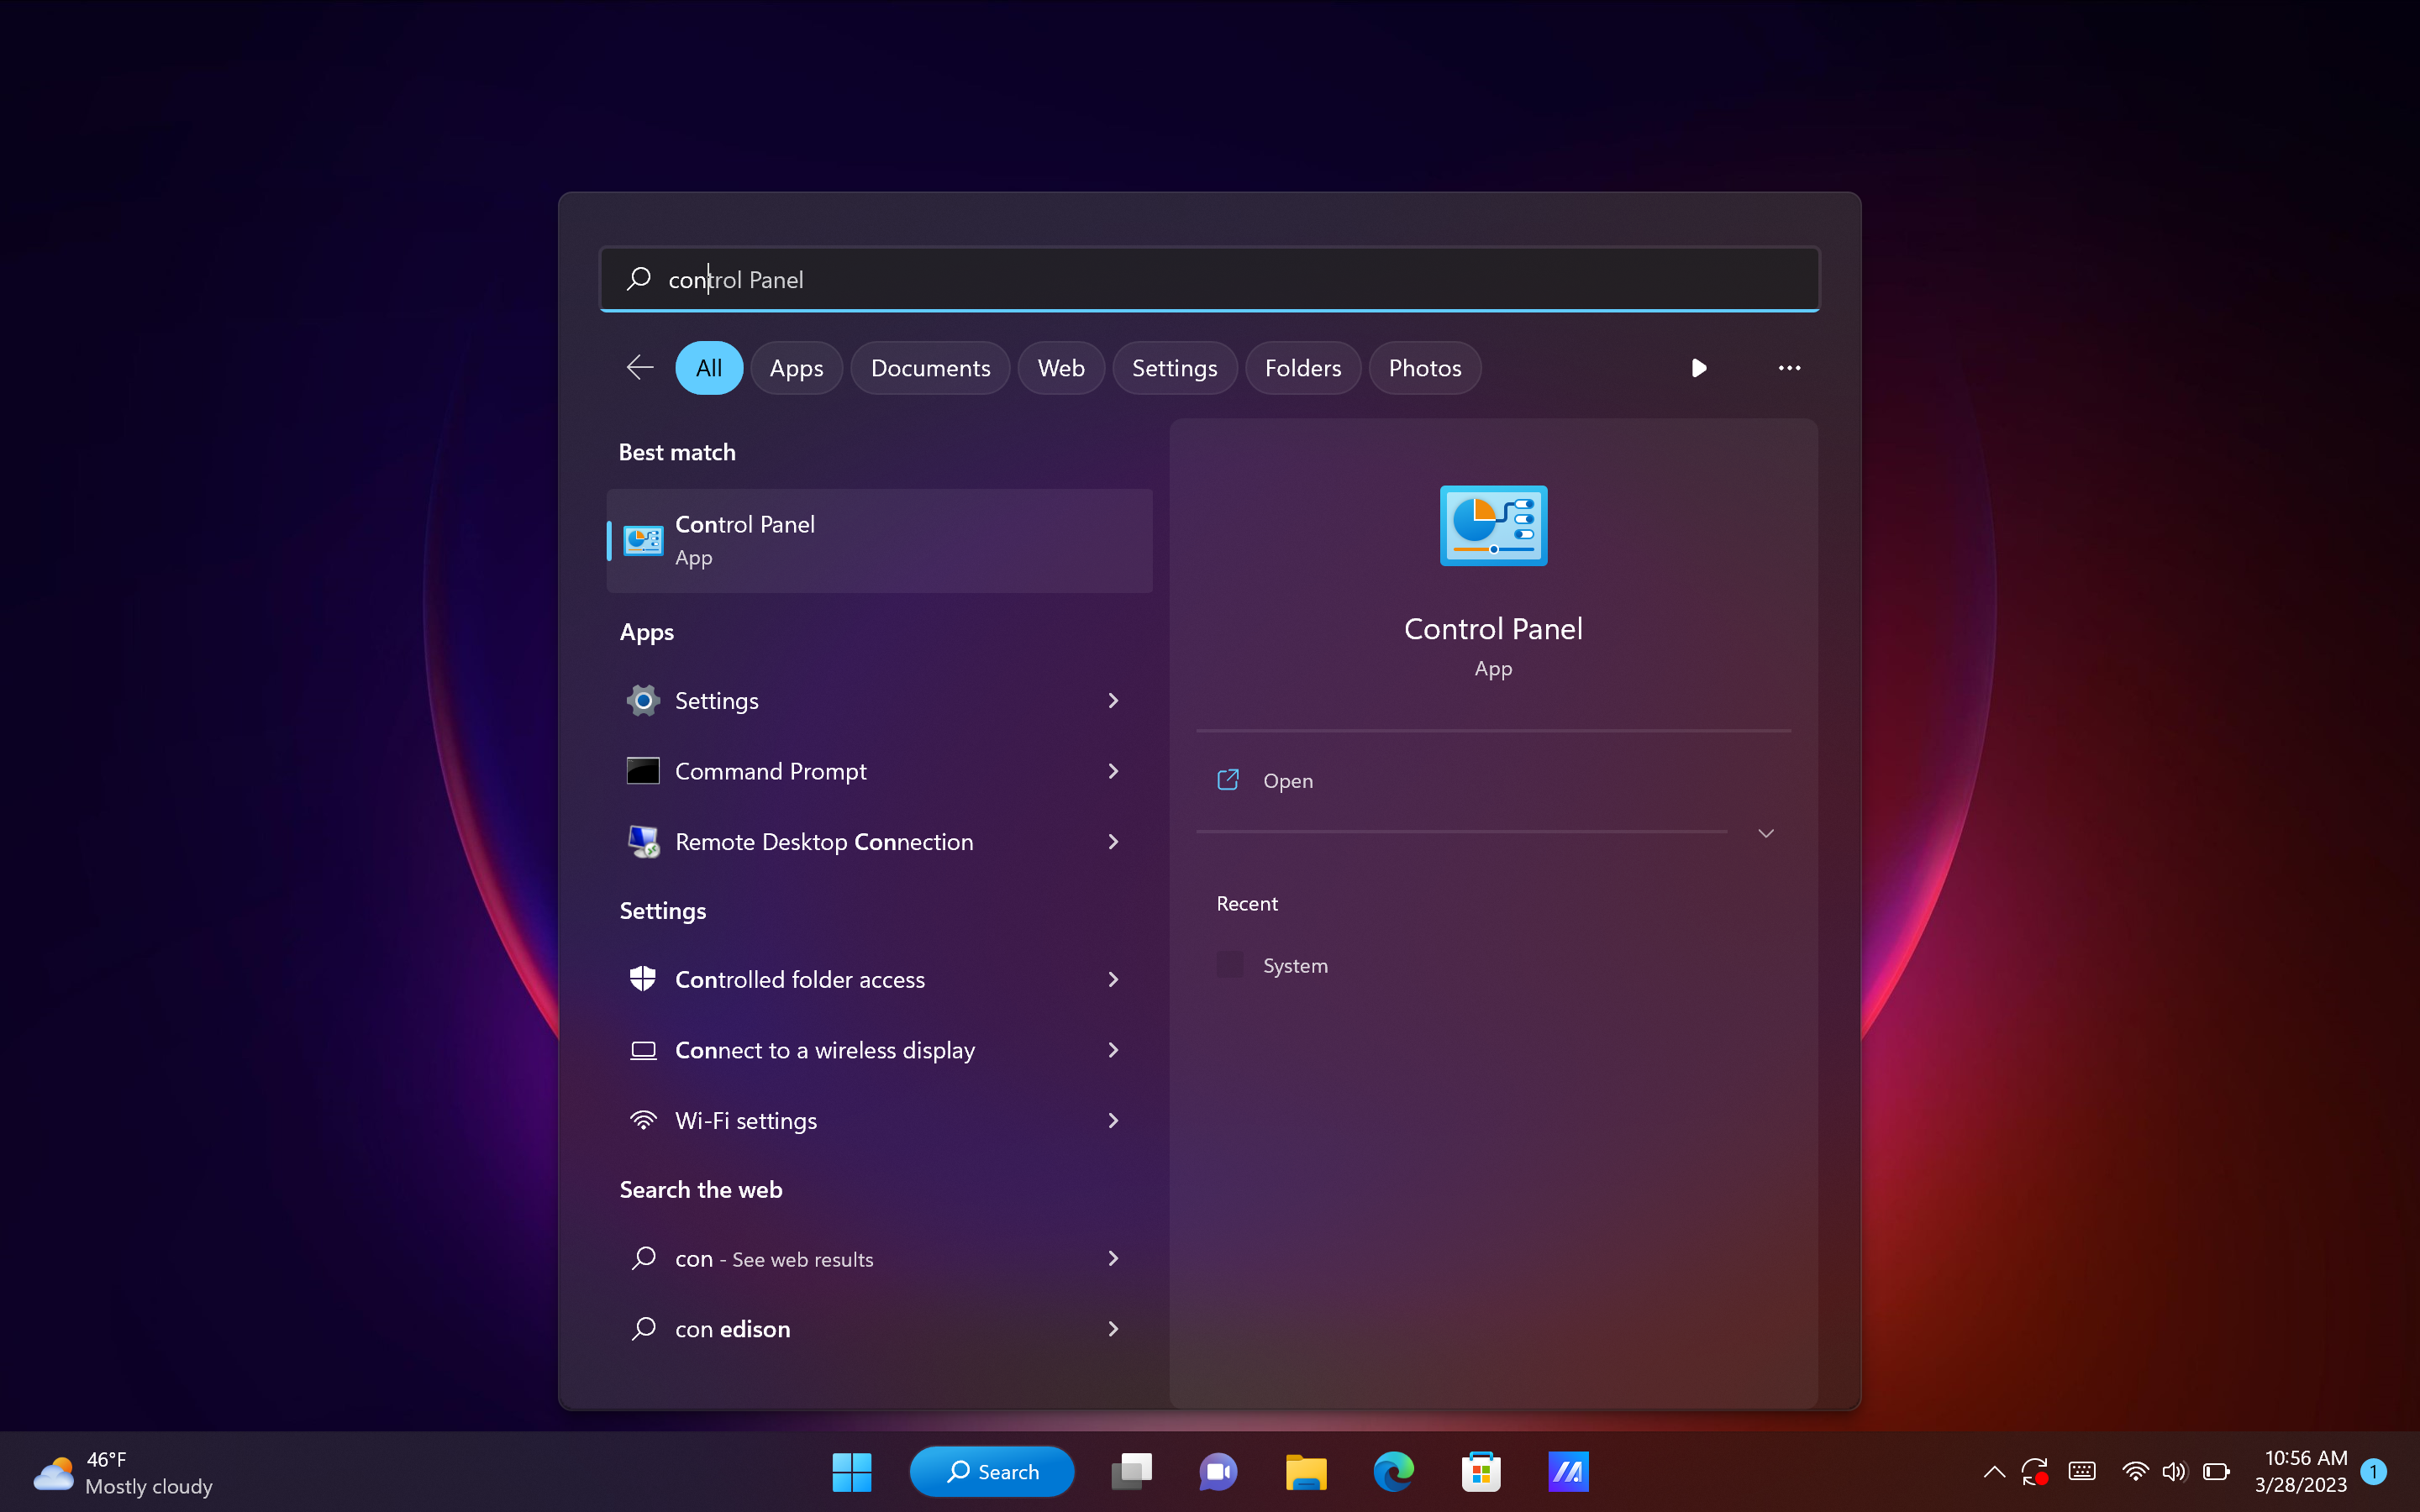
2. Type in Control Panel in the search field and click on it.
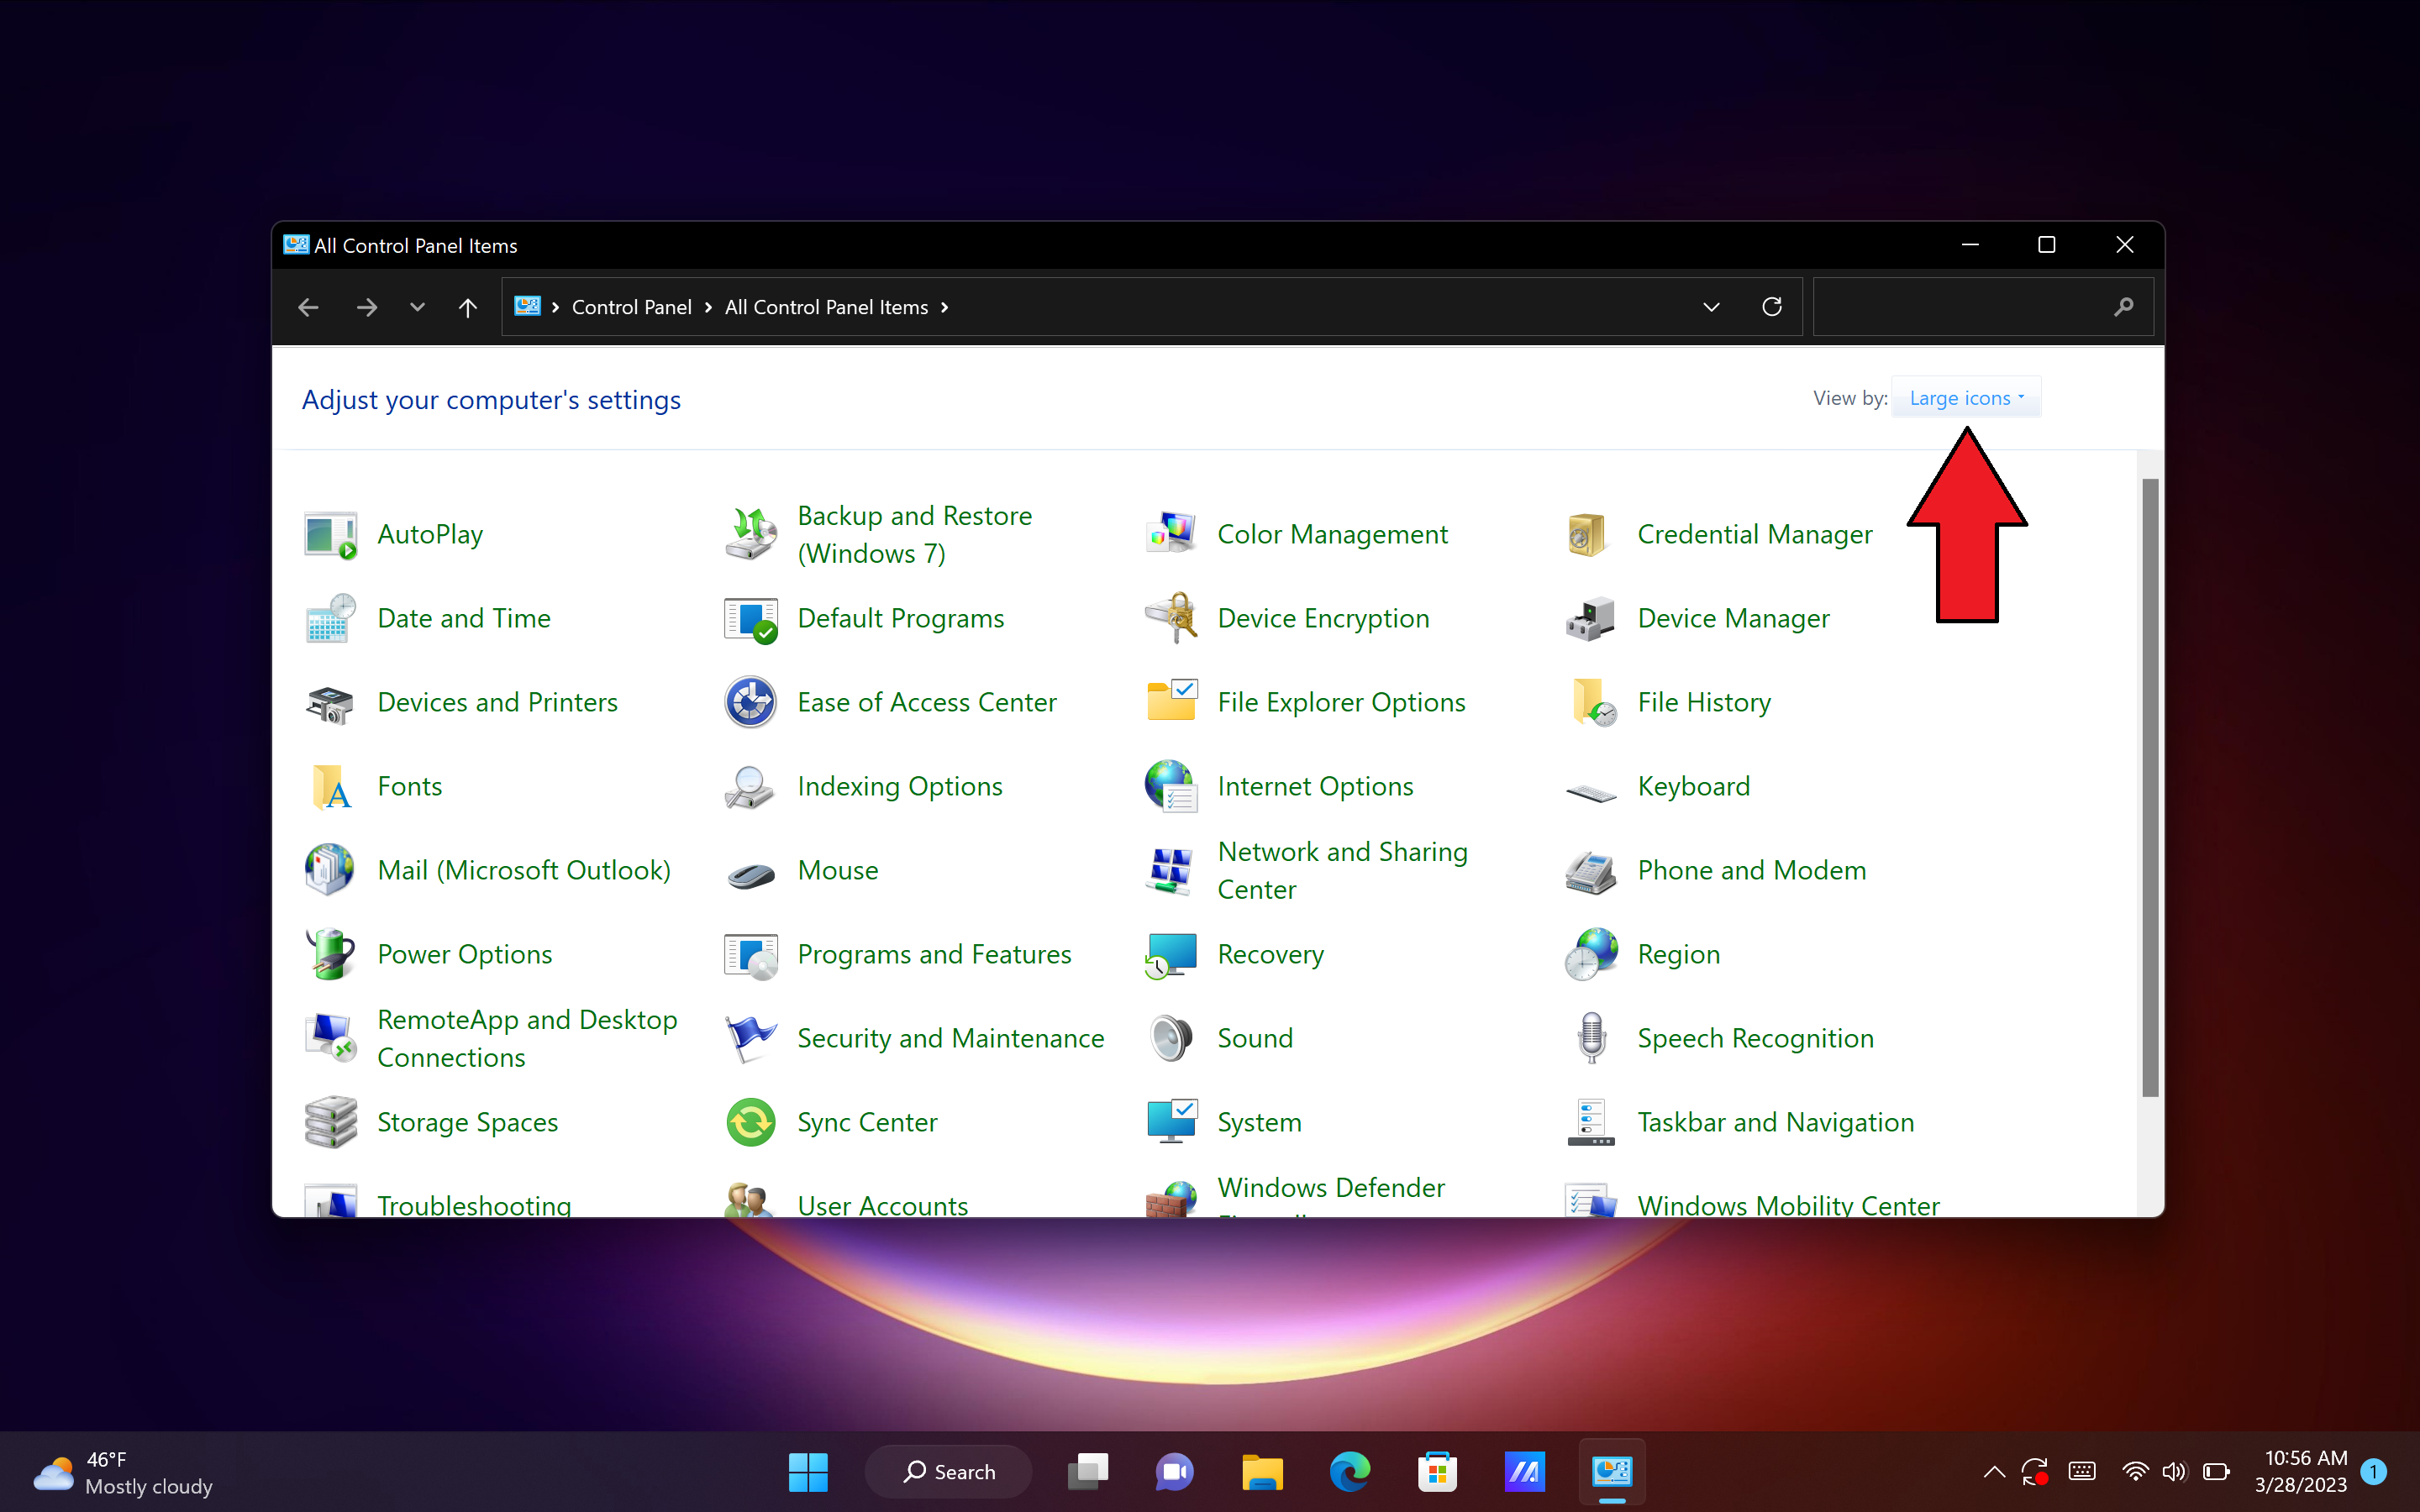
3. On the top-right corner, make sure Large Icons is toggled on next to View By.
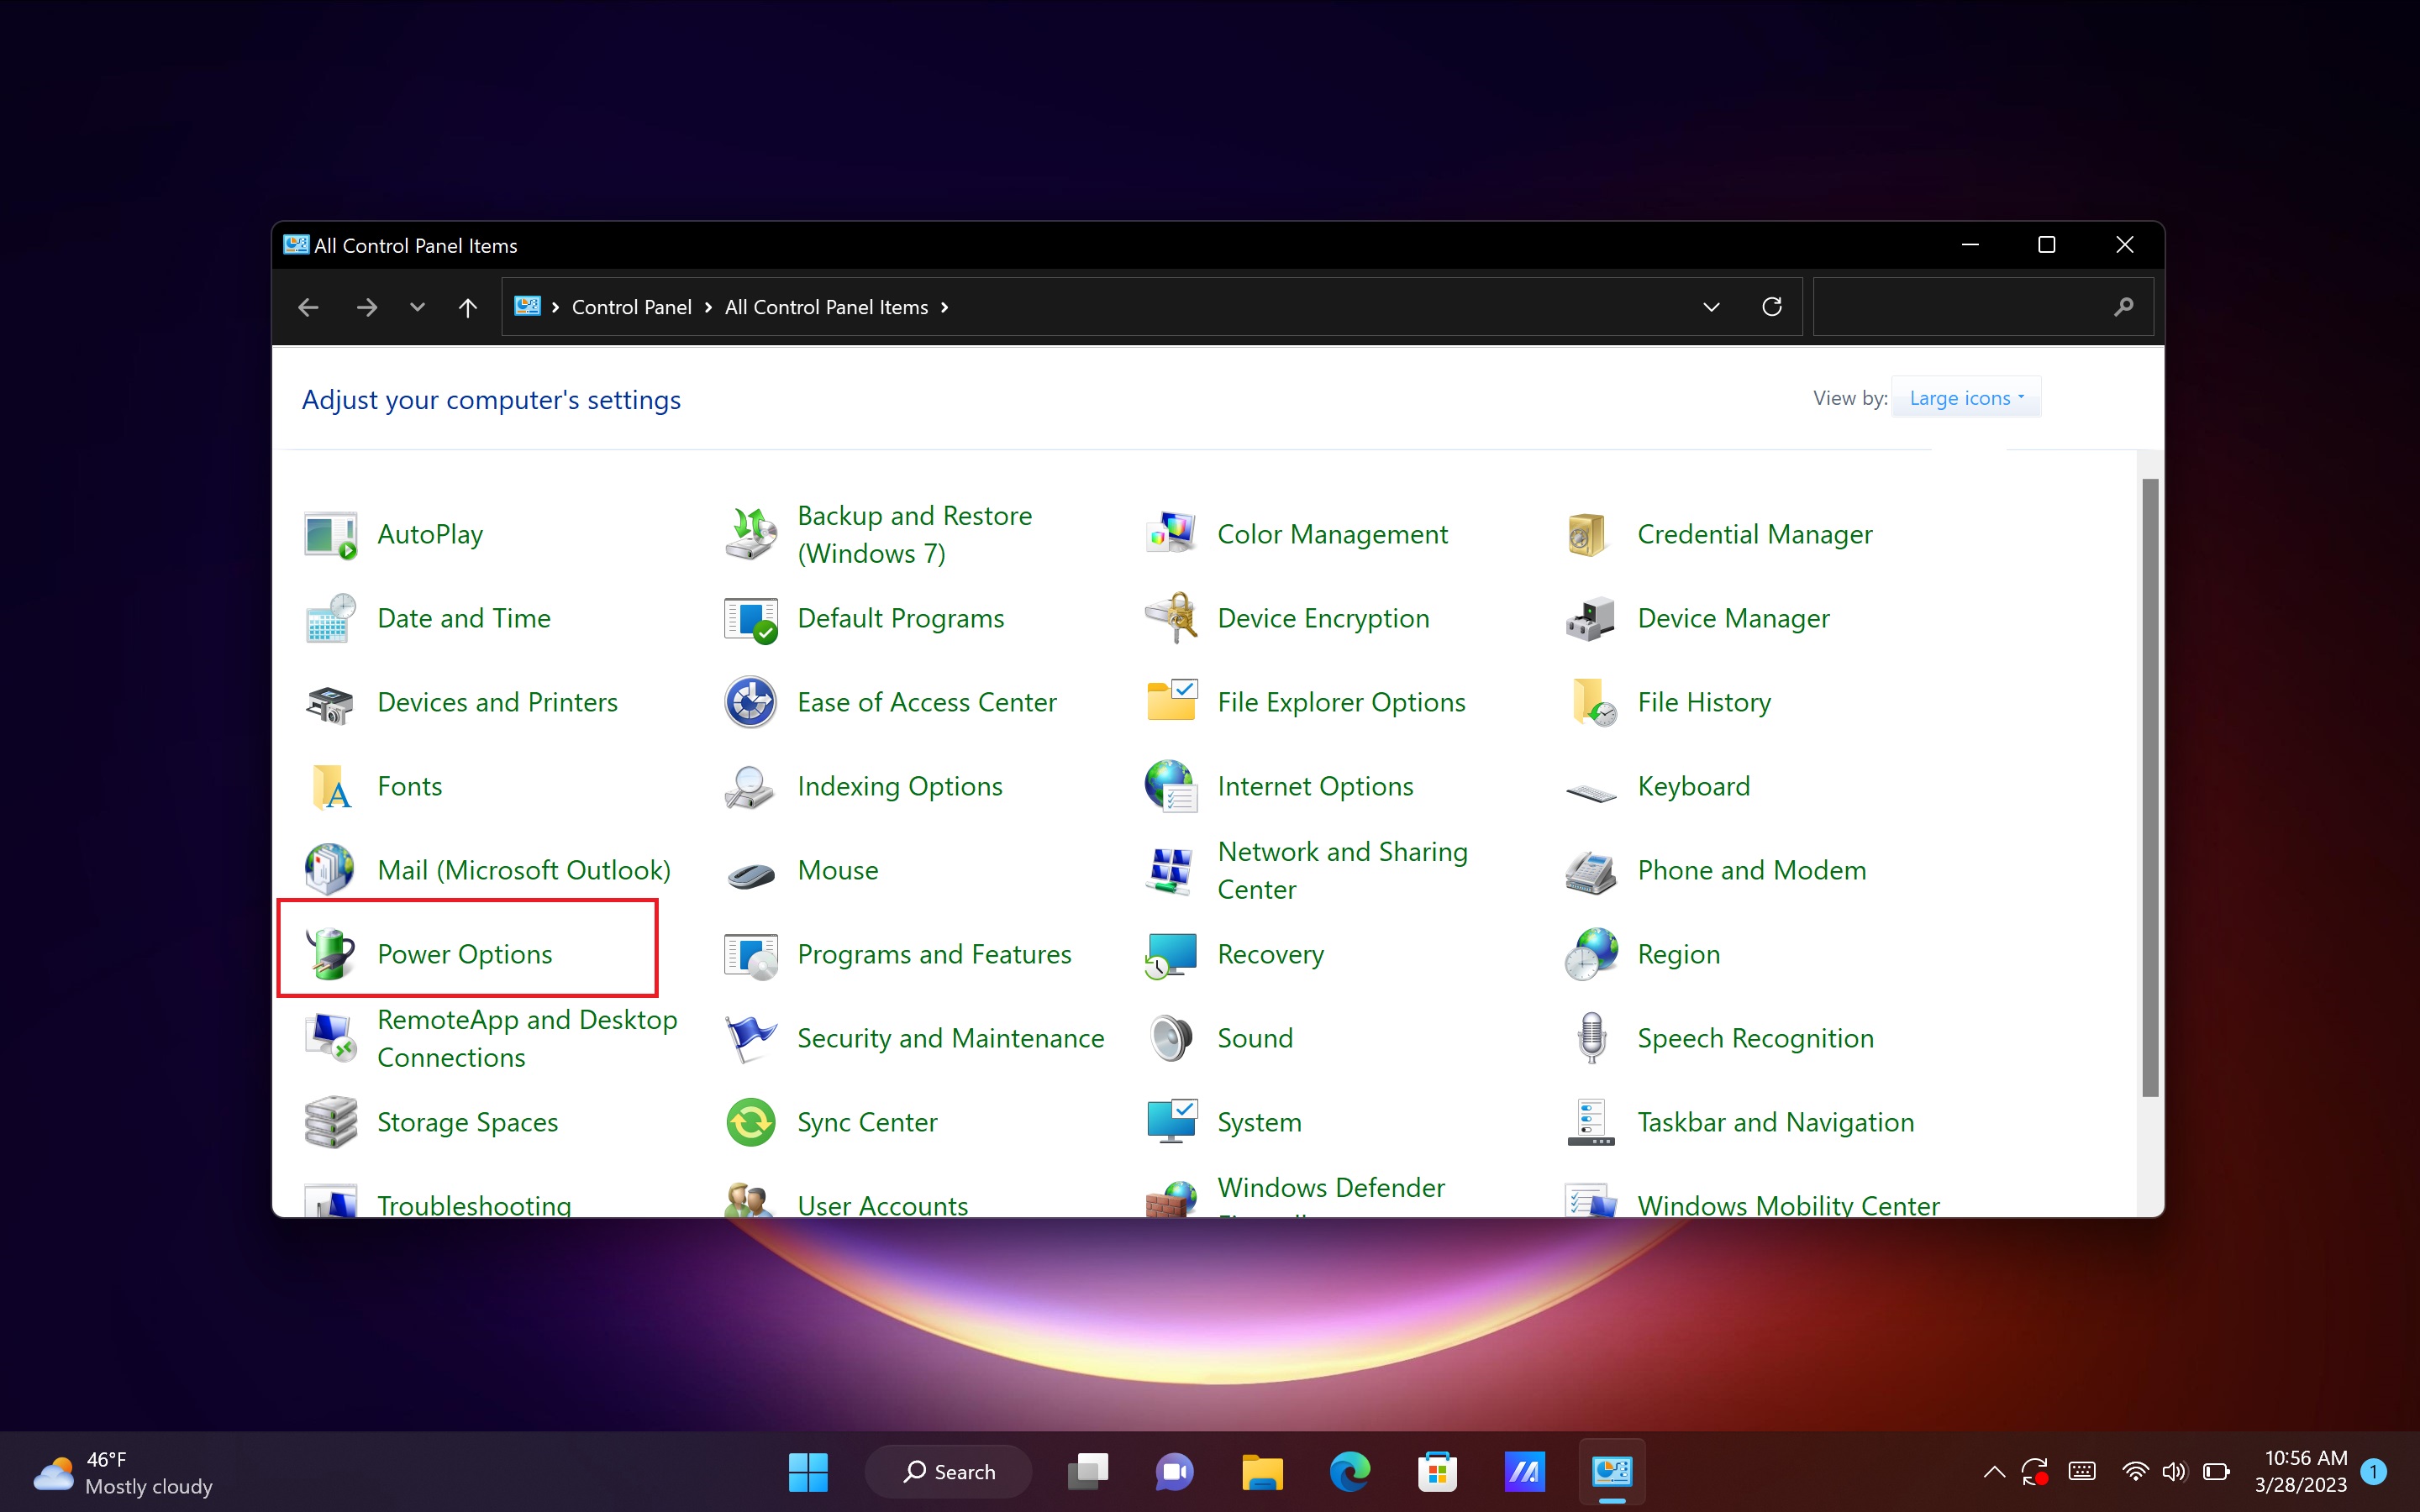
3. Click on Power Options.
4. On the left panel, click on Change when the computer sleeps.
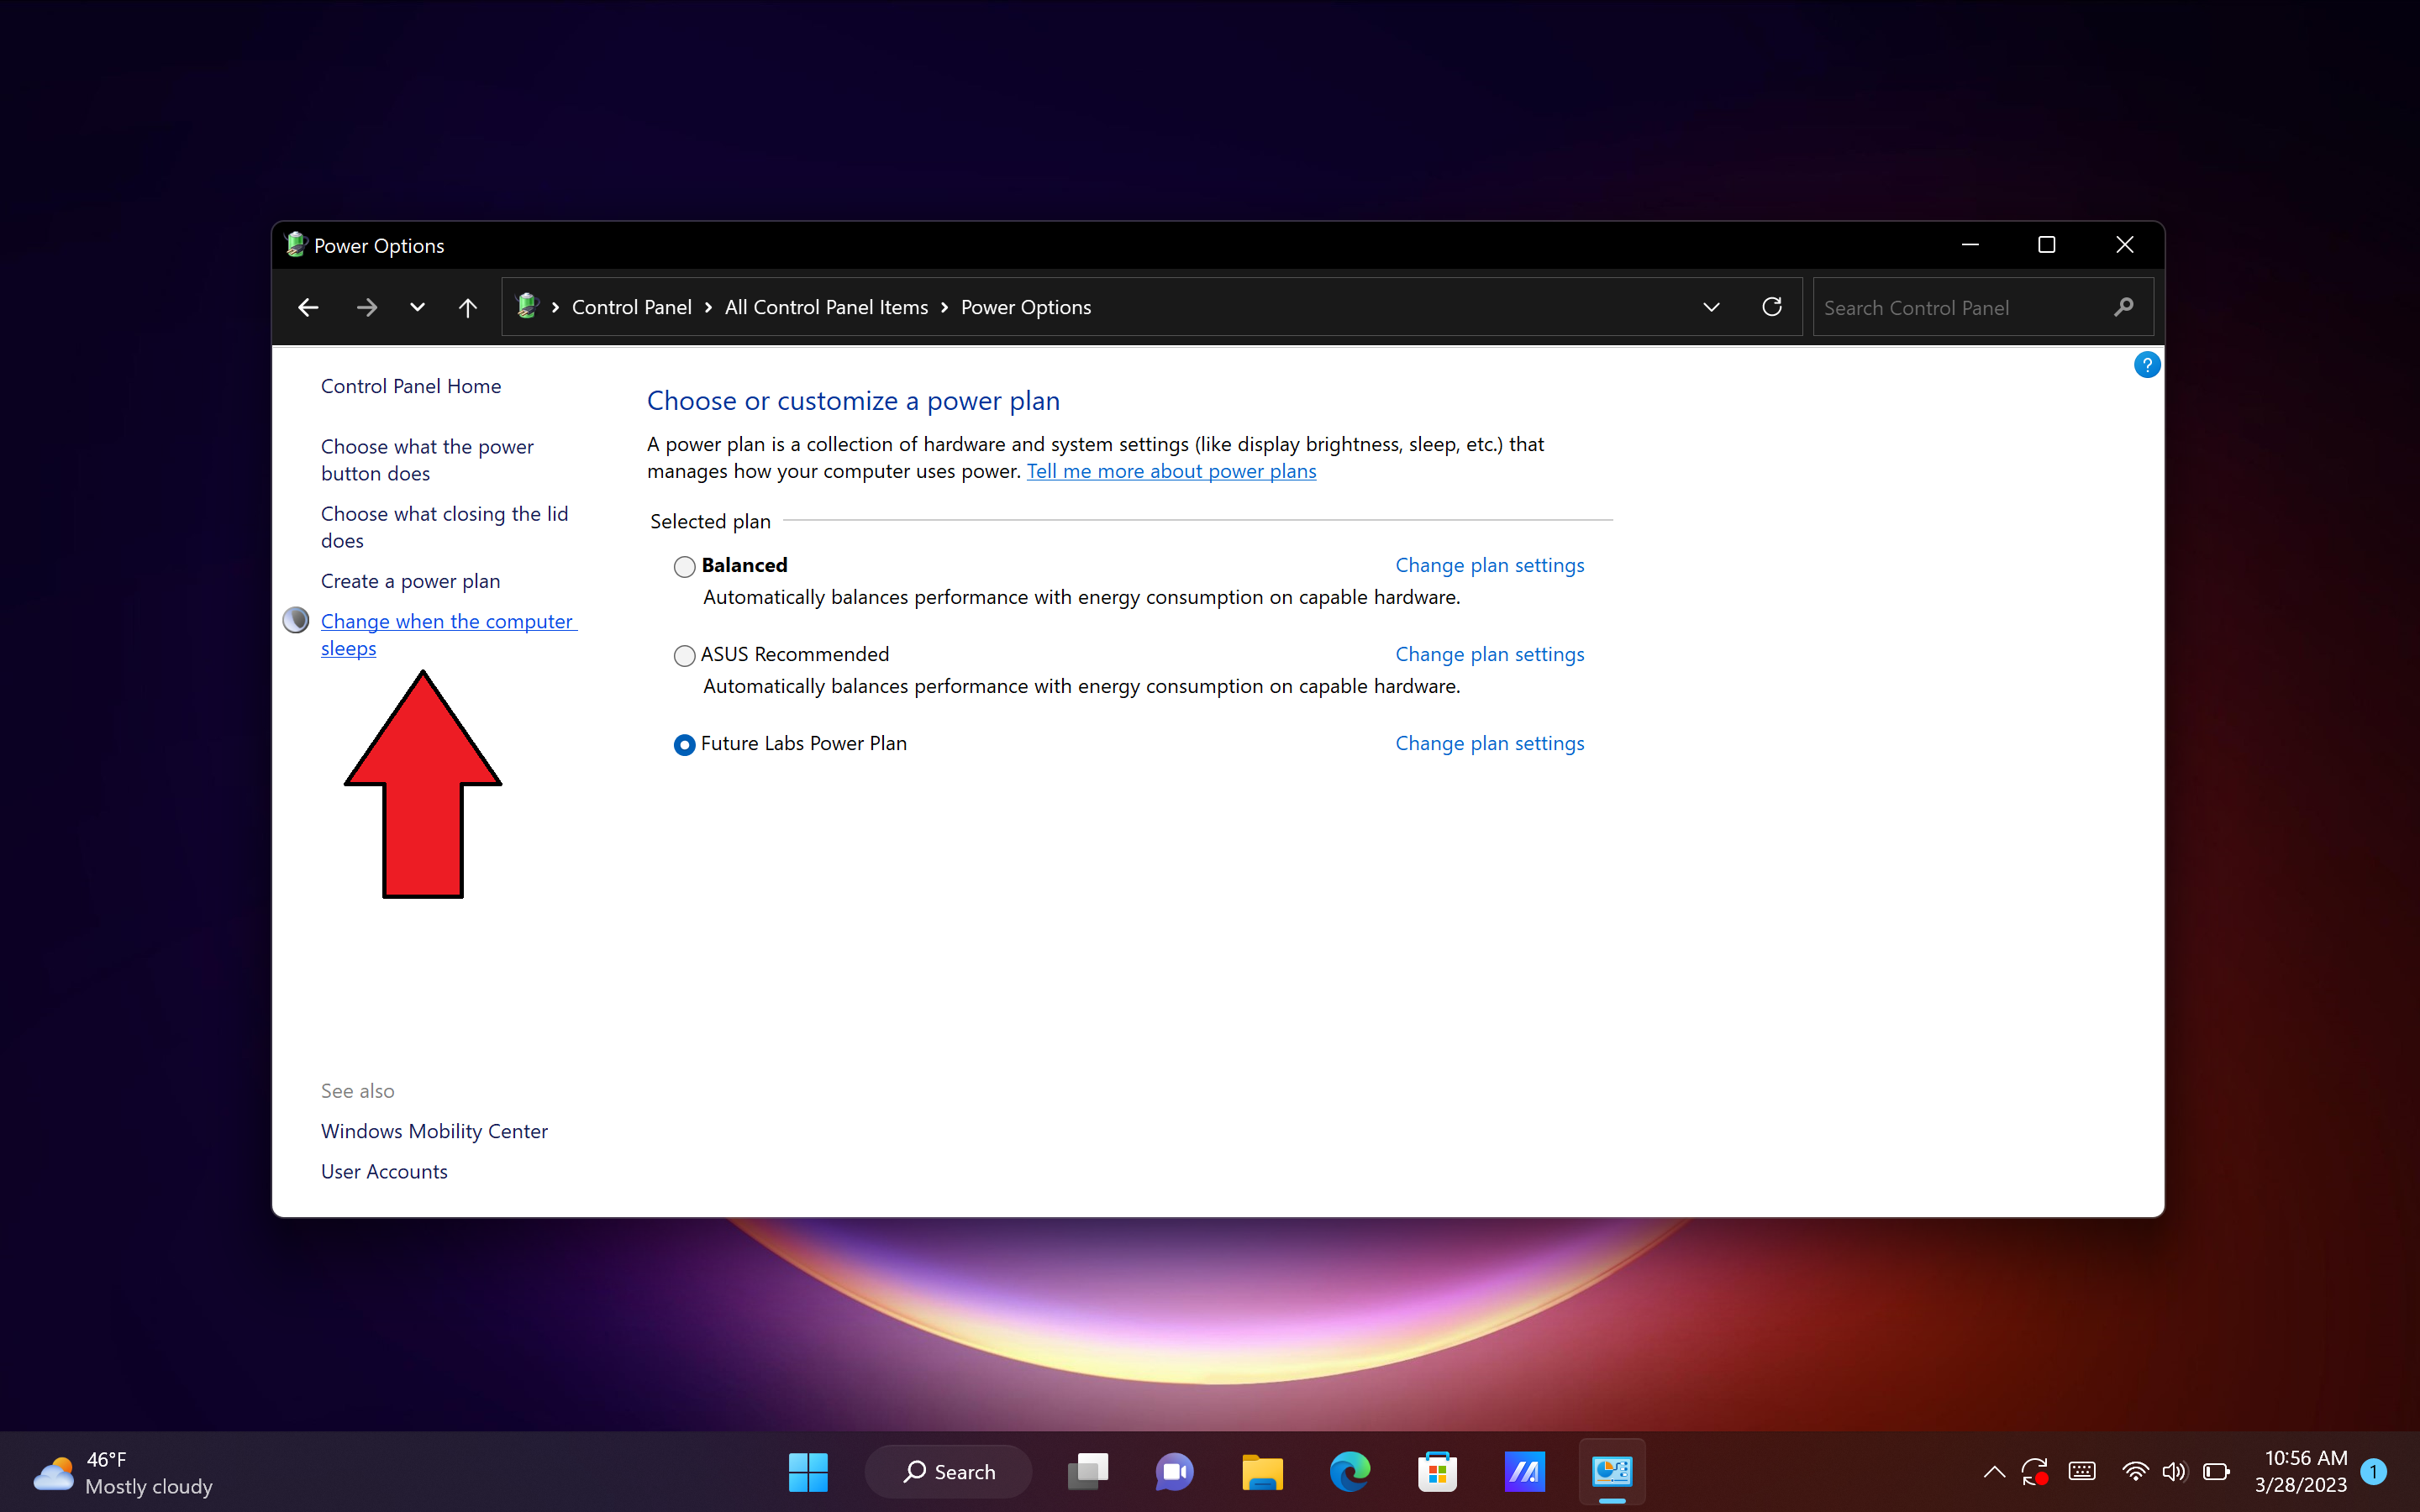
5. Here, you can choose your desired timeframe for your screen timeout. If you don't want your display to sleep at all, select Never.
You can even program your laptop to timeout at your desired setting while it's plugged in. It's all up to you!