
You'll want to know how to change keyboard shortcuts in Windows 11 if the default shortcuts just aren't cutting it for you.
Perhaps you're used to a macOS keyboard, or switch between Windows and Mac for work/play like me — if that's the case, it's super useful to reconfigure the default Windows shortcuts so that they're the same as on Mac. You might also want to use a particular keyboard shortcut that feels more comfortable, if you have difficulties with your hand or finger movement, for example.
Whatever the reason, it's easy to change keyboard shortcuts in Windows 11, but it isn't obvious how to do so if you don't already know. Luckily, this guide is here to walk you through it.
To remap the default Windows keyboard shortcuts, we're going to be using the PowerToys (a suite of Windows tools for power users) Keyboard Manager. Read our guide on how to get PowerToys in Windows 11 if you haven't got the tools yet.
We've already covered how to remap keys in Windows using the Keyboard Manager, but the process for remapping shortcuts is a little different. Remapping keys also changes individual keystrokes, while remapping shortcuts changes keystroke combinations like Ctrl + C (copy). You can also remap specific shortcuts to work differently in specific apps, which we'll also cover in this guide.
If you're ready to get into the guide, so are we! All you need to do now is read on to find out how to change keyboard shortcuts in Windows 11.
How to change keyboard shortcuts in Windows 11
Before you start: remap shortcuts with a little bit of caution as it can cause headaches down the line, but don't worry about messing things up permanently. You can always undo the remaps that you apply with a simple click of the trash can in Keyboard Manager.
1. Open PowerToys and enable Keyboard Manager
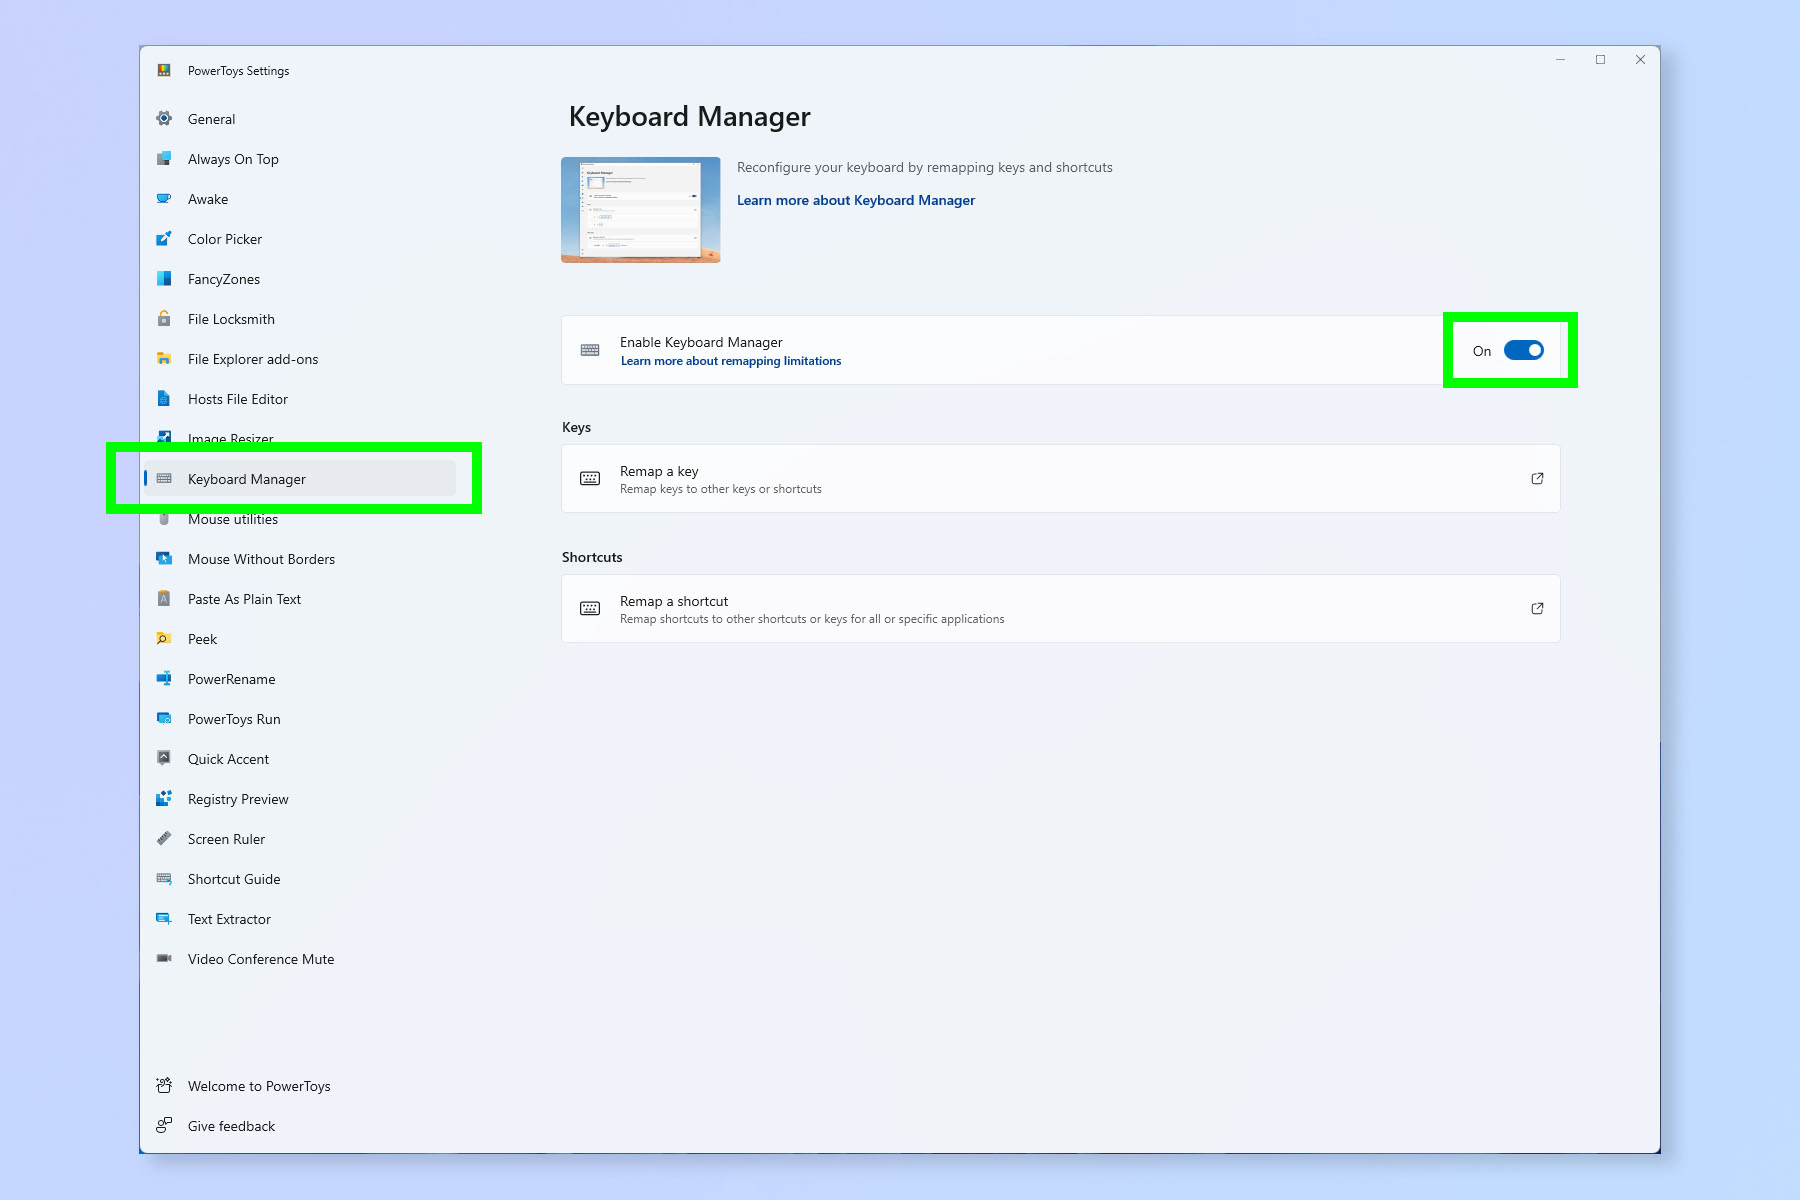
First up, open PowerToys and select Keyboard Managers from the menu on the left. It should be on by default, but if it isn't, toggle on Keyboard Manager.
2. Select Remap a shortcut
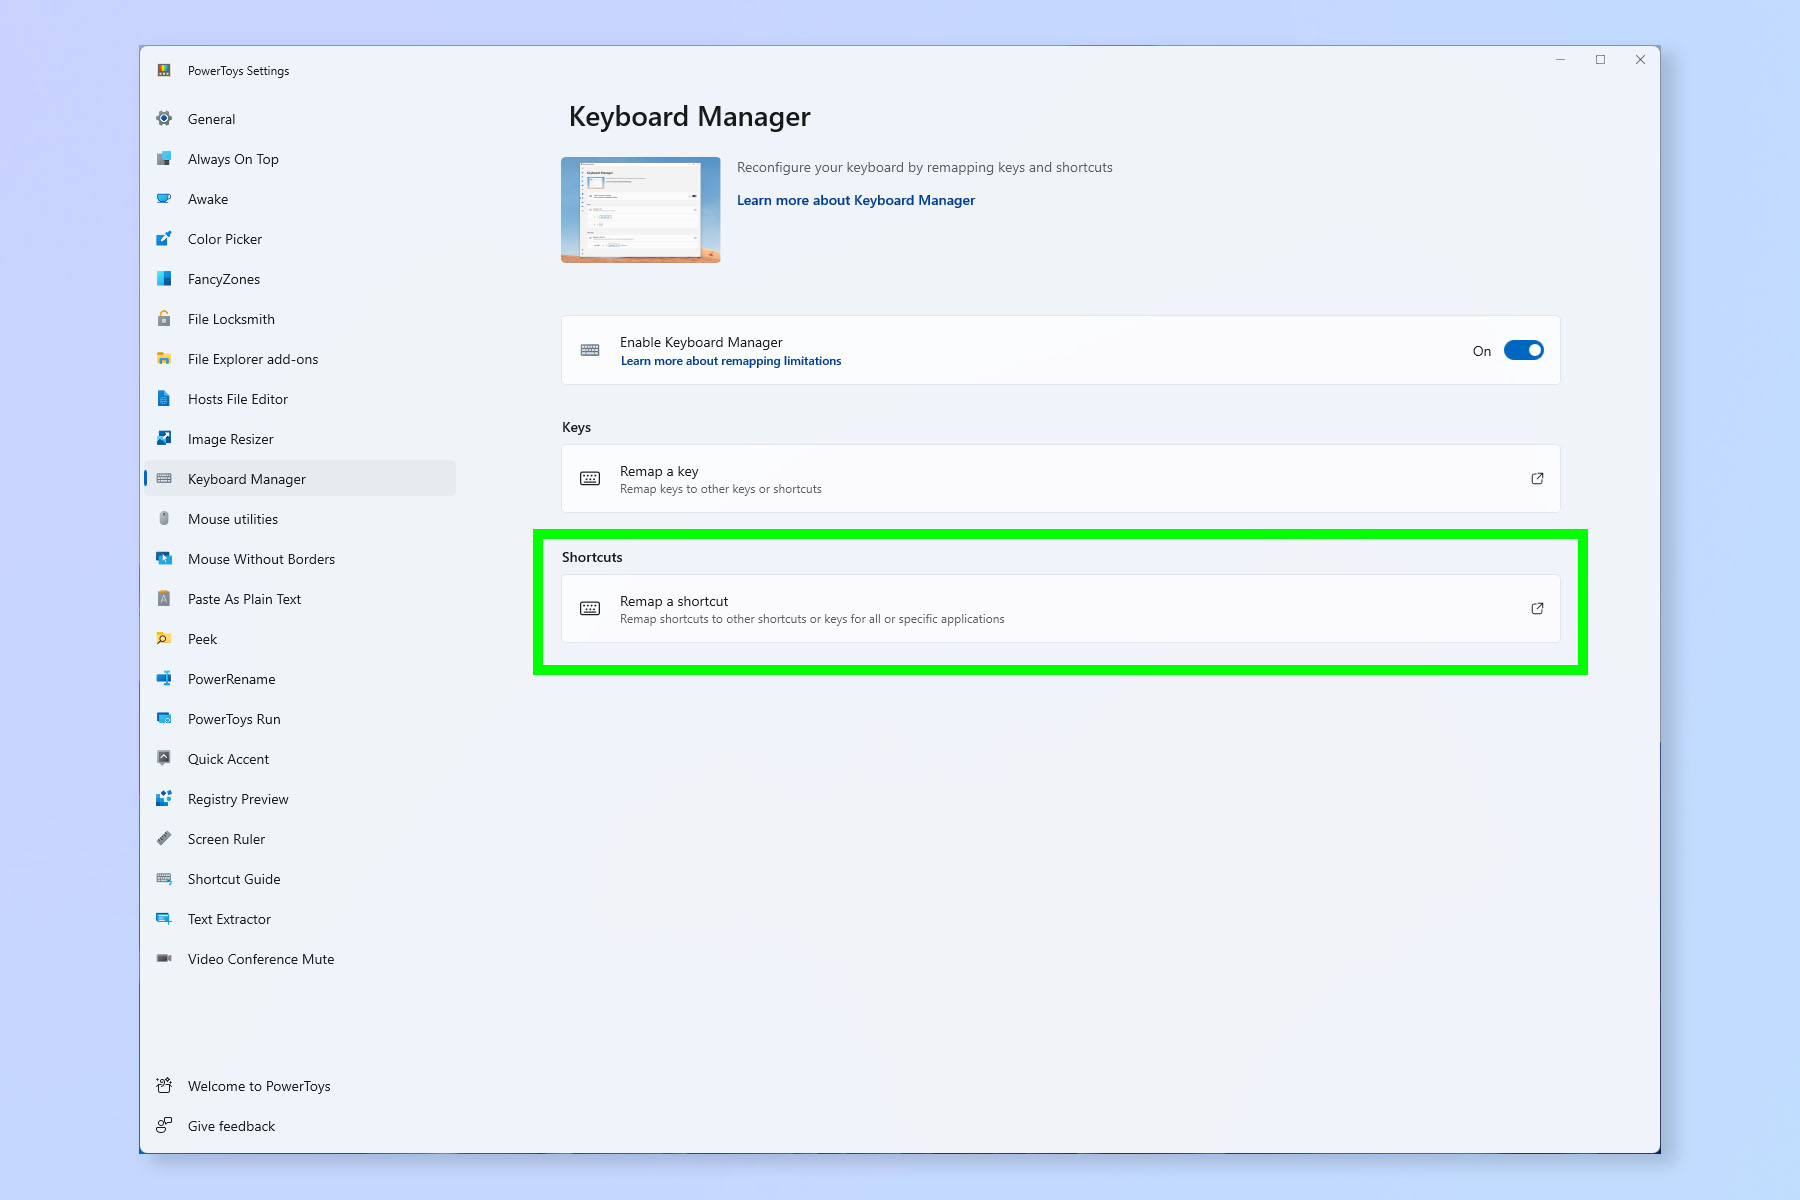
Now select Remap a shortcut.
3. Click the + button
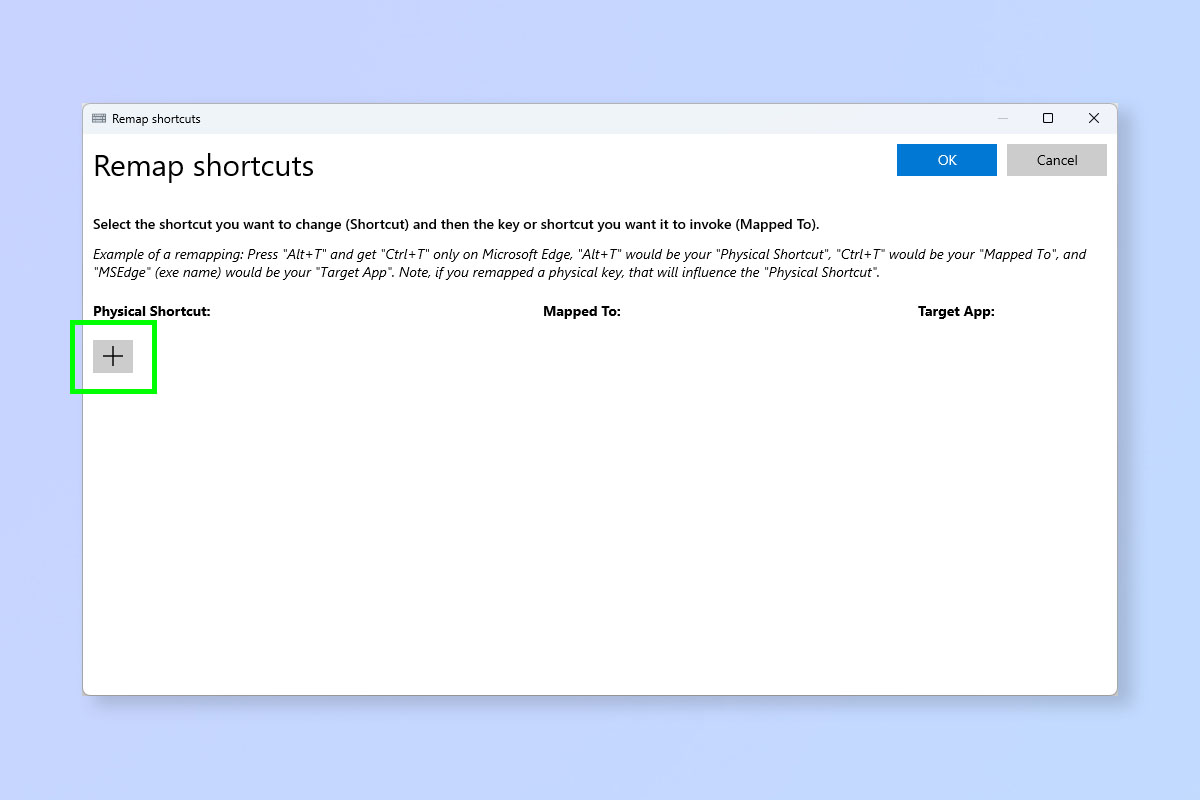
Click the + button to create a new shortcut map.
4. Select your Physical Shortcut
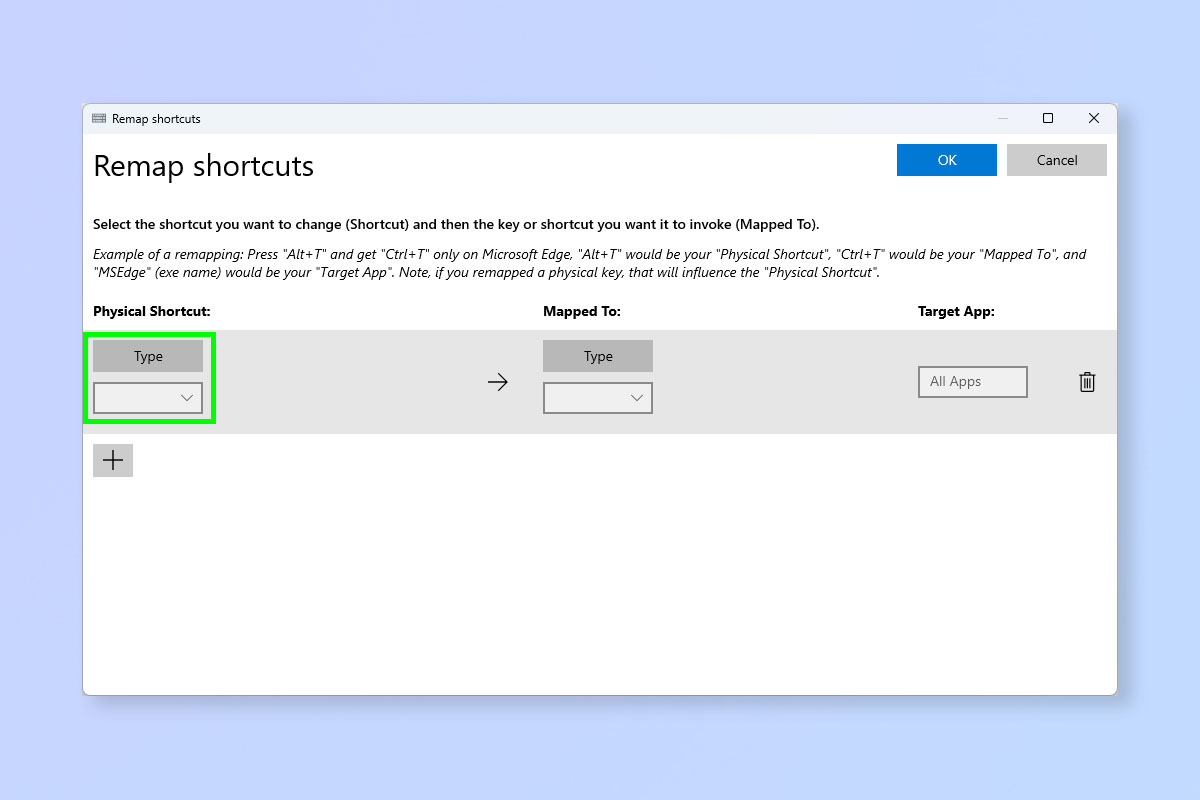
You now need to select your Physical Shortcut. This is what keys you press in order to get the result of the existing shortcut you don't like. For example: I am going to set Ctrl + Up Arrow as my Physical Shortcut, mapped to Ctrl + C. That means when I press Ctrl + Up, I will get Ctrl + C (copy).
You have two options to select your Physical Shortcut. Click the dropdown and select a shortcut, or click Type and press the keys you want.
5. Choose your Mapped To keys
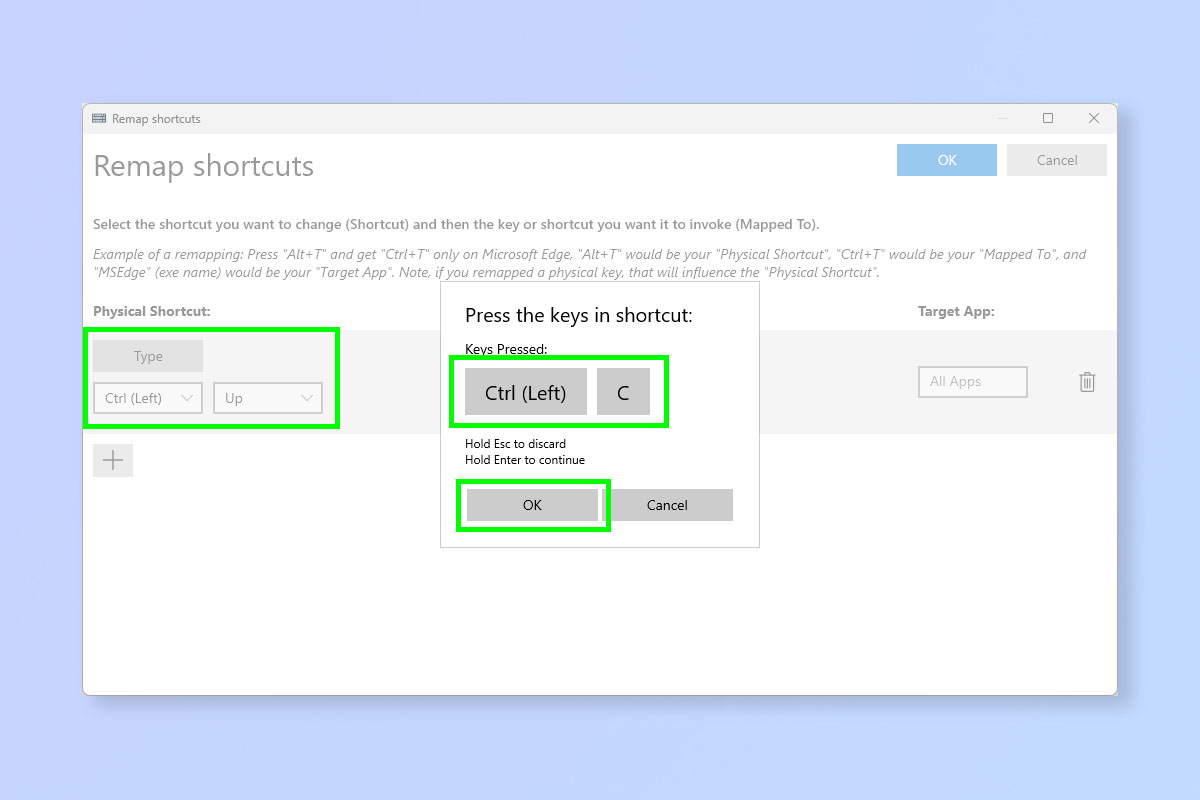
Now choose your Mapped To keys in the same way as step 4. As you can see in the screenshot, I have select Ctrl + Up as my Physical Shortcut and Ctrl + C as my Mapped To.
If you're typing your shortcuts as in the screenshot above, press OK when the correct keys appear.
6. (Optional) Select an app to use the new shortcut
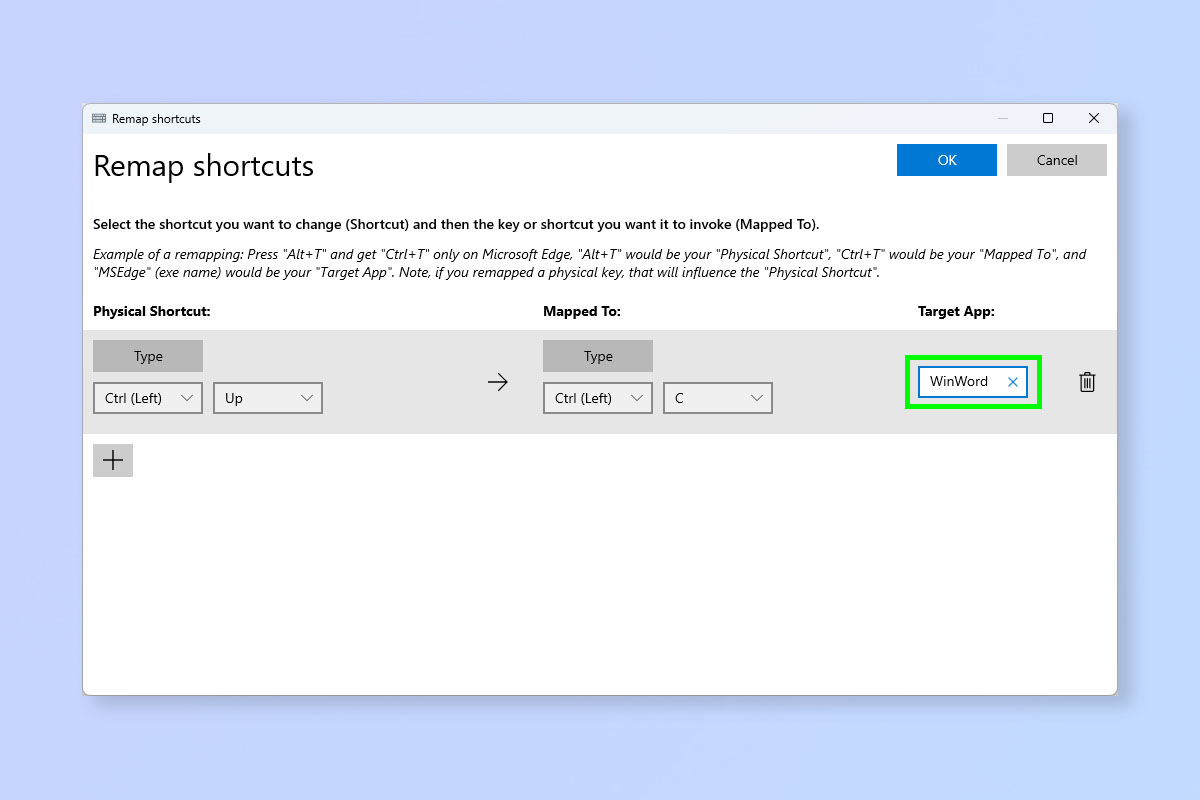
You can now select a target app for the shortcut to work in. In the example above, I have selected only Microsoft Word for this shortcut to run in. You need to use the .exe name of the application: for word that's WinWord. Essentially use everything before the ".exe" on the application executable filename.
To use the shortcut globally, simply leave the Target Apps box blank.
7. Click OK when done
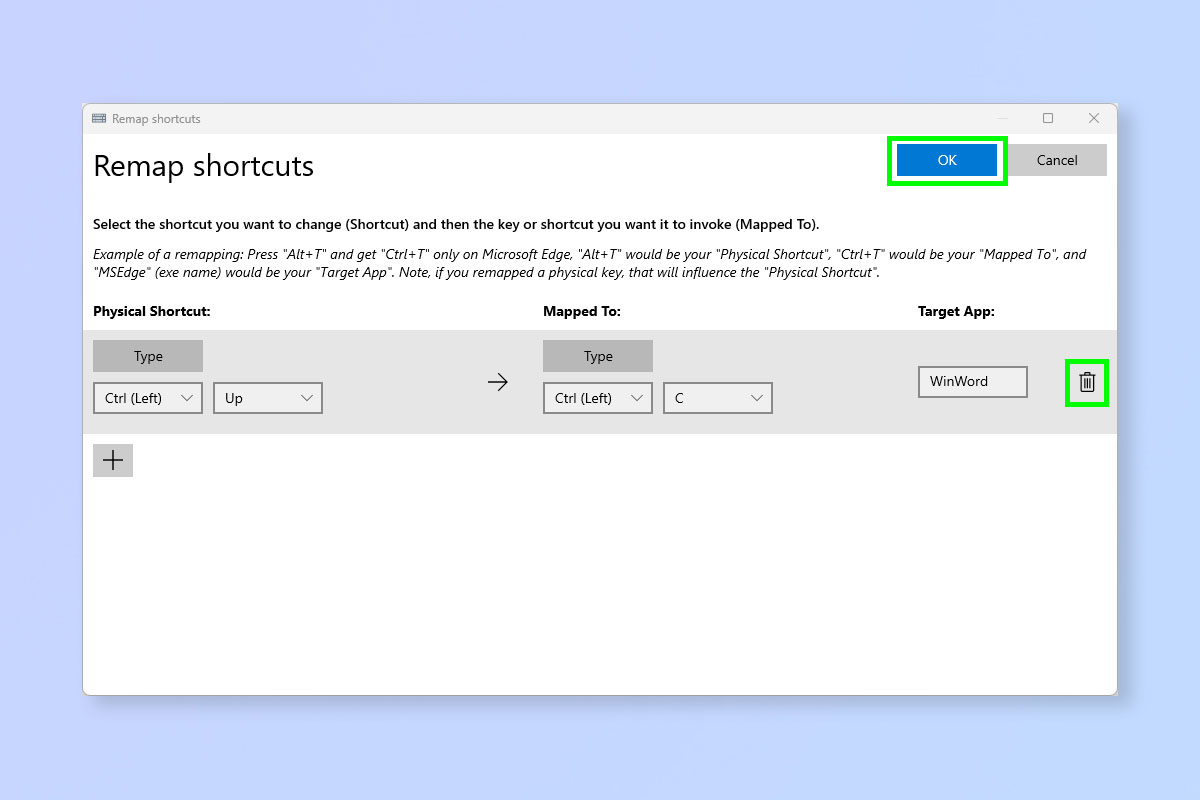
When you're happy, click OK to save your changes.
Don't worry if you don't like your new shortcut. To delete a shortcut, simply follow steps 1-2 to return to the Remap shortcuts page and click the trash can icon next to the shortcut you want to delete.
It's as easy as that! You can now create all the shortcuts you like. If you'd like to read more ways to use PowerToys, we can show you how to use PowerRename to bulk rename files and how to keep your computer awake with PowerToys Awake. You might also be interested in learning about how to customize the Windows 11 Start menu, if you aren't a fan of how it looks or works.


