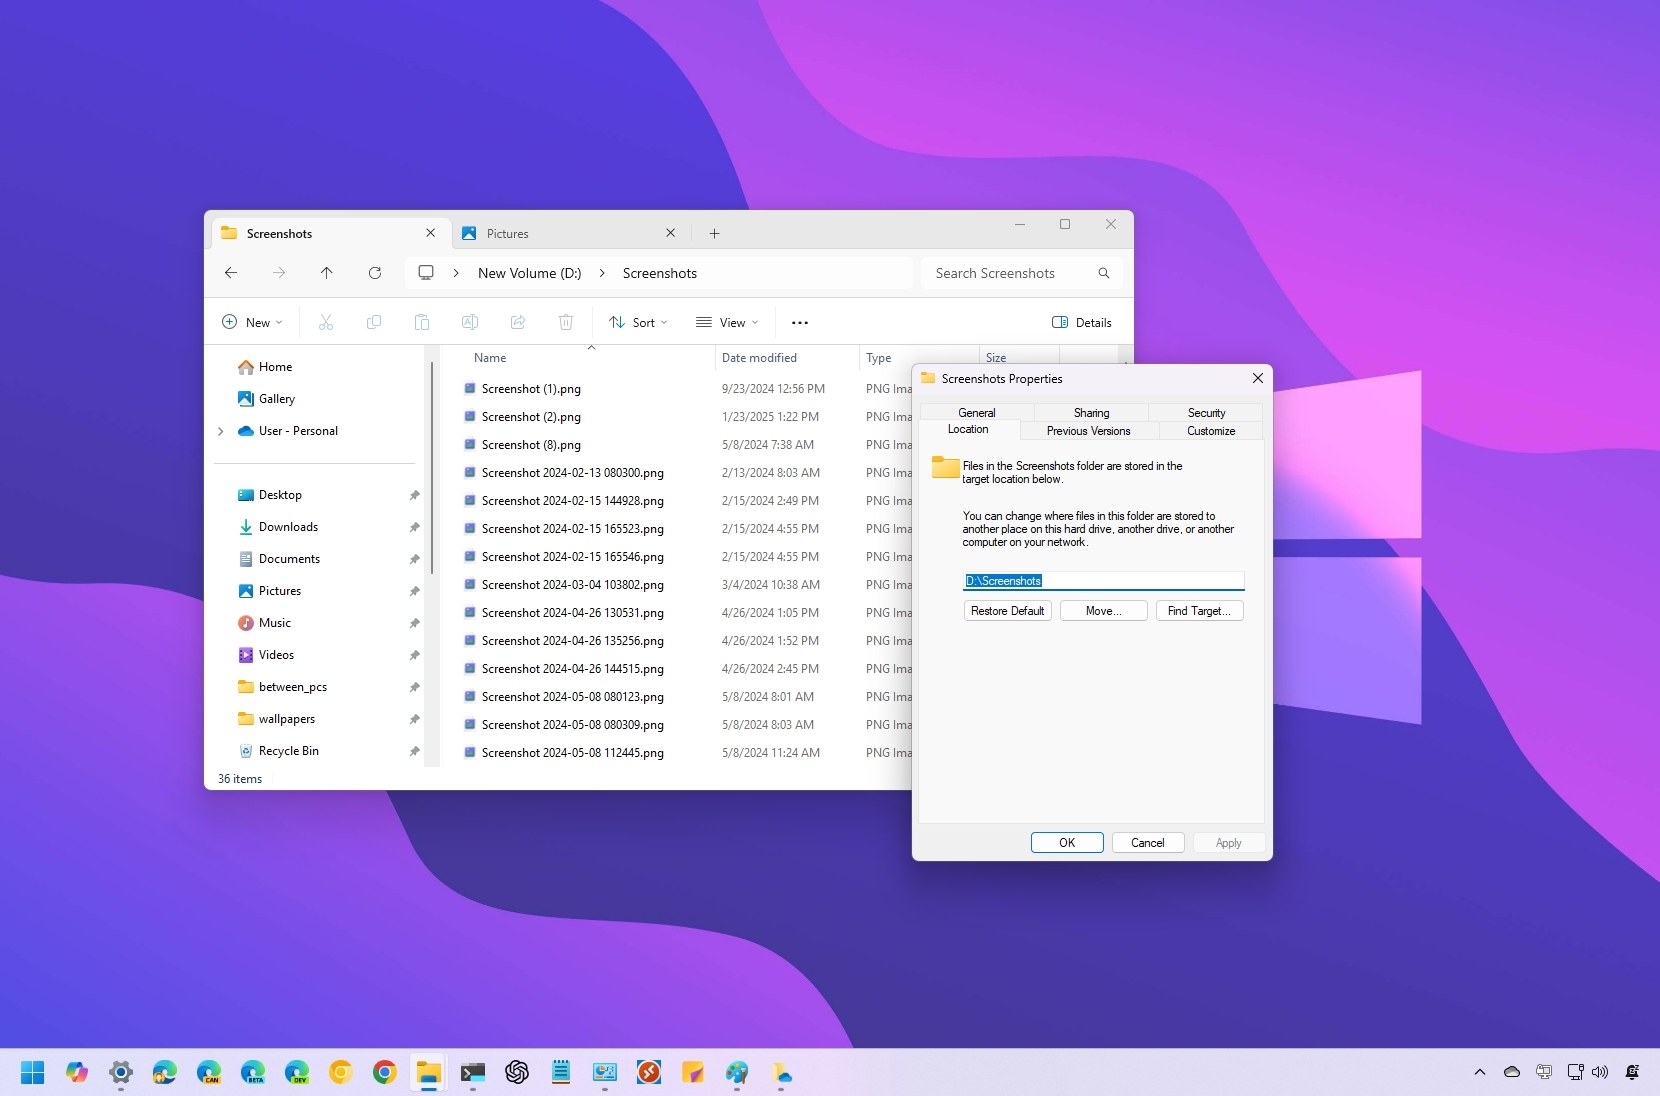
On Windows 11, you can choose the location to save screenshots automatically, and in this guide, I will explain how to complete this configuration.
Although there are many different ways to take screenshots, the most common methods include using the "Print" key, the "Windows key + Print" keyboard shortcut, or the "Windows key + Shift + S" shortcut, and the one thing these options have in common is that they always save the capture automatically in the "Screenshots" folders.
Usually, the Screenshots folder lives in the "Pictures" folder. However, you can always change this location to another folder or another drive, depending on how you want to organize your files.
In this how-to guide, I will explain the easy ways to choose a different location to store screenshots on Windows 11.
Change screenshot folder location on Windows 11
To change the default folder location to store screenshots on Windows 11, use these steps:
- Open File Explorer.
- Open the new folder location to store the screenshots.
- Click on New and select the Folder option.
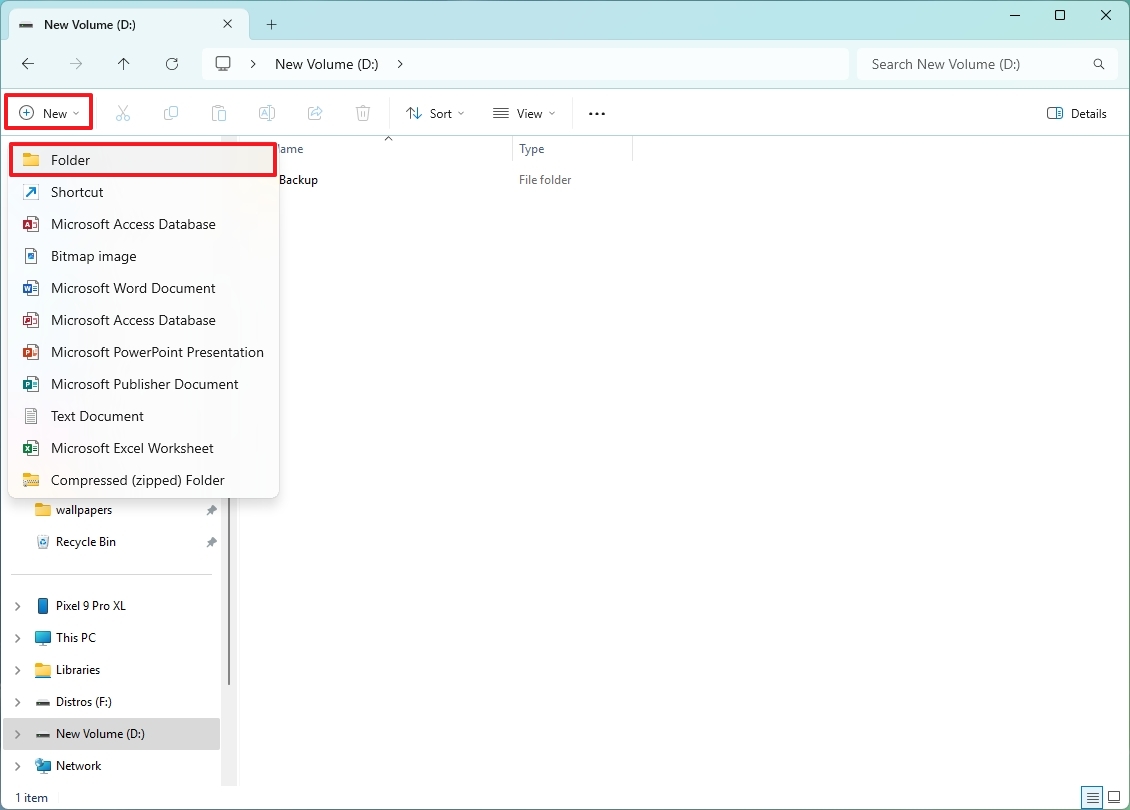
- Confirm the "Screenshots" name and press Enter.
- Open the default "Screenshots" folder path in the Pictures folder: C:\Users\YOUR-USERNAME\Pictures
In the command, update the path with your account folder name.
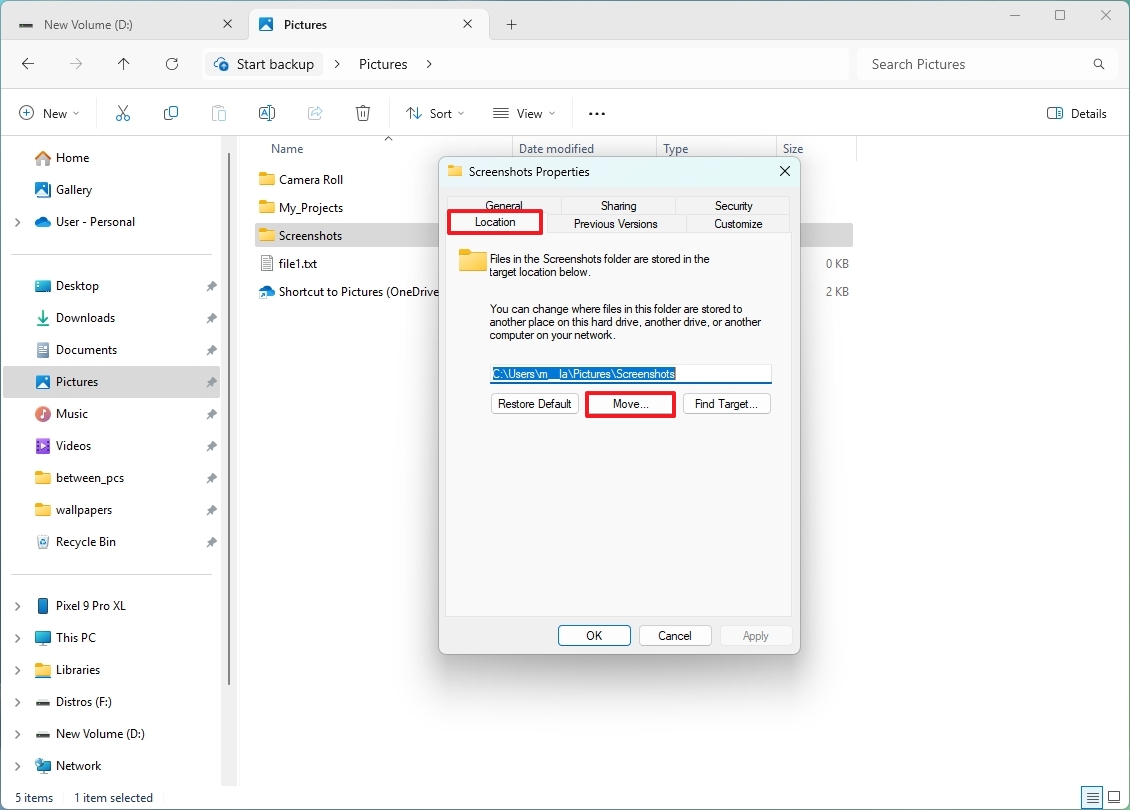
- Right-click on the Screenshots folder and select the "Properties" option.
- Click on the "Location" tab.
- Click the "Move..." button.
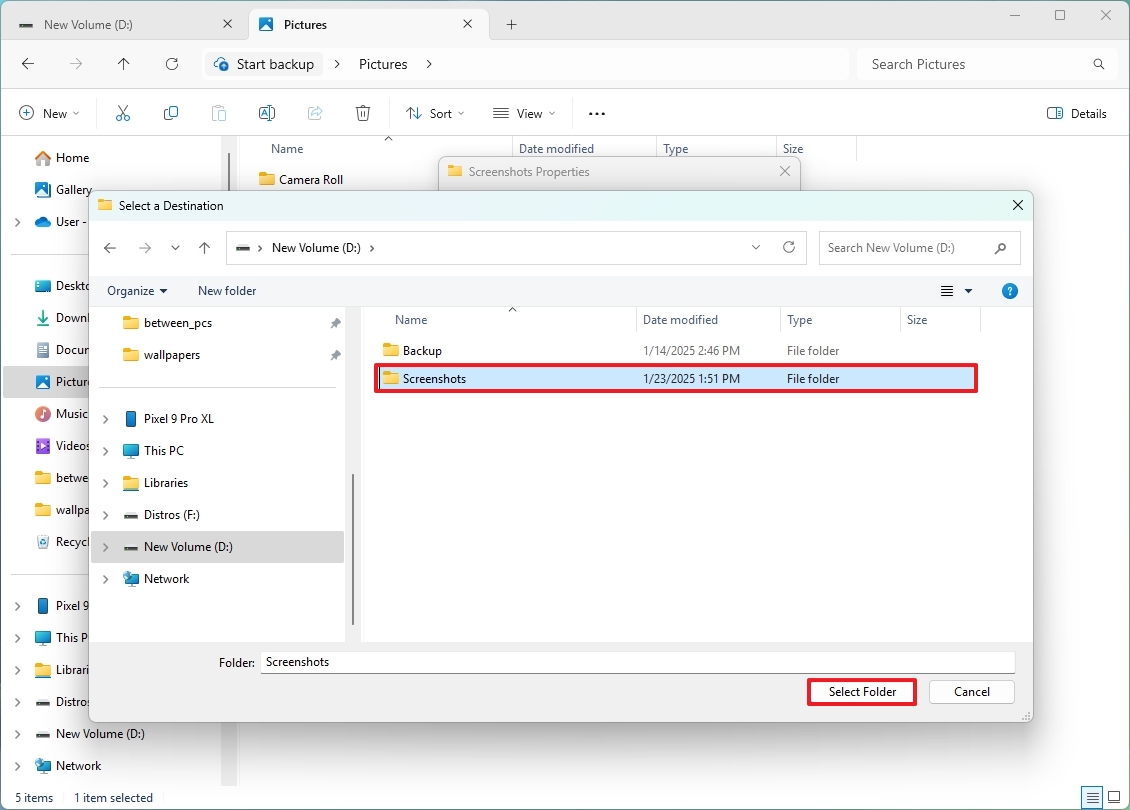
- Choose your desired new location for the Screenshots folder.
- Click "Select Folder" to confirm.
- Click the Apply button.
- Click the Yes button.
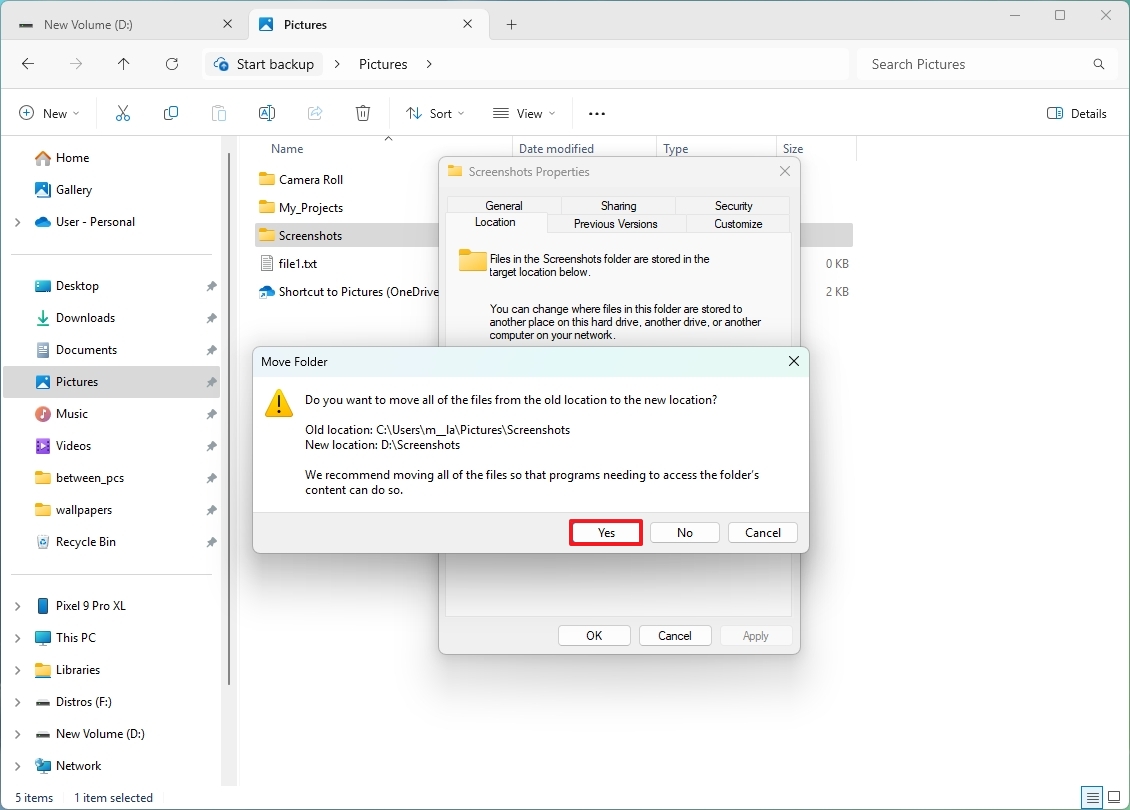
- Click the OK button.
Once you complete the steps, the next time you take a screenshot, the system will save it by default in the new location.
More resources
Find in-depth guides, troubleshooting tips, and the latest updates on Windows 11 and 10 here:


