Adding a signature to your emails can add a sense of professionalism to your outbound communiqué or just save you the hassle of having to write "Best wishes" or "Thanks for your time" at the end of every email.
Whatever your reasons, we've noticed that a fair amount of Gmail users are looking to add signatures to their emails but don't know how. Well, luckily, we do! And we're happy to show you how with our guide on how to add a signature in Gmail.
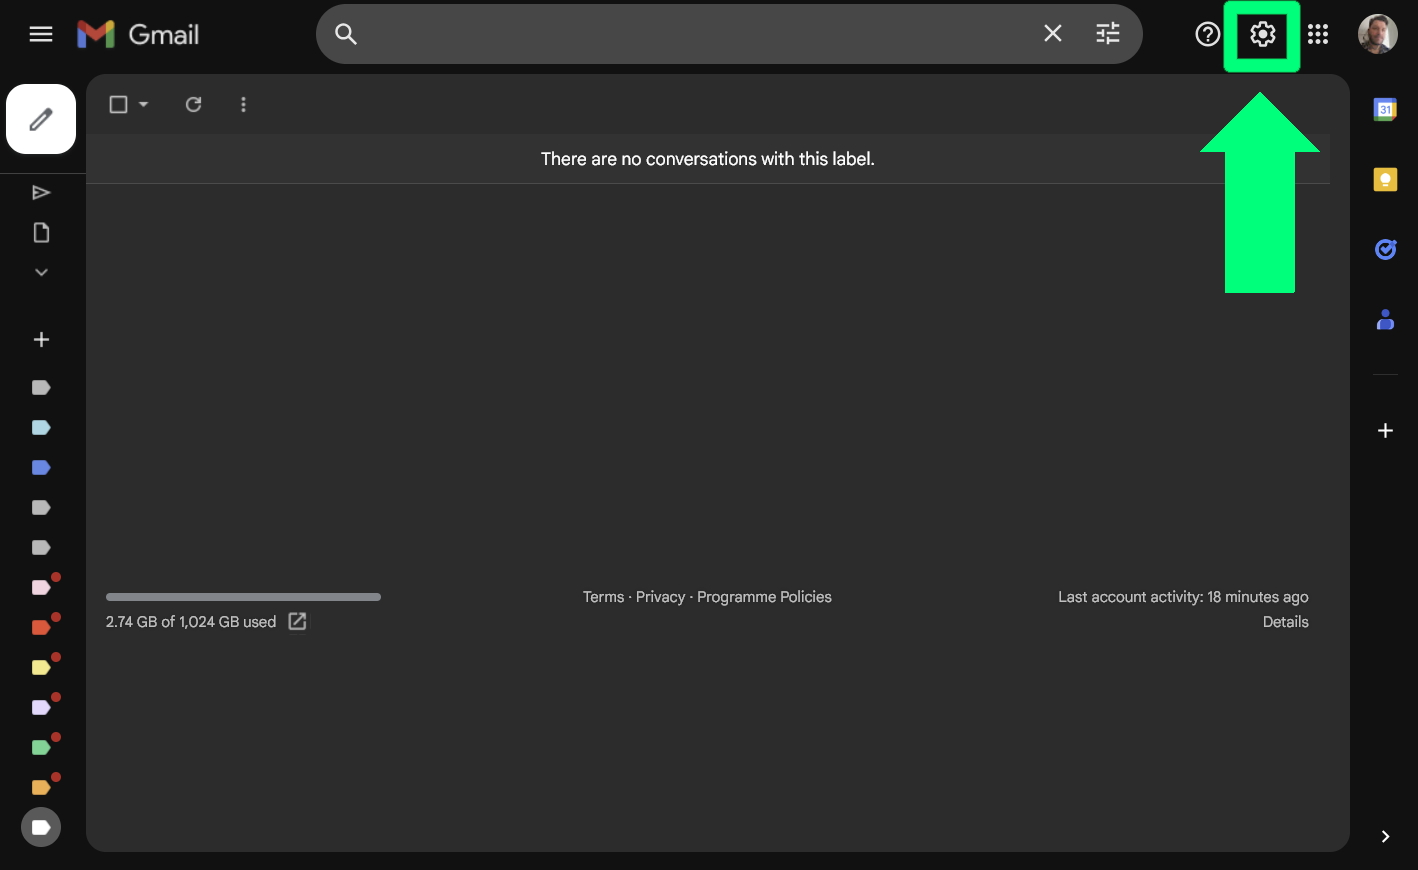
Step 1: Open Settings in Gmail
First things first, open up Gmail and look towards the top right of the window. You'll want to click on the "Settings" button, represented by the icon of a cog.
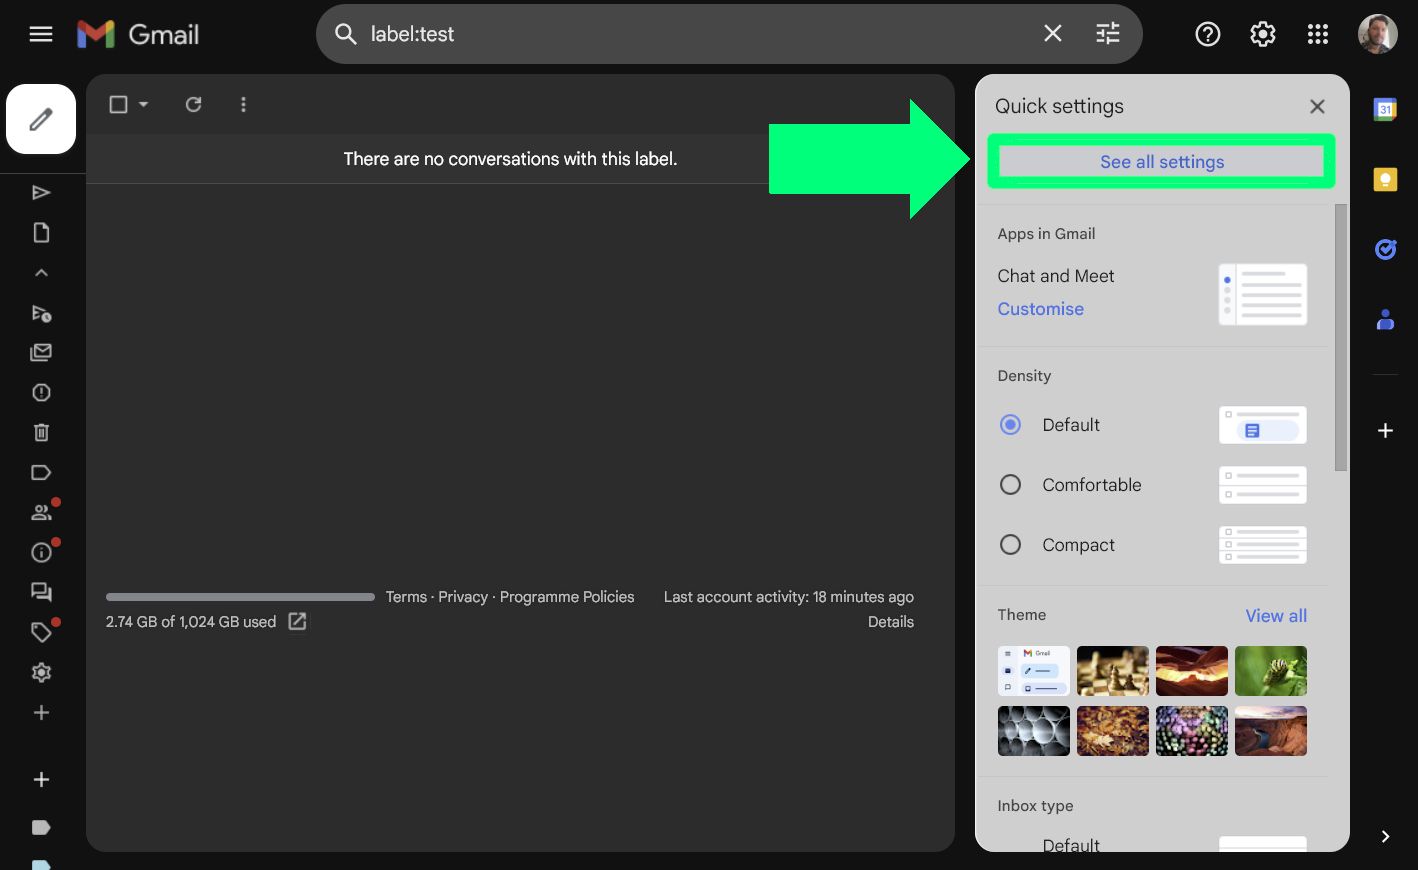
In the panel that drops down, you'll then want to click on "See all settings."
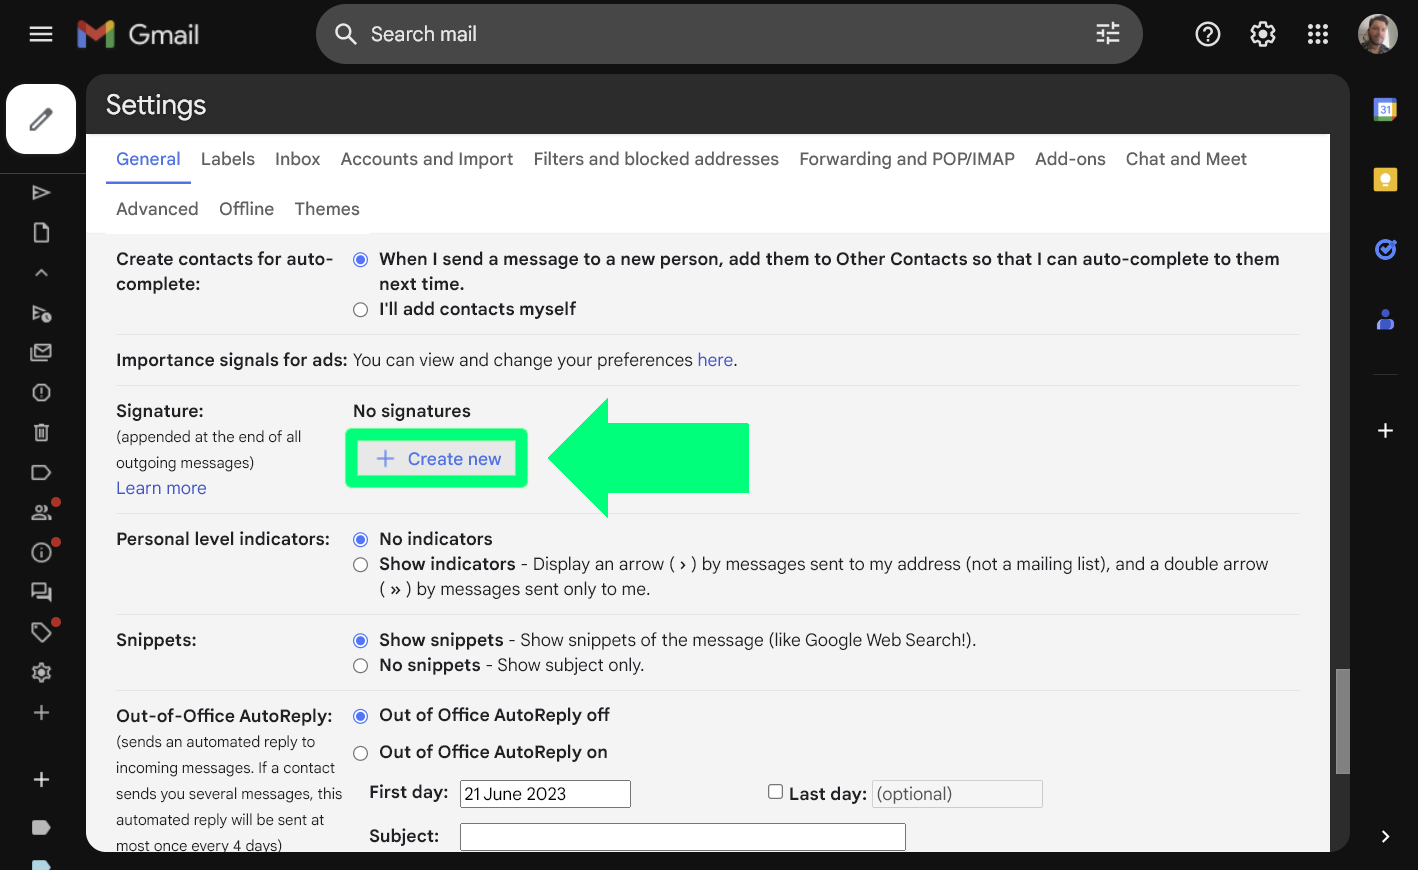
Step 2: Add and configure your new signature
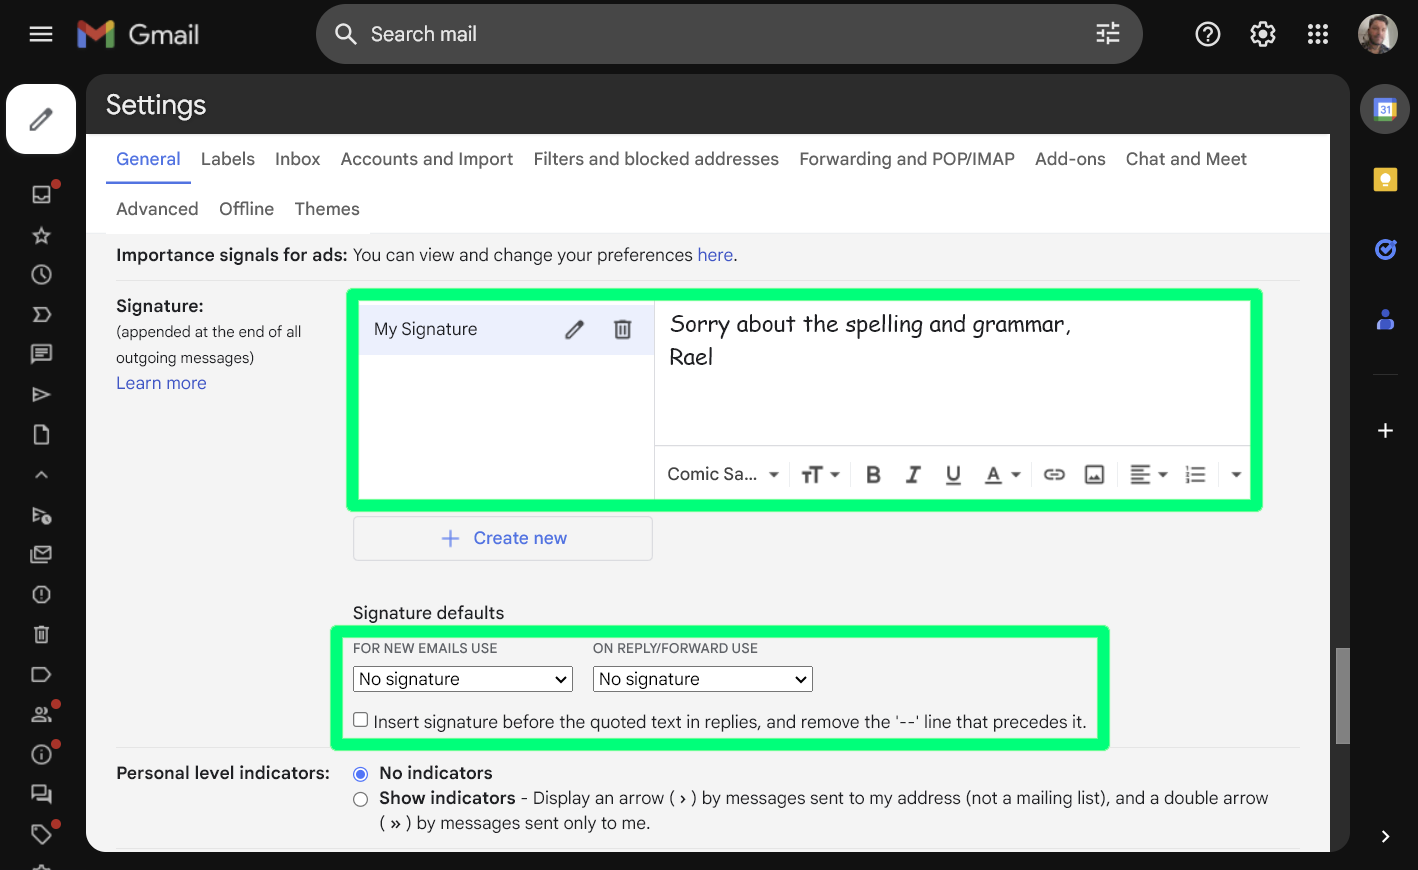
Now that you're in the settings menu, scroll down until you get to the section labelled "Signature" and click the "+ Create new" button.
You'll be asked to choose a name for your signature so you can easily identify it. I.e. If you want to use a particular signature for responding to business or work issues, then "Work" would be best suited.
After you've chosen a name, you'll then see the signature editor in full. Here, you can use a variety of rich-text formatting, hyperlinks, and images to customize your email footer as you see fit.
Also, make sure to pay attention to the options below the editor. Here, you'll be able to set when and where your new signature will appear.
Step 3: Save the changes
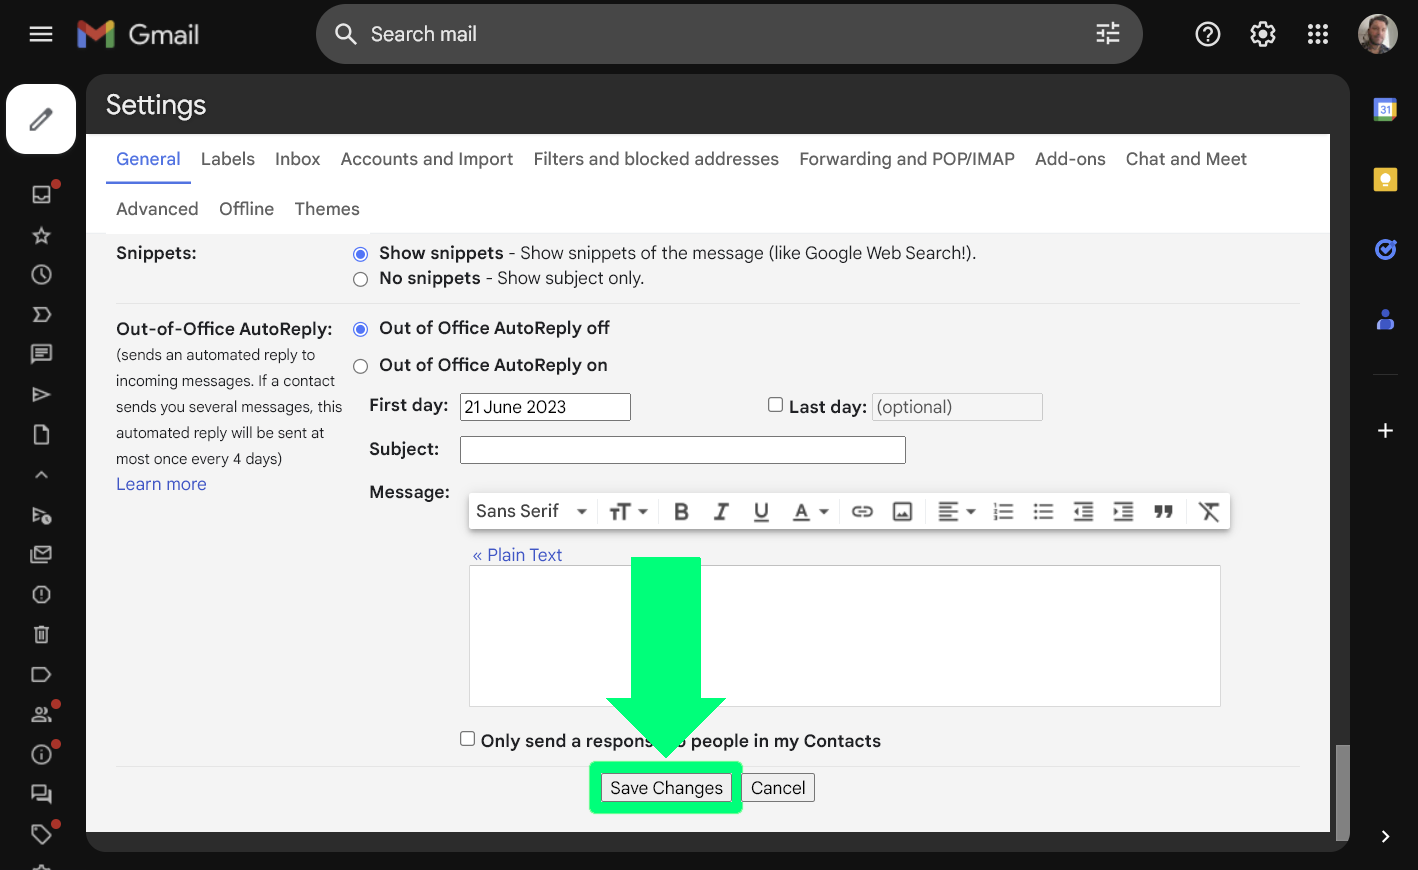
Once you're done writing and arranging your signature, you'll need to scroll down to the bottom of the settings window and click the "Save changes" button.
And there you have it! Your emails should now feature your new signature. Try sending yourself and email to see how it looks, and if anything needs altering or changing.
If so, simply follow the same steps to return to the settings screen and edit your signature from there. Just remember to click the "Save changes" button after each edit to make sure you don't lose any work.