Unveiled back in May, Logic Pro 11 brings a ton of useful new features to Apple's DAW, including stem separation and AI-powered melody and bassline generators.
Another powerful creative tool revealed in Logic's latest update is ChromaGlow, a new stock effects plugin that emulates the warmth and character gifted to sounds by analogue audio equipment. By replicating the sonic niceties of vintage gear, this saturation tool can give your tracks texture, depth and nuance - here's how to do it.
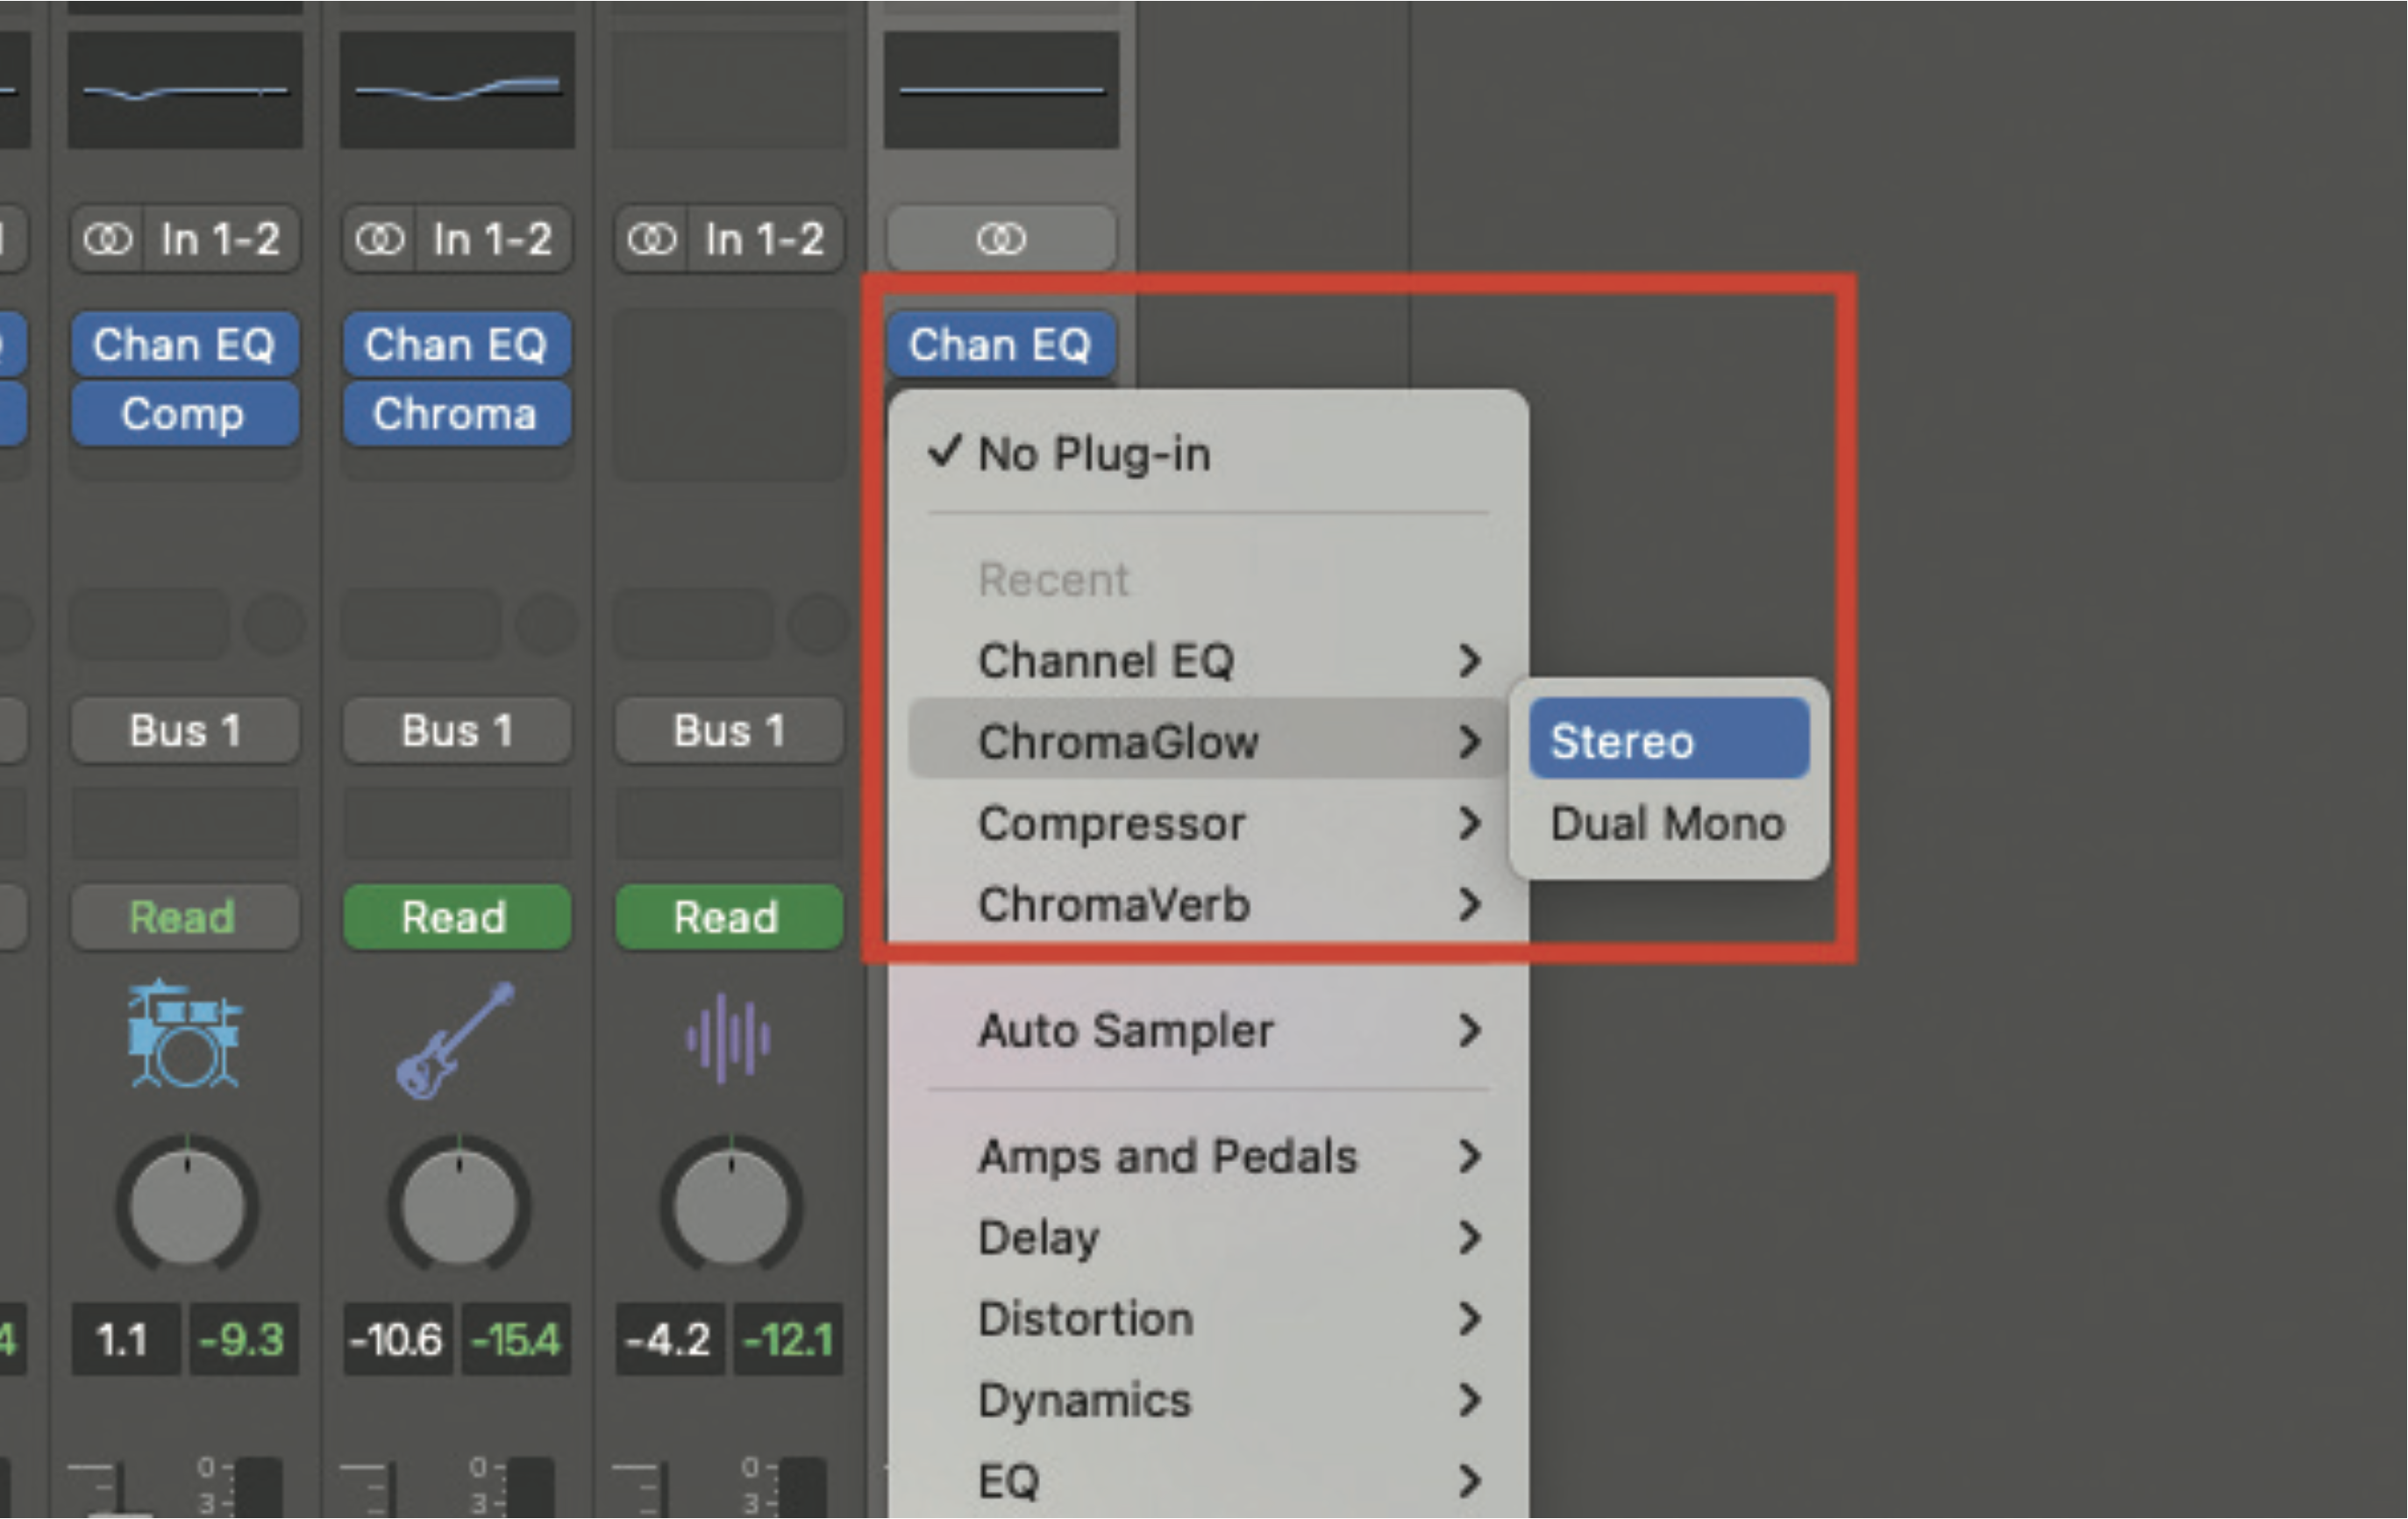
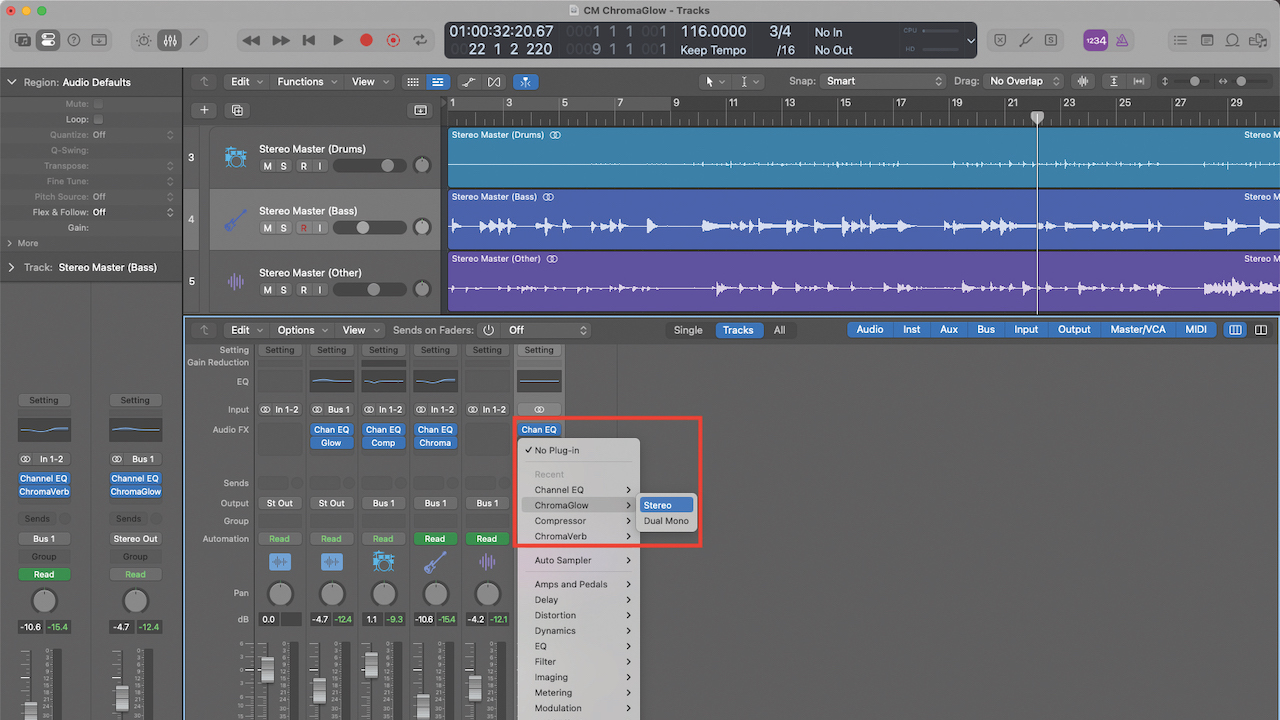
Let’s explore some of the possibilities for the new ChromaGlow plugin. Being an included Logic plugin, it can be used at the channel level, or in our example, used to colour an entire mix. Move to an appropriate channel or master strip, and plug in ChromaGlow.
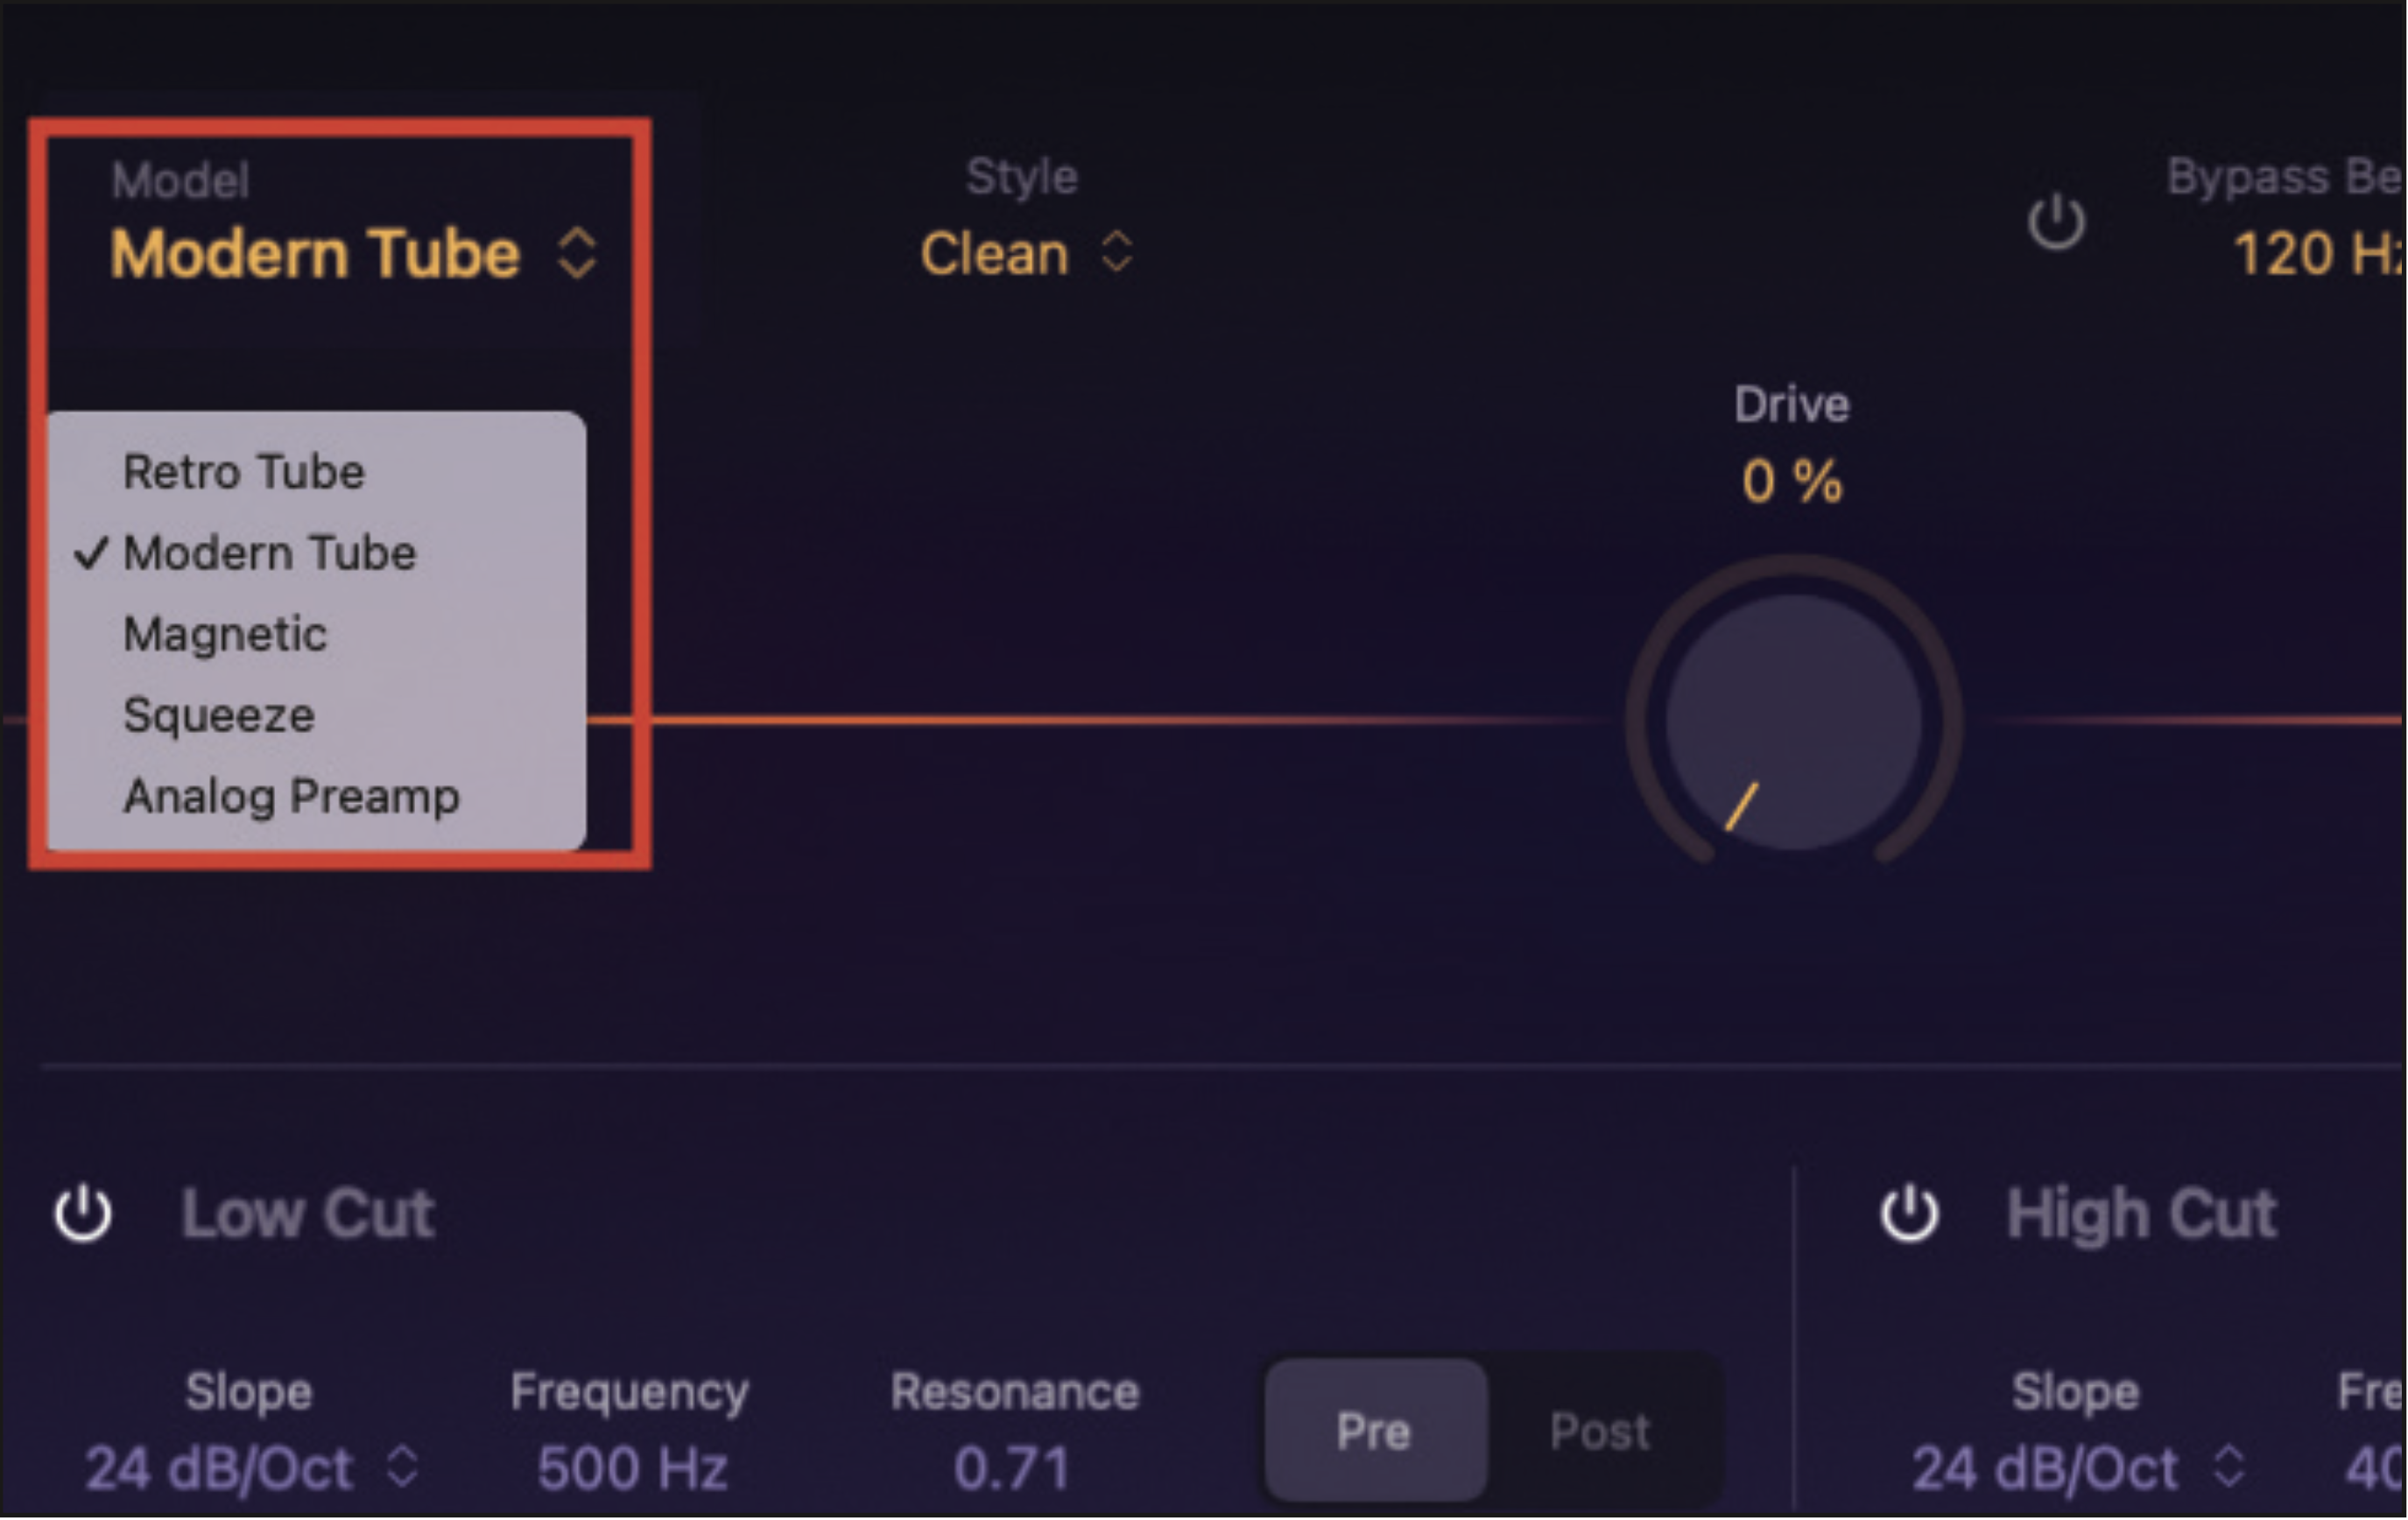
The primary element that will colour your sound relates to the selected model. There are five to choose from, ranging from vacuum tube (valve) simulations to magnetic tape and analogue pre‑amplifiers. Any of these is worthy of audition, but we’re choosing Magnetic, to simulate the sound of analogue tape.
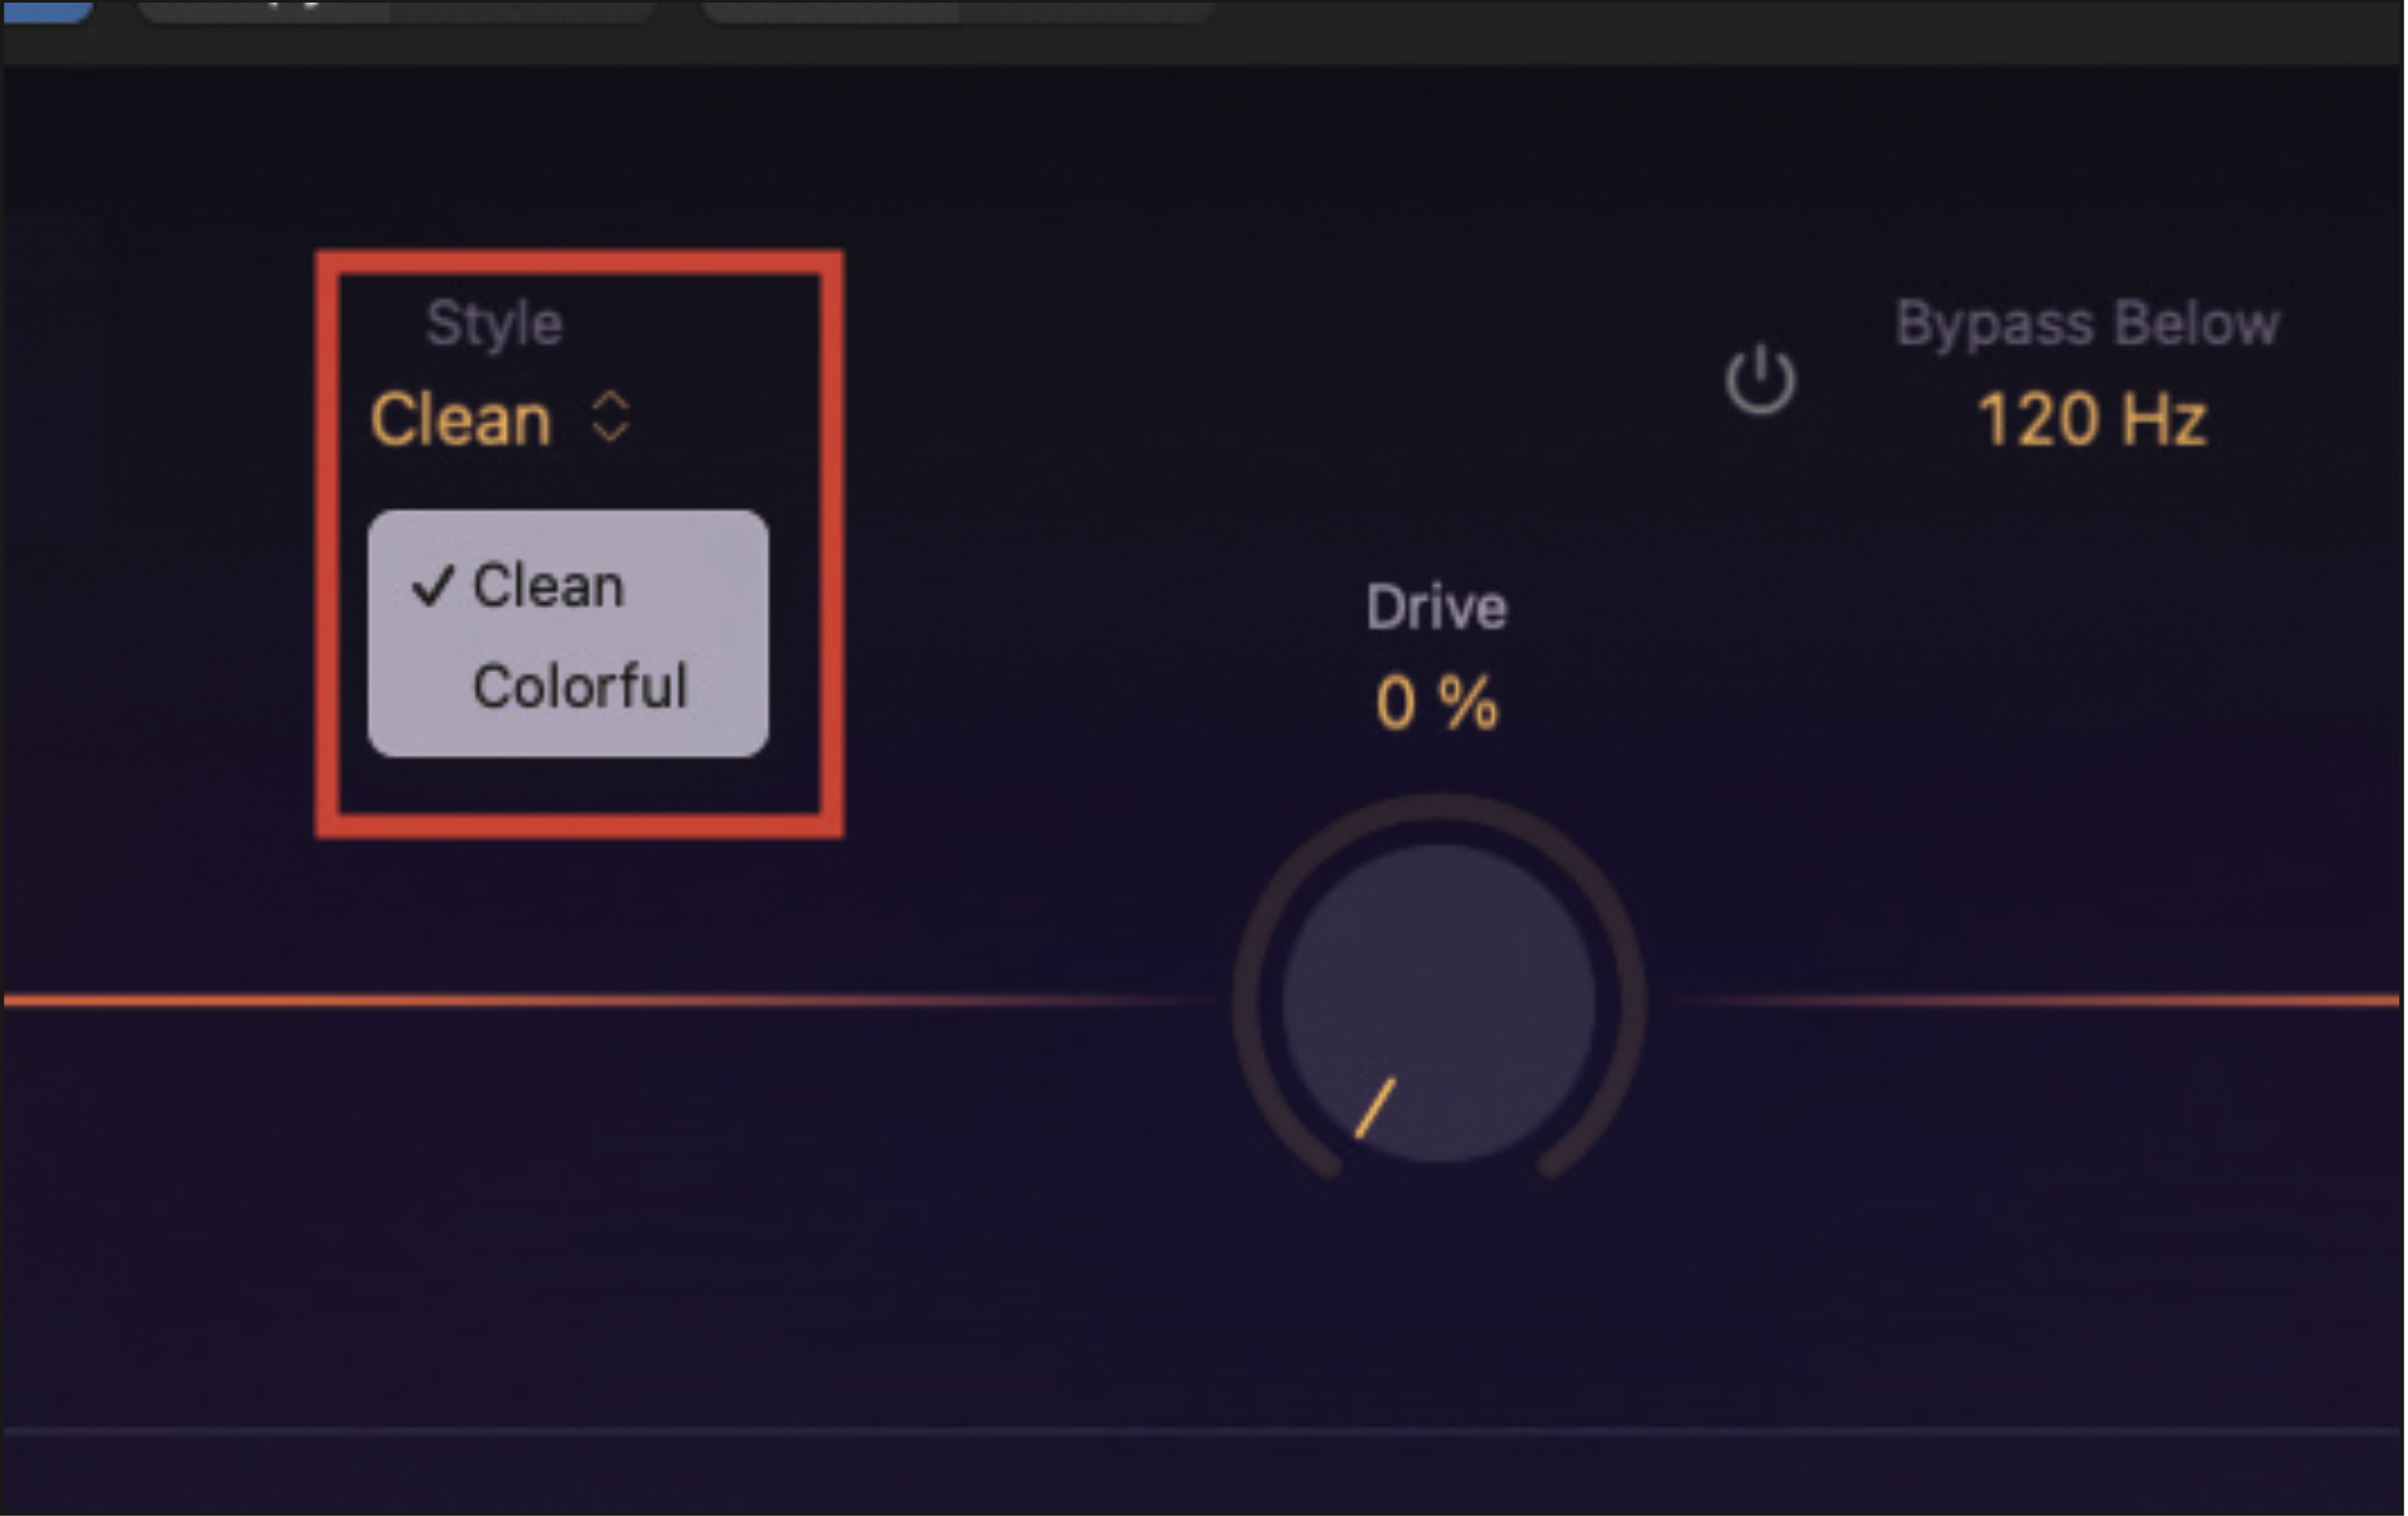
The Style drop-down menu provides a clean or colourful setting, to accompany your chosen model. Choose clean if you want something more transparent, while colourful will be perfect for a more overdriven style of effect. As we will discover, it doesn’t take much to tip ChromaGlow into the realms of extreme distortion.

Increase the central Drive pot, which will begin to apply your selected effect preferences. In a nice touch, you will see the audio register in the form of waveforms, on either side of the pot. Experiment by taking this setting to the extreme. It can sound raucous, if required.
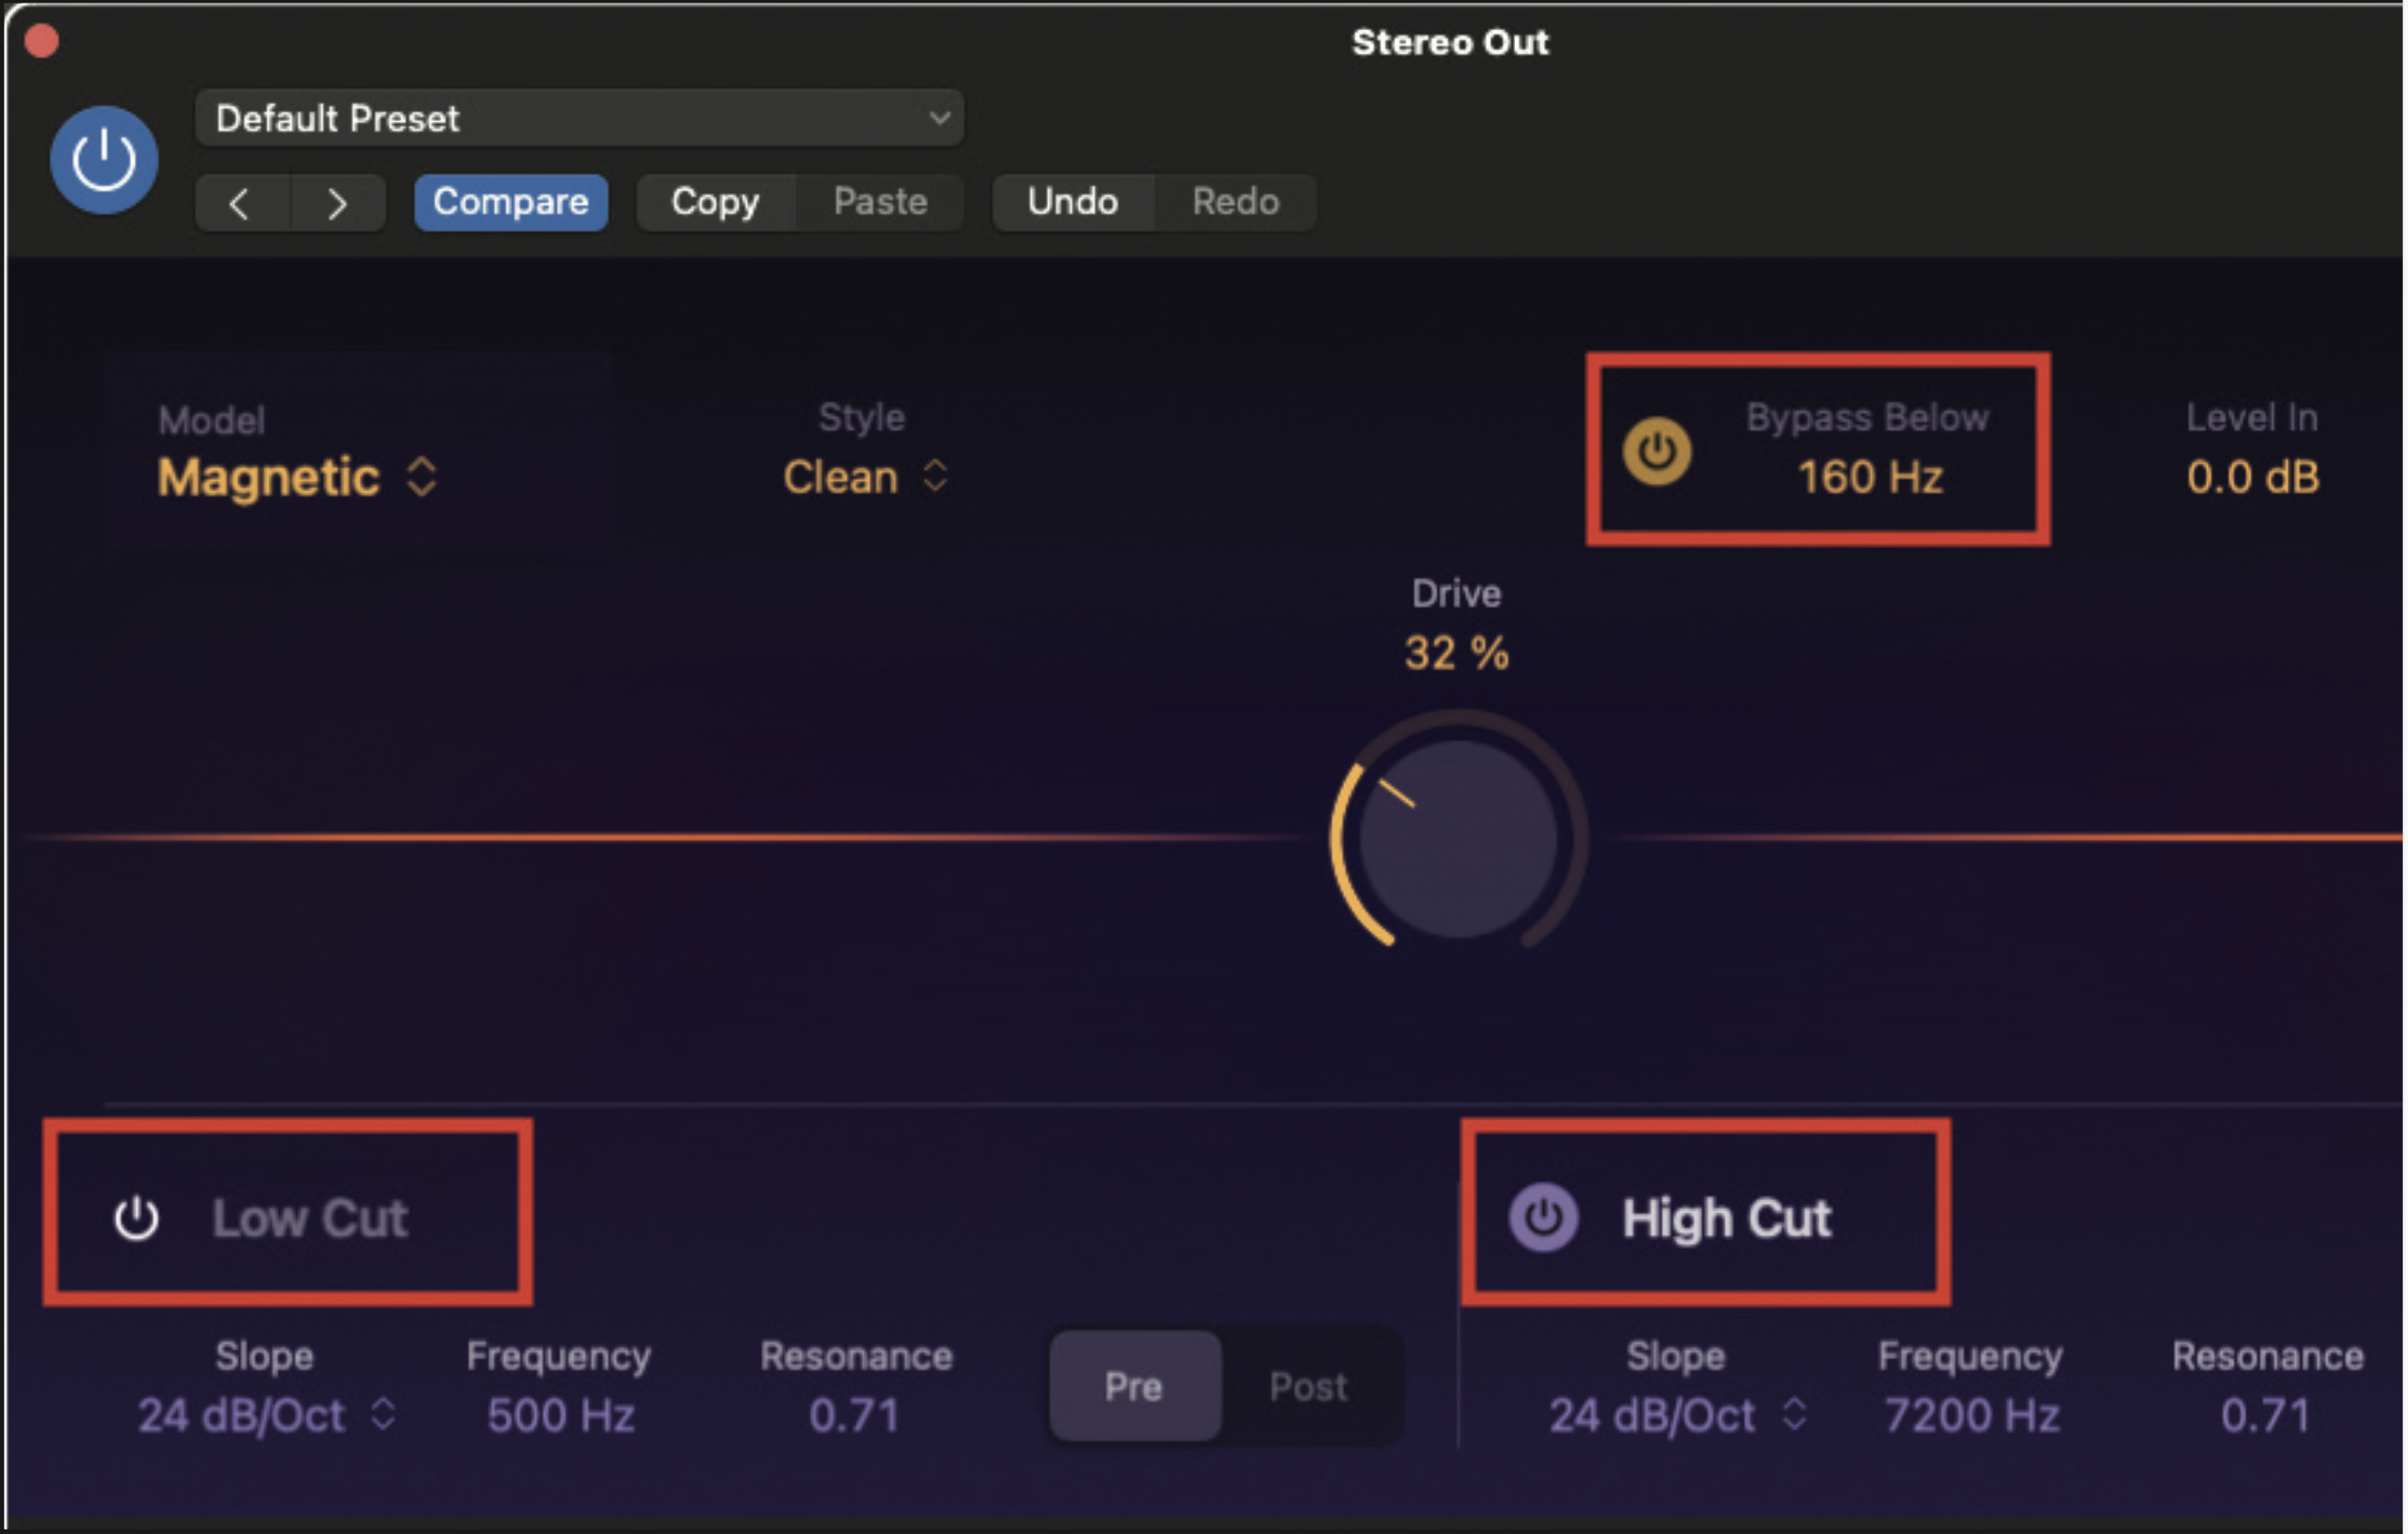
ChromaGlow is equipped with a number of filtering and shelving options. At the top of the window, a low bypass can be assigned at a specified frequency point. This means that lower frequencies below this point will remain unaffected. Similarly, the low and high cut allow us to specify exactly where the saturation is applied. These do not have to be used, but they can be useful in various scenarios.
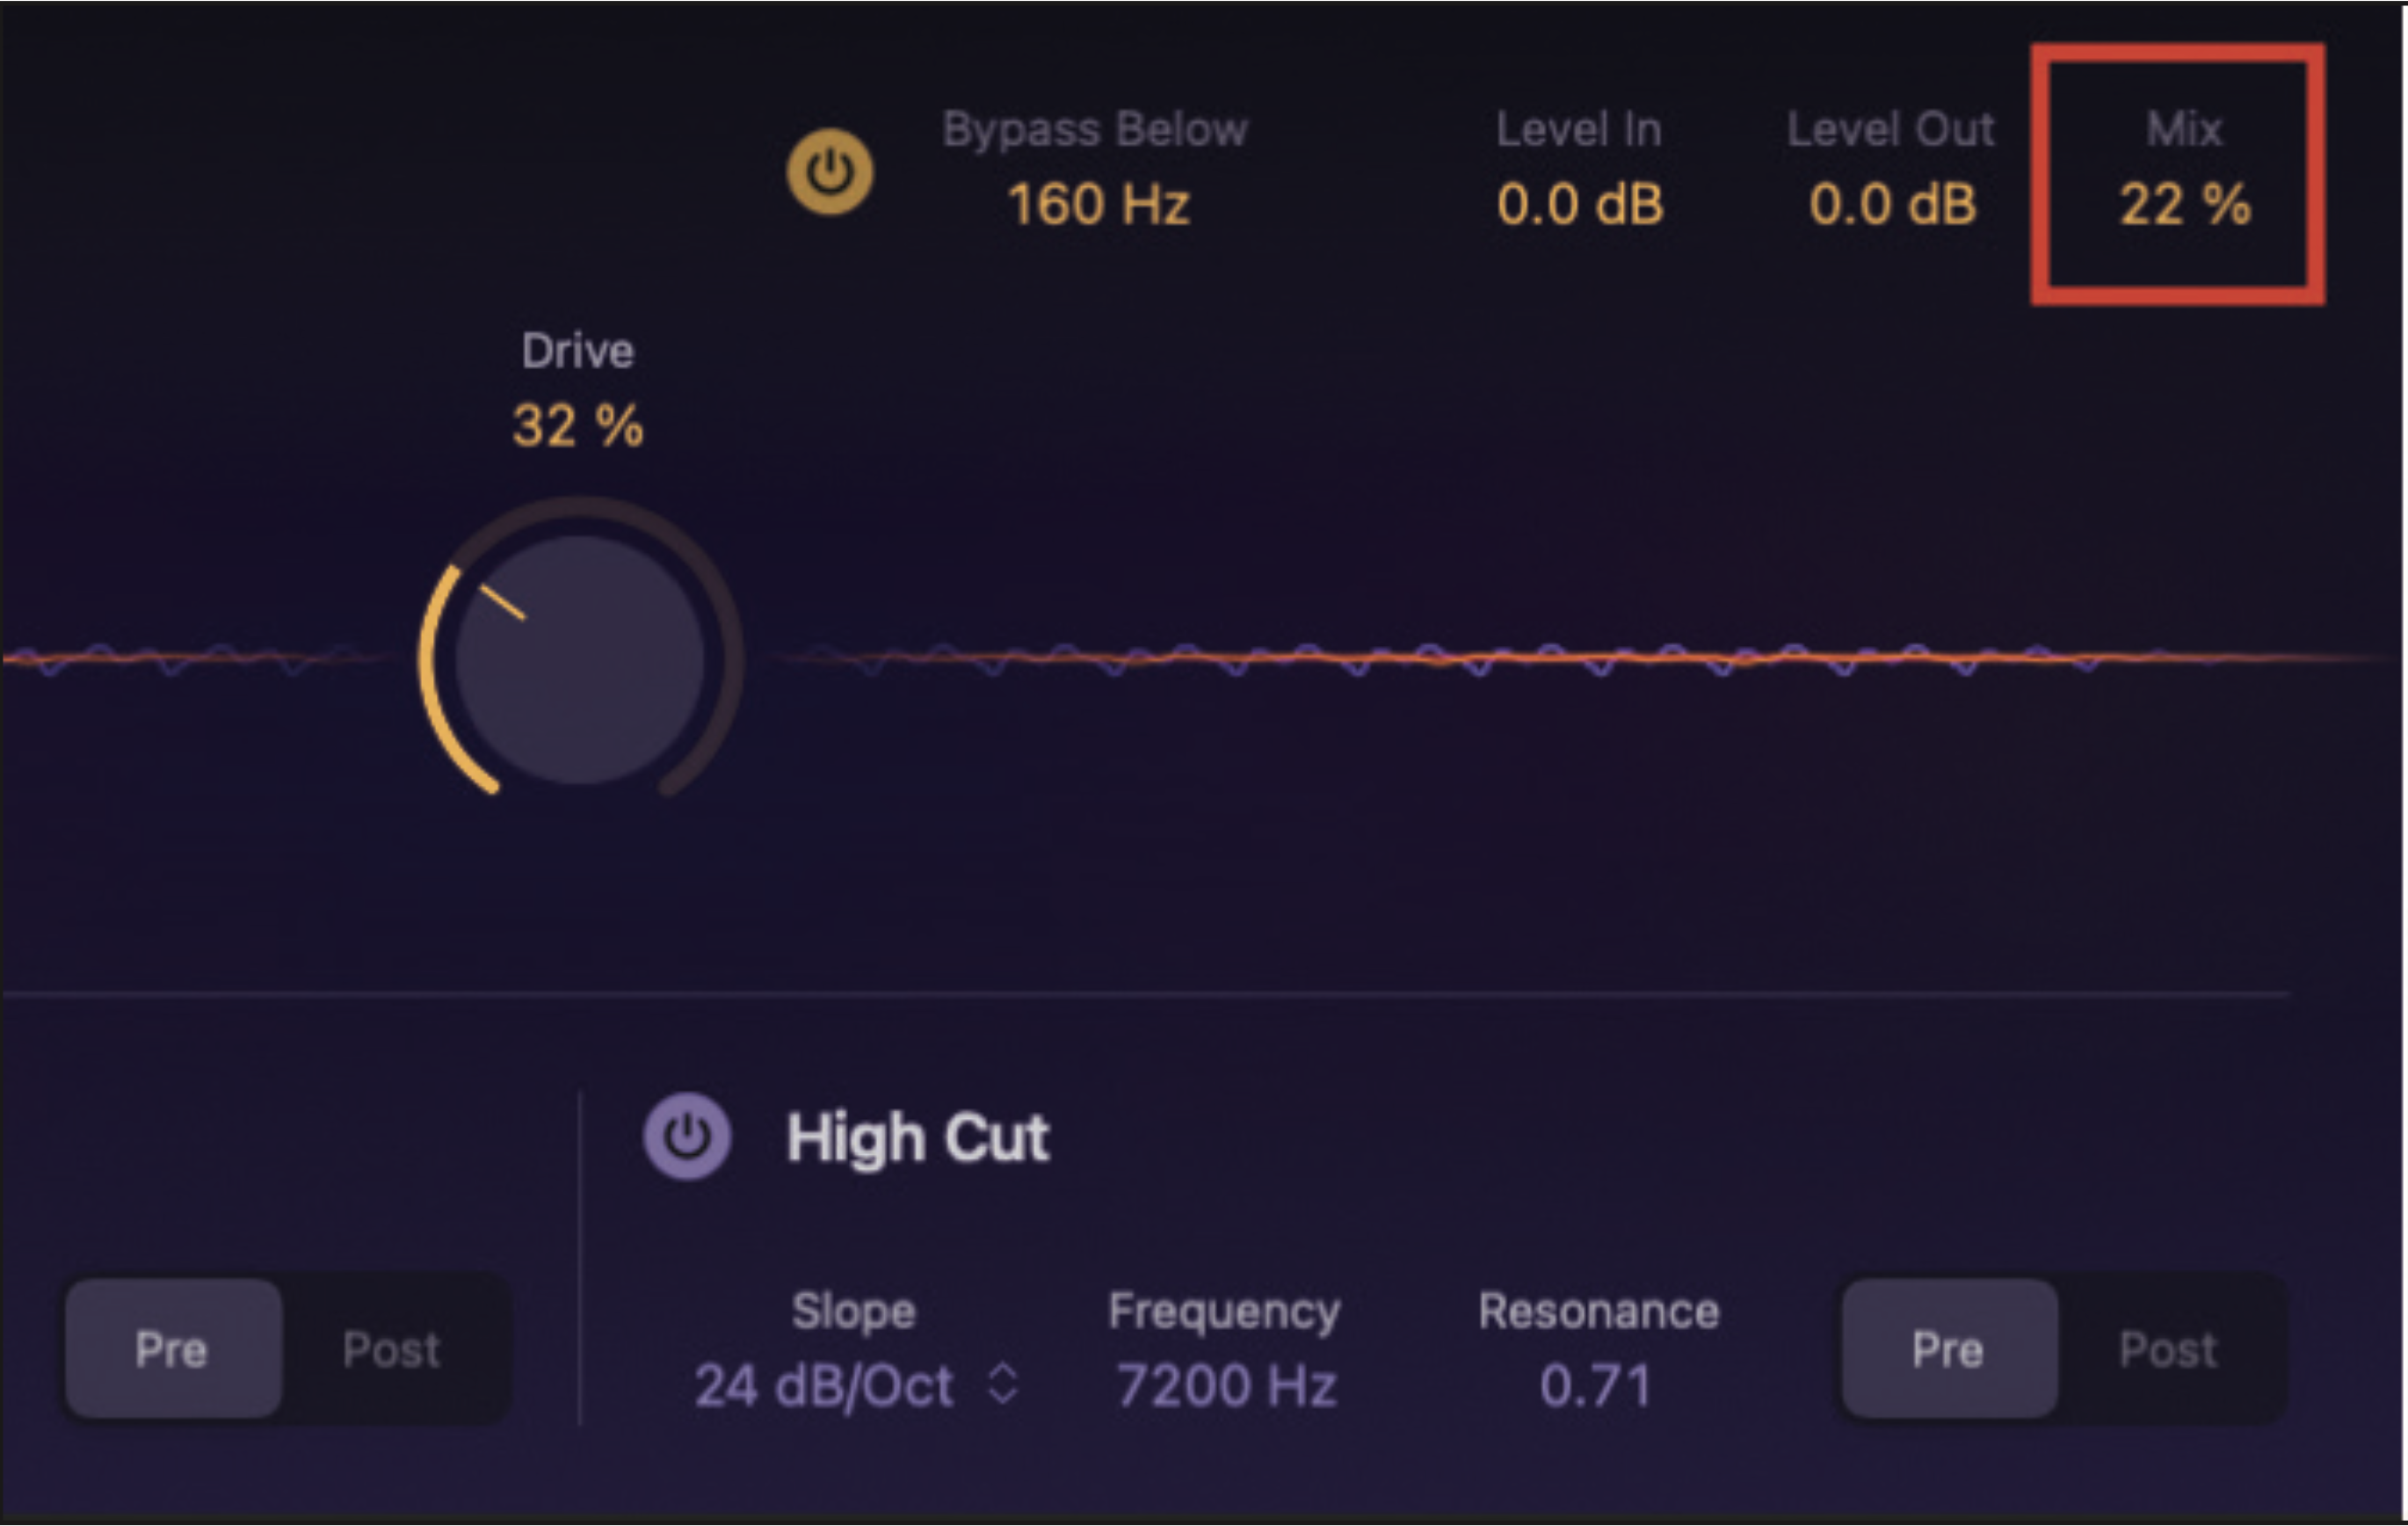
Finally, adjust the mix control. If set to 100%, you will only hear the effected signal. By selecting a lower value, you can make an adjustment to the balance between the effected signal, and the original clean signal. This can be particularly useful if used in conjunction with the low and high-cut parameters.