Sometimes I get crazy ideas and none of my coworkers at Input stop me. Crazy idea No. 1,768,534: mod my Lego NES into a real game console that plays classic 8-bit Nintendo games.
I knew I had to make this mod happen the moment Lego and Nintendo unveiled the 2,646-piece set of the NES. How could I not? The boxy console — complete with faithful port cutouts and flip-up cartridge slot — and ‘80s-style CRT were begging to be brought to life.
So I ordered some parts and got to work. Here’s a step-by-step guide on how I modded my Lego NES and made it 100 percent more awesome.
What you need:
- Lego NES set (of course!)
- An 8-inch 4:3 monitor with HDMI port
- NES Classic
- Phillips-head screwdriver
- HDMI cable
- Hair dryer
- Tape (double-sided is preferred, but single is fine)
- A ton of patience (the most important thing)
Step 1
Gutting the display and NES Classic
There are a dozen ways I could have modded my Lego NES. I could have used a Raspberry Pi and installed an emulator to run ROMs. (Remember, only run ROMs for games you own. We don’t condone piracy!) You’d still need a screen, controller (your choice of wired or wireless), and any requisite cables to connect them together.
I also could have found a small Android tablet, installed an emulator like EmuBox or NES.emu, and hooked up a Bluetooth controller. Apple doesn’t allow emulators on the App Store, but there are ways to install them on an iPad without jailbreaking.
But for my mod, I wanted to be as authentic and official as possible. That’s why I used an NES Classic. It comes with 30 pre-installed games (it’s also super easy to hack and add more) and an NES controller that faithfully replicates the original.
My plan was to gut my NES Classic and transplant the components into the Lego NES and snake the NES controller cable through the front Player 1 port and HDMI and power cable through the rear. Then, disassemble my 8-inch monitor and its respective electronic board and retrofit it into the Lego TV. Finally, connect the modded NES and TV together via HDMI, plug in power for both, and ta-daaa!
I had expected this project to be completed in maybe an hour, but it ended up taking the better part of an entire day. I ran into problems nearly every step of the way and had to break down and rebuild certain parts of the Lego NES and TV to get the mod just right.
I recommend investing in a toolkit if you're going to open up electronics. Though this project only requires Phillips-head screwdrivers, the different size bits and pry tools inside of the $27 Hautton 126-piece toolkit I recently bought to open up my PS4 (and many other gadgets) made dissembling the NES Classic and the monitor's screws and wiring much easier.
Input may receive a portion of sales if you purchase a product through a link in this article. We only include products that have been independently selected by Input's editorial team.
The NES Classic is super easy to open up. Half of the mini console is just an empty shell. The circuit board doesn't take up much space. It's roughly the same size as a Raspberry Pi.
I wanted to remove all these NES Classic parts and retrofit the controller ports and power + reset buttons in their respective placements on the Lego NES. But I quickly discovered that's not possible because the power and reset buttons use spring-loaded switches that require a backboard for them to press against to actuate.
Since I didn't want to cut or glue any pieces, I abandoned the more advanced retrofit (I'll save it for when I have more time) and decided to brute force things and drop the entire half-disassembled console inside of the Lego NES. That meant I would have to remove the pop-up cartridge slot mechanism inside of the Lego NES to make room for the NES Classic.
Once the center of the Lego NES is cleared out, there's room to squeeze the NES Classic in (without top cover, of course).
The next thing I did was strip my 8-inch 4:3 HDMI monitor to its display panel and circuit board. Feel free to use whatever size LCD you can find that fits inside of the Lego TV. Just know that you'll have to figure out how to modify the Lego TV's brick structure to align it properly with its square frame.
I went with the Eyoyo 8-inch HDMI monitor for a few reasons:
- It's a 4:3 aspect ratio which means there won't be pillarboxing for running the NES Classic
- The display's plastic housing is super easy to strip off
- It's just the right height to easily prop up without needing glue or tape
- It comes with built-in speakers so I also can get sound for the NES Classic
- Has additional video ports like VGA, AV, BNC
Again, you can use any brand or monitor that fits. I made the mistake of ordering two different 7-inch widescreen 16:9 HDMI displays because they were under $50. One was a barebones display made for a Raspberry Pi so it was a plug-and-play installation and the other had a plastic housing that was glued shut. Both of the displays' heights were too short. Luckily, the Eyoyo monitor was a near-perfect fit.
Learn from my mistake and do the following before disassembling the monitor:
- Plug it in the display and connect your NES Classic and make sure everything works properly. Just a quick test to make sure the display is taking the signal from the NES Classic and sound is coming out of the speakers.
- Make sure the input is set to HDMI
- Adjust any picture settings like brightness and contrast
- Go into the menu and flip the screen upside down. This will be important because we're mounting the display upside down so that all of the ports are facing upwards and easily accessible for cable management. The ribbon cable for the display should be coming out of the bottom instead of the top.
If you don't do these steps pre-disassembly, you'll end up having to reconnect the plug to the button circuit board that's bolted to the front of the monitor housing (see below photo). Of course, you could disconnect this piece and stash it inside of the Lego TV along with the display and speakers, but I think it's better to set everything upfront so there's less fiddling later.
I recommend unplugging the speakers, which we'll reconnect later. Just be extra careful because the wiring is extremely fragile and can easily rip apart. I used tweezers to gently wiggle the connector plug out.
I used a hair dryer to loosen the glued-down speakers. A few seconds on hot or warm should do the trick. My beloved Dyson SuperSonic came in handy again!
Step 2
Hollowing out the Lego TV
Next, I hollowed out the Lego TV to make room to house the display, speakers, and cables coming out. The Lego TV is the most complex piece of the brick set so be really careful when taking it apart — bring your patience — because something will probably go sideways at some point. A piece will randomly fall off or certain parts of the build will come undone because you used too much force. You will probably curse out loud.
First, remove the Lego TV off its legs stand. We can set that aside for now. Also, pull off the top panels.
Once the facade is pulled off, you'll be able to easily remove the Super Mario Bros. diorama.
Step 3
Transplant electronics
This is the hardest part. You need to fit the display inside of the Lego TV, the NES Classic inside of the Lego NES, and strategically remove bricks to make openings for the controller, HDMI, and power cables to snake out of. So let's get to it.
I recommend doing a fit test before permanently installing parts. Place your display inside of the Lego TV and then hold the front panel up to see how the screen aligns. This will inform which bricks you may need to remove for a snug fit.
And the first cable is passed through!
At this point, you should do another test after plugging in the HDMI and power cables to make sure everything is working properly and you didn't break anything.
Next, reattach the speakers. Connect the plug back to the display's circuit board and then use double-sided tape or regular tape (looped) to attach them to the interior of the Lego TV.
I later realized I needed to do a little more modding to get the display to fit better. There were several bricks that prevented the display from being positioned straight. (If you don't do this, your display will come out angled like in the photo below, which doesn't look great.) Once I removed those pieces, it created a trench for the display to nestle into.
The NES Classic is a tight fit inside of the Lego NES. But my main issue was the HDMI cable. Most of the ones I had were too thick and wouldn't allow passthrough even if I removed a few bricks from the backside.
I got really lucky. Out of the dozens of HDMI cables I have, the one connecting my soundbar wasn't so reinforced. So I swapped them.
Step 4
Play time!
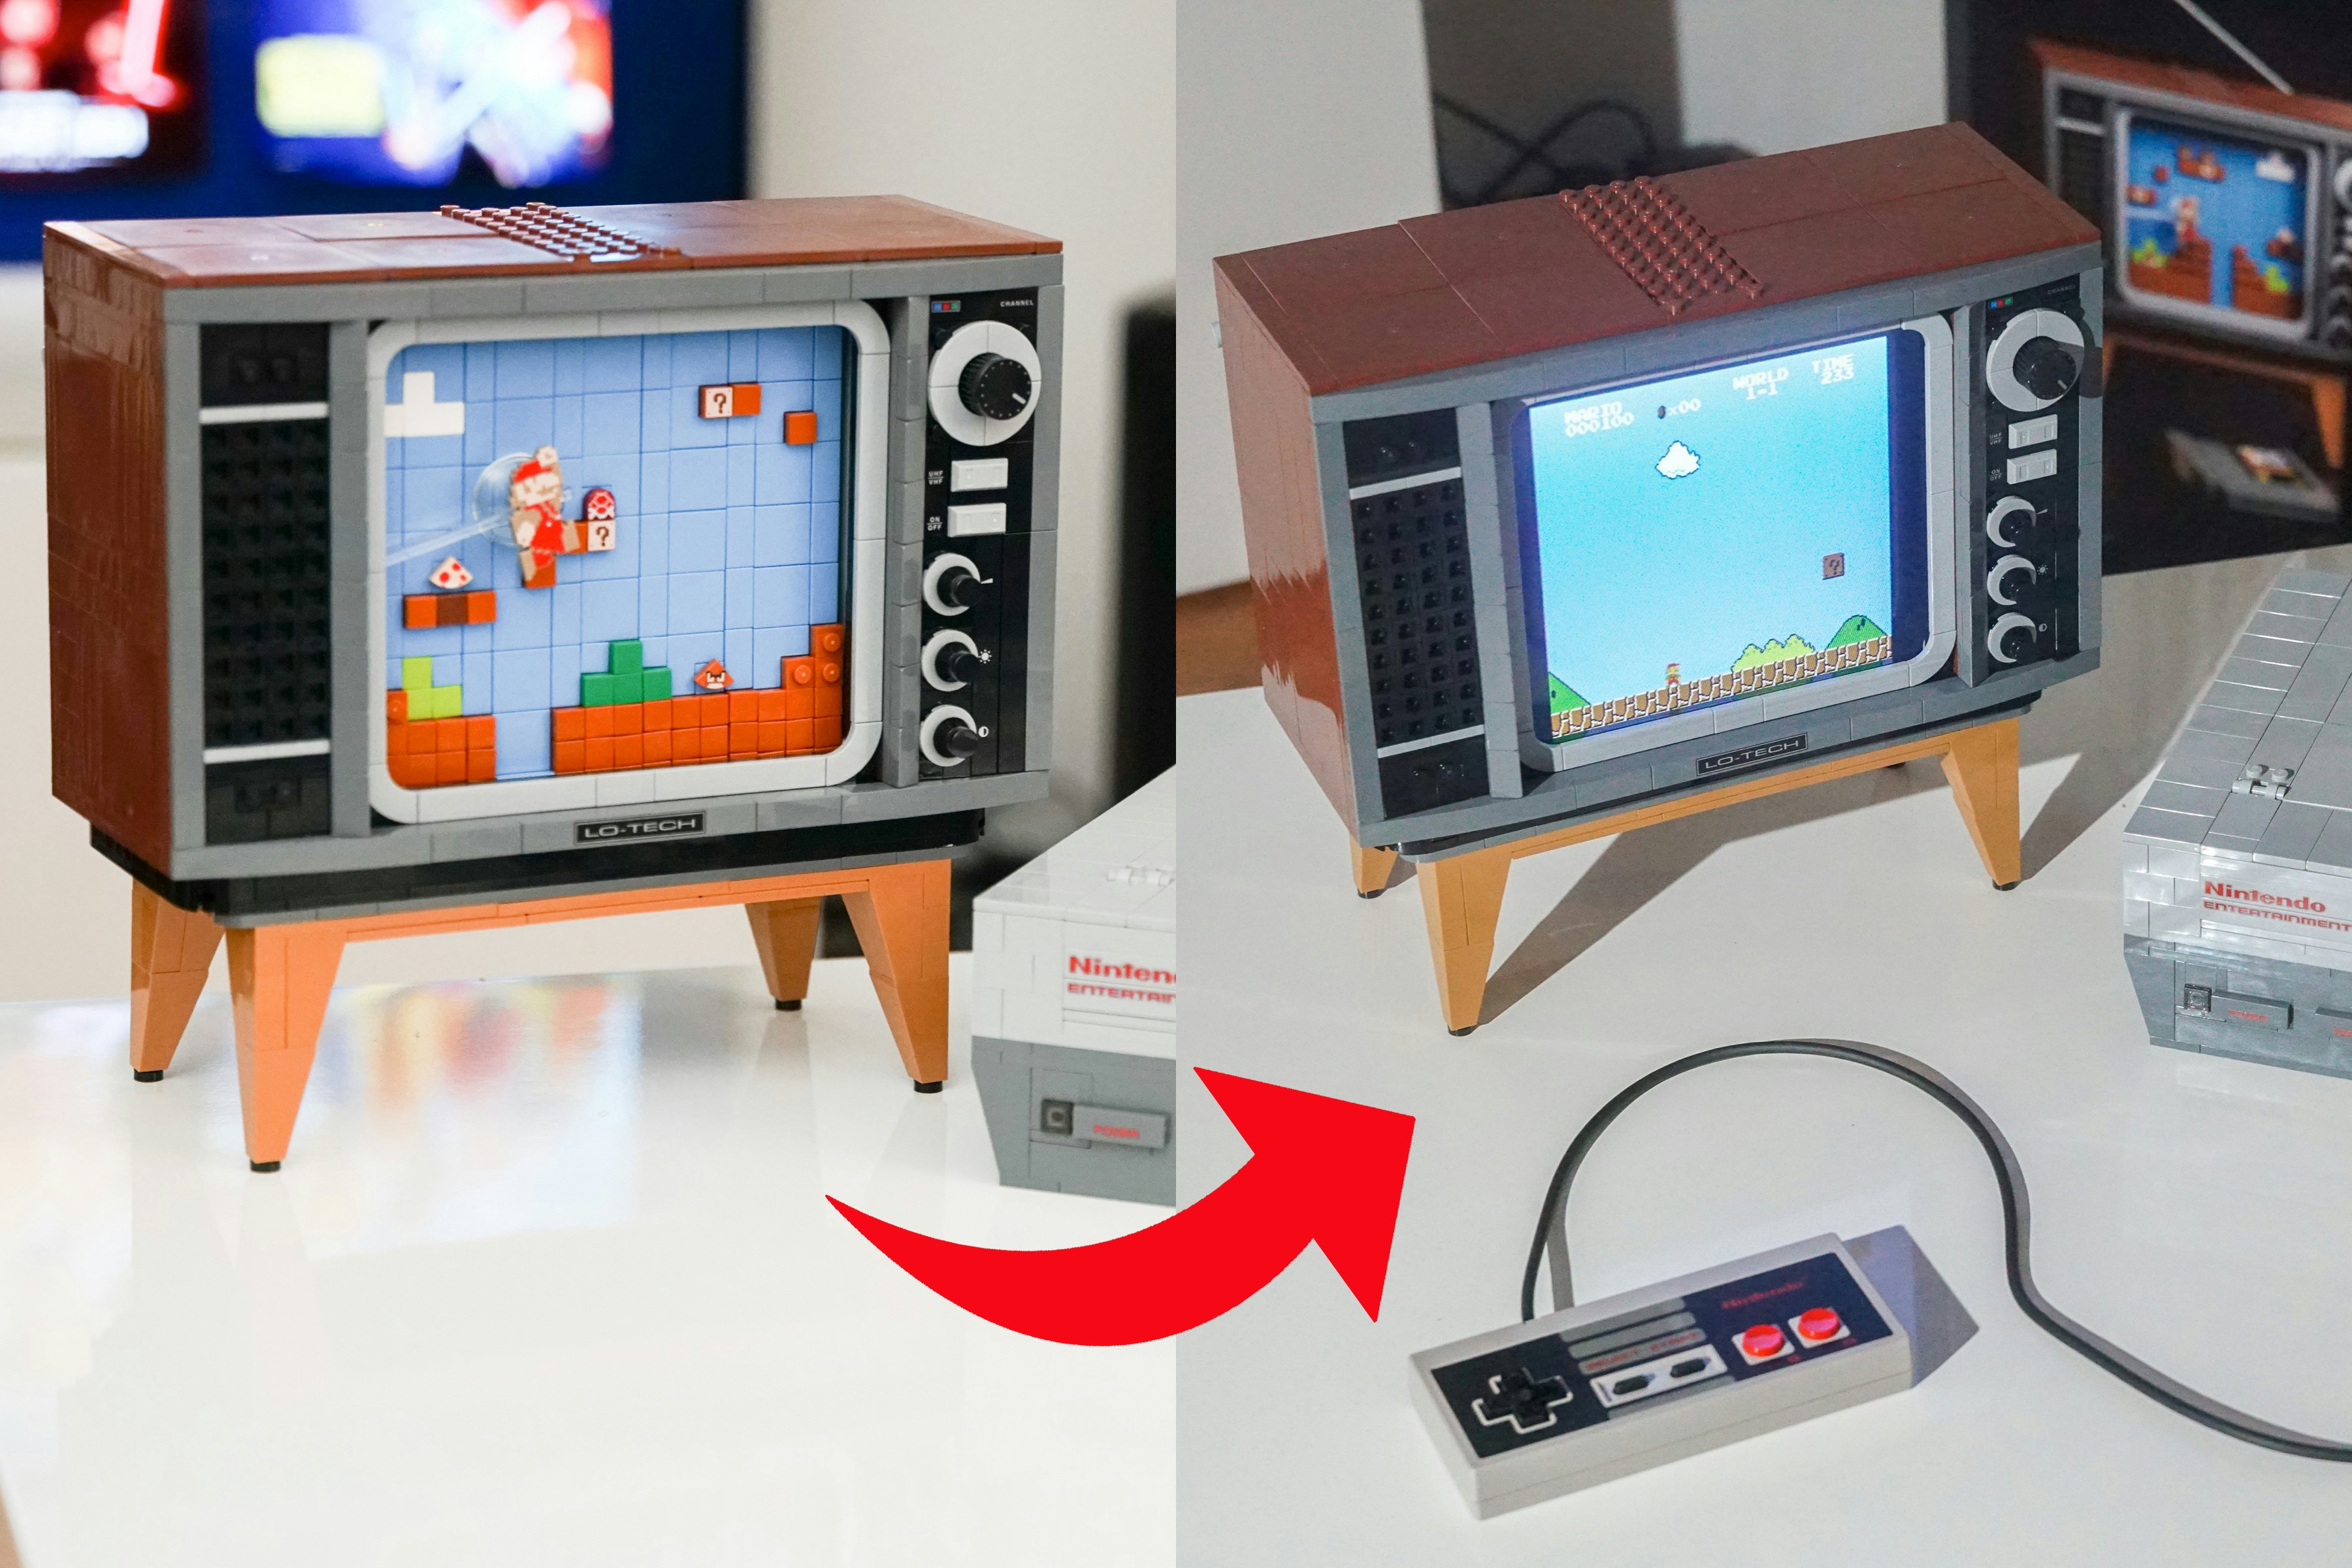
After many, many, many hours of work and brick modification later, my Lego NES and TV were working. For version 1.0, I'm really happy with how everything turned out. I had to improvise along the way when I ran into issues with the HDMI cable not fitting, the display not aligning perfectly straight, and the spring-loaded NES Classic button requiring a backplate. But the Lego NES and TV are both fully functional and look pretty damn good.
For version 1.0, I'm really happy with how it turned out.
The moving diorama is cool and all, but honestly, this is the toy that Lego and Nintendo should have made. Yeah, I know the price would have been well north of $229, but it would have been pretty sick. No matter, because now my knowledge is passed onto you!
This mod is a great weekend project. My mod is by no means perfect, but I have no complaints. Maybe in the future I'll tweak the design — I really want to transplant the NES controller's electronics into the Lego gamepad, but that's a more difficult mod — but for now, I'm enjoying my sweet build.