Watch video: High Dynamic Range vs Luminosity Masking
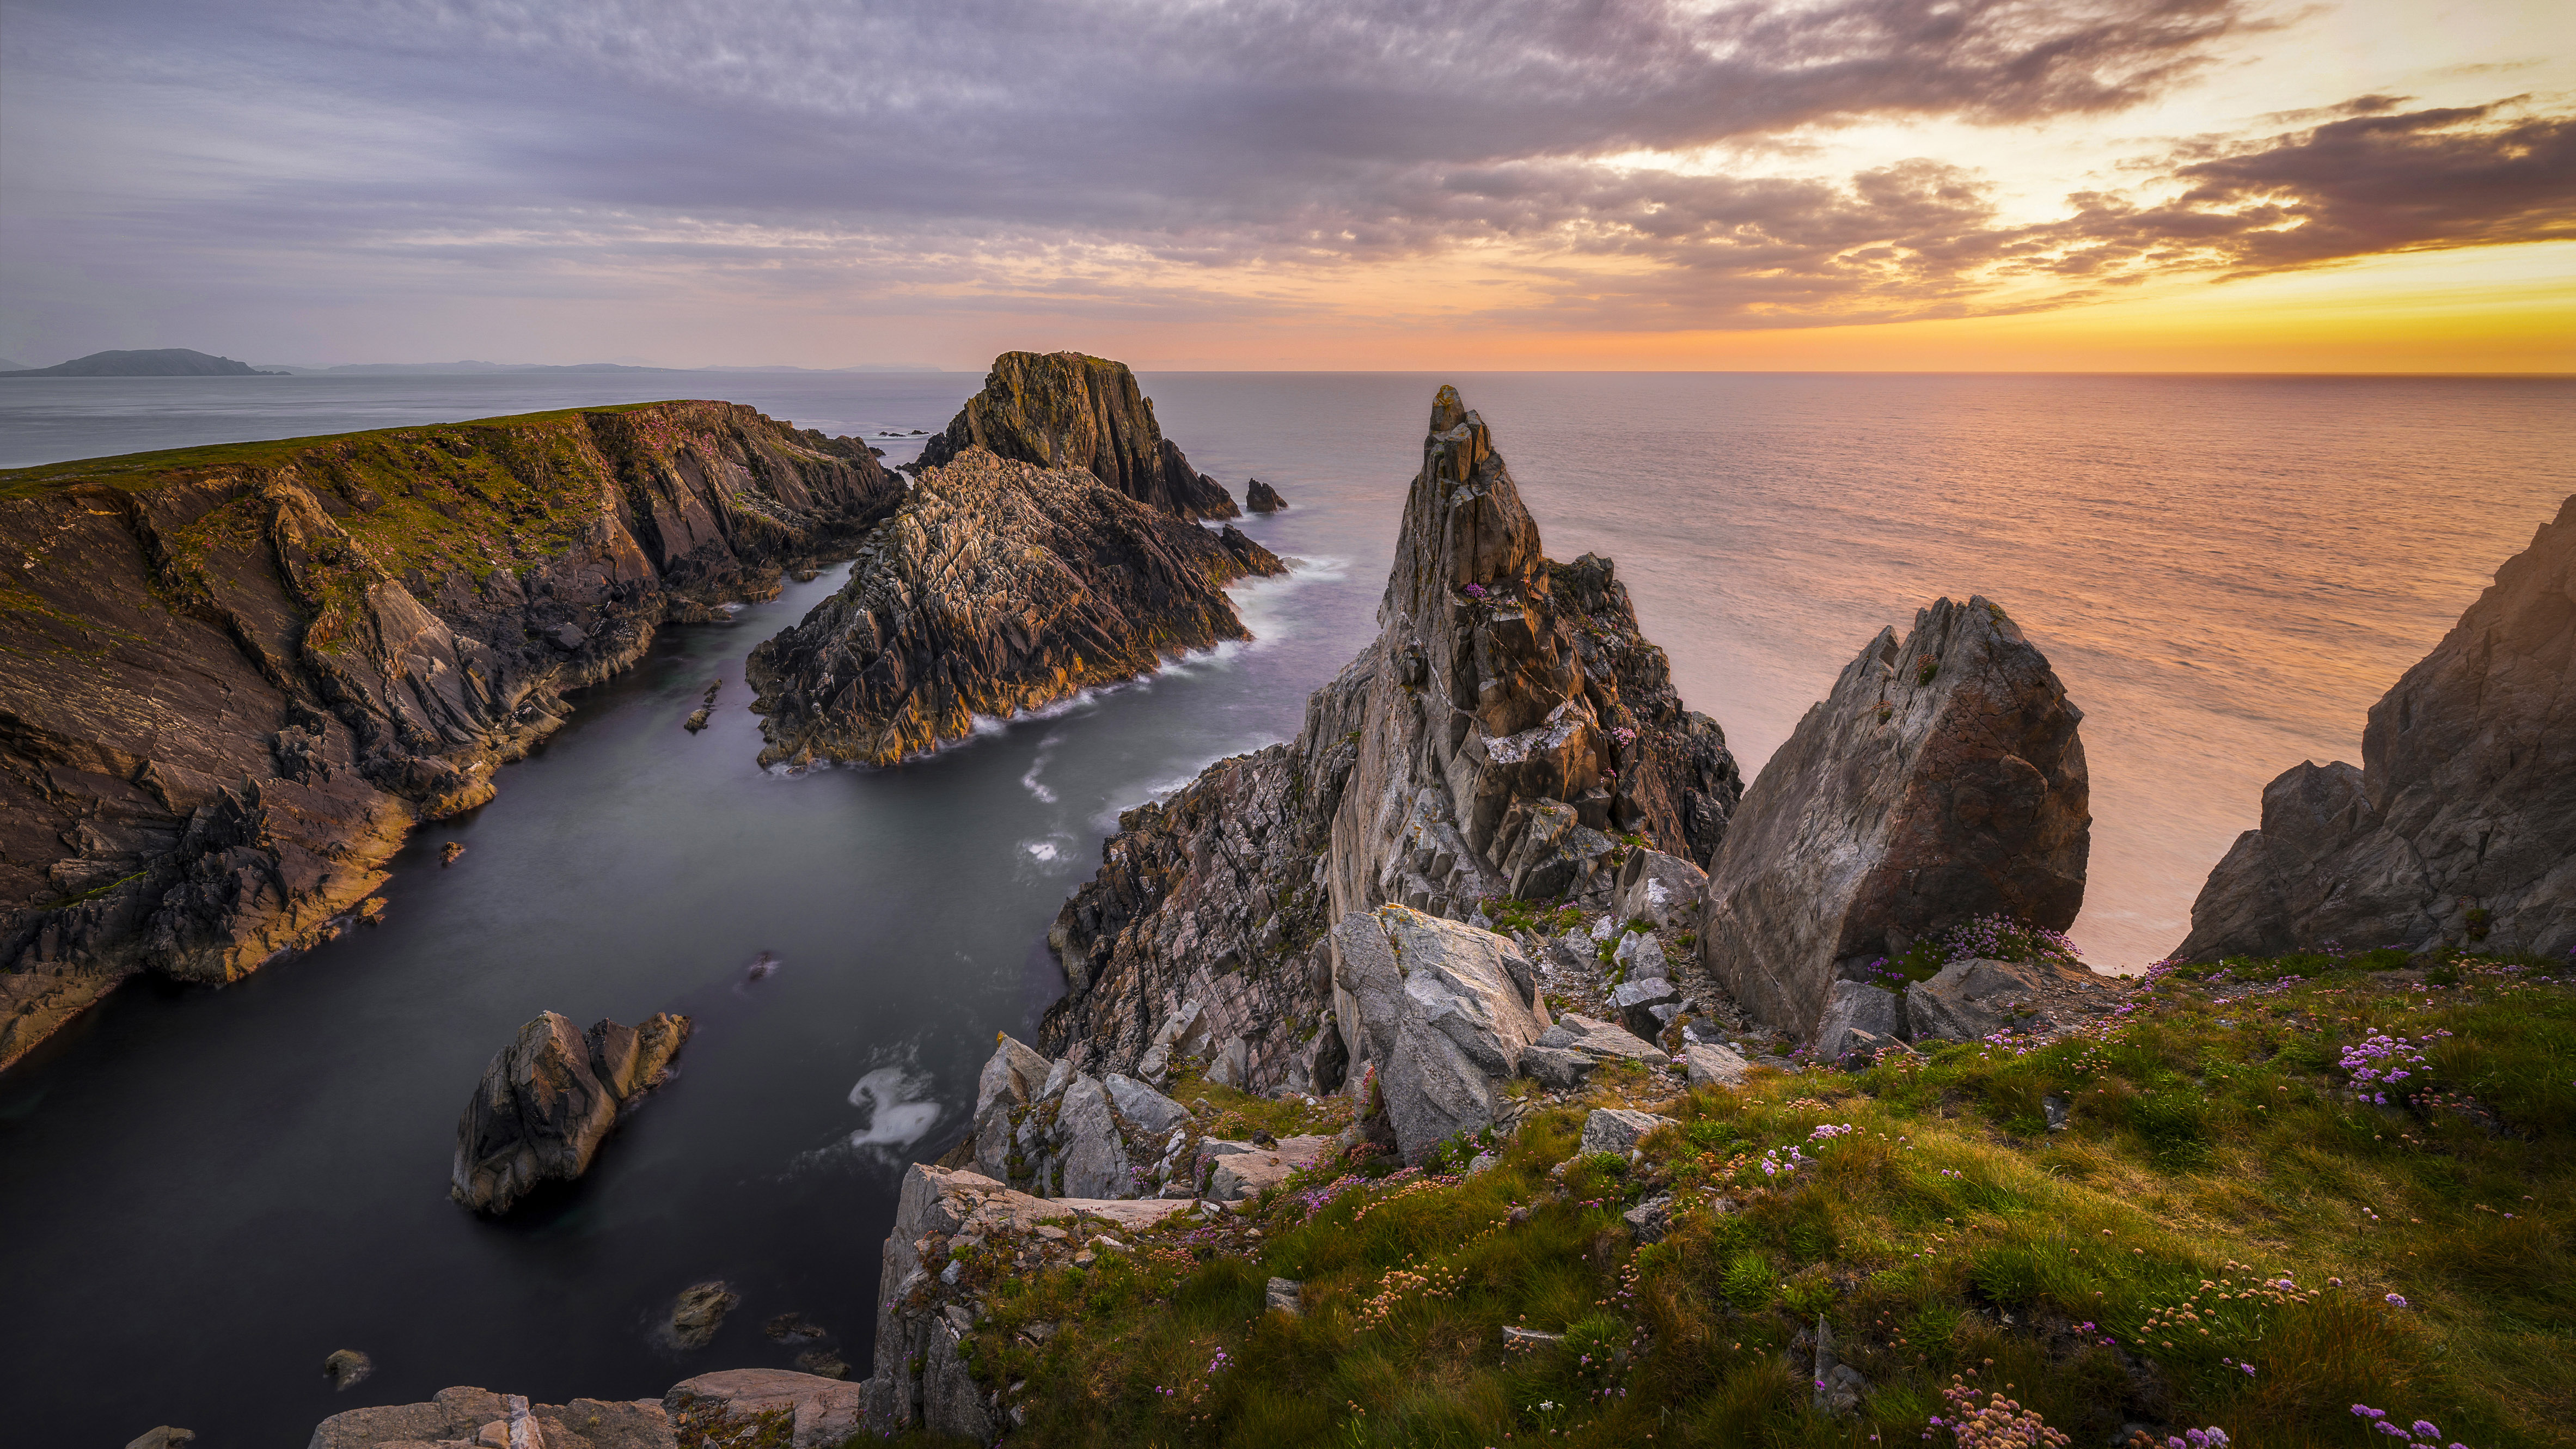
If you’re into landscape photography, you’ve probably heard of HDR imaging. It involves using software to blend a set of bracketed exposures into a single image with a high dynamic range, which enables us to display detail in very bright and very dark areas. It’s especially useful for sunrise or sunset landscapes, as the sky is usually so much brighter than the land, so recording a balanced exposure without using HDR can be a challenge.
However, there is a second option that’s perhaps less practised, but potentially more effective. Luminosity Masking is similar to HDR in that it lets us blend bright and dark frames, but it’s more of a manual process of layering and masking images in Photoshop, using the luminosity of different areas to create seamless blends. As such, it has a steeper learning curve than HDR, but with greater control comes results that are often more nuanced.
Both HDR and Luminosity Masking are forms of exposure blending, so we need more than one exposure to work with. This is where bracketing with your EOS camera comes in. But there’s more to it than simply engaging your Canon’s bracketing mode. Read on and we’ll explain everything.
1. Try an HDR in Photoshop
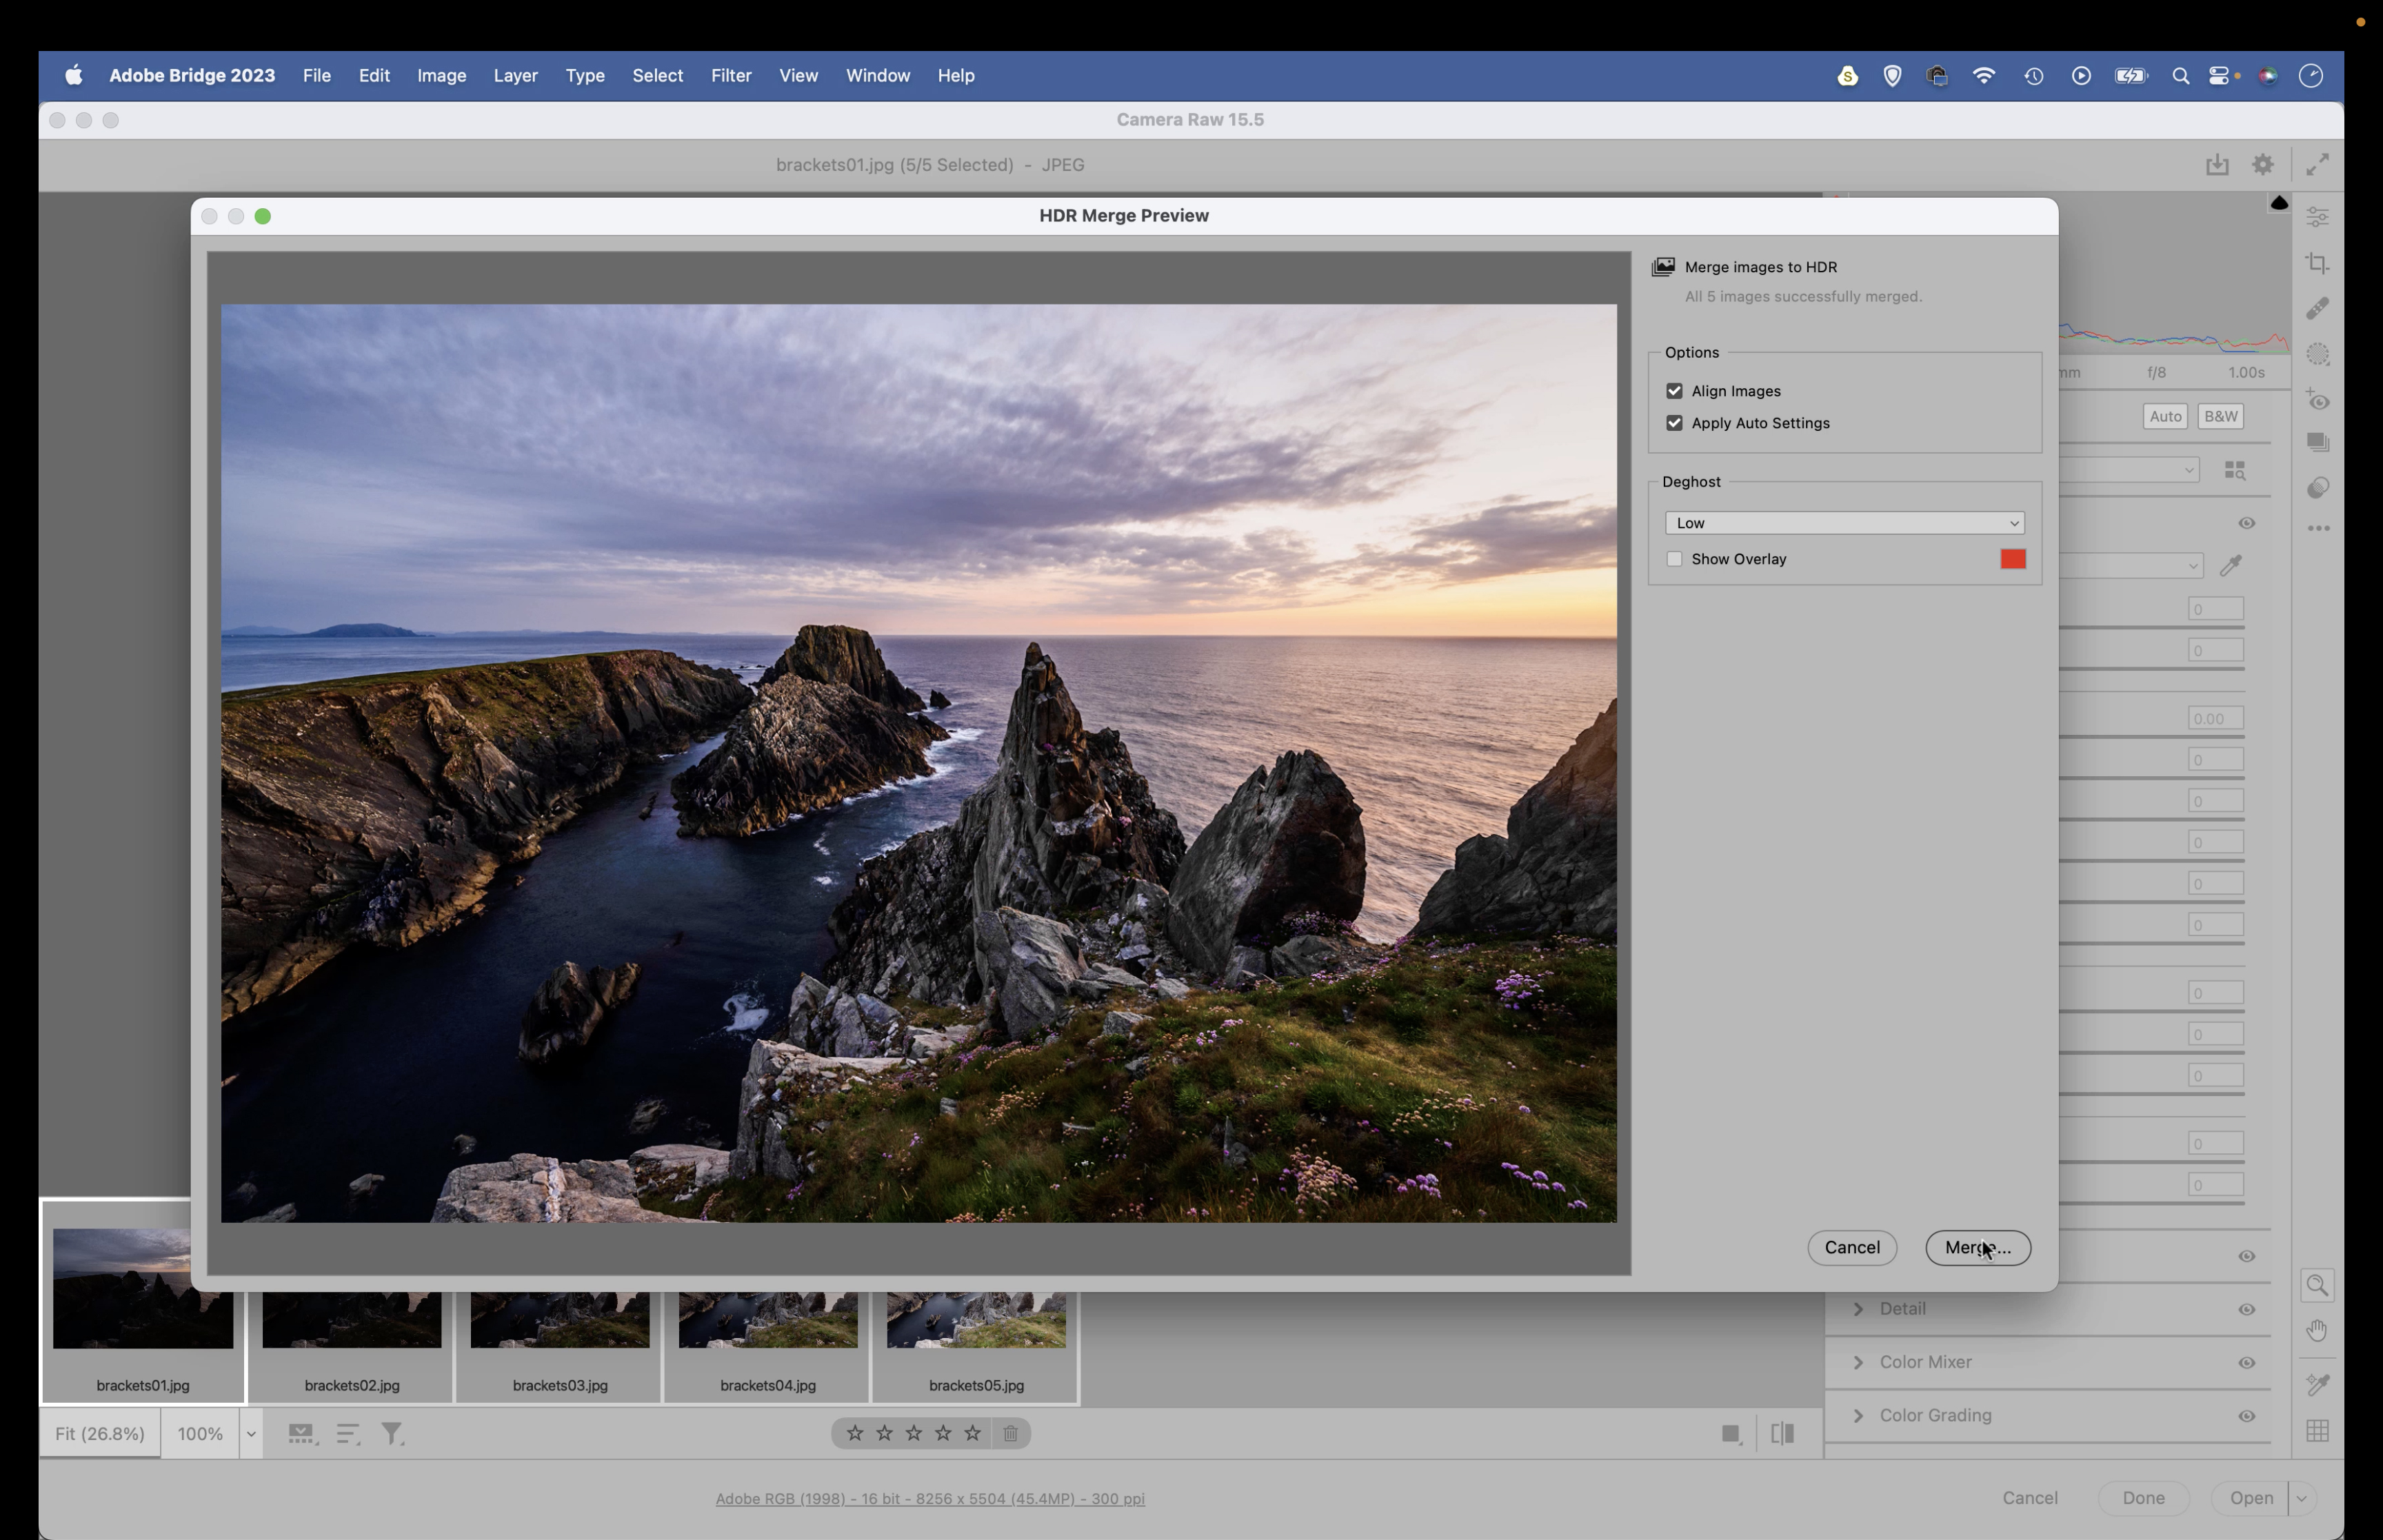
Highlight the images in Adobe Bridge, right-click and Open In Camera Raw. Hit Cmd/Ctrl+A to select them, right-click and choose Merge To HDR. Adjust settings to suit. Hit OK. A new HDR DNG image is created, which you can edit with Camera Raw’s tonal tools.
2. Try Luminosity masking
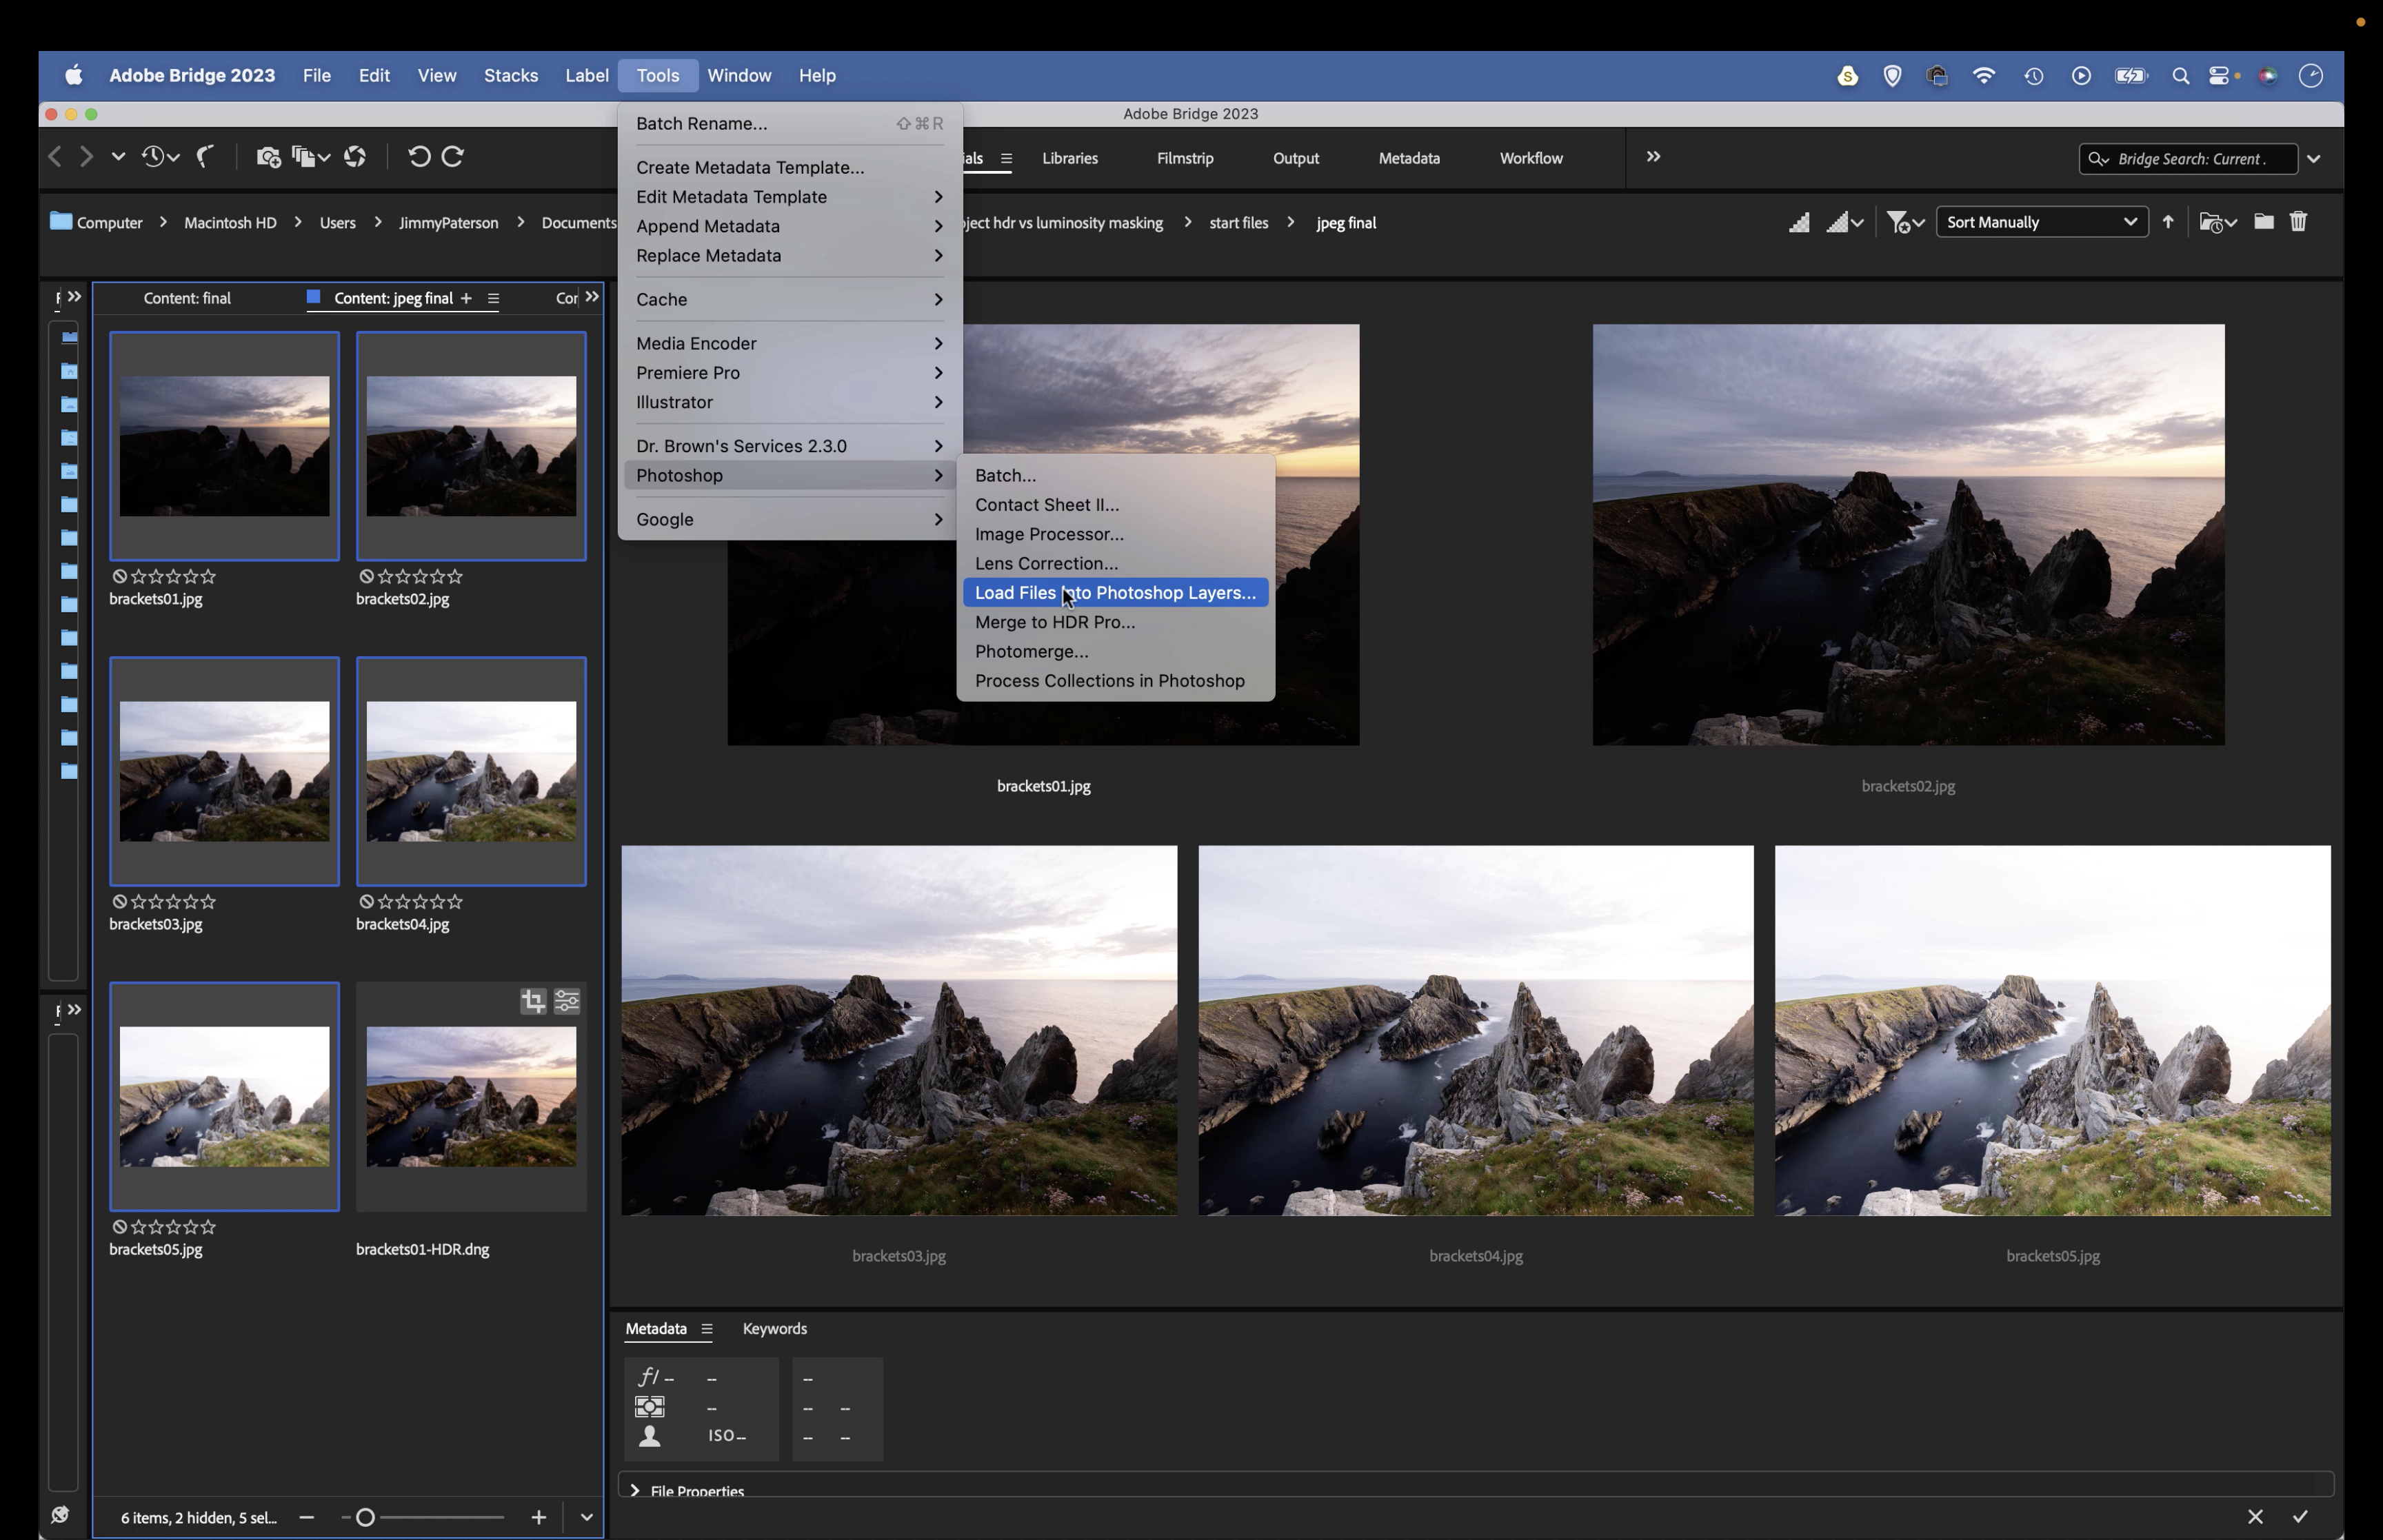
Highlight the bracketed frames in Adobe Bridge, then go to Tools>Photoshop>Load Files Into Photoshop Layers. Highlight all the layers and go to Edit>Auto-Align Layers. Choose the most balanced exposure, drag this layer to the bottom and hide the others.
3. Run the action
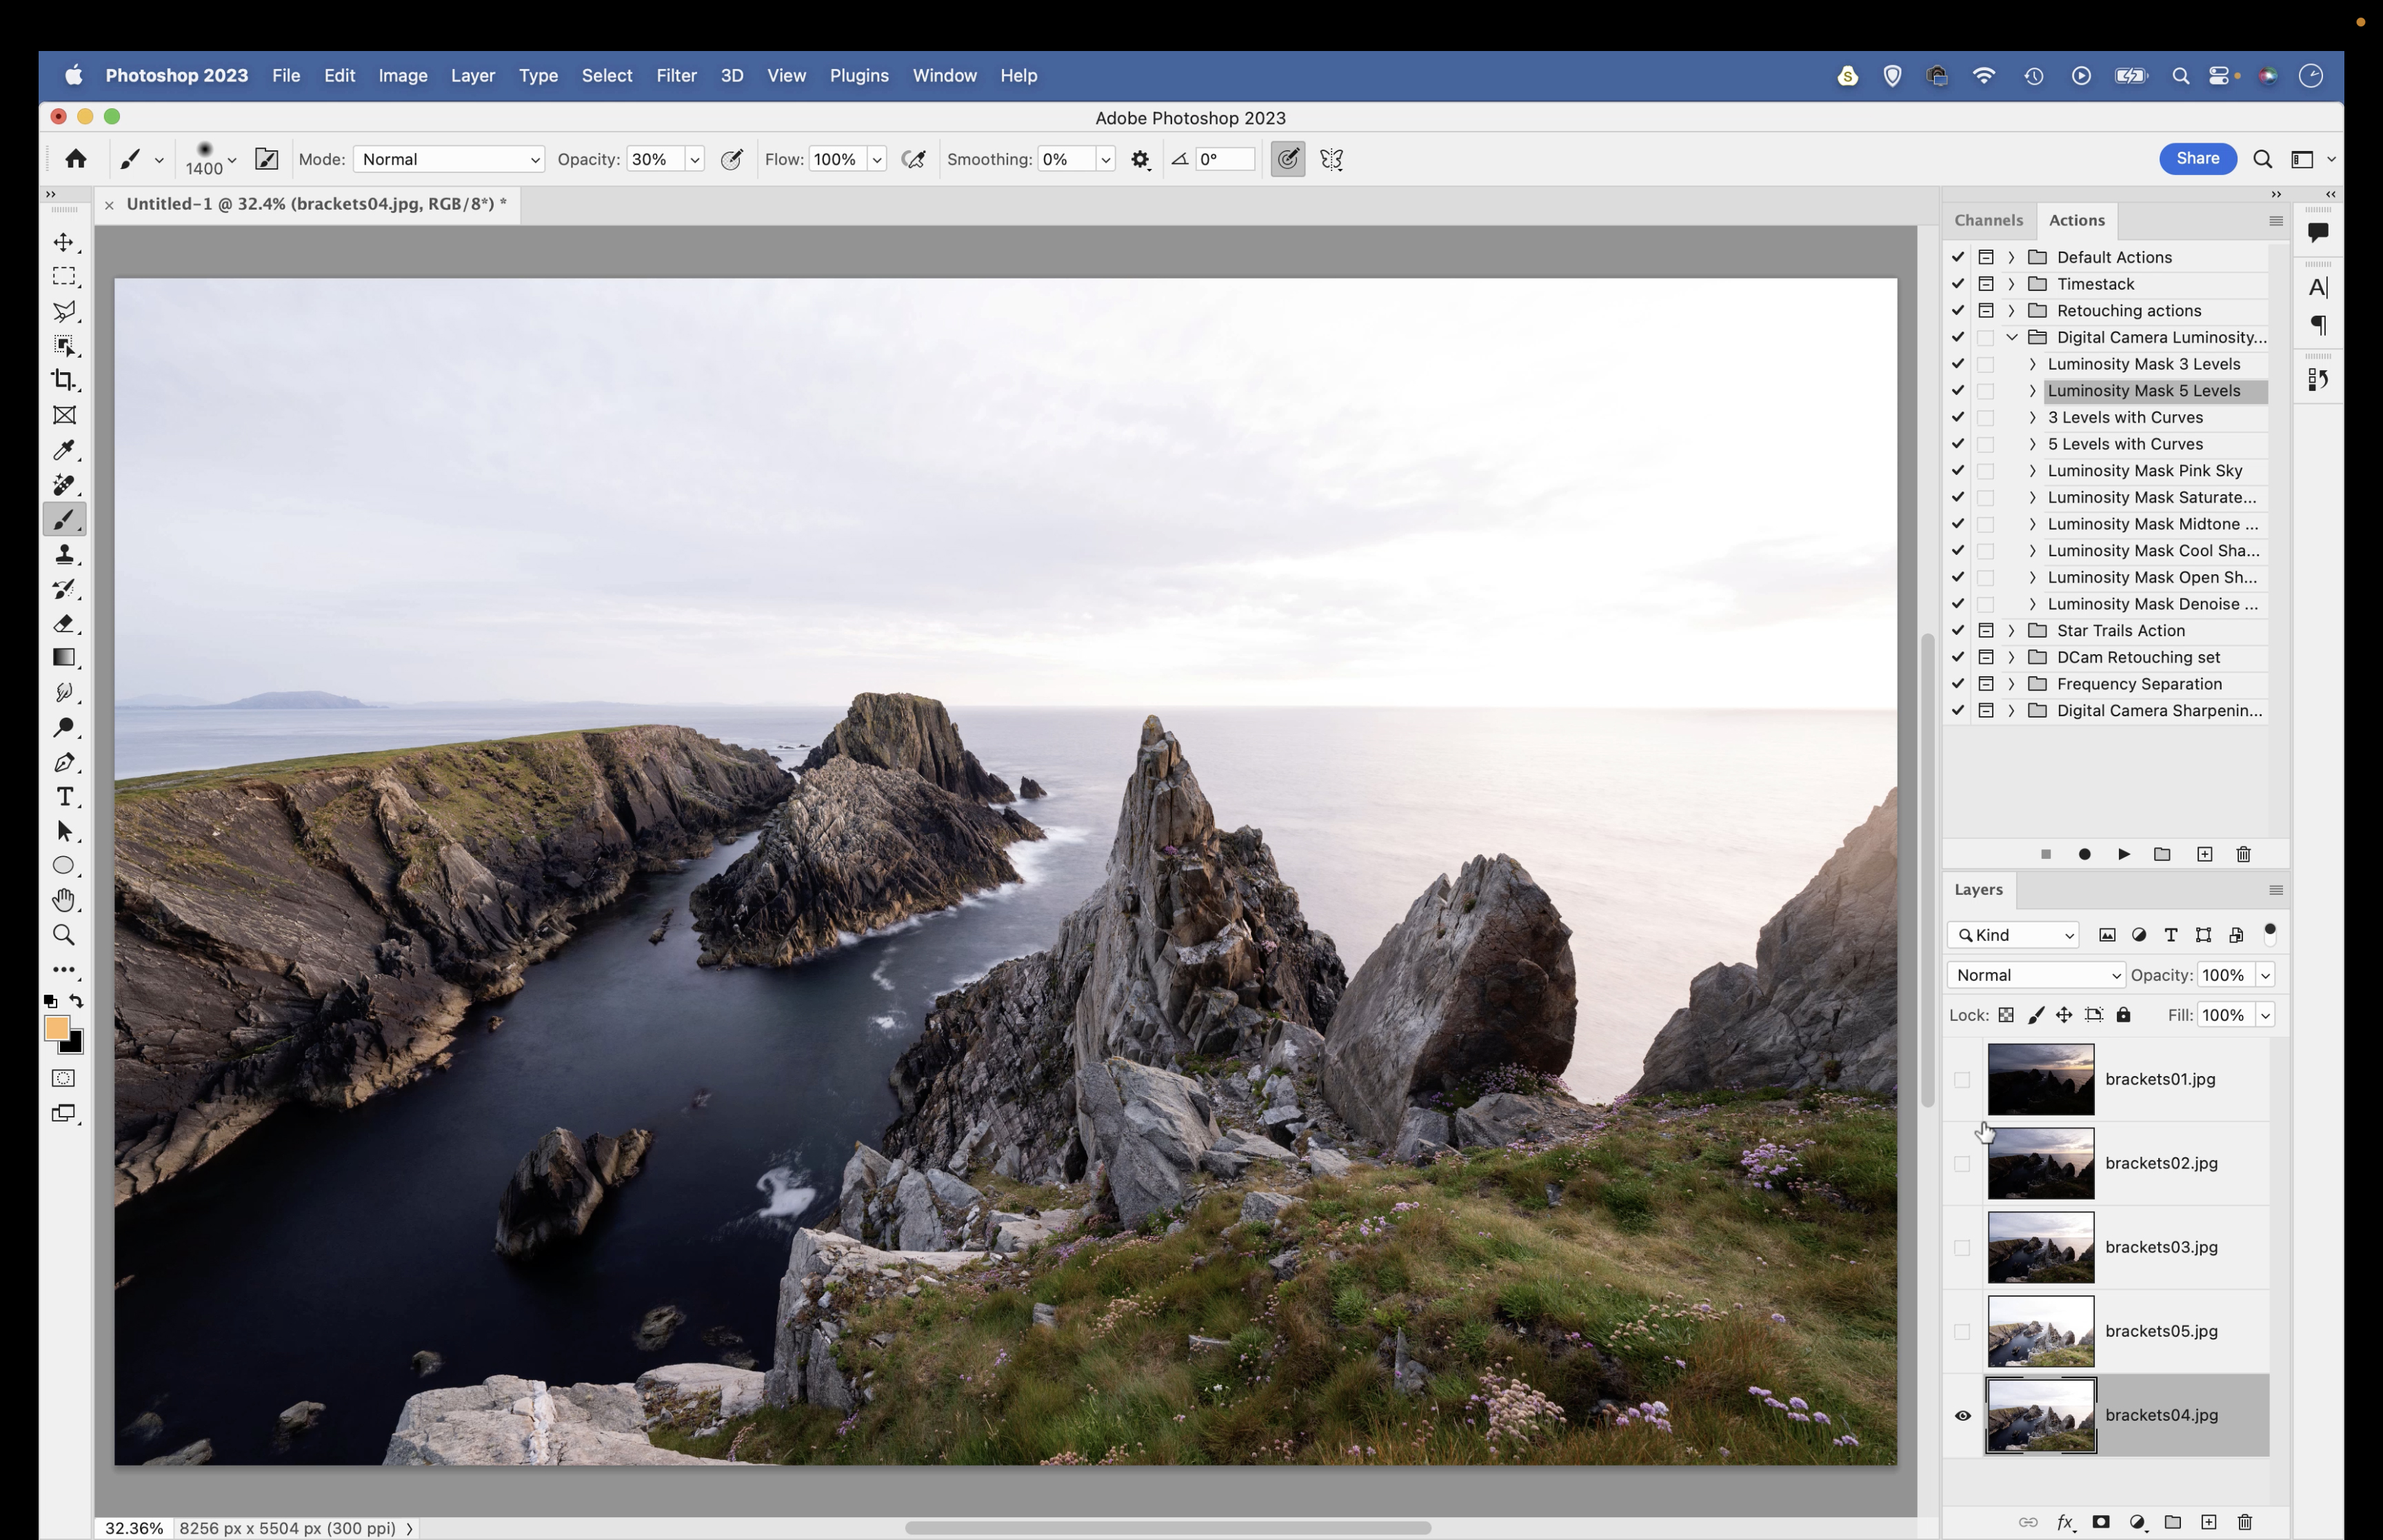
Download the supplied Action set (download here). Go to Window>Actions in Photoshop. Click the flyout menu and choose Load Actions. Once done, click the Luminosity Mask 5 Levels action and hit the play button. This creates channels for different levels of luminosity.
4. Target the highlights
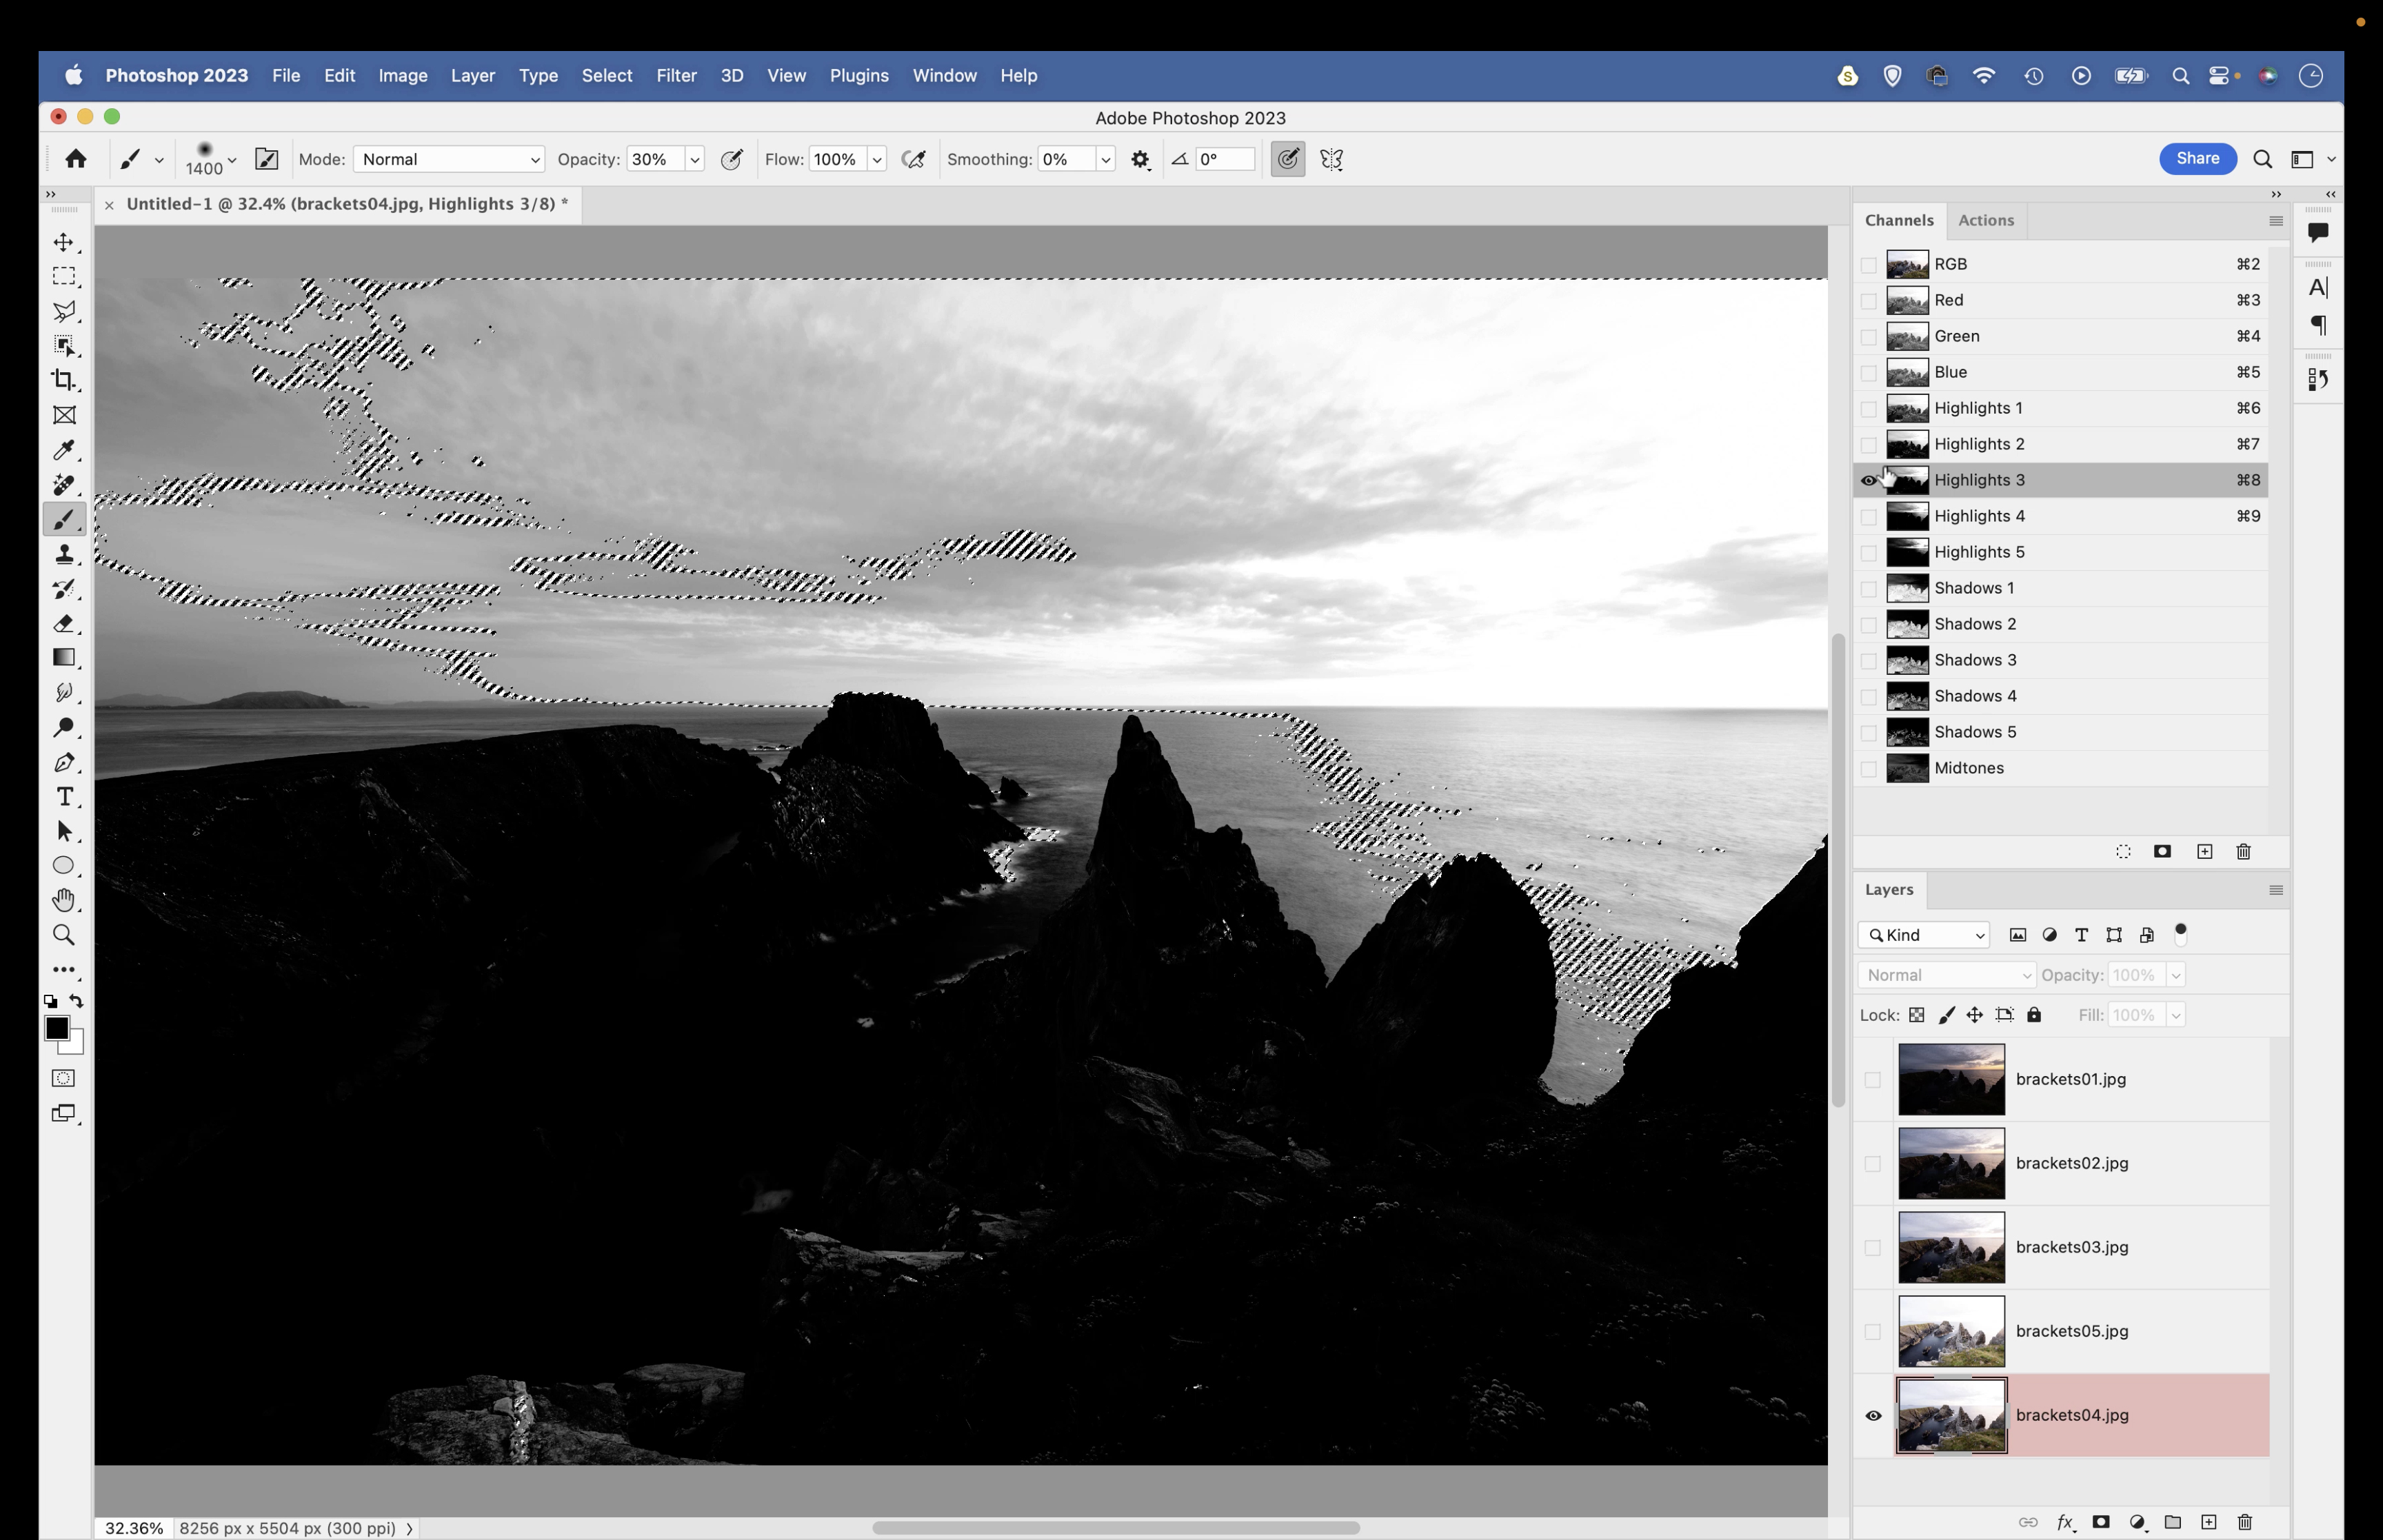
Go to the Channels Panel (Window>Channels) and click on the different channels for highlights. Choose the one that targets the brighter parts of the sky. Hold Cmd/Ctrl and click on the channel to load the white parts as a selection, then click on the RGB channel.
5. Paint a mask
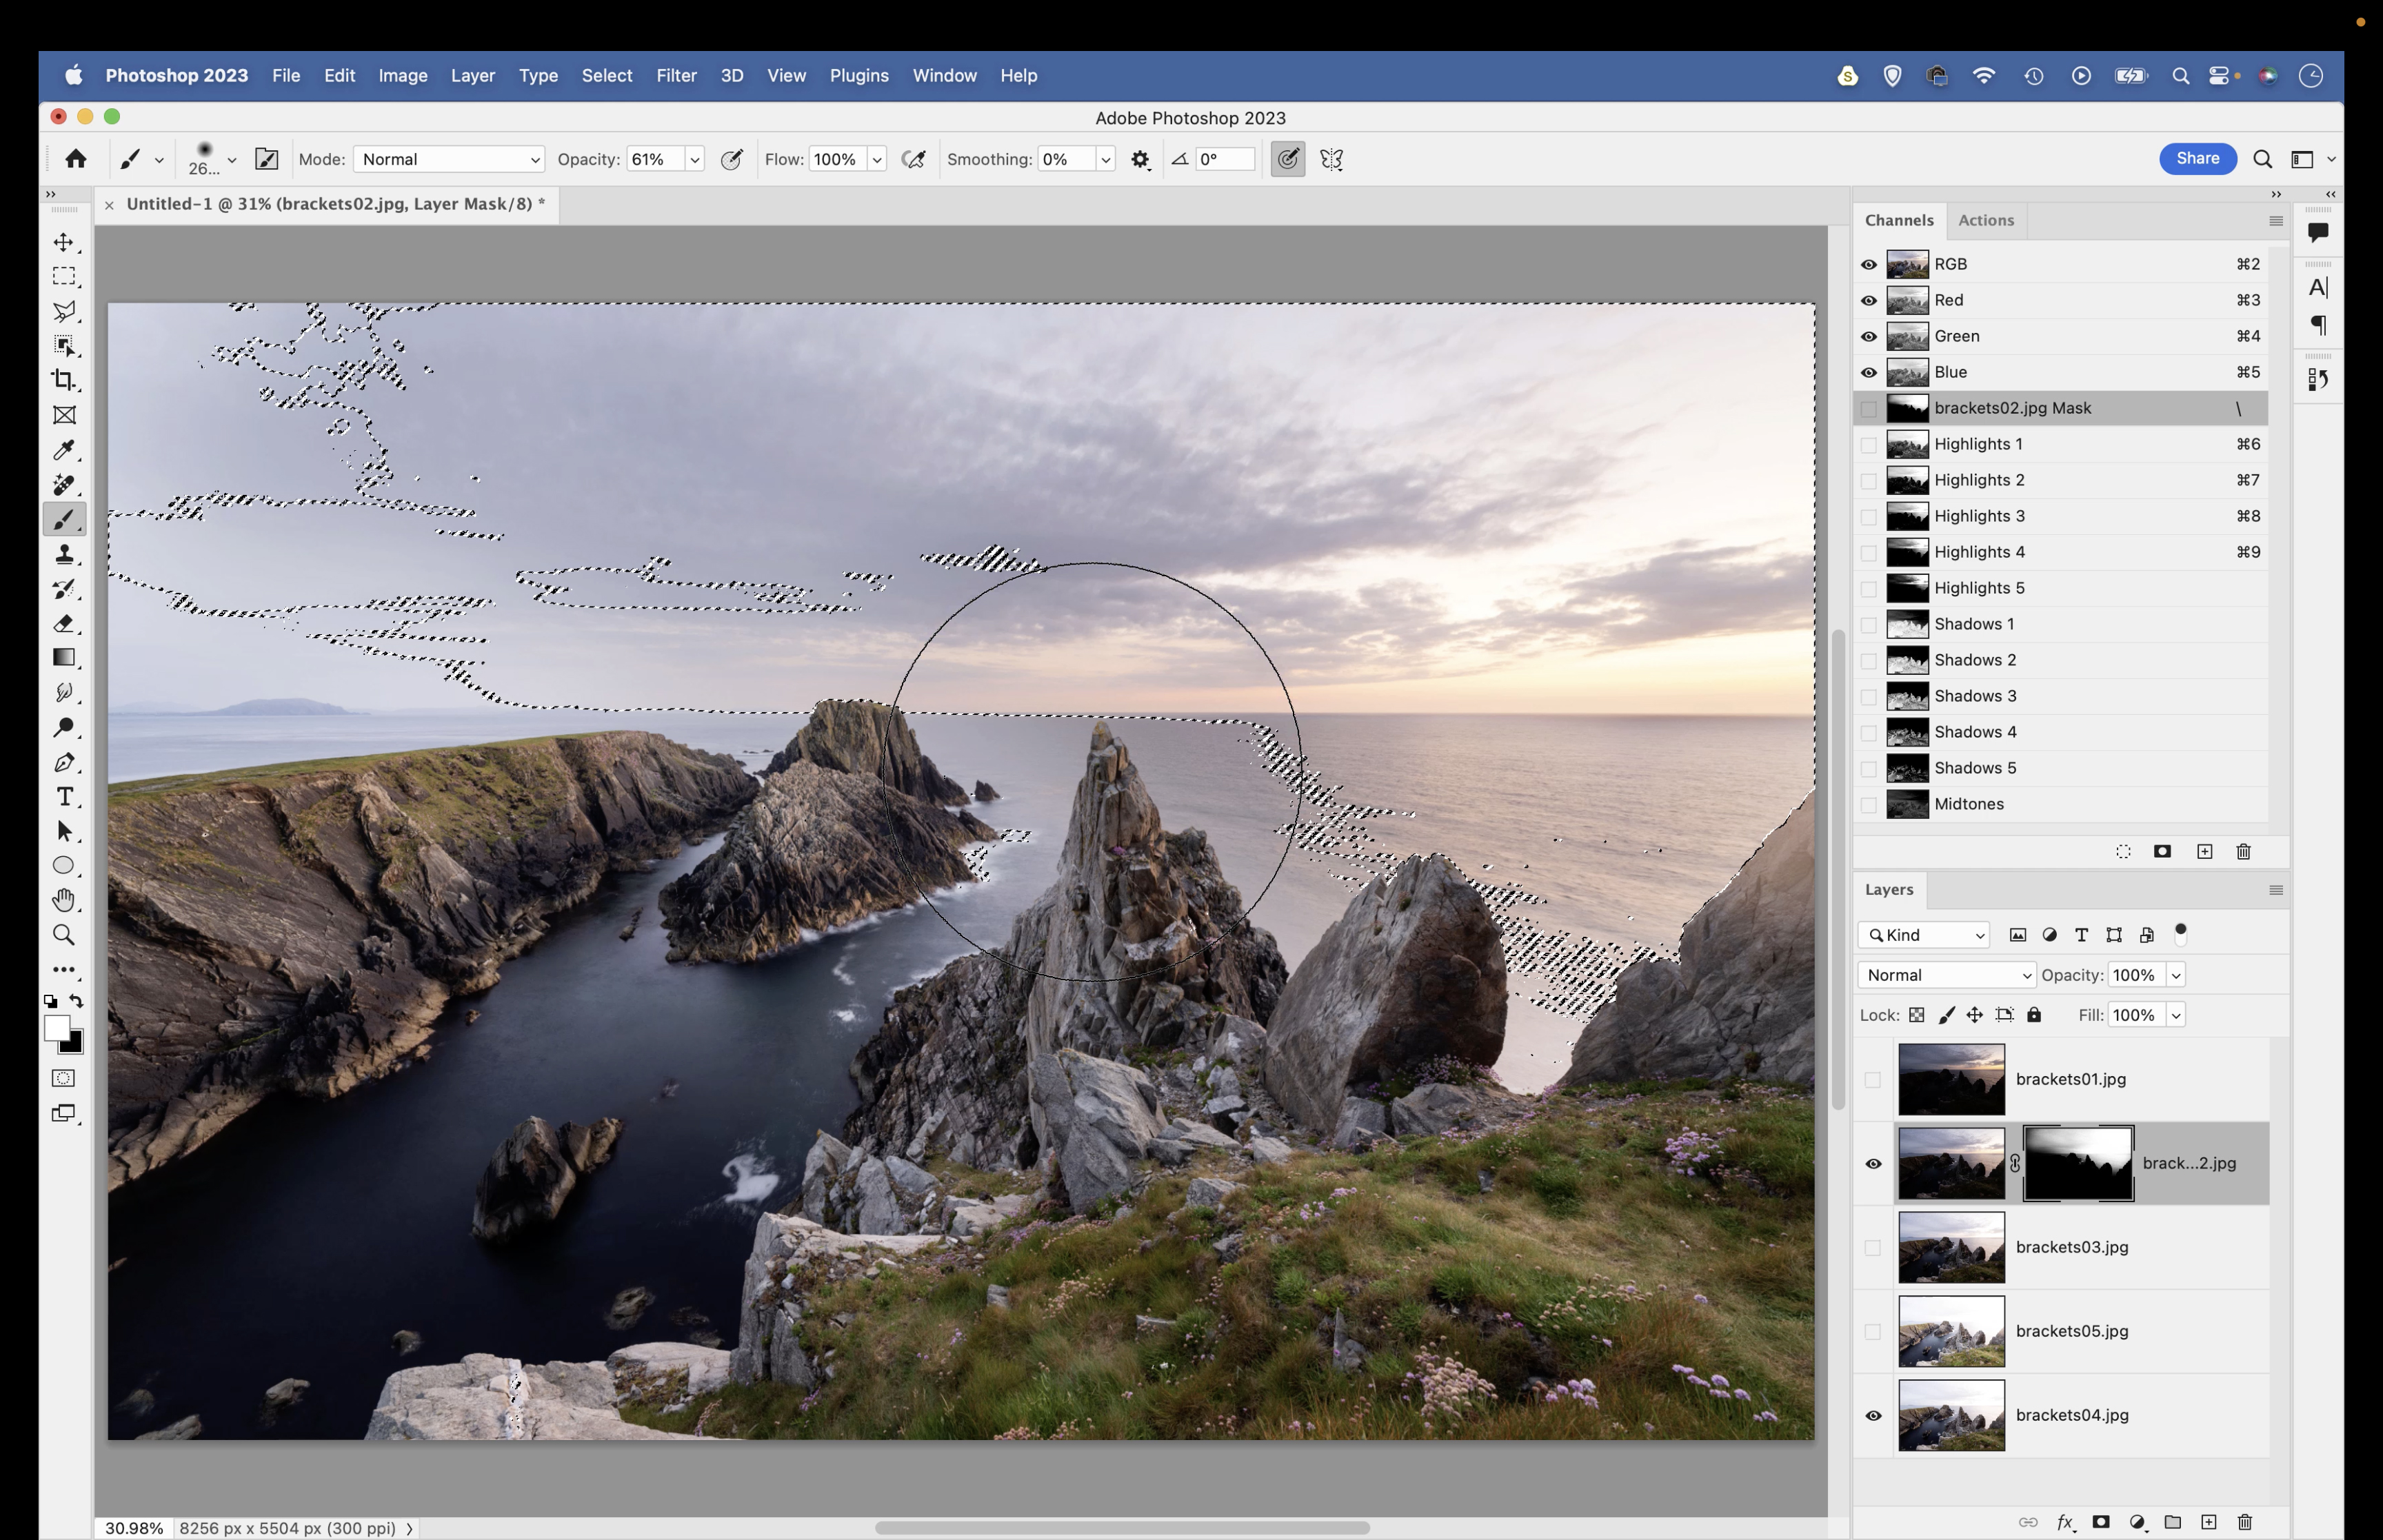
Reveal the layer that has a darker sky, then go to Layer>Mask>Hide All. Grab the Brush tool, set colour to white and brush opacity 50%, then paint over the sky to gradually reveal the darker, more vibrant colours in the highlights. Once done hit Cmd/Ctrl+D to deselect.
6. Reveal shadow details
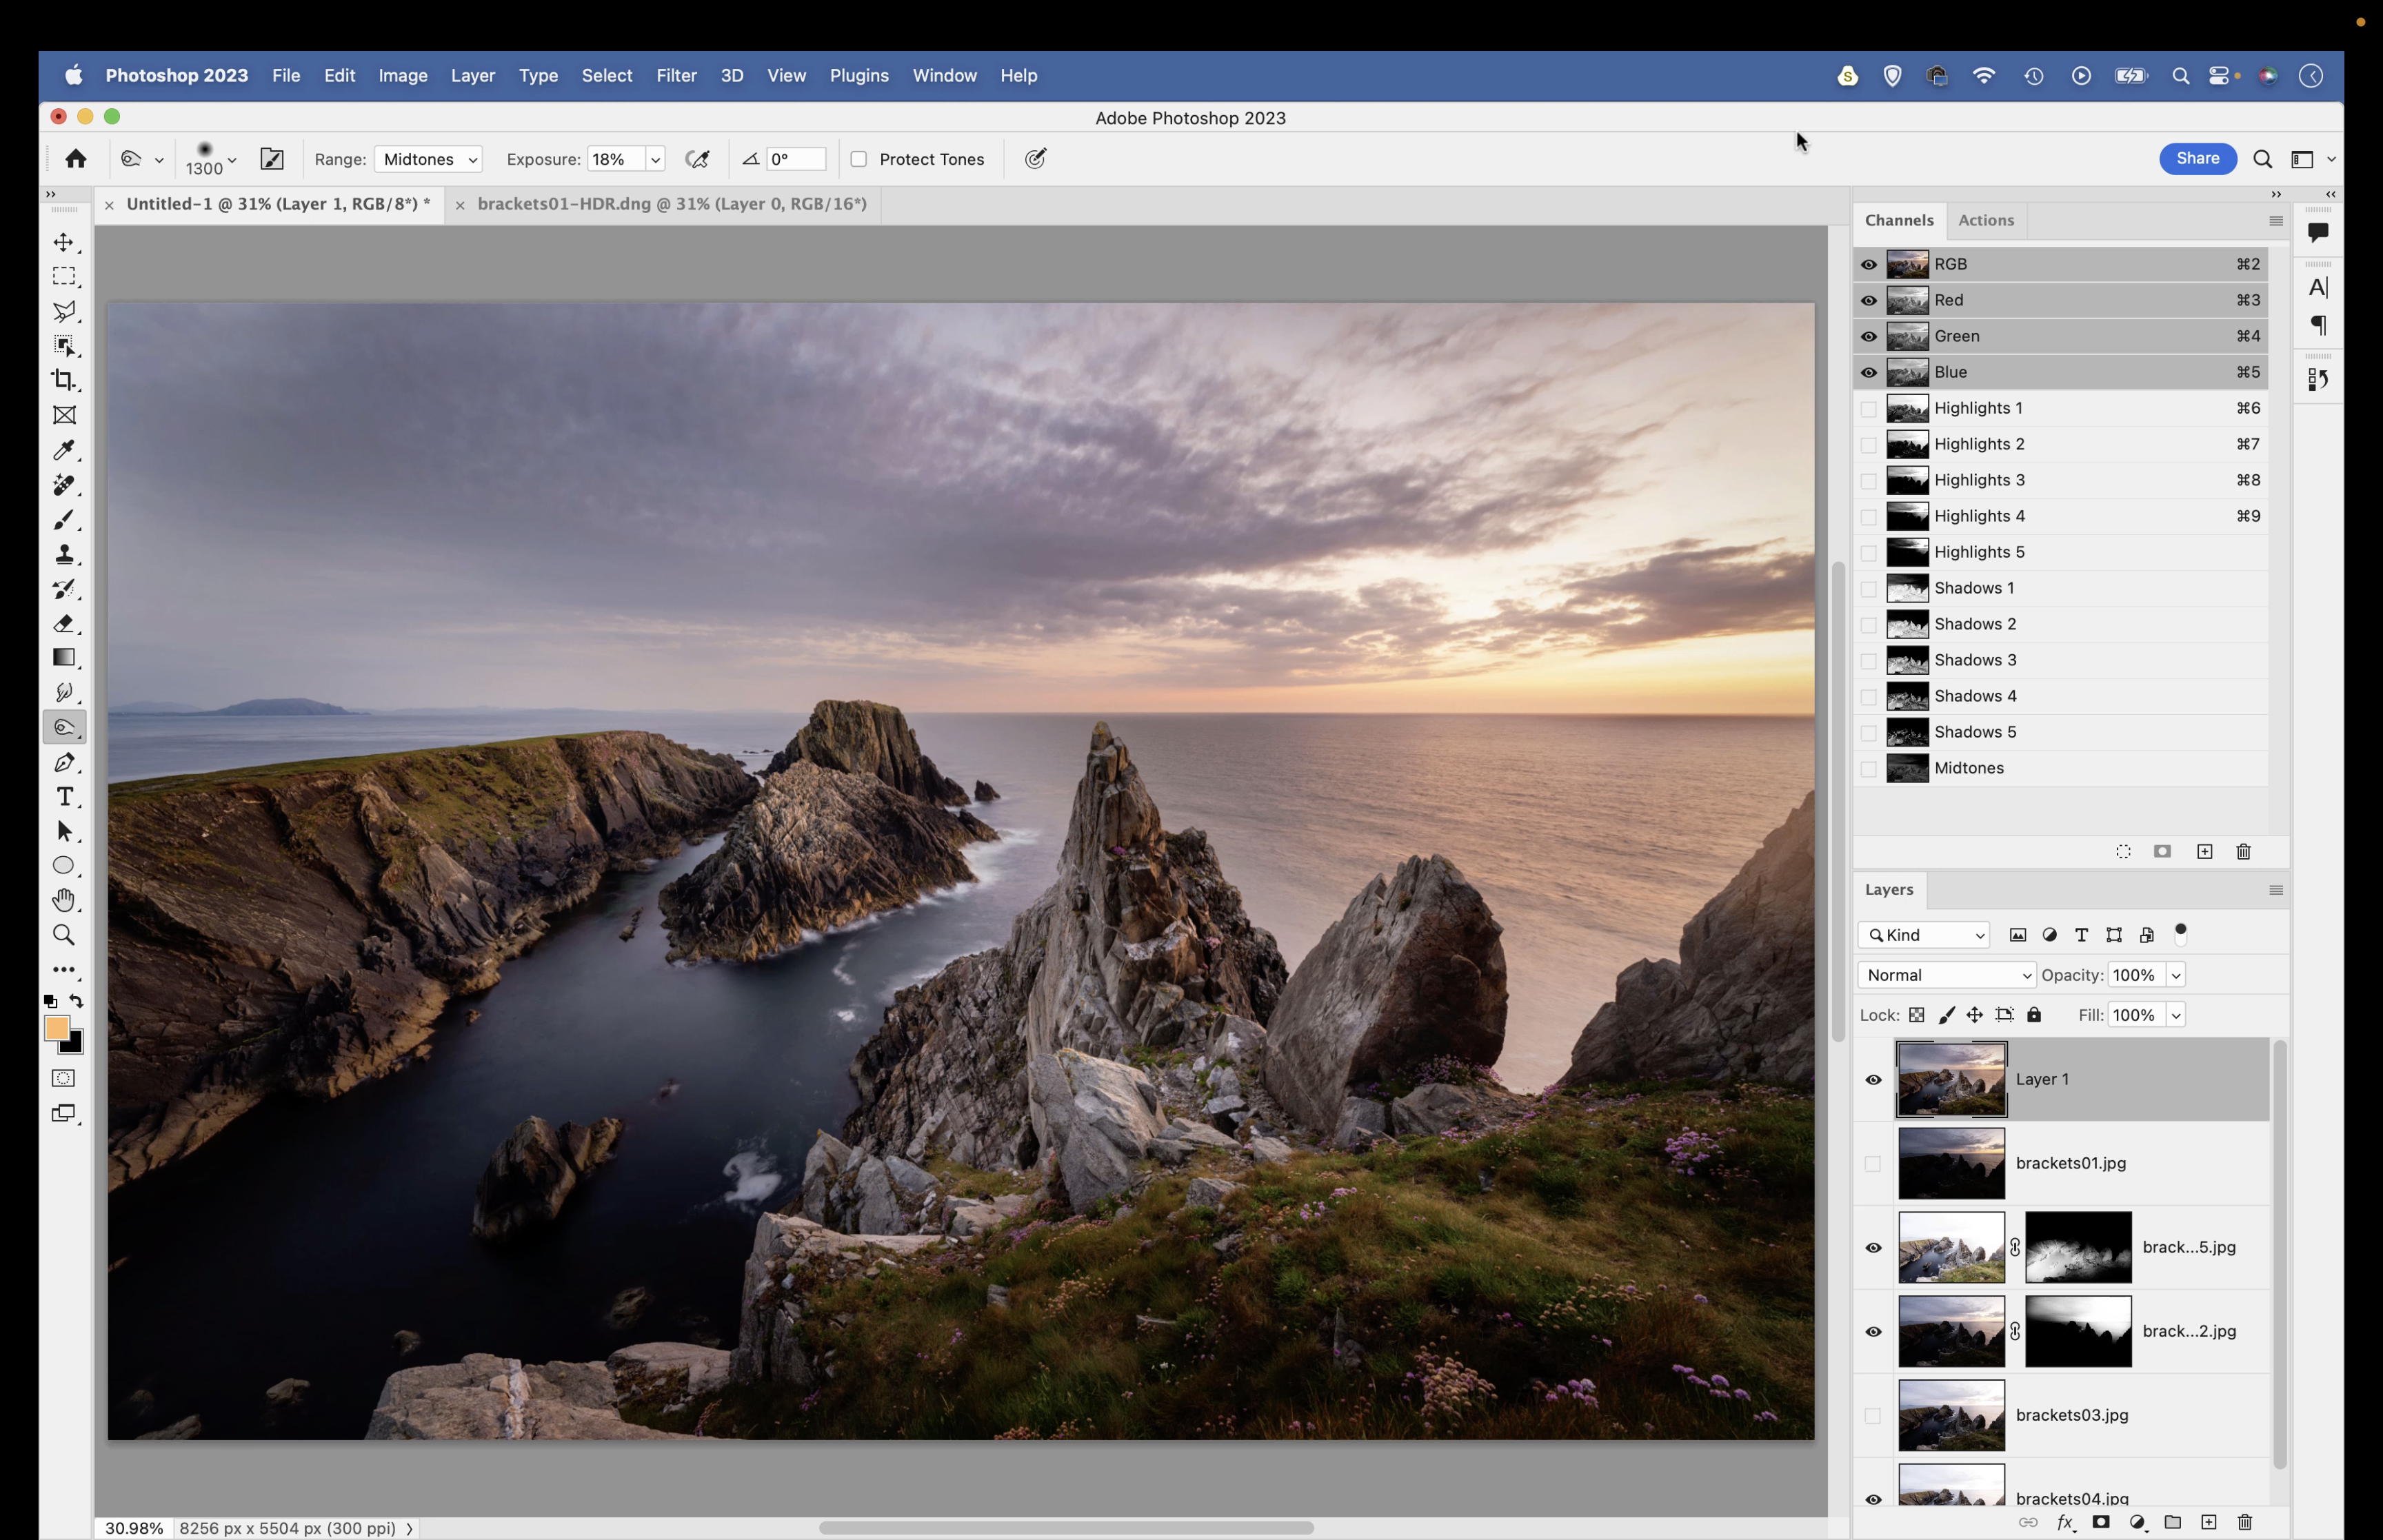
Go back to the Channels Panel and click through the shadows channels. Choose one that targets the deepest shadows. Cmd/Ctrl+click it. Go to the Layers Panel and reveal the brightest layer. Add a black mask and paint white to reveal more detail in the shadows.
7. Paint colours in Soft Light
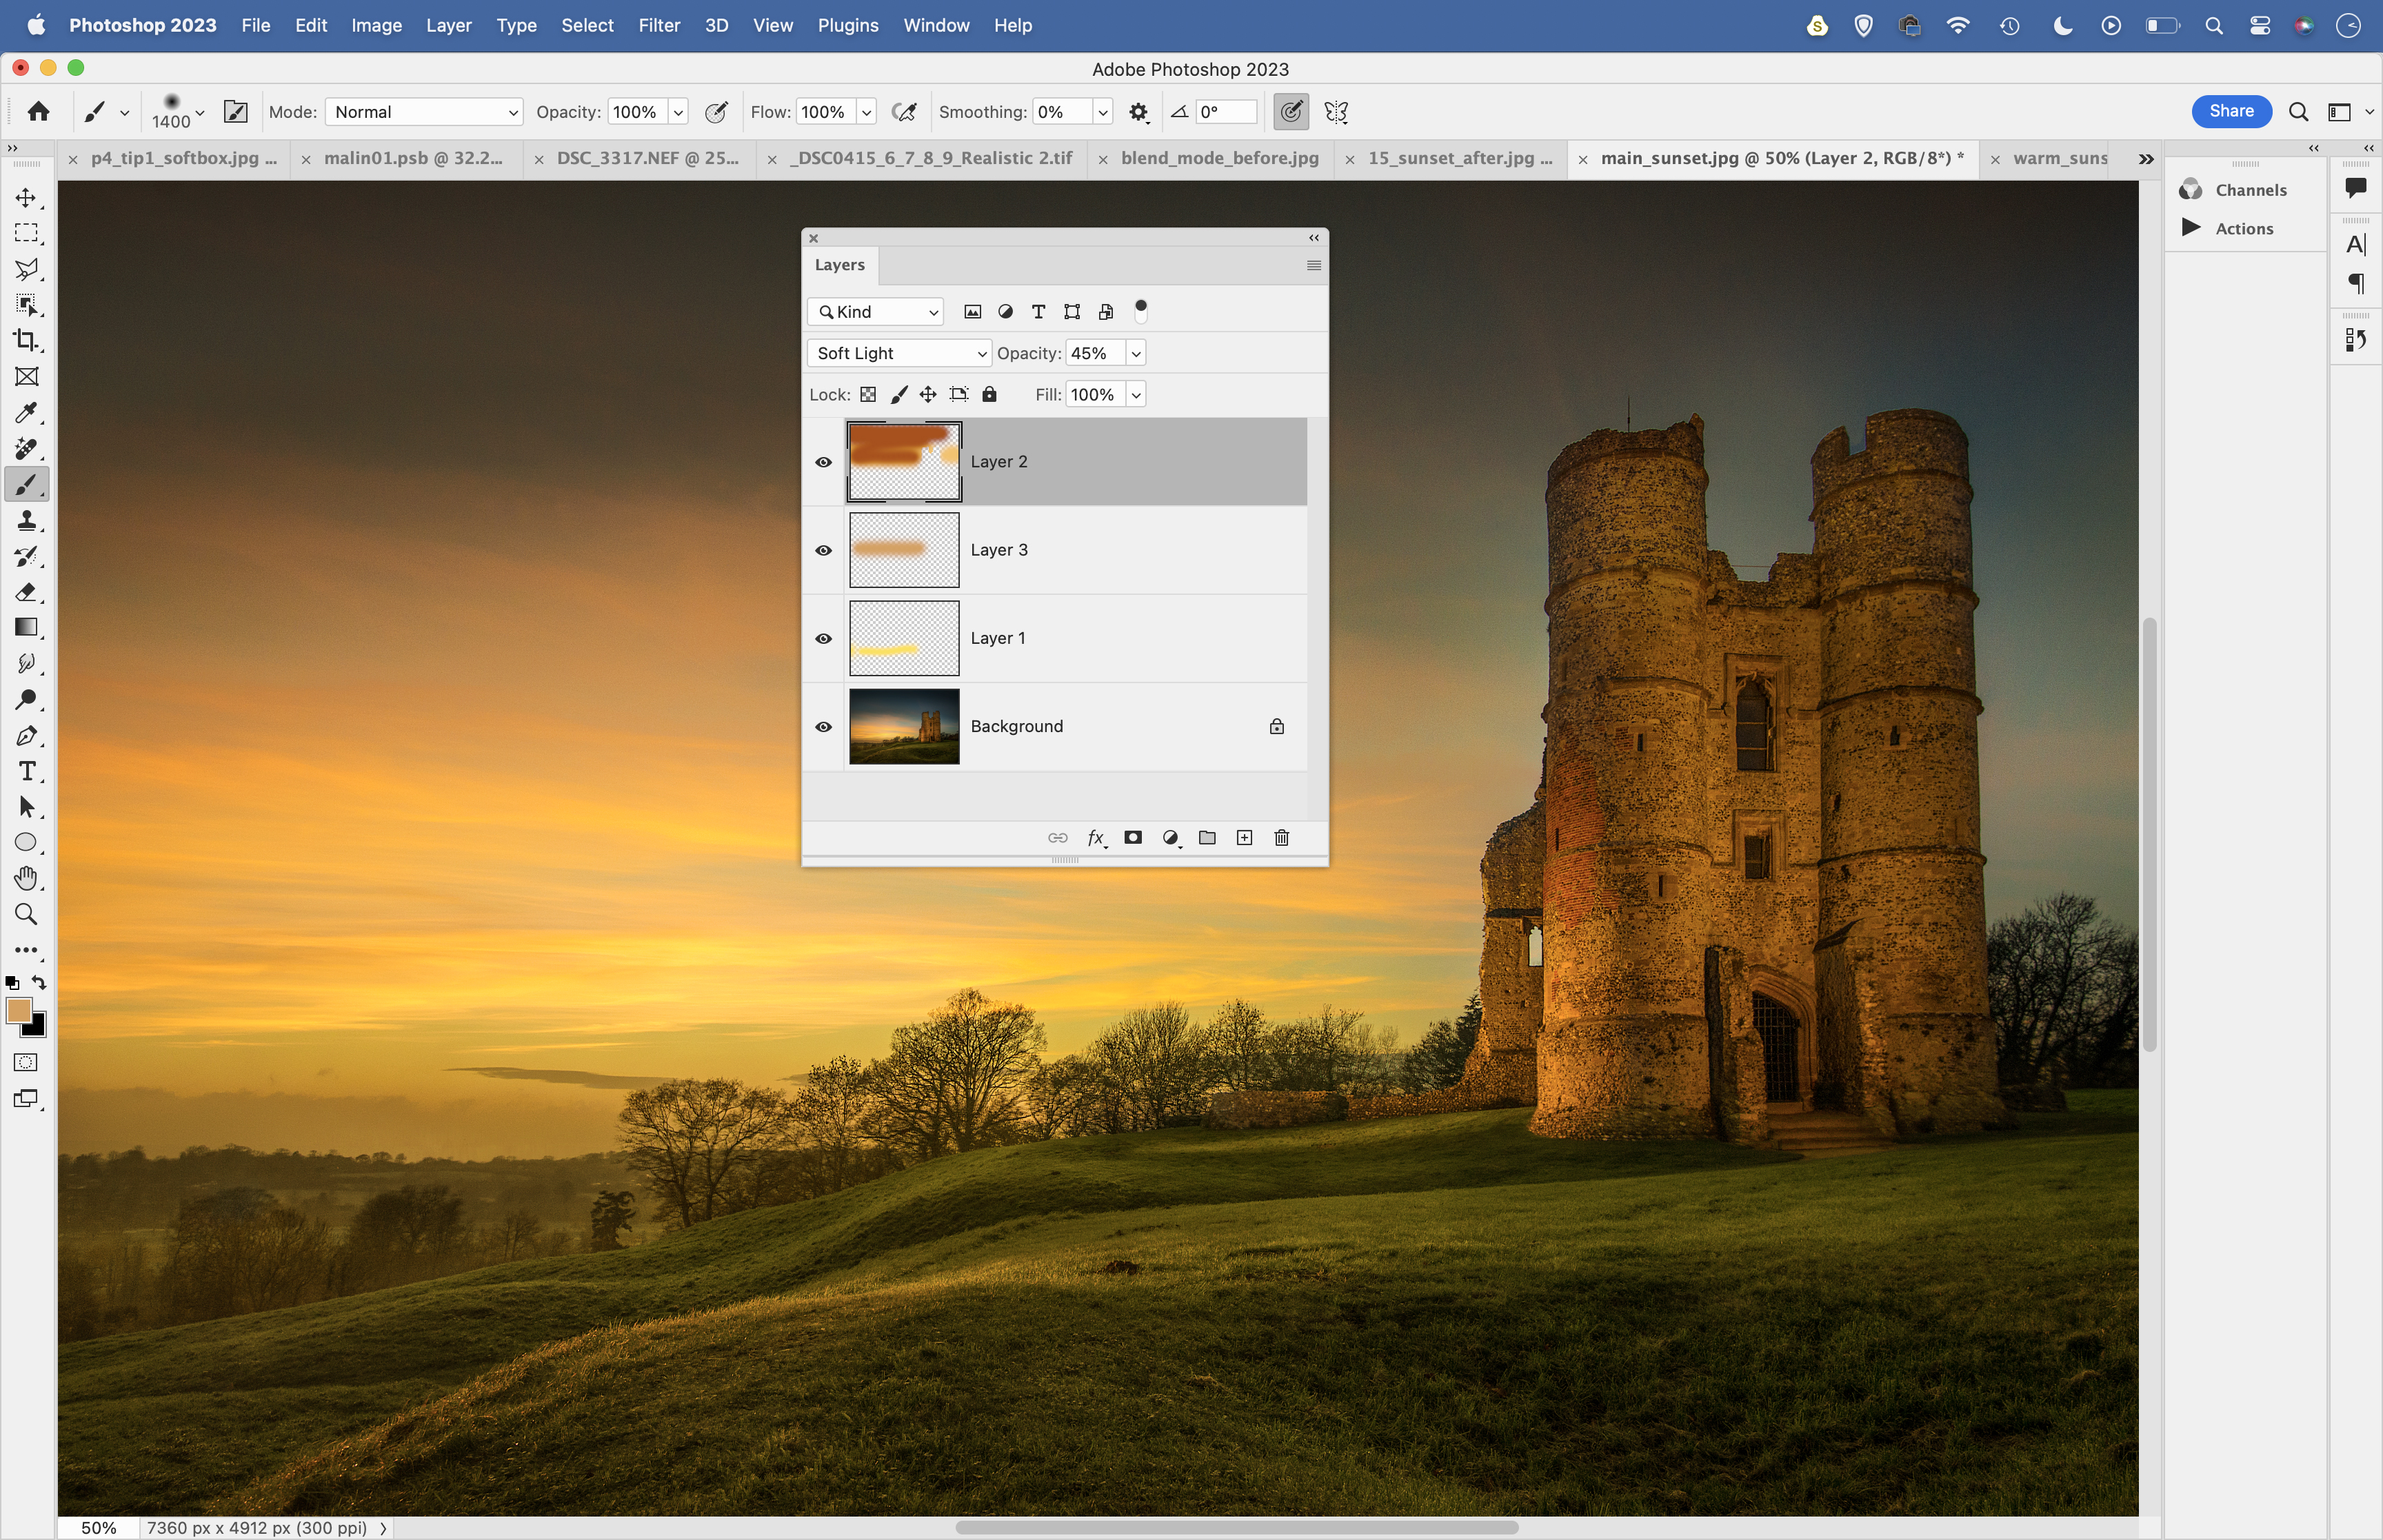
Make a new layer in Photoshop and set the Blend Mode to Soft Light. Grab the Brush tool, hold Alt and click to sample a colour from the sunset. Using a soft-edged brush, paint around the coloured areas of the sky to enhance the colour. Lower the layer opacity. You can repeat for another colour if you like.
8. Use Channel Mixer
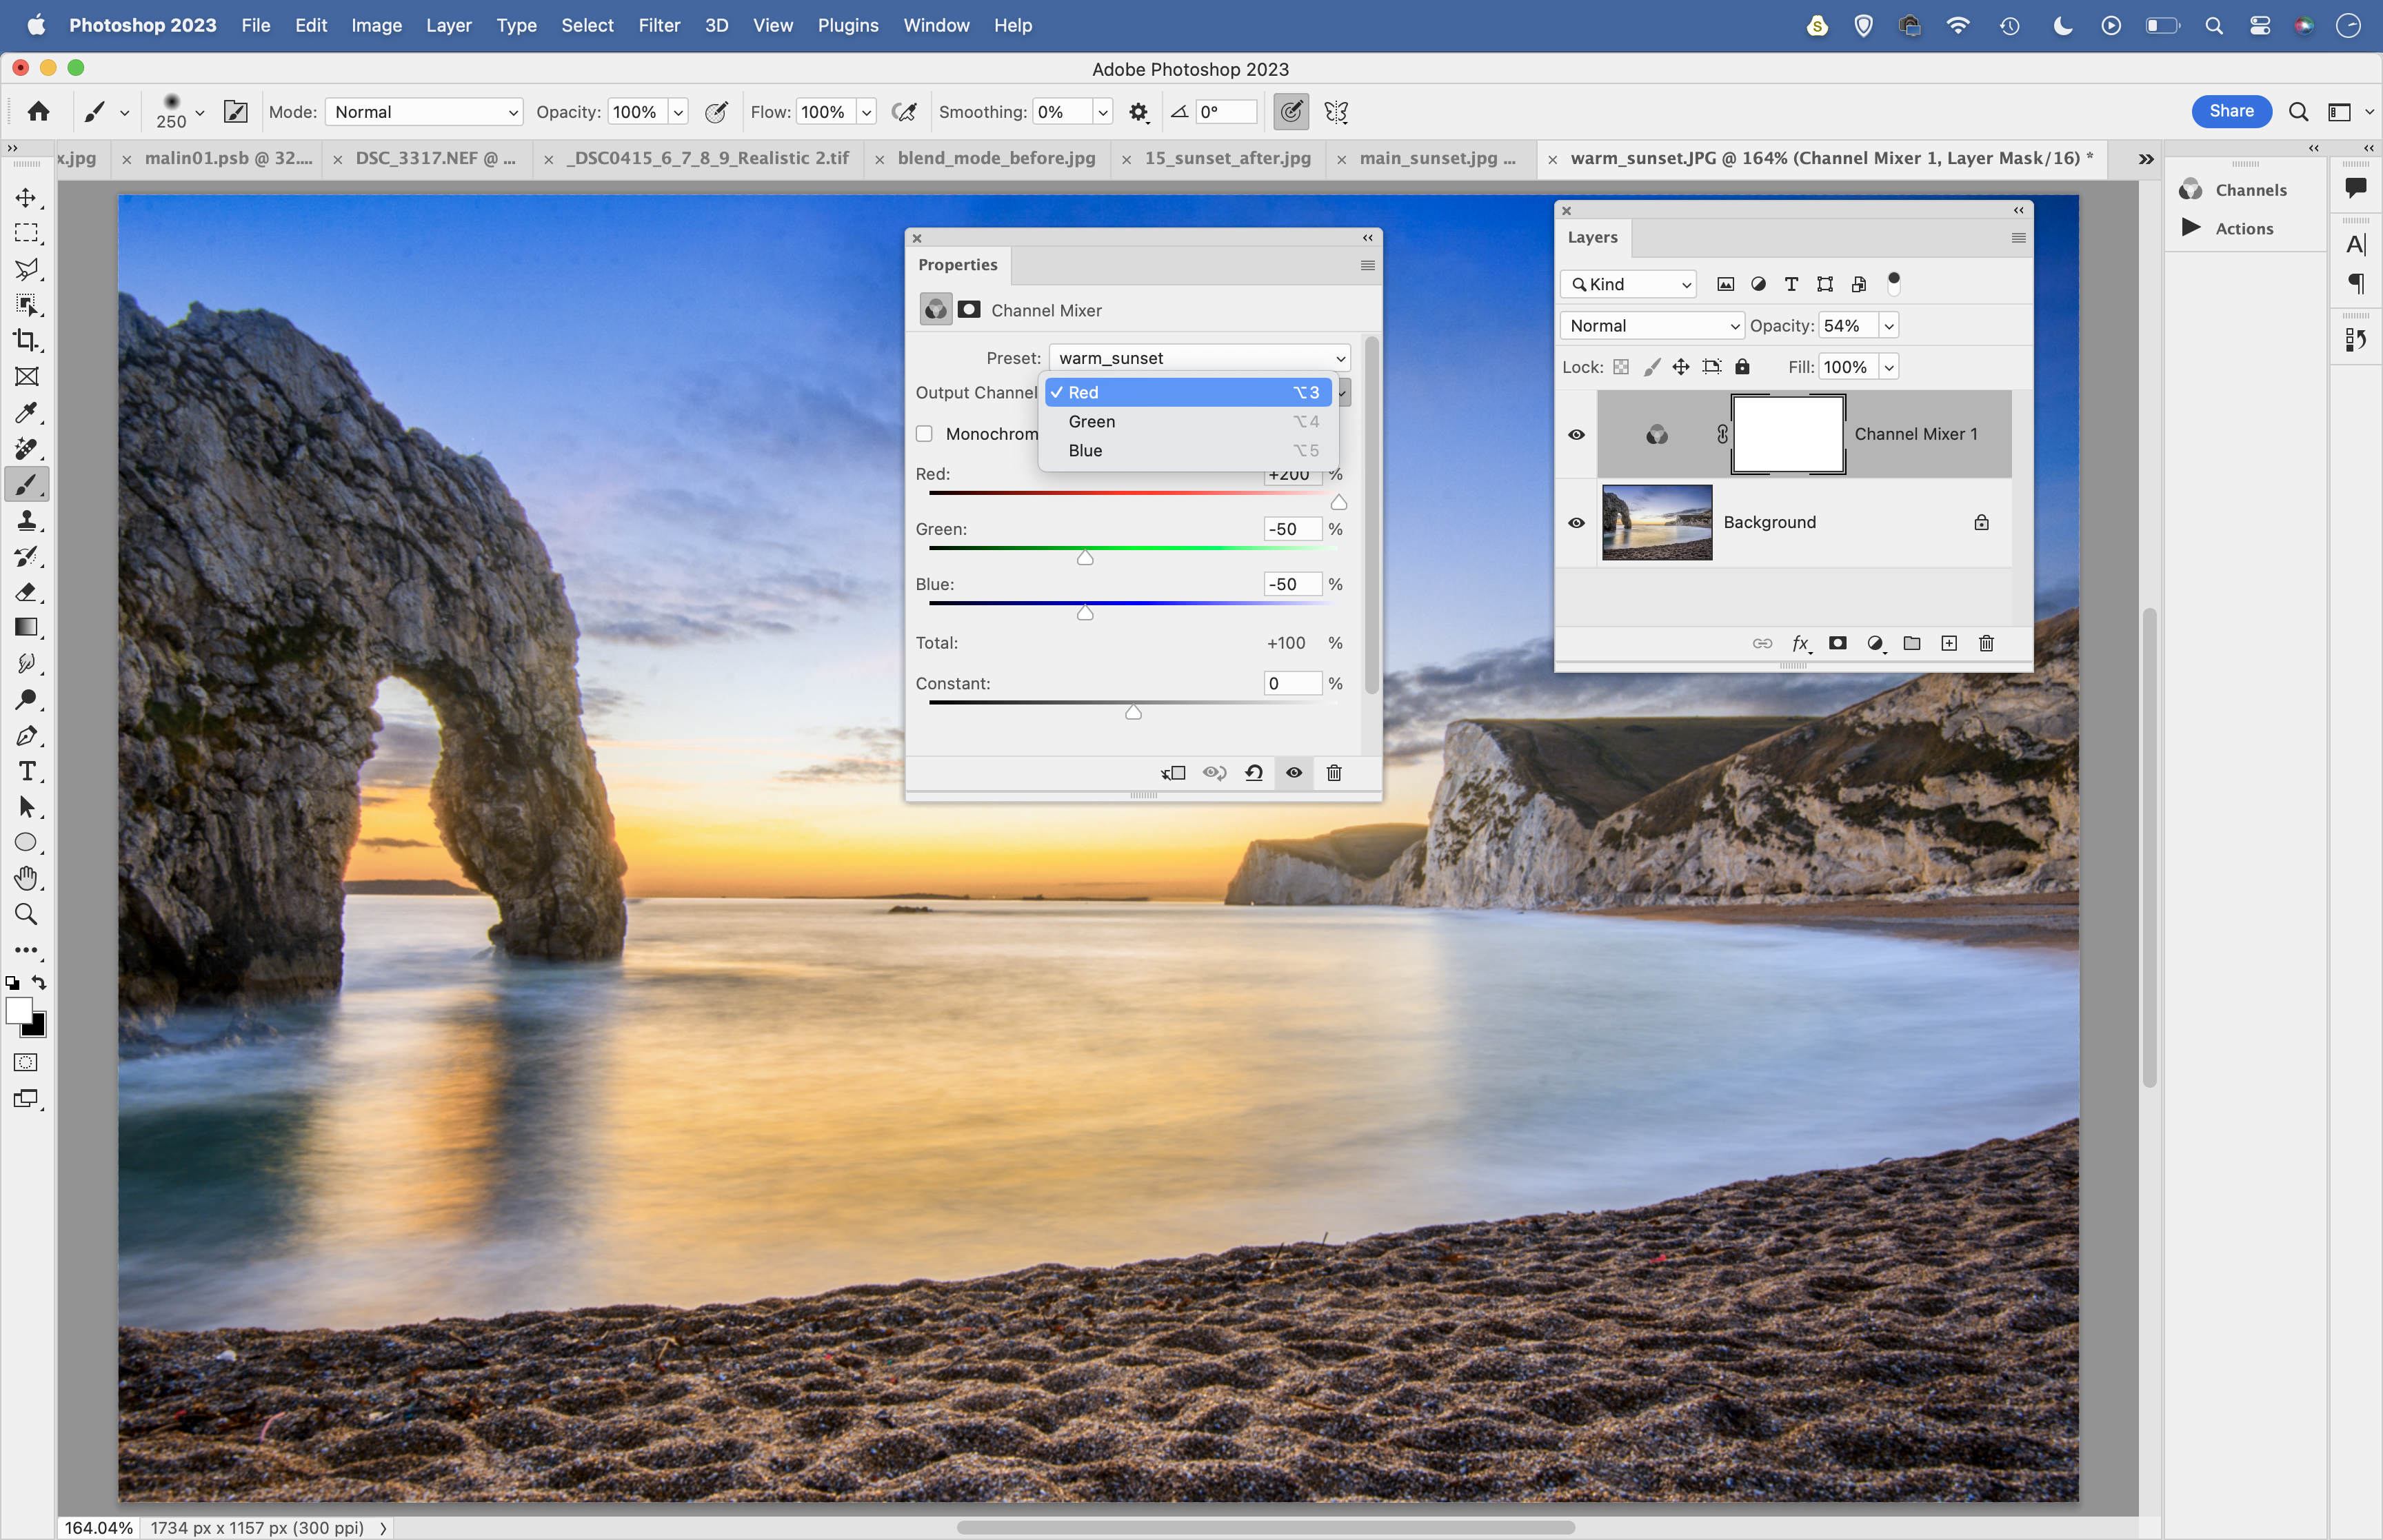
Add a Channel Mixer adjustment layer in Photoshop. Select Output Channel: Red, then set Red +200, Green -50, Blue -50. Next, go to the Blue Channel and set Blue +200, Red -50, Green -50. Adjust the layer opacity to control the strength of the effect, and paint black on the layer mask if you want to hide it in areas.
9. Tweak camera calibration
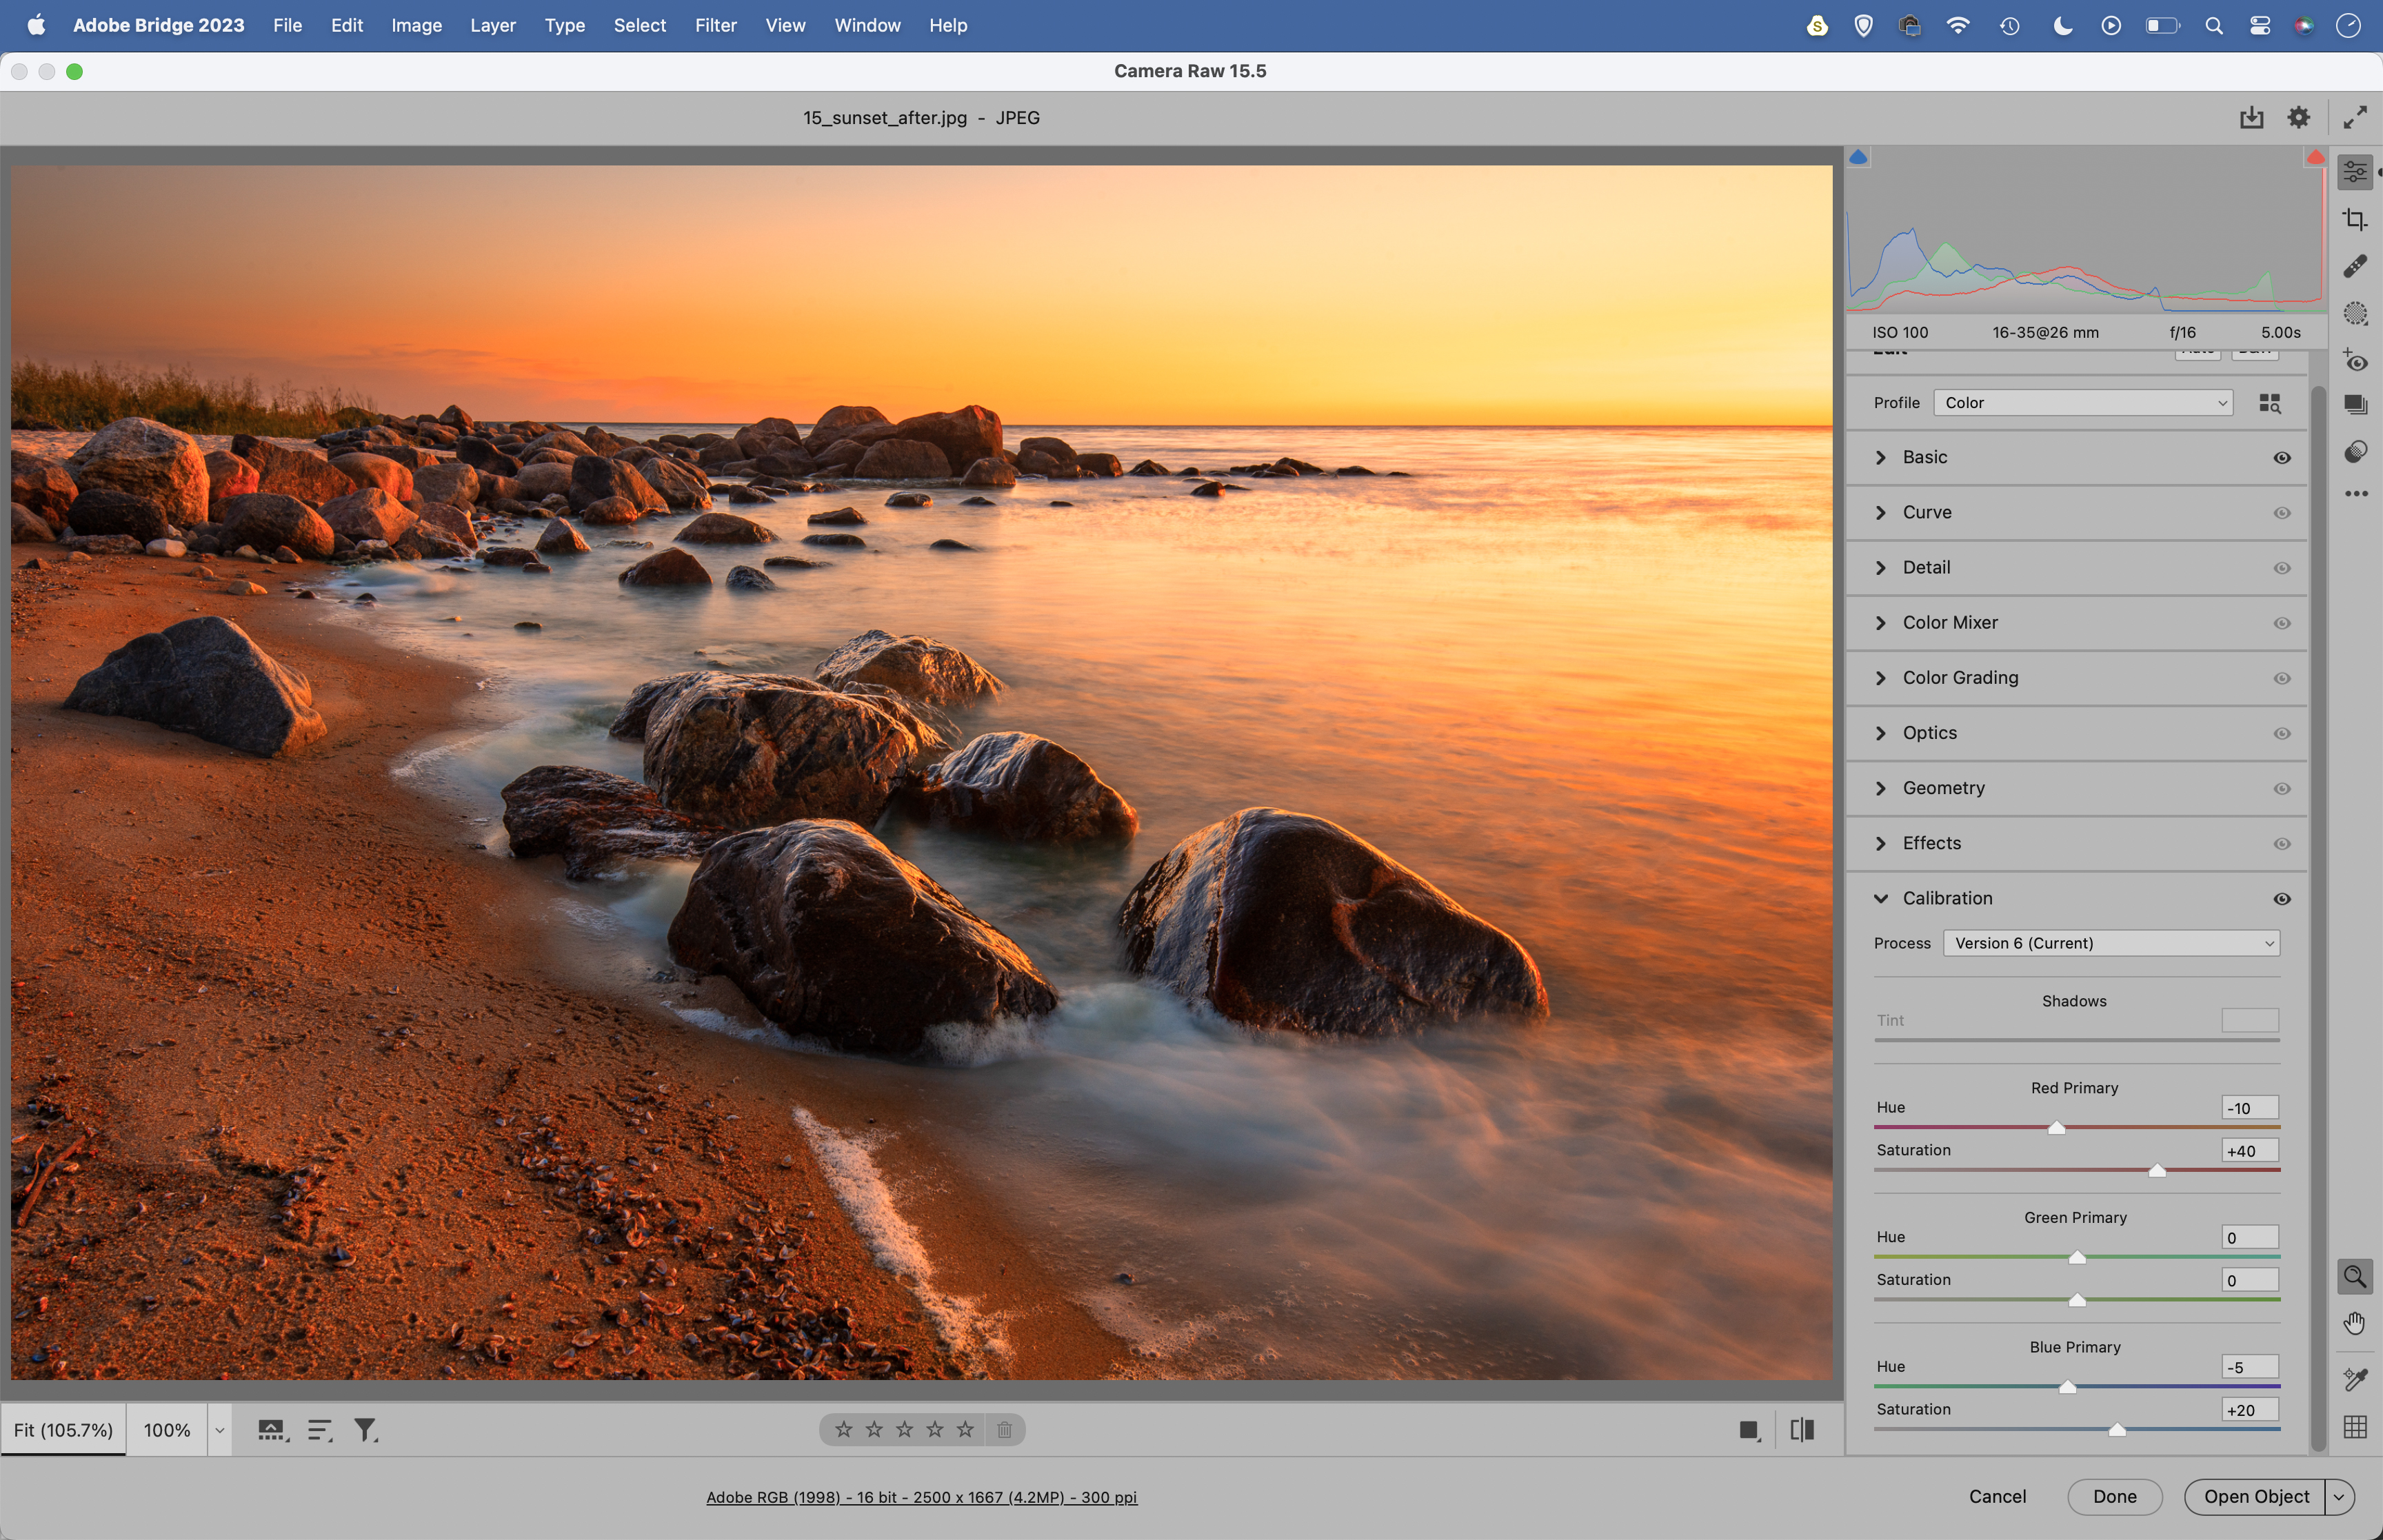
Open your image in Camera Raw and go to the Calibration Panel. Try increasing the Red Primary Saturation slider to about +40 and set the Red Primary Hue to -10. Then go to the Blue Primary and increase Saturation to +20 and set Hue to -5. Experiment with the saturation strength to get the effect you want.
If you're serious about scenery, take a look at the best cameras for landscape photography along with the best lenses for landscapes.


