Watch video: Get the toy-town look
While we call this miniaturization look a ‘tilt-shift’ effect, it’s actually only the tilting part of an expensive, specialist tilt-shift lens that will have the ability to shift the zone of focus in this artful way.
Tilt-shift lenses are specialist optics, out of reach for most photographers (myself included). But for architectural and city photographers they’re the holy grail, allowing users to move the lens along its axis, either left/right and the pitch, or up/down and the yaw, depending on which way the lens is set up, while still attached to its Canon body. Needless to say, this fancy functionality comes with a high price tag.
Fortunately the ‘tilt’ aspect, responsible for creating these toy-town effects, can be easily replicated in-camera, using Scene modes of some entry-level Canons, as well as in Photoshop. Shooting your start image with a telephoto lens provides the best results, as not only will you have a totally sharp shot to begin with to add blur in Photoshop; unlike with the in-camera filters, or even a tilt-shift effect, you’ll be able to refine the blur after you’ve clicked the shutter button.
In this project we take a look at how you can achieve tilt-shift shots in-camera, as well as how to transform ordinary pictures into toy-town scenes. You can set the exact amount of blur, fine-tune where the sharp band of focus sits on your image, and also boost the colours to really ramp up the playful miniaturized look, with the end result looking like a fabulous tiny toy town.
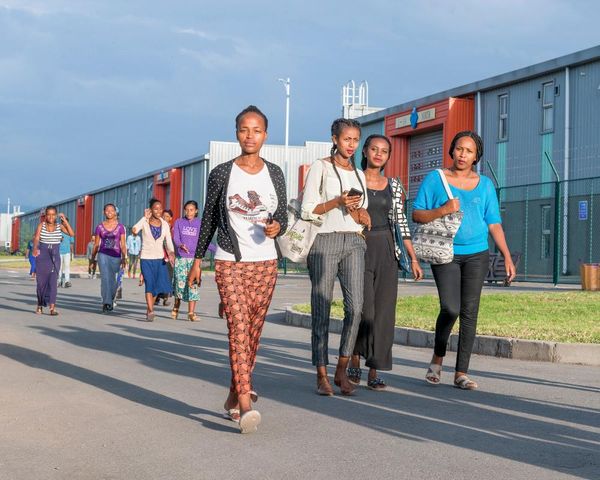
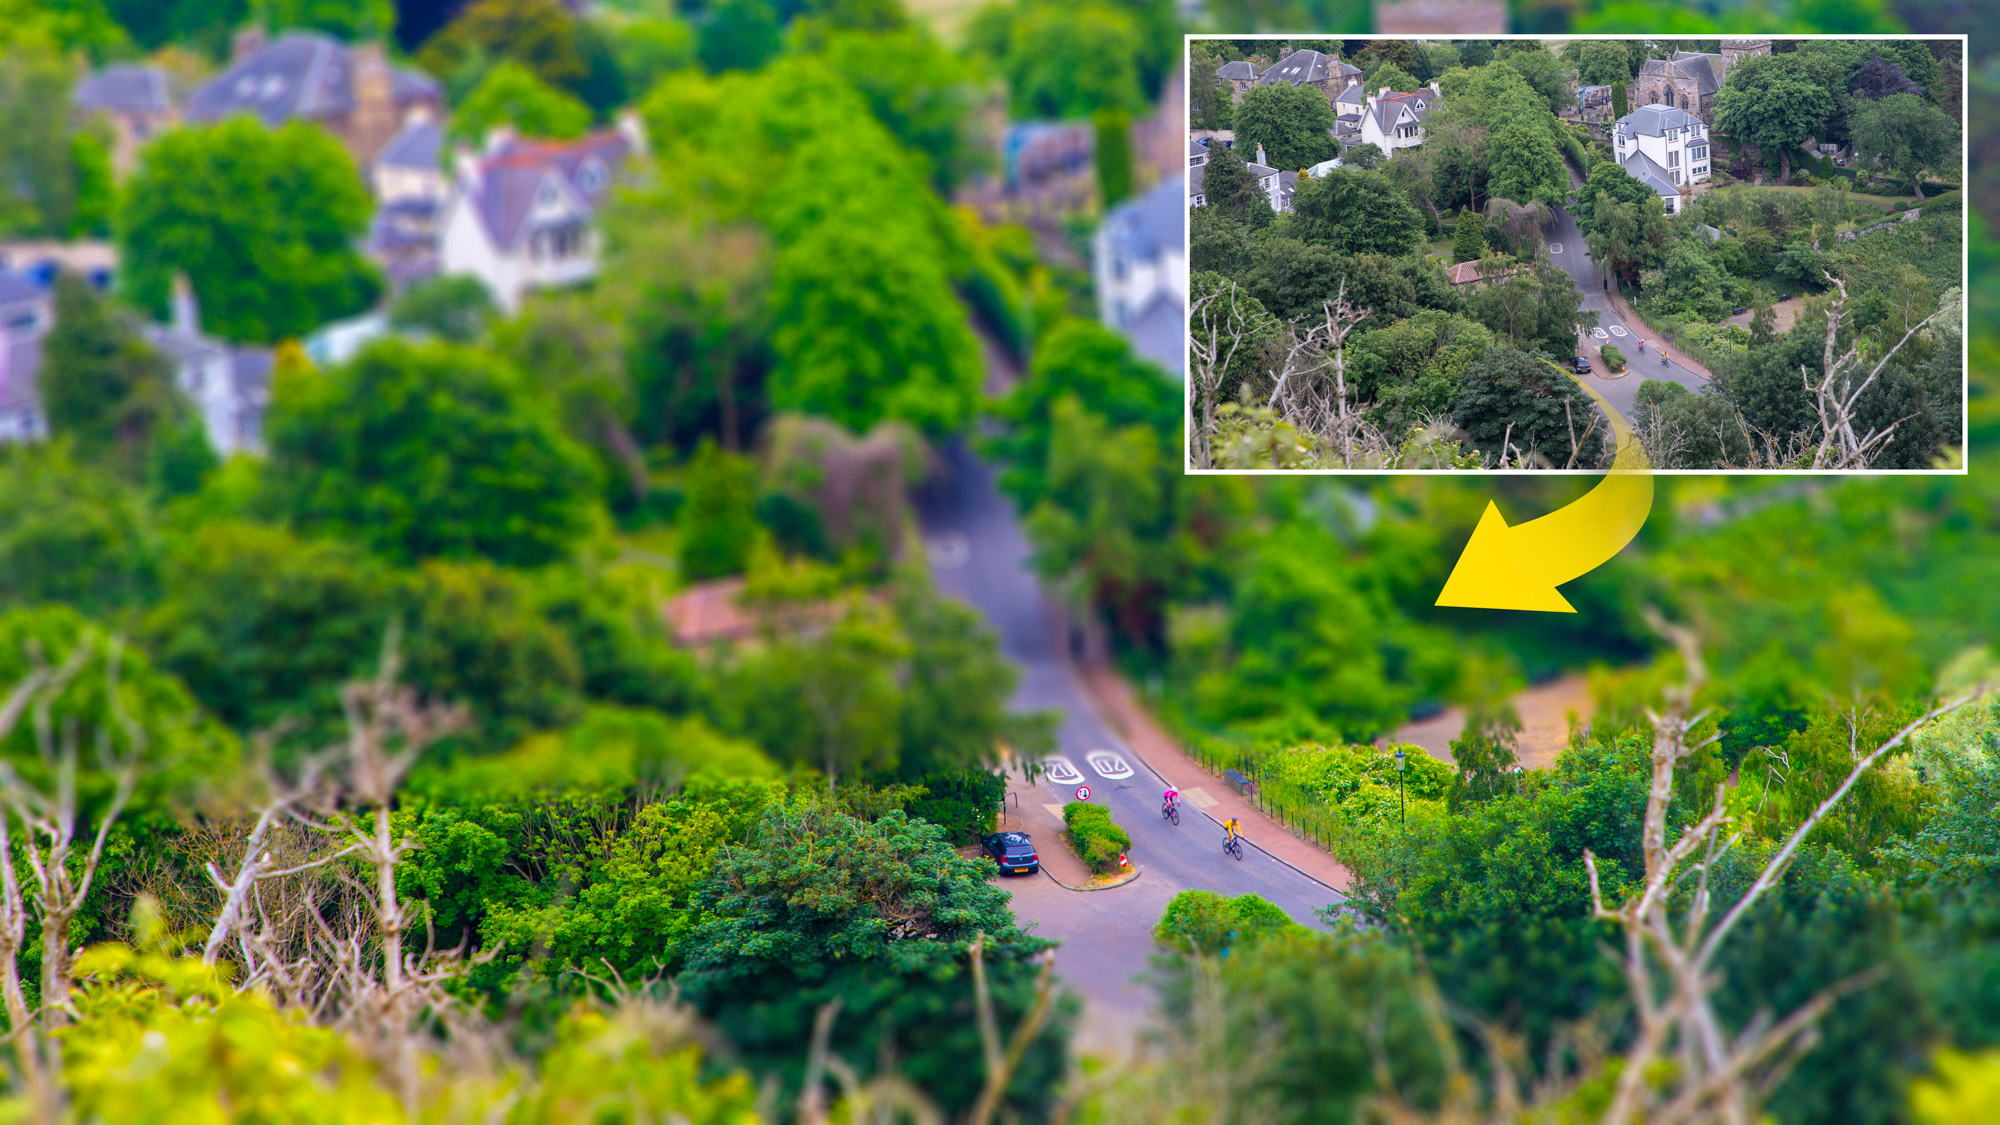
It helps to shoot from up high, whether that’s from the stands at a football game, a cityscape from the top of a skyscraper or bridge, or a landscape from the top of a hill. This is so you can replicate the view we associate with those toy town scenes, like old children’s TV shows, so things will look miniature once blur is added.
You’ll also want a clear focal point that you can firmly fix your band of sharpness on, such as a person, vehicle, building, or the two cyclists in our example. Without further ado, let’s get to it and create a toy town!
1. In-camera Scene Modes
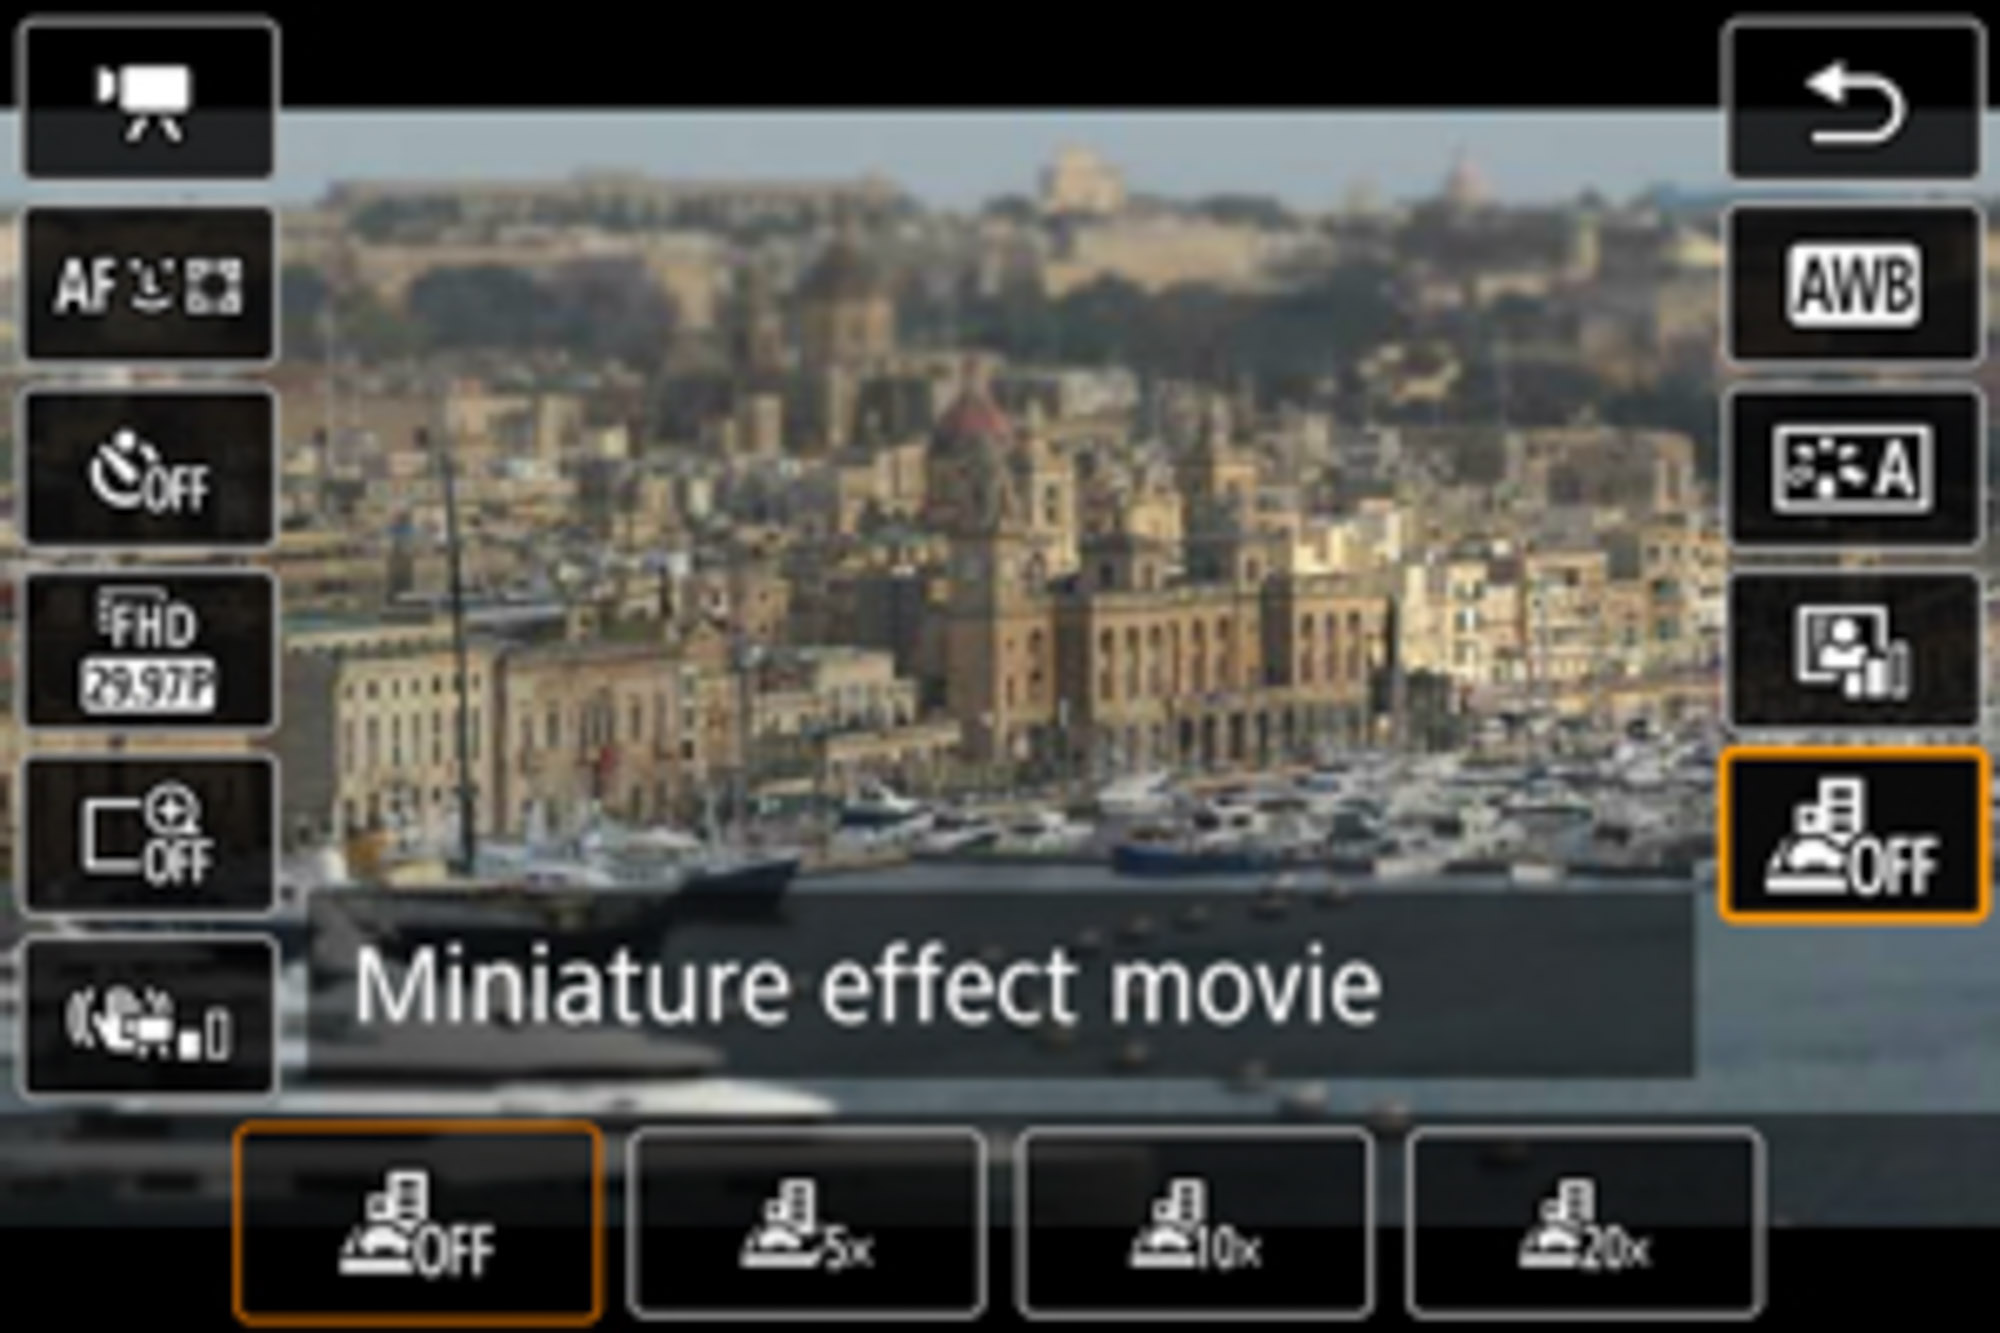
Many entry-level Canons have a large bank of Scene modes to choose from. Cameras like the EOS R50 have a Miniature Effect mode, or Miniature Effect Movie mode as in the EOS M50 Mk II (above), allowing you to get the tilt-shift look in-camera.
2. Tilt-shift lenses

Tilt-shift lenses, such as the Canon TS-E 24mm f/3.5L II, are expensive specialist optics that allow the lens to be tilted or shifted. While useful for correcting verticals in architecture, they can also shift the focus zone for a miniature effect in-camera.
3. Use a standard zoom lens
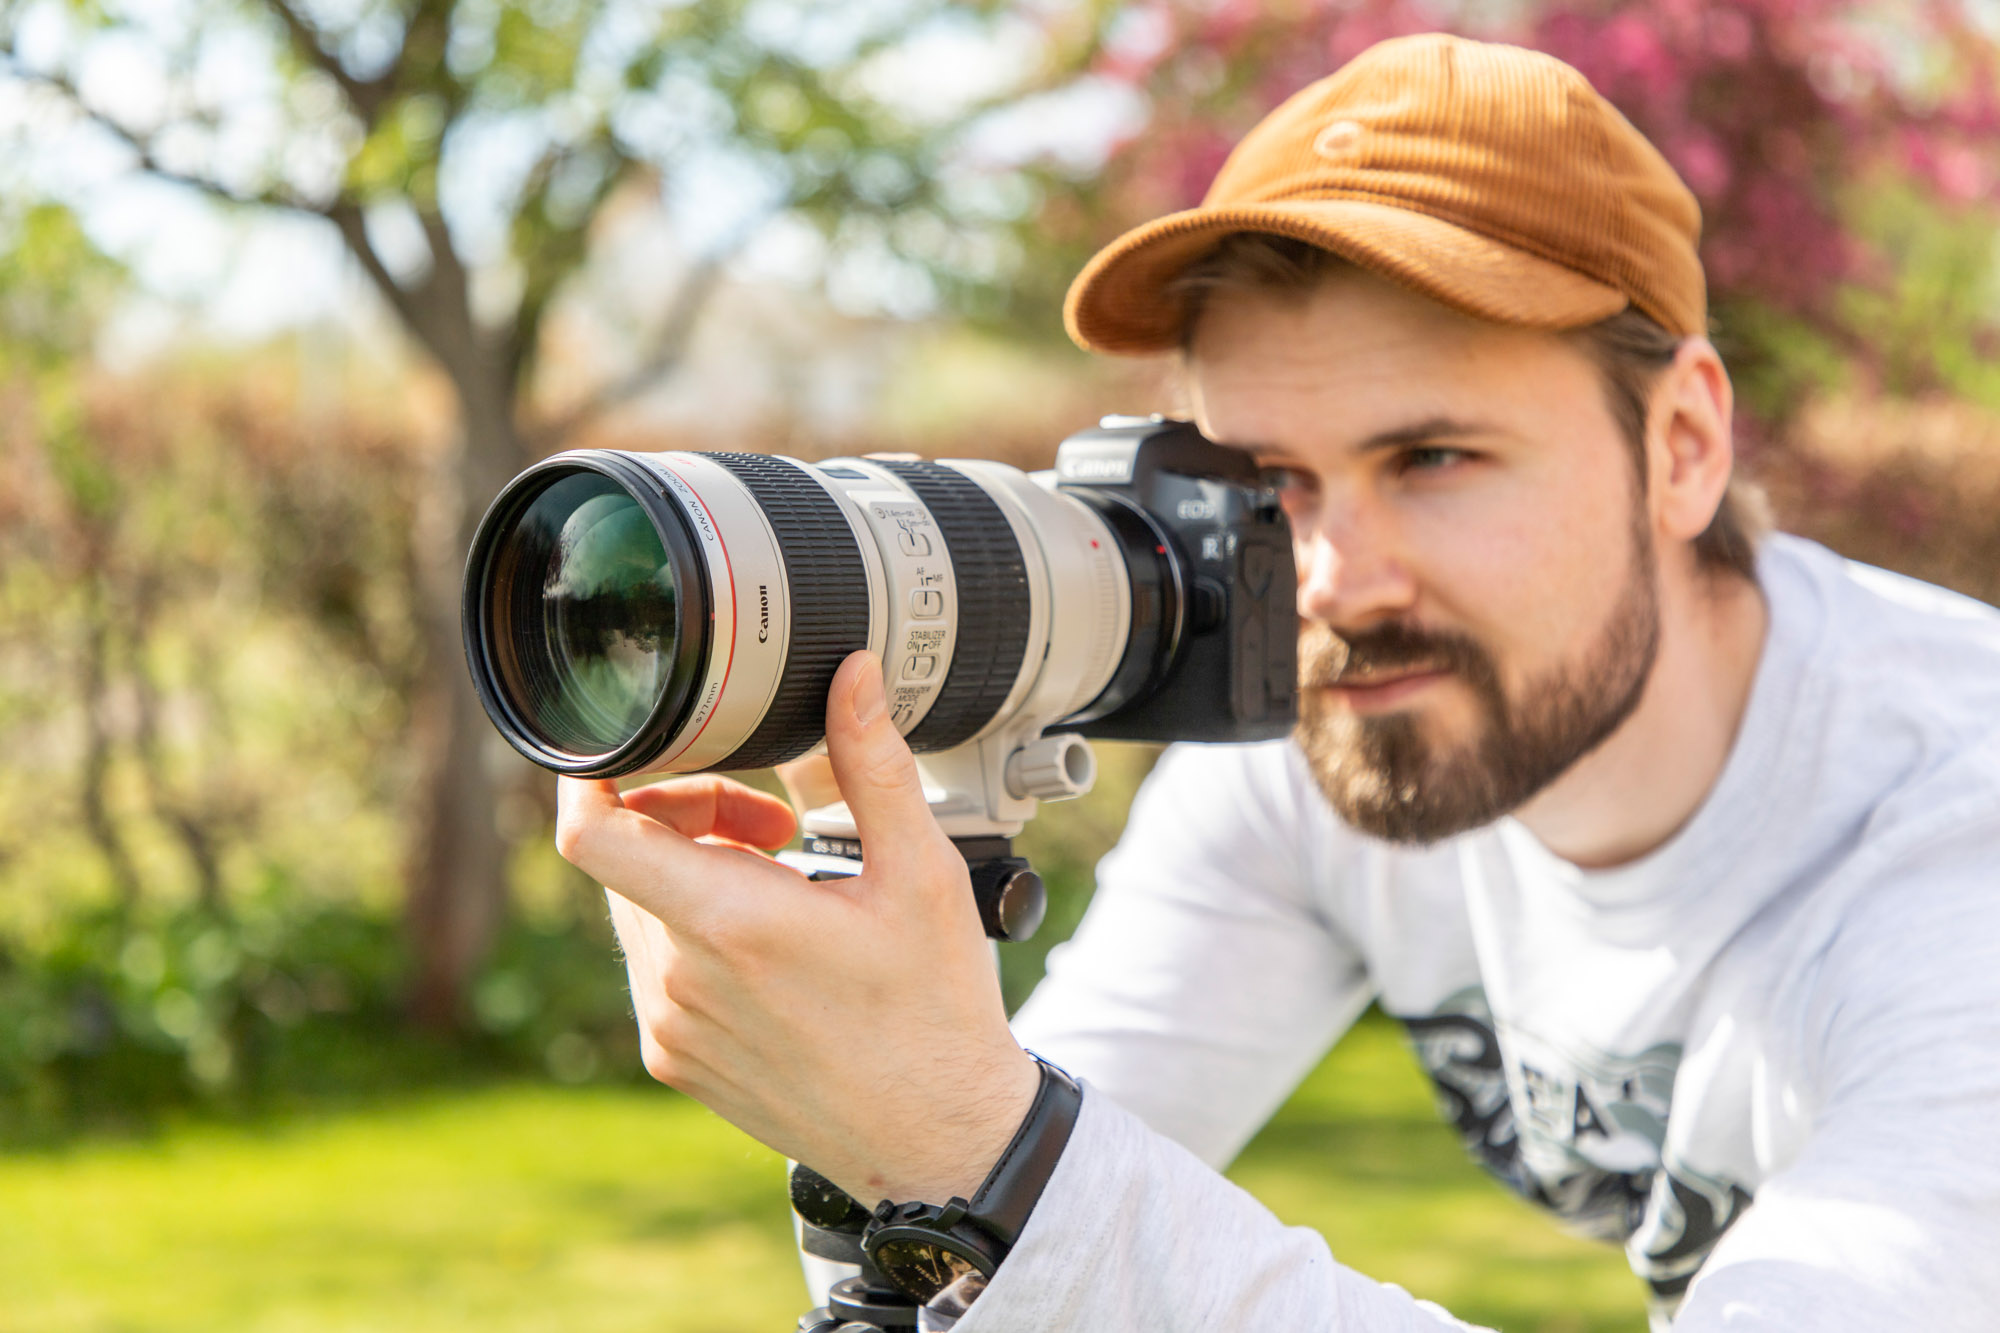
The most accessible way is to use a zoom lens, such as a 70-200mm on a full-frame (above) or 55-250mm on an APS-C. Shoot from somewhere high up such as a hill or a tall building so you can achieve a high perspective across your landscape.
4. Edit in Photoshop CC
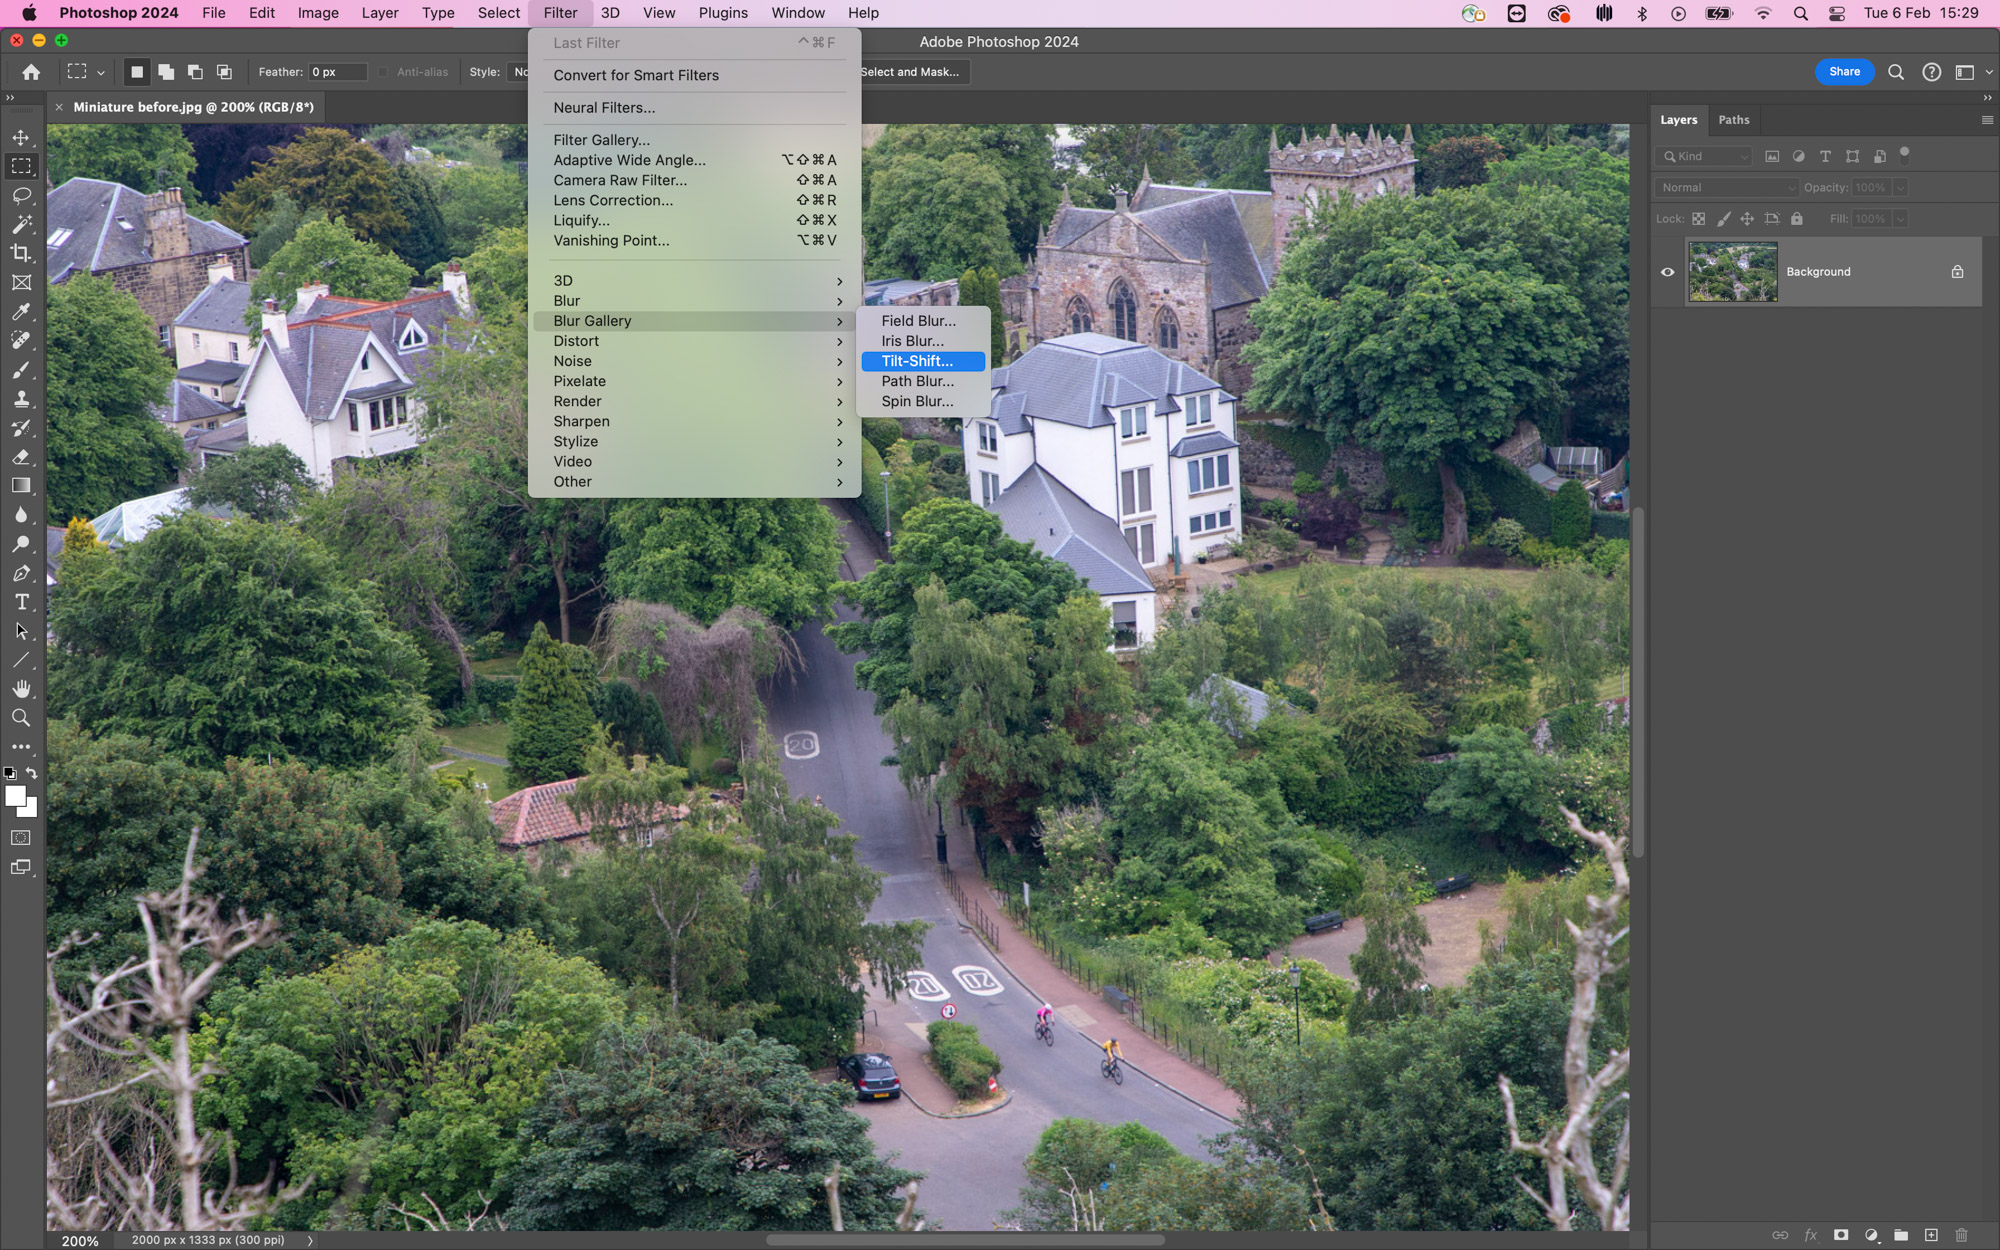
Shooting with a standard lens, your depth of field is likely to be fairly sharp across the scene, so we’ll need to selectively add some blur to mimic the look of an expensive tilt-shift lens and create the toy-town effect. In Photoshop open your shot and go to Filter>Blur Gallery>Tilt-Shift.
5. Refine the effect
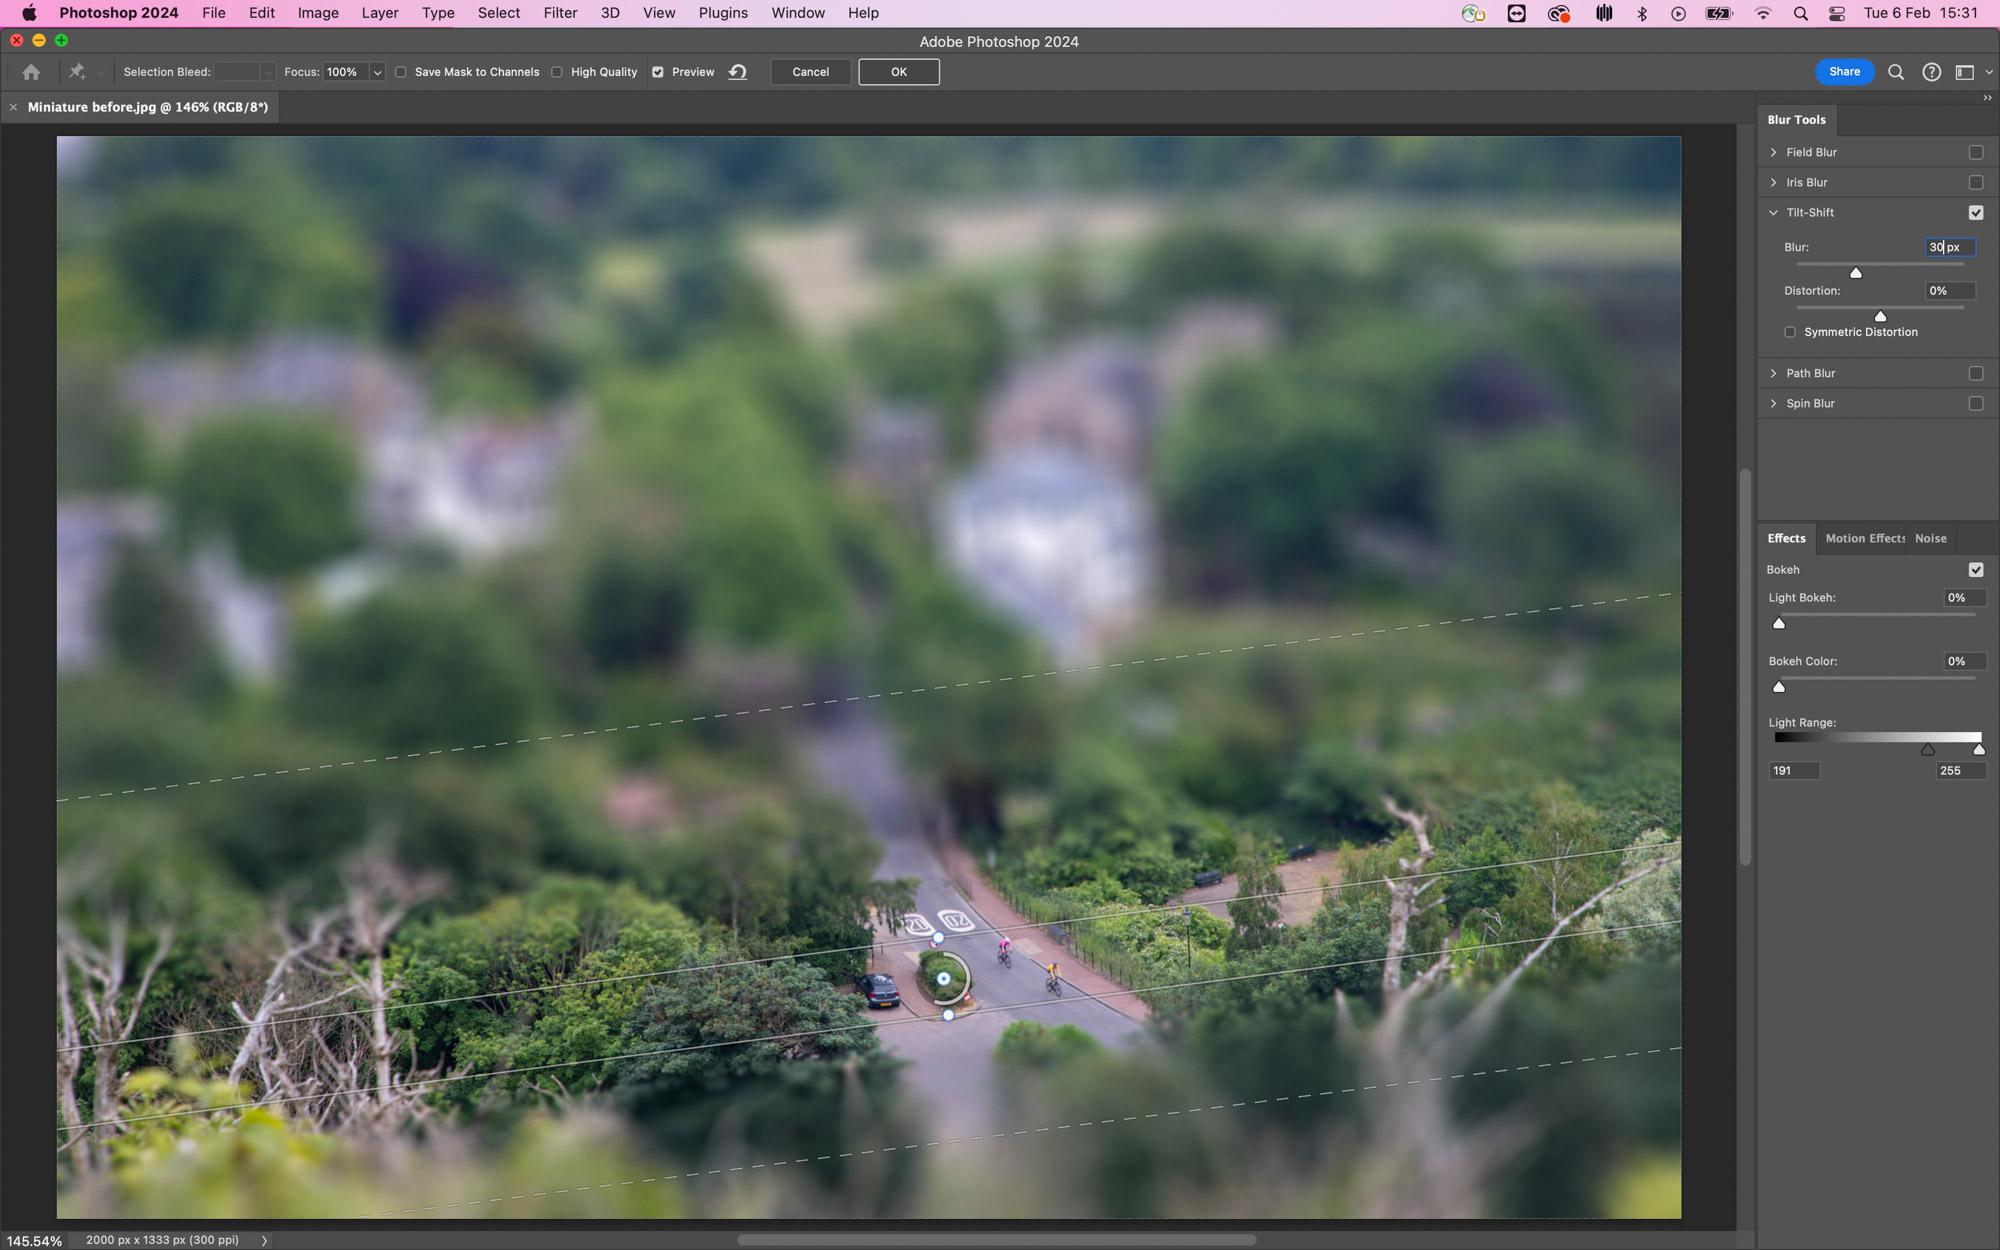
Set Blur to 20px and Distortion to 0% then drag the centre reticule down to where you want the sharp band to be in your scene, and drag outside of it to change the angle. The two bands of straight and dotted lines either side can be dragged in or out to change the size of the sharp zone.
6. Boost the colors
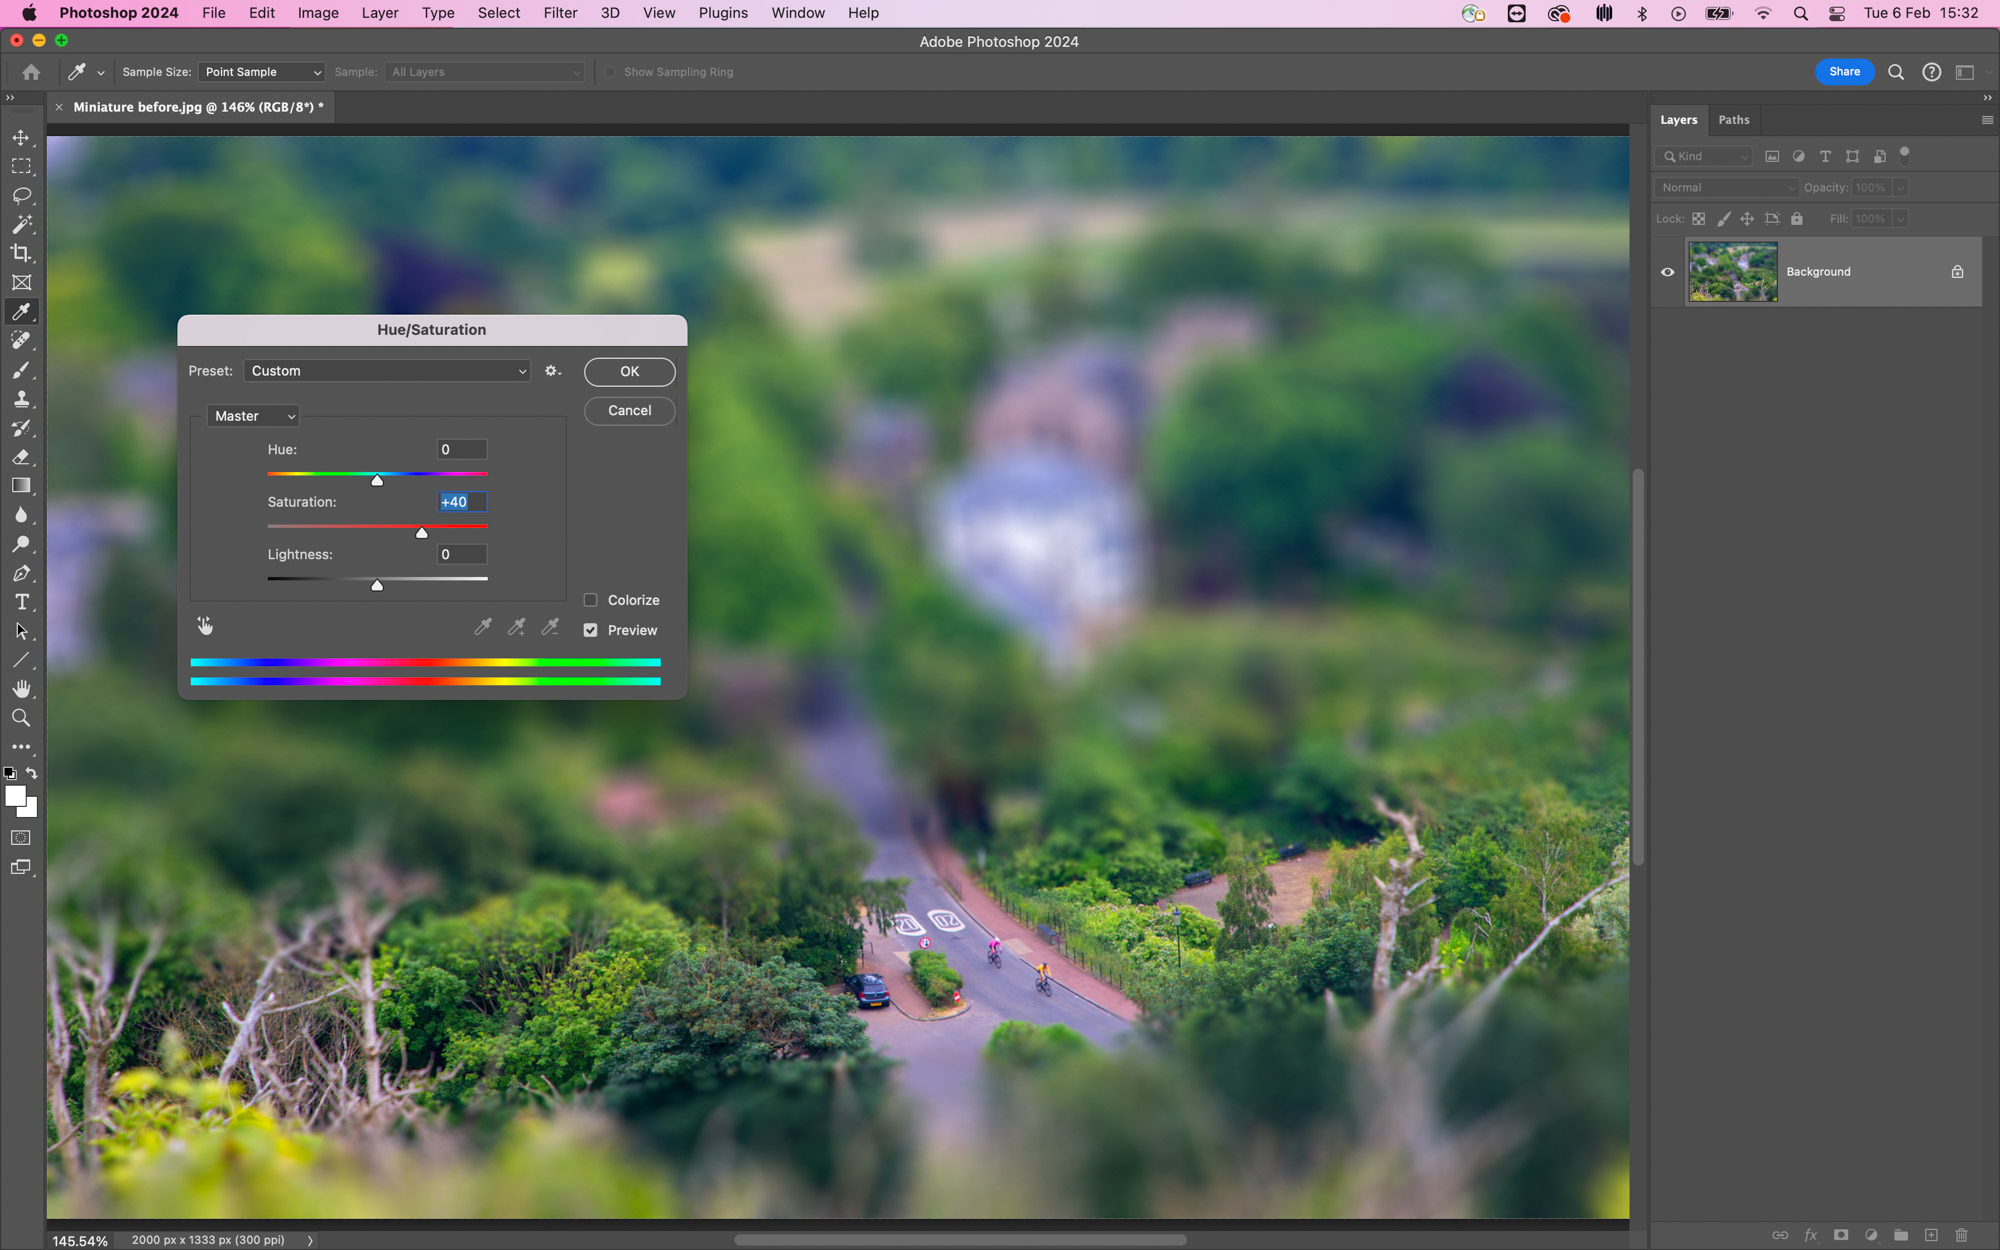
Click OK at the top of the screen to apply the effect then hit Ctrl/Cmd+U to bring up the Hue/Saturation panel and boost the Saturation to make the colours punchy and hit OK to apply. Then go to Image> Adjustments> Brightness/Contrast and give the Contrast a boost too.
If you're serious about scenery, take a look at the best cameras for landscape photography along with the best lenses for landscapes.