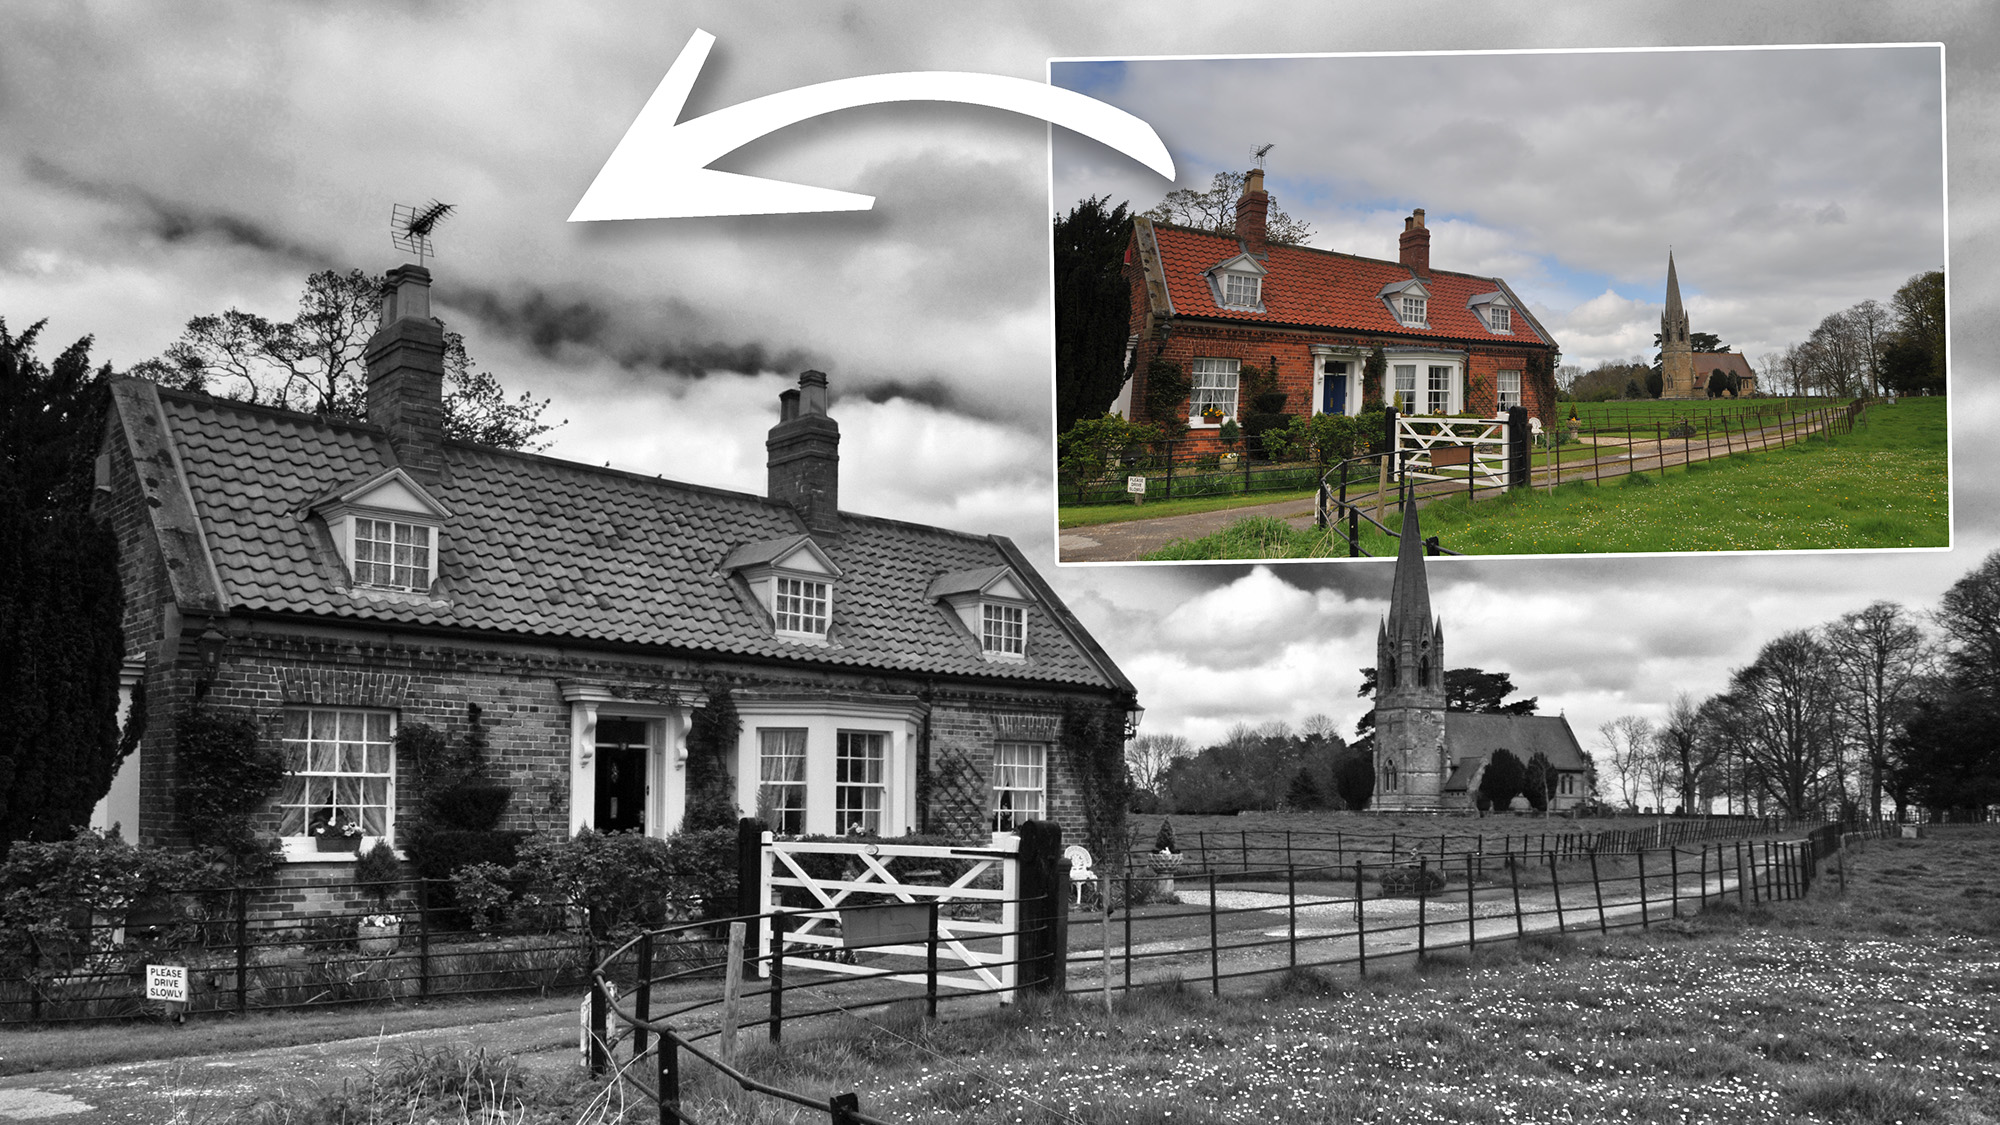
I’ve lost count of how many times I’ve headed out into the country, hoping for great lighting, only to discover that it’s another cloud-filled day, enveloping my destination in a blanket of grey drabness. If this happens to you, rather than give up in disgust, take your photos anyway with a view to converting them to mono using the best photo editing software when you get back home.
In fact, for punchy mono conversions, lots of cloud is actually a good thing, as you’ll see with the example below. Here we have a classic British red brick cottage, a winding pathway and an old English church in the background. But there was no sign of the sun and the light was completely flat. So, I used my favorite landscape photography tips to capture the best image I could and fired up Affinity Photo 2 when I got home.
Here’s how I turned this flat, lifeless image, into a beautiful black-and-white photo.
1. Select your software
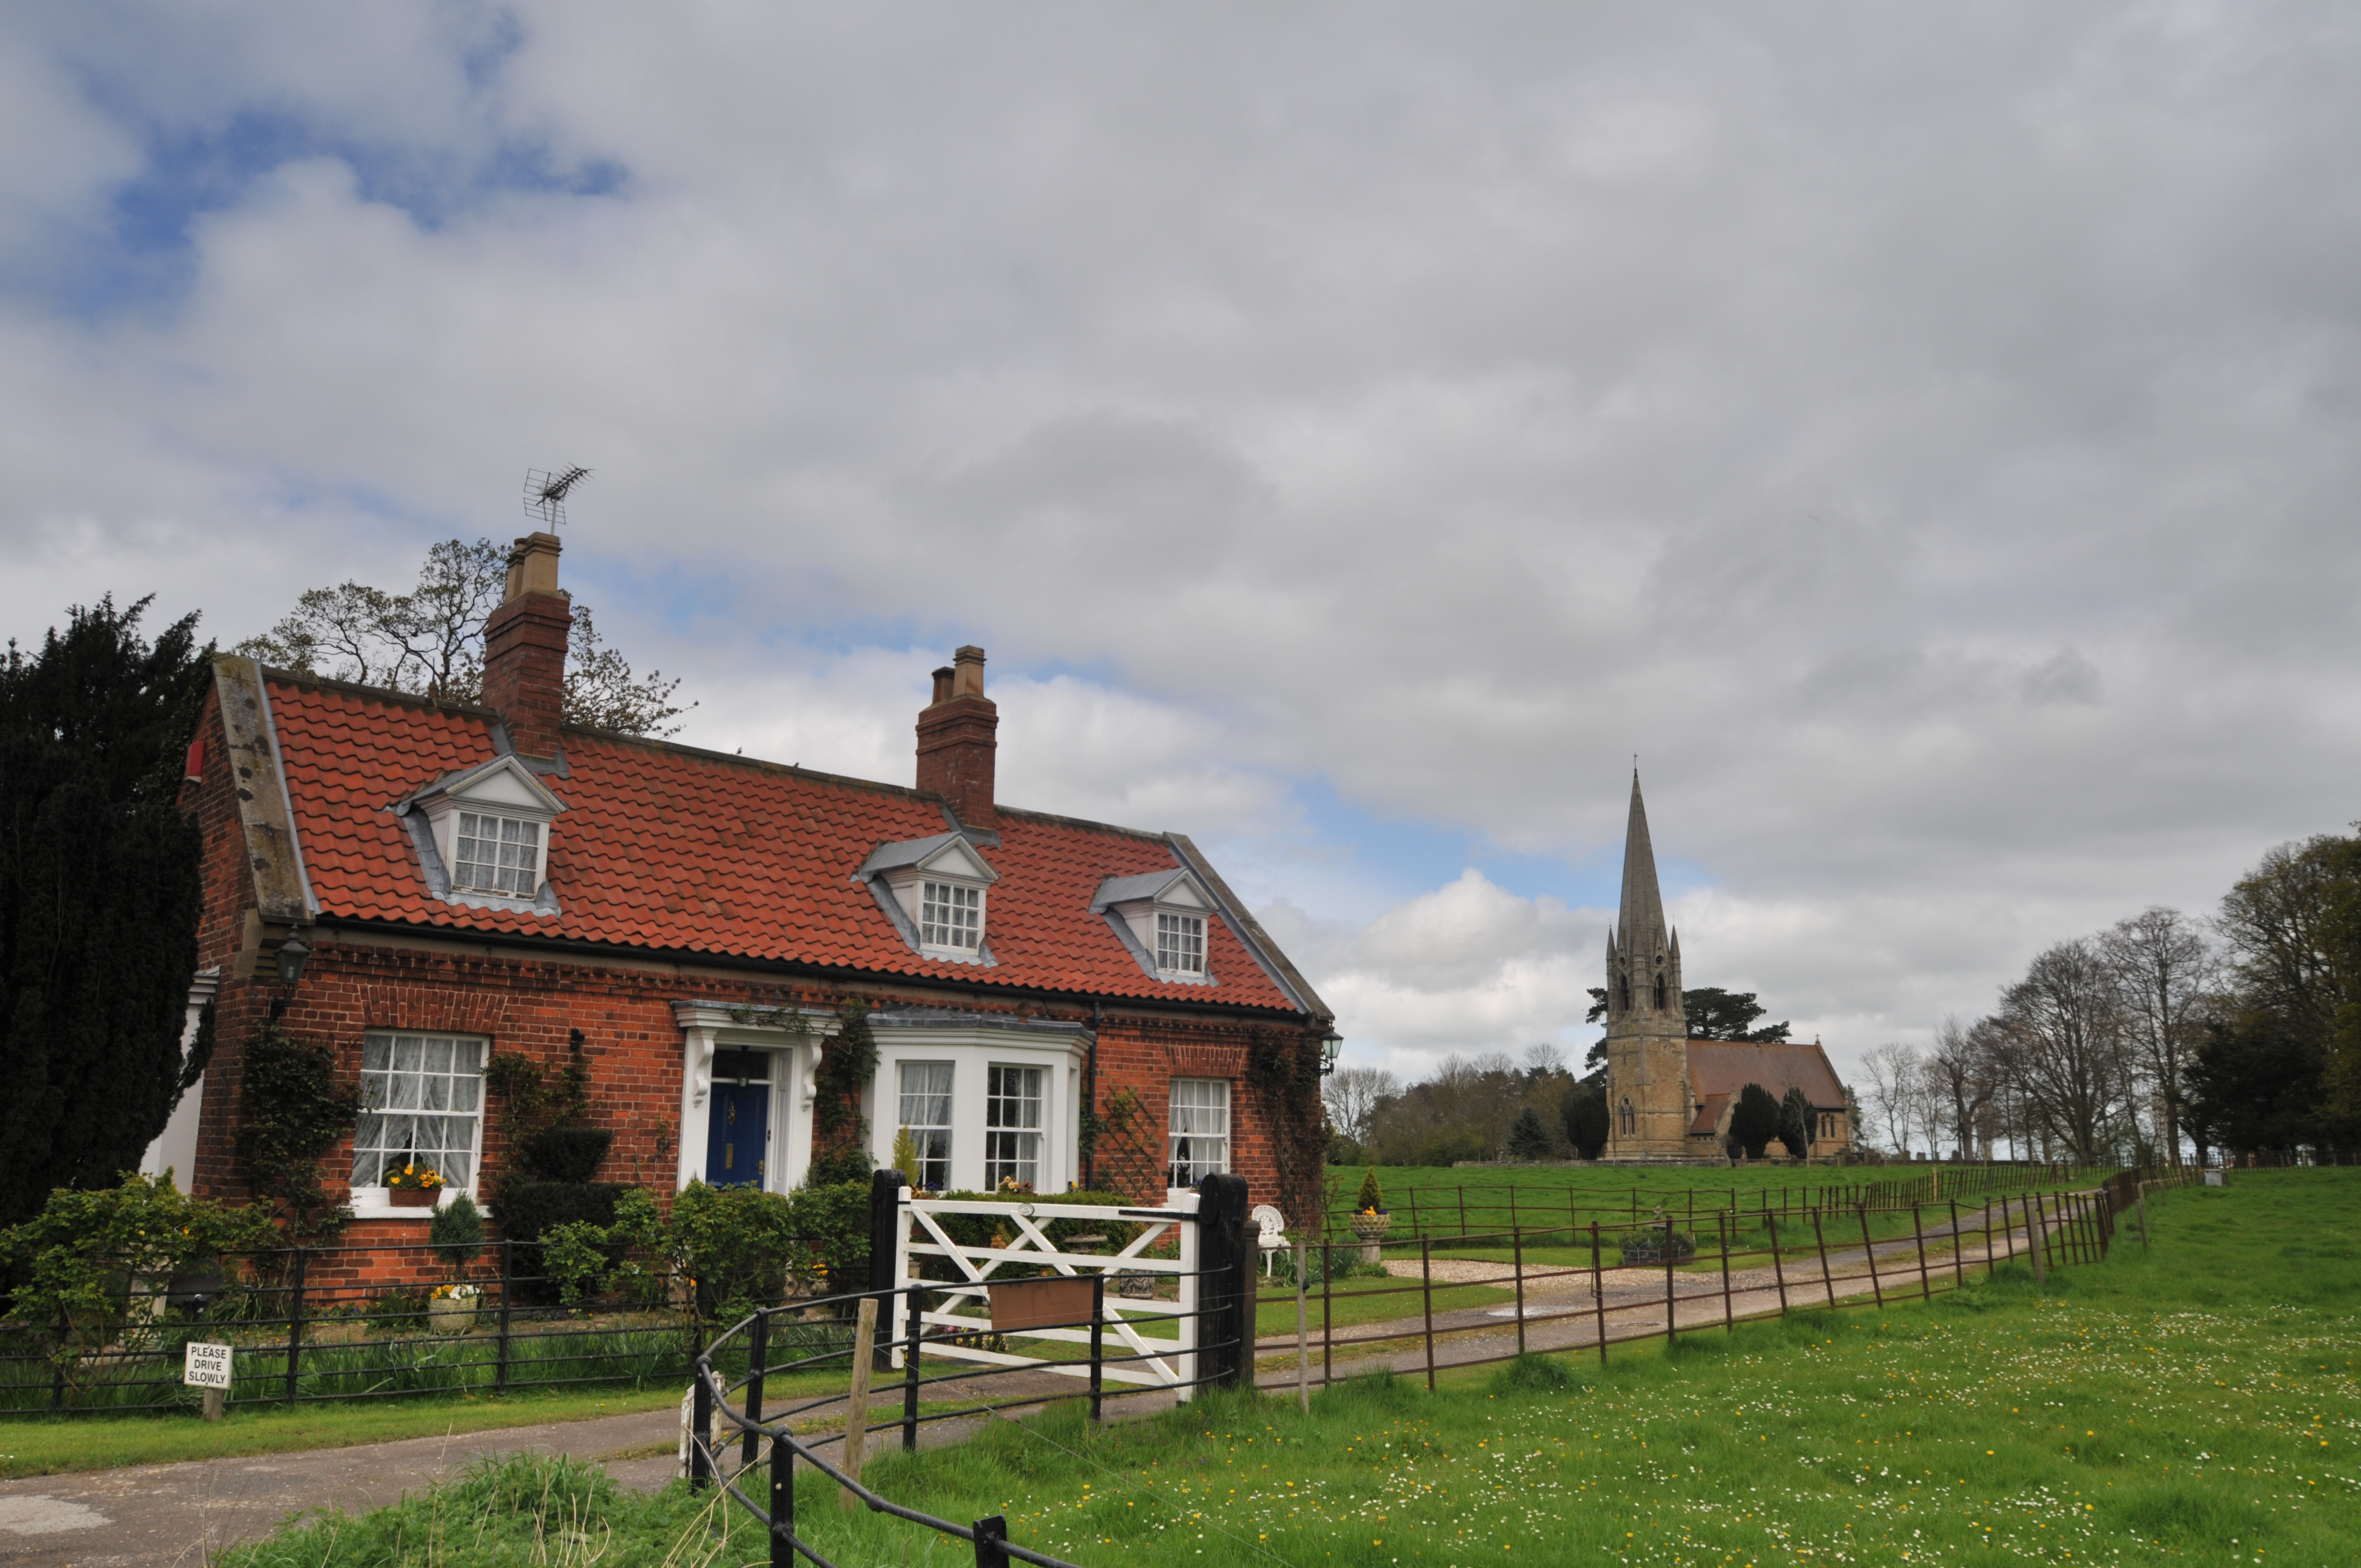
I used Affinity Photo 2 in this project, but you can perform black-and-white conversions in almost any photo editing software, such as Corel PaintShop Pro and Adobe Photoshop. If you don't have any editing software, try out the best free photo editing software that's available.
2. Quick corrections
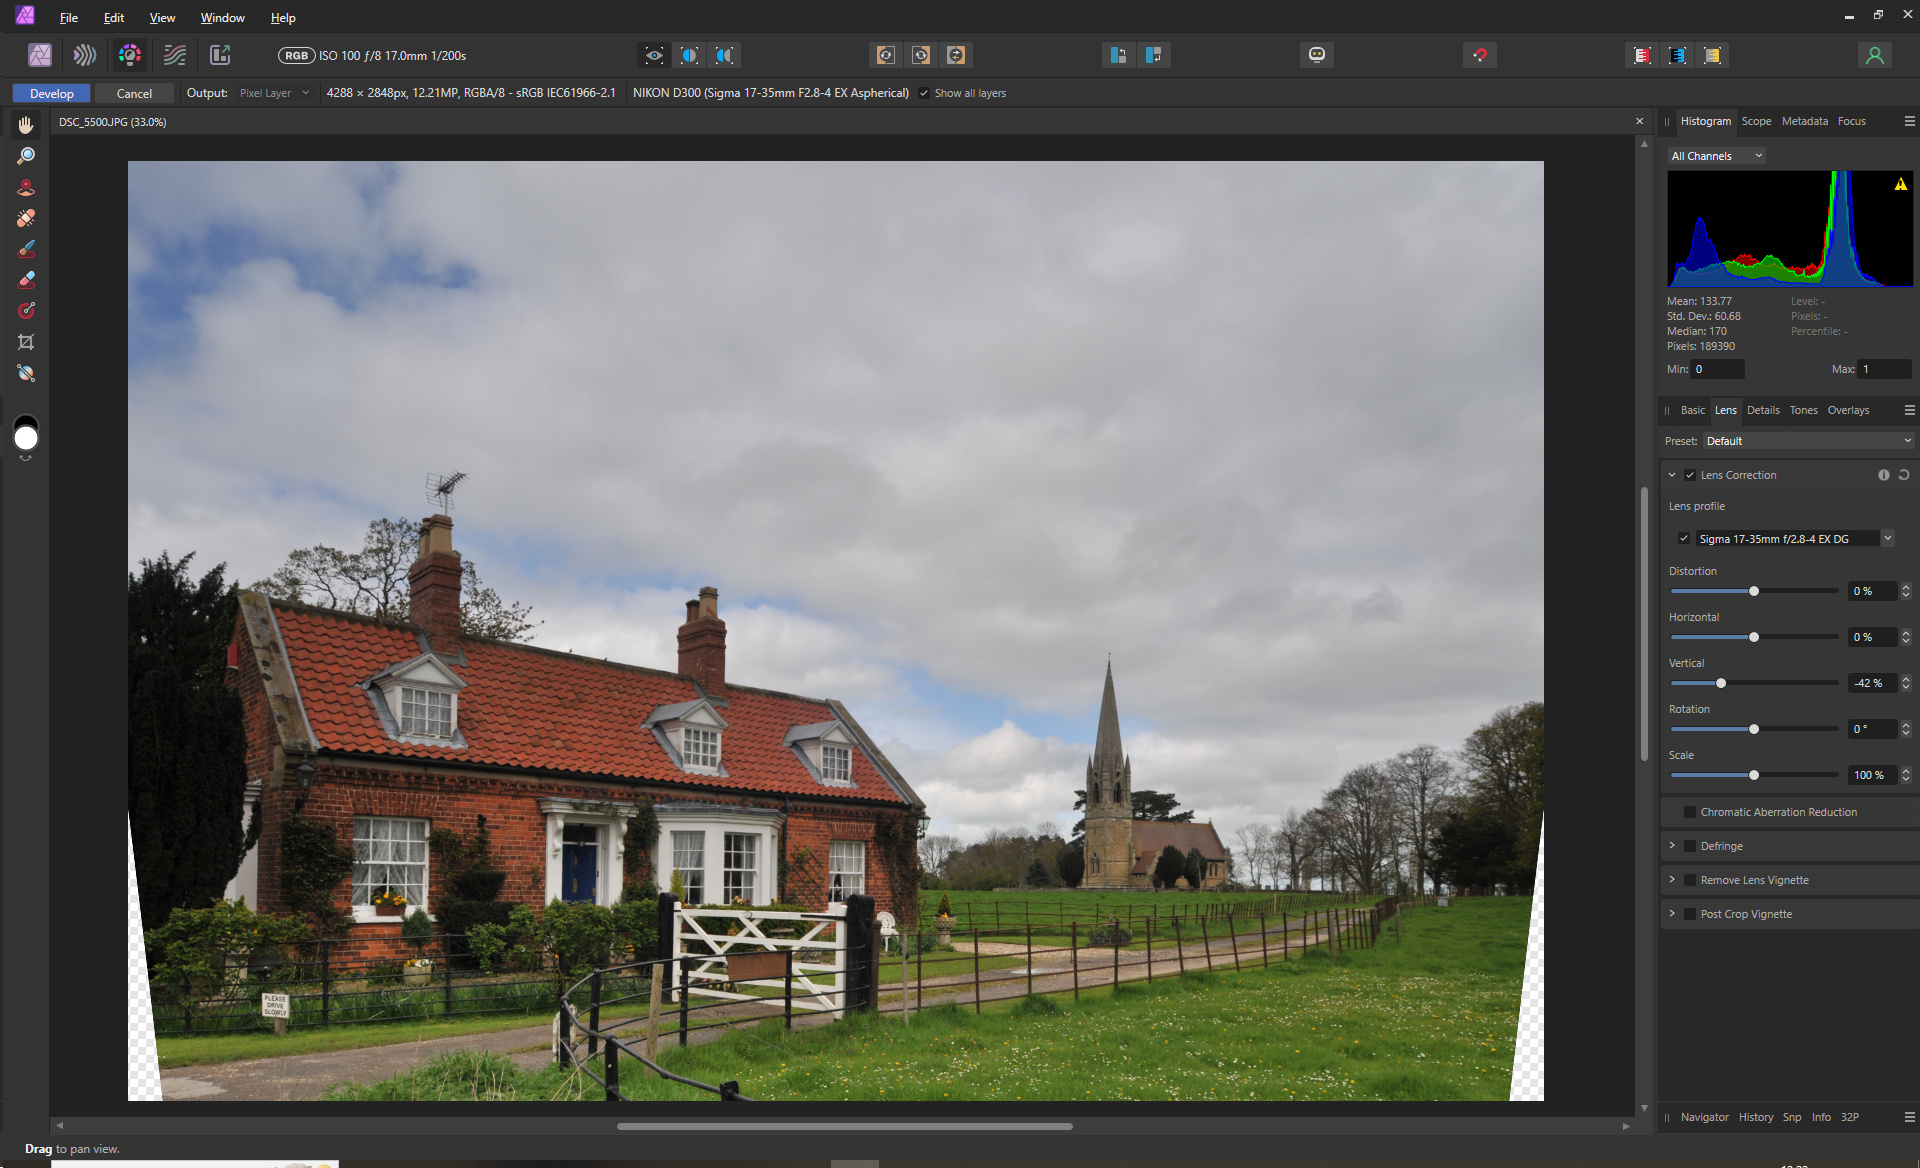
To begin, clean up any flaws. My image was shot with a wide-angle lens, so the side of the cottage is leaning in due to barrel distortion. Click on the Develop Persona icon and then on the Lens Correction tab on the right. There are options for specific Lens profiles, so if you used one of those listed select it. Then, move the Vertical slider to the left to correct the leaning wall.
2. Convert the tones
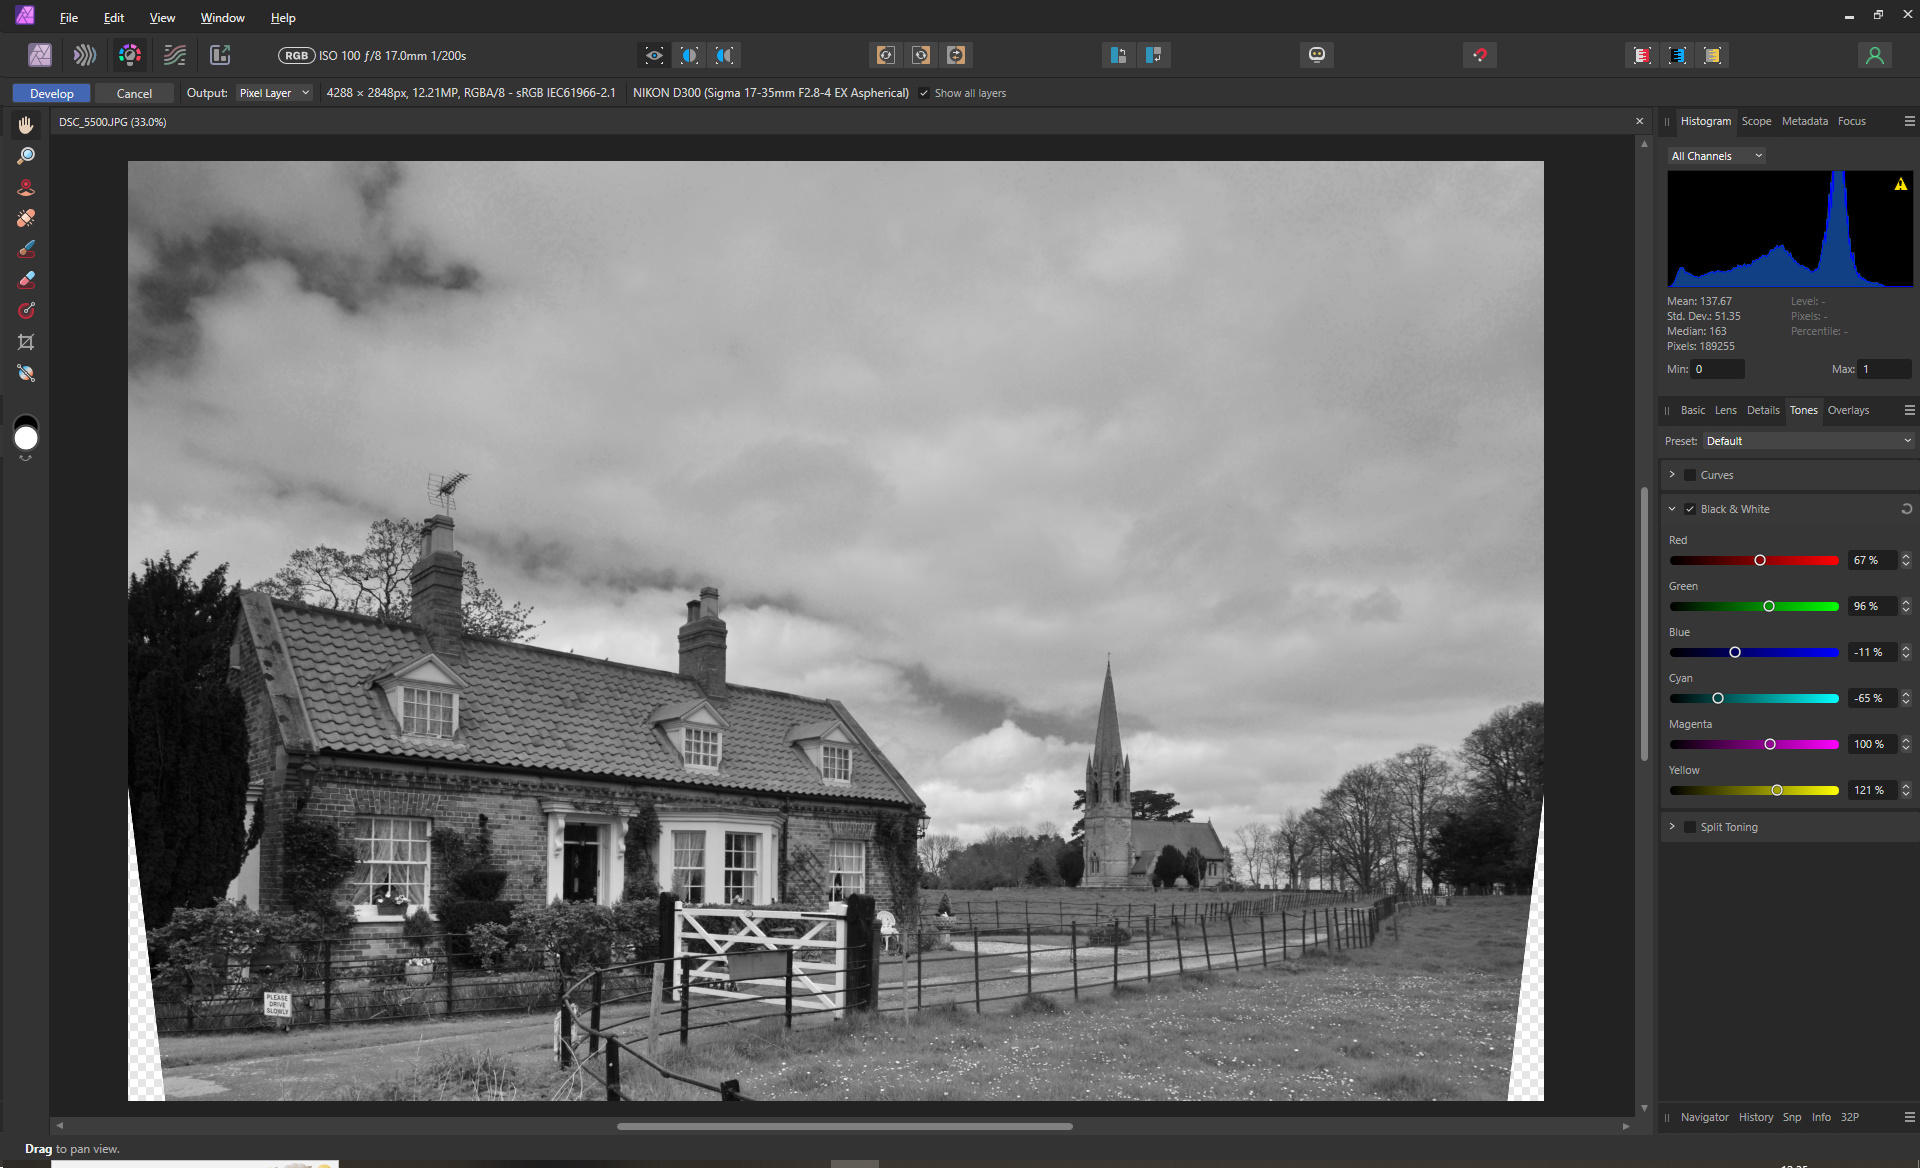
Next, click on the Tones tab to show the six color channels. The red channel normally covers brickwork in landscape shots, the green and yellow are the grass, and blue and cyan are the blue parts of the sky. To get more impact into the bland lighting, you'll want to reduce the Blue and Cyan channels to make those parts of the sky darker, without creating excessive noise and pixelation. The red needed tweaking as it was a little too bright.
3. Define the sky
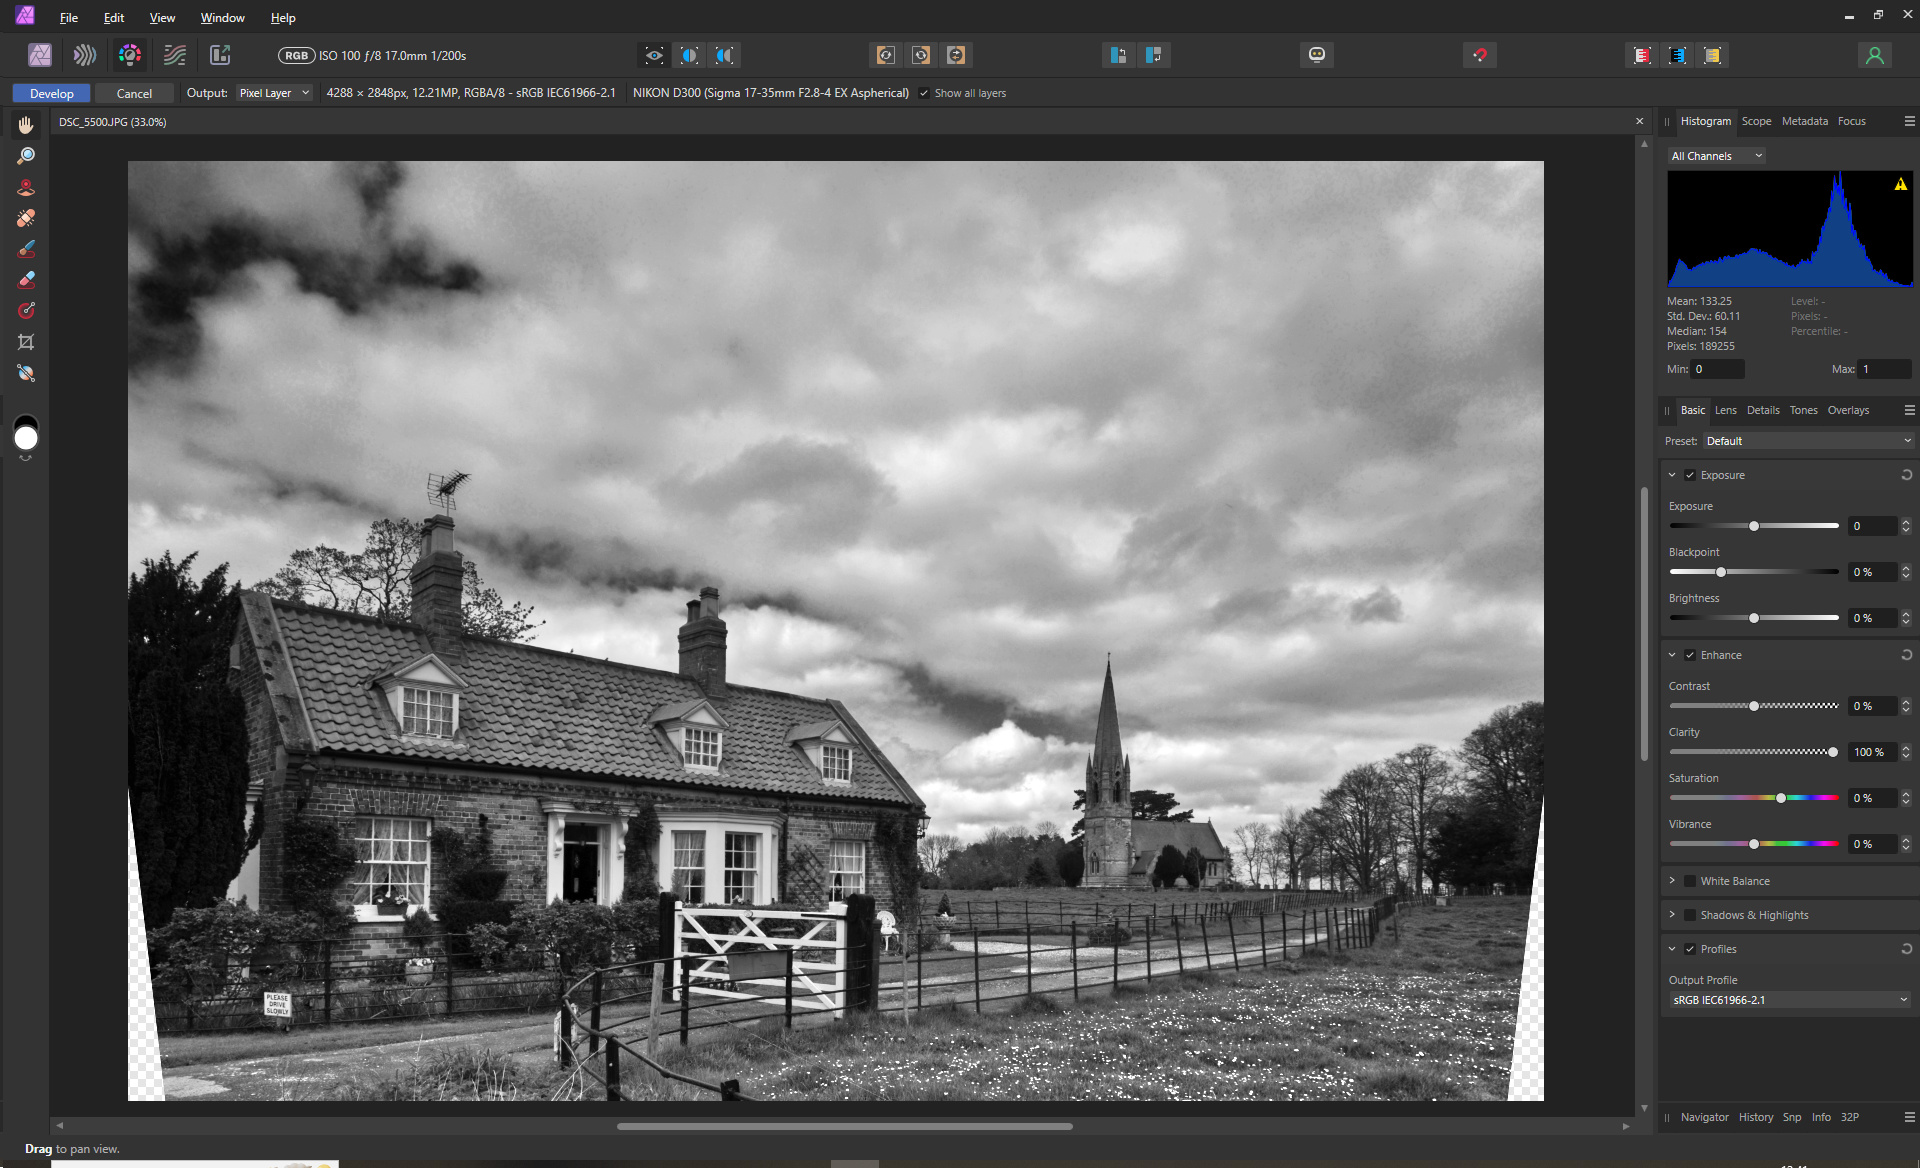
Go to the Basic tab and increase the clarity until some definition and drama start to appear in the sky. If this also makes the flowers on the ground area too bright, you might need to adjust the yellow or green channels again. While on the Tones tab tweak the overall contrast using Curves with an "S" shape to make it slightly punchier overall.
4. Finishing touches
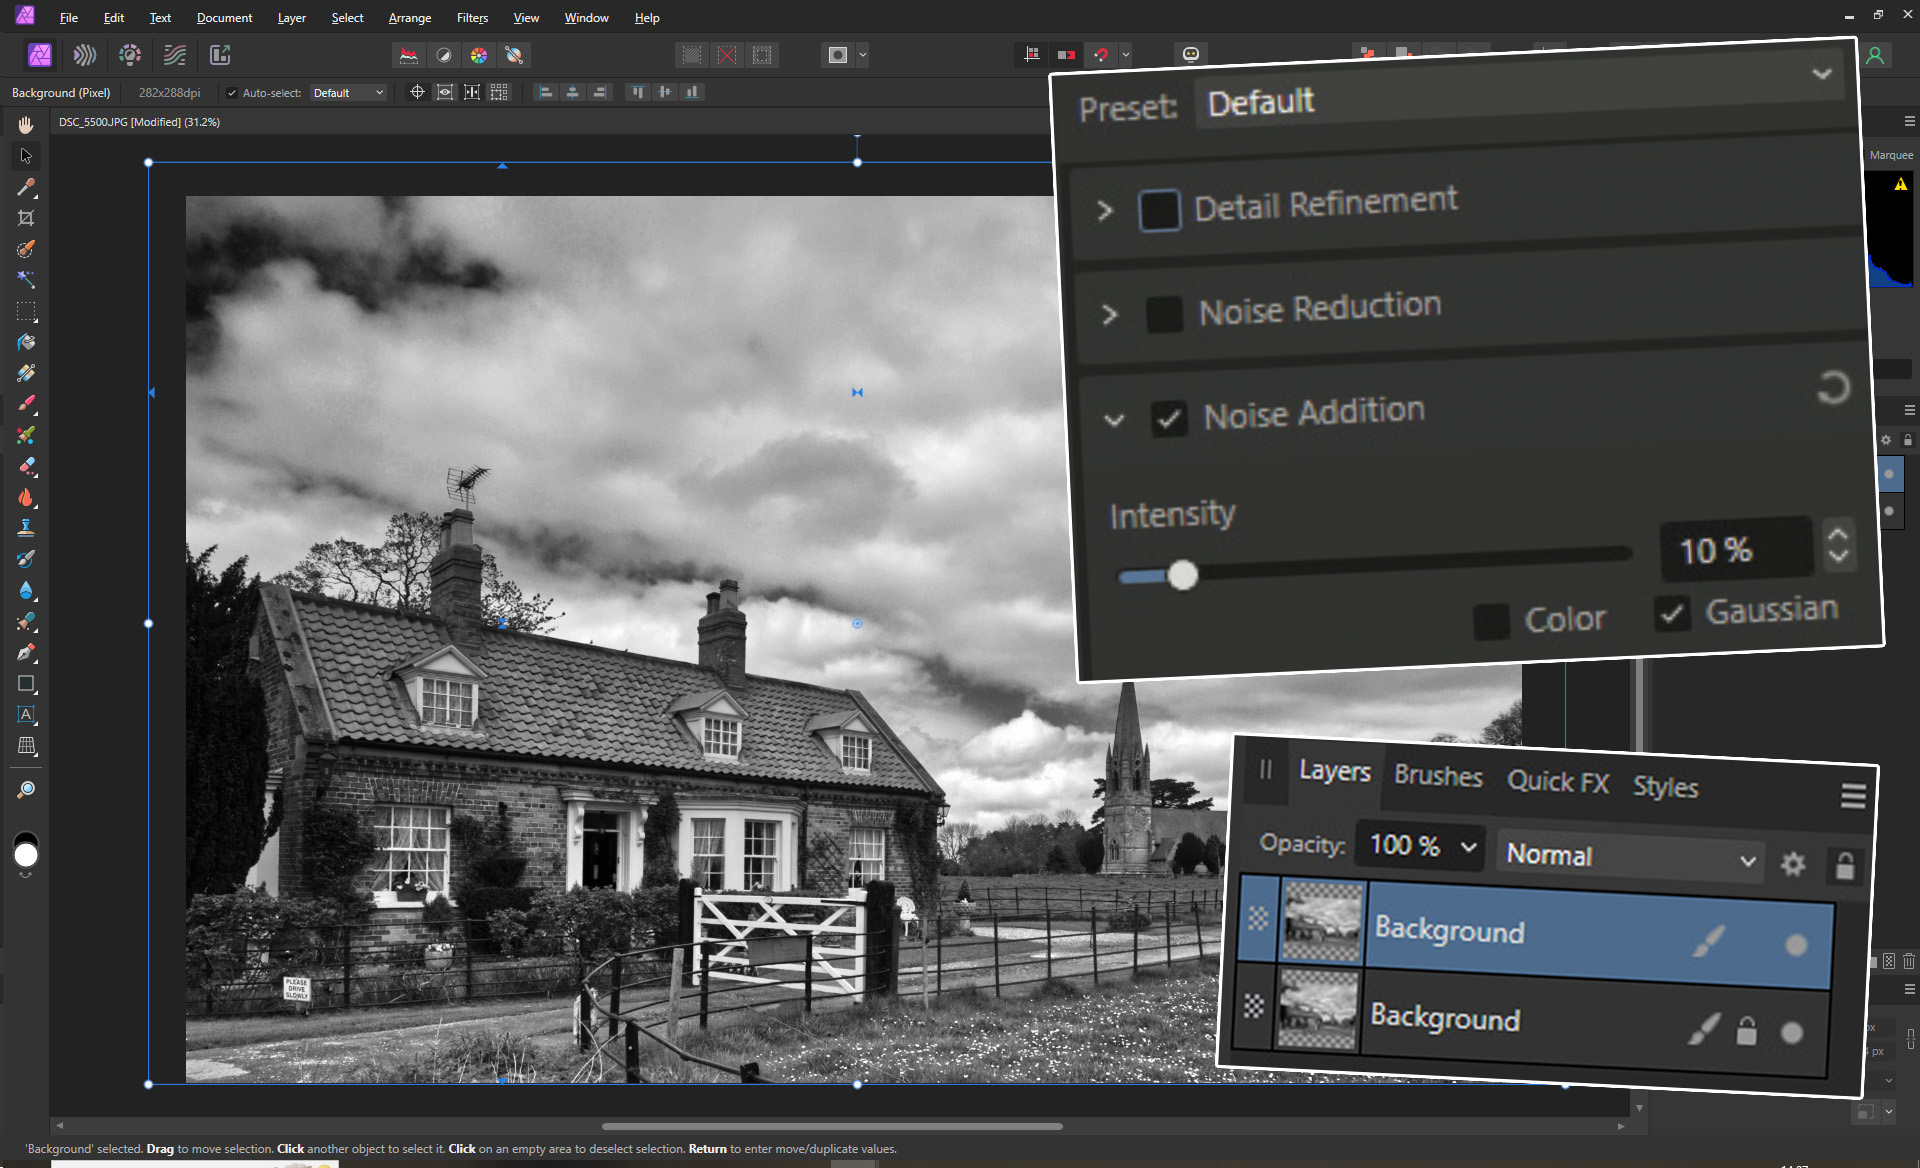
Click on the Details tab and then on Noise Addition. Increase the Intensity to 10% to give it a gritty feel. Duplicate the background layer to enable transformations. Select the Move tool and drag the left and right center handles out to fill the gaps. Grab the top center handle and drag up to retain the scale of the building. There was plenty of sky, so better to lose a bit of that than the foreground scenery. Flatten and save to finish.
You may also like...
Make sure you're using one of the best cameras for landscape photography, and check out the best tripods as well. When shooting on a bland day though, I sometimes like to liven things up with specialist accessories like the Kenko White Mist No.1 filter.


