Watch video (above): Ultimate selfie
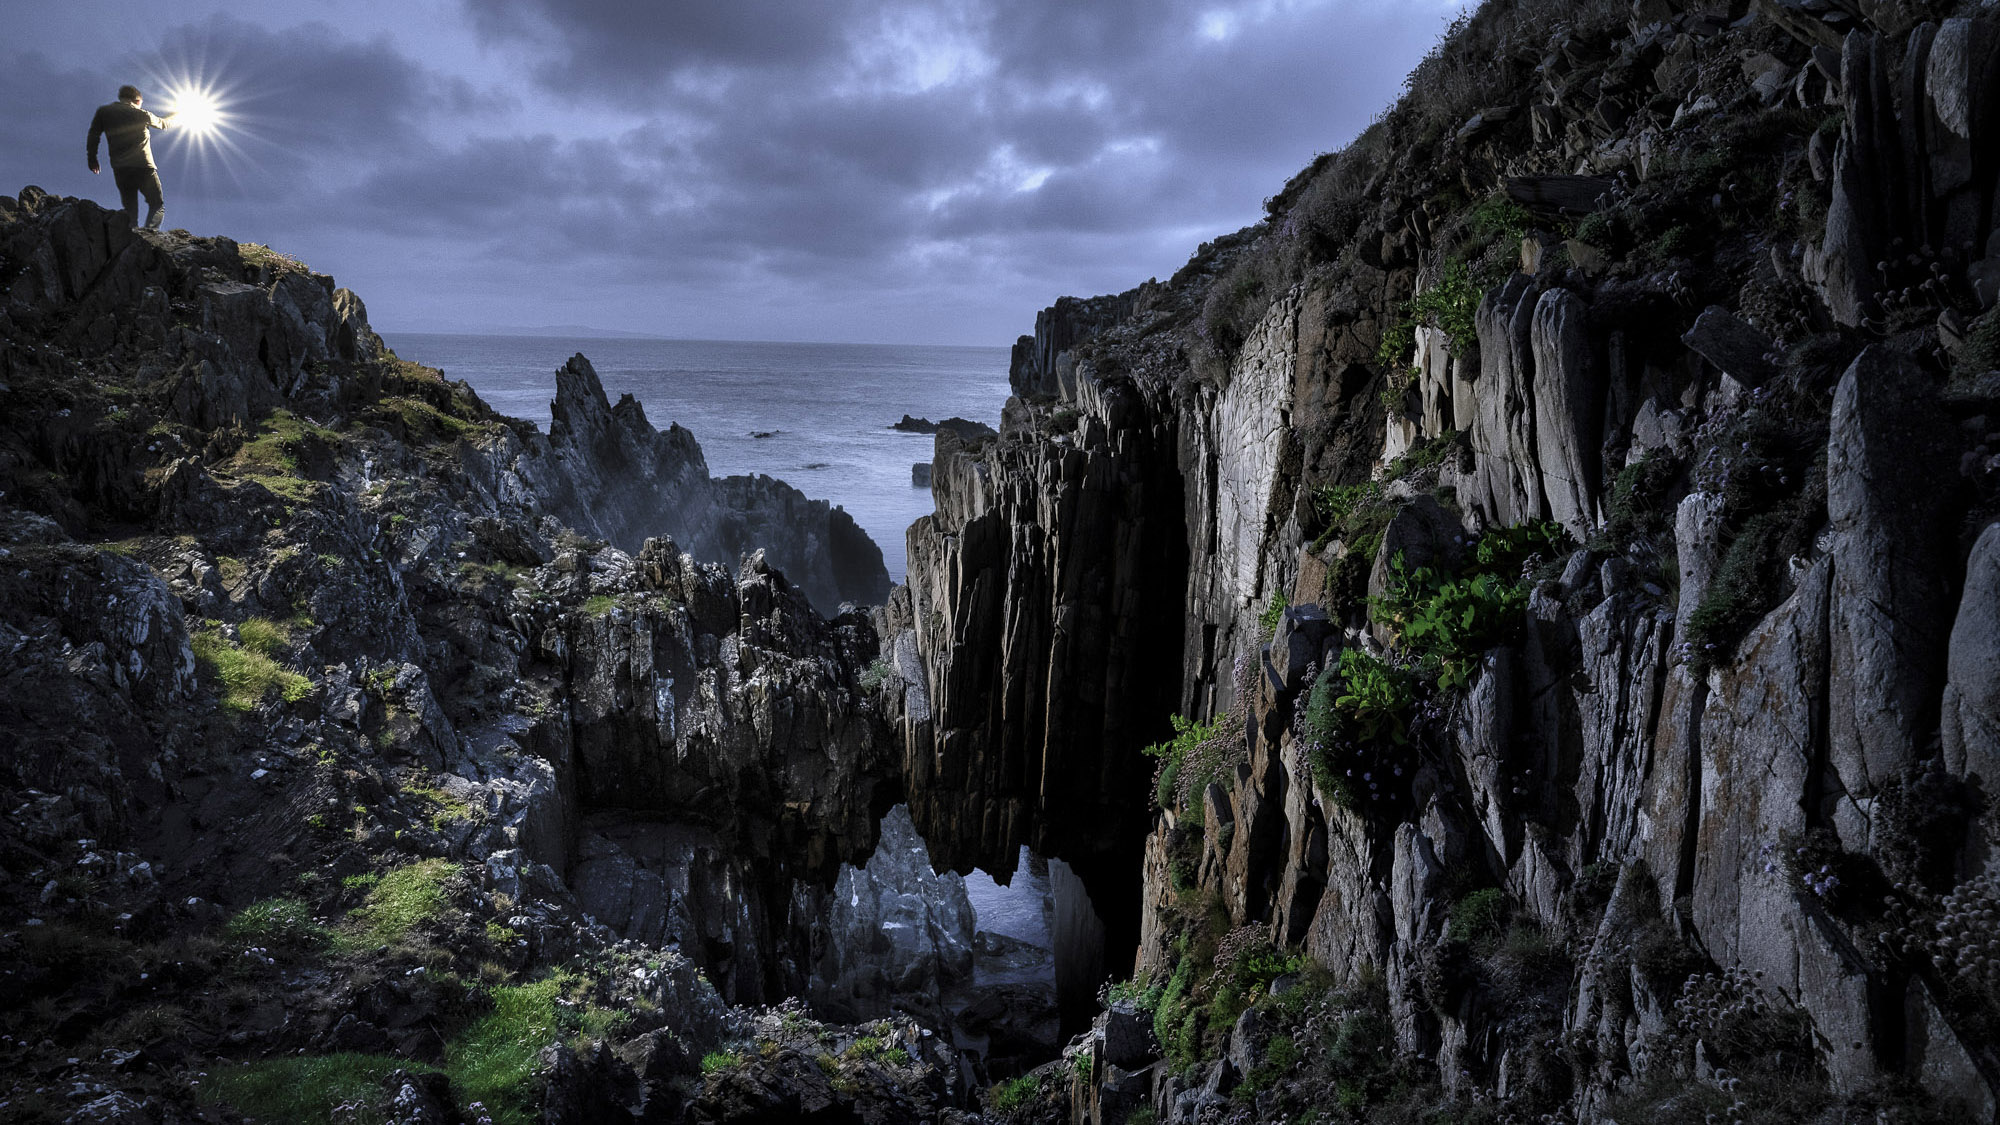
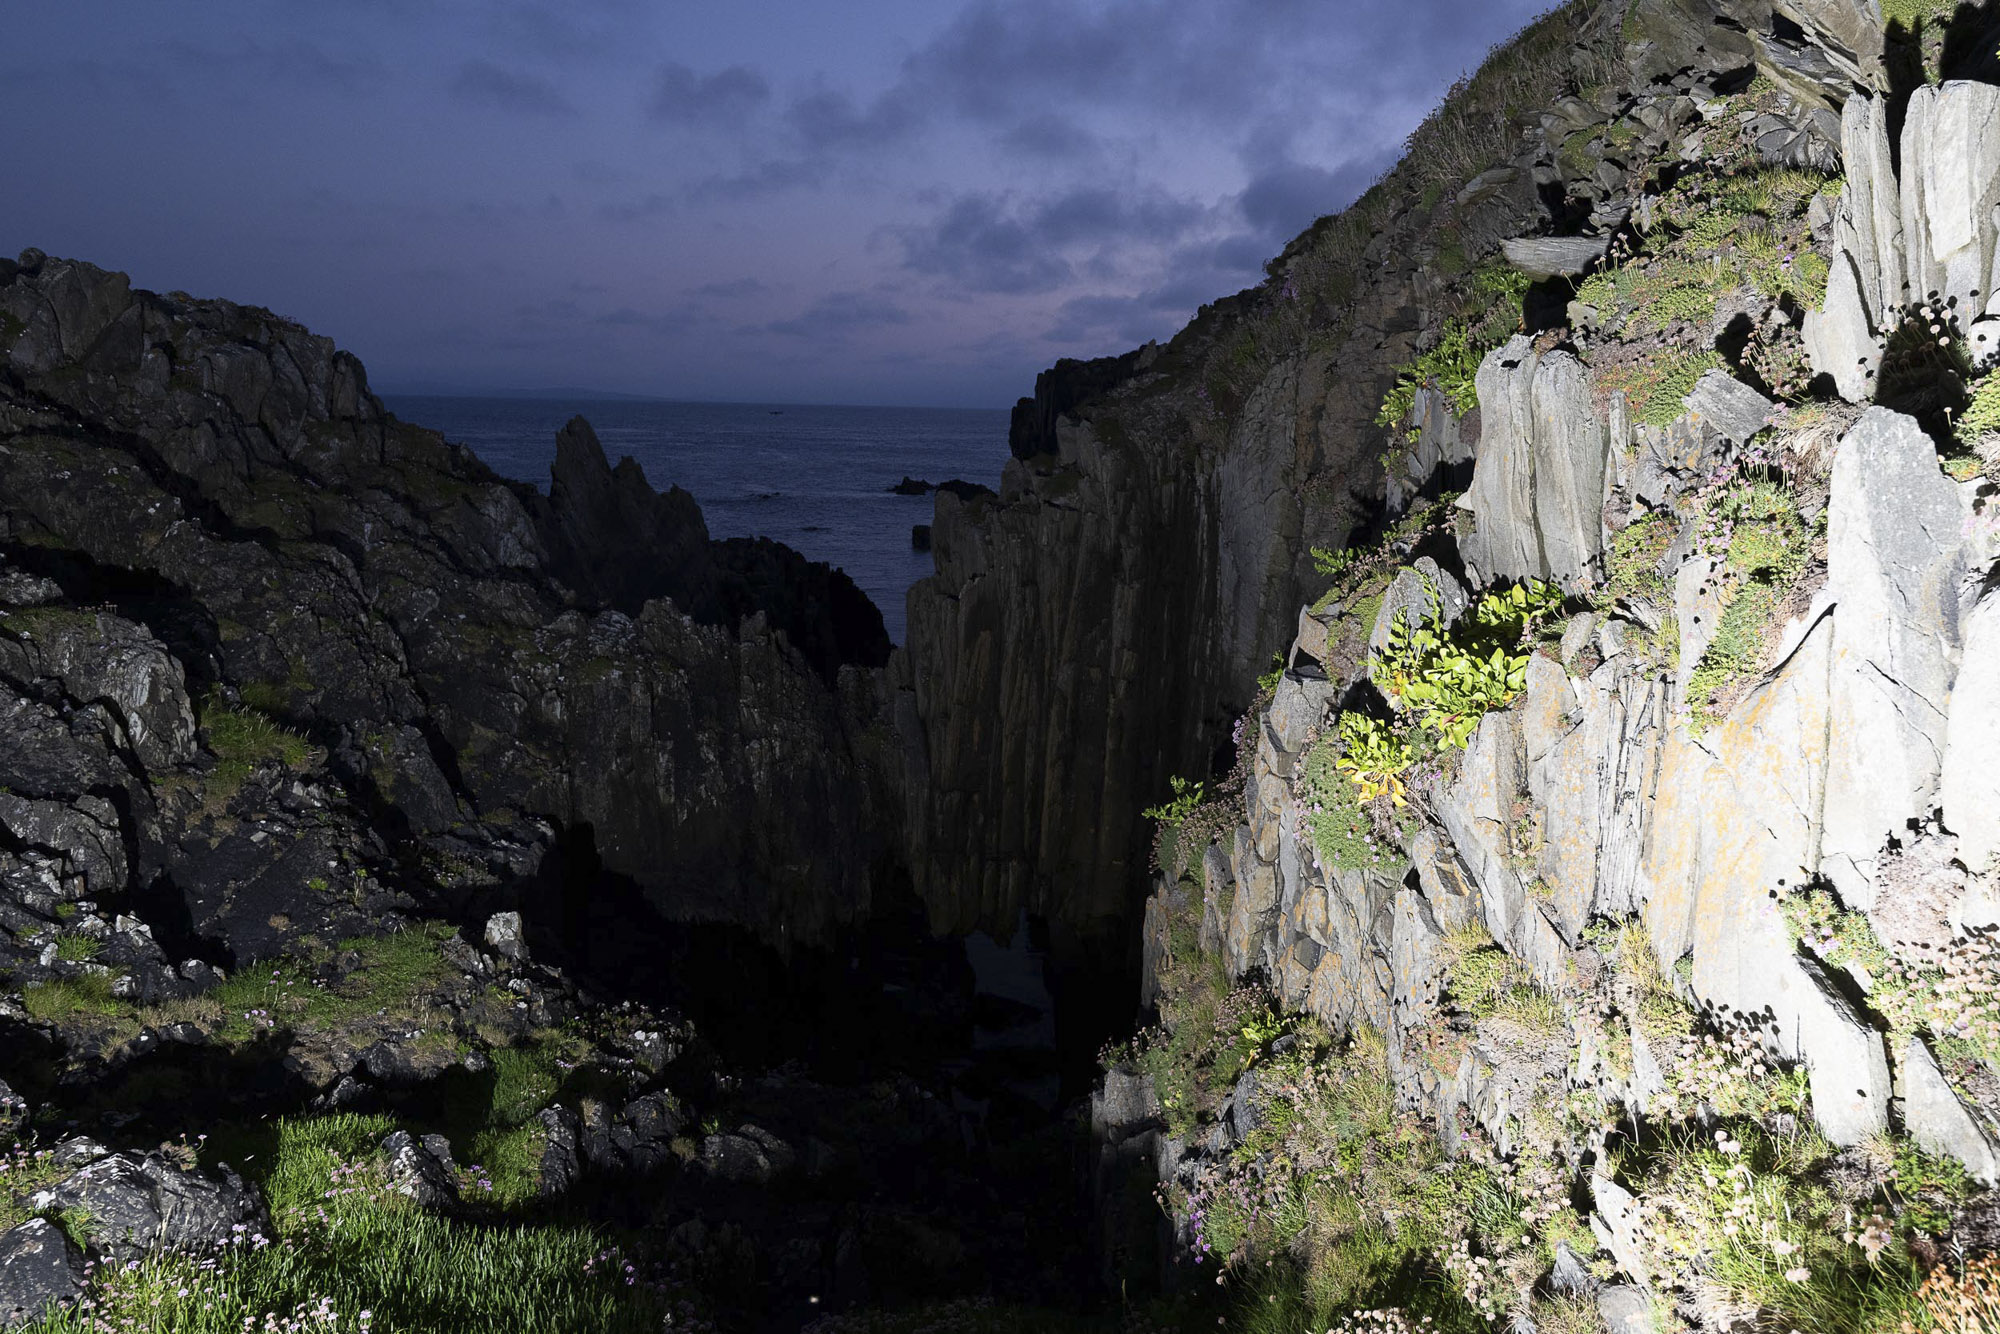
Few things are better than capturing a landscape under the perfect light. But often we’re met with less-than-perfect conditions, dull skies and flat light. This could be a time to try flash painting. By using a portable flashgun or Speedlite, you can pick out details and highlight the contours in a scene. This could also be an opportunity to include a figure – or yourself if shooting solo like me – in the shot while holding up your light, as I’ve done here.
You don’t necessarily need an expensive flash for this, almost any Speedlite will do. Getting the flash off-camera is essential so you’ll need a wireless trigger and receiver to fire it, but these can also be picked up very cheaply.
Twilight can be the best time to head out, as skies are dark and moody, the remaining daylight becomes a cool blue in color, and scenes take on an atmosphere that feels entirely different from daylight. The technique for this might seem complicated, but when it boils down to it, there are two key skills to grasp.
First, we use an exposure that underexposes the daylight, so that – without flash – the scene appears very dark in shot. Then with our exposure locked in, we simply fire our flash around the scene to light the parts that we want to showcase. This way, everything else comes out dark and moody, while the flash-lit parts can look spectacular. To make things easier, we can pop our flash in different places over several frames, then combine the best parts later in Photoshop.
1. Work out an ambient exposure
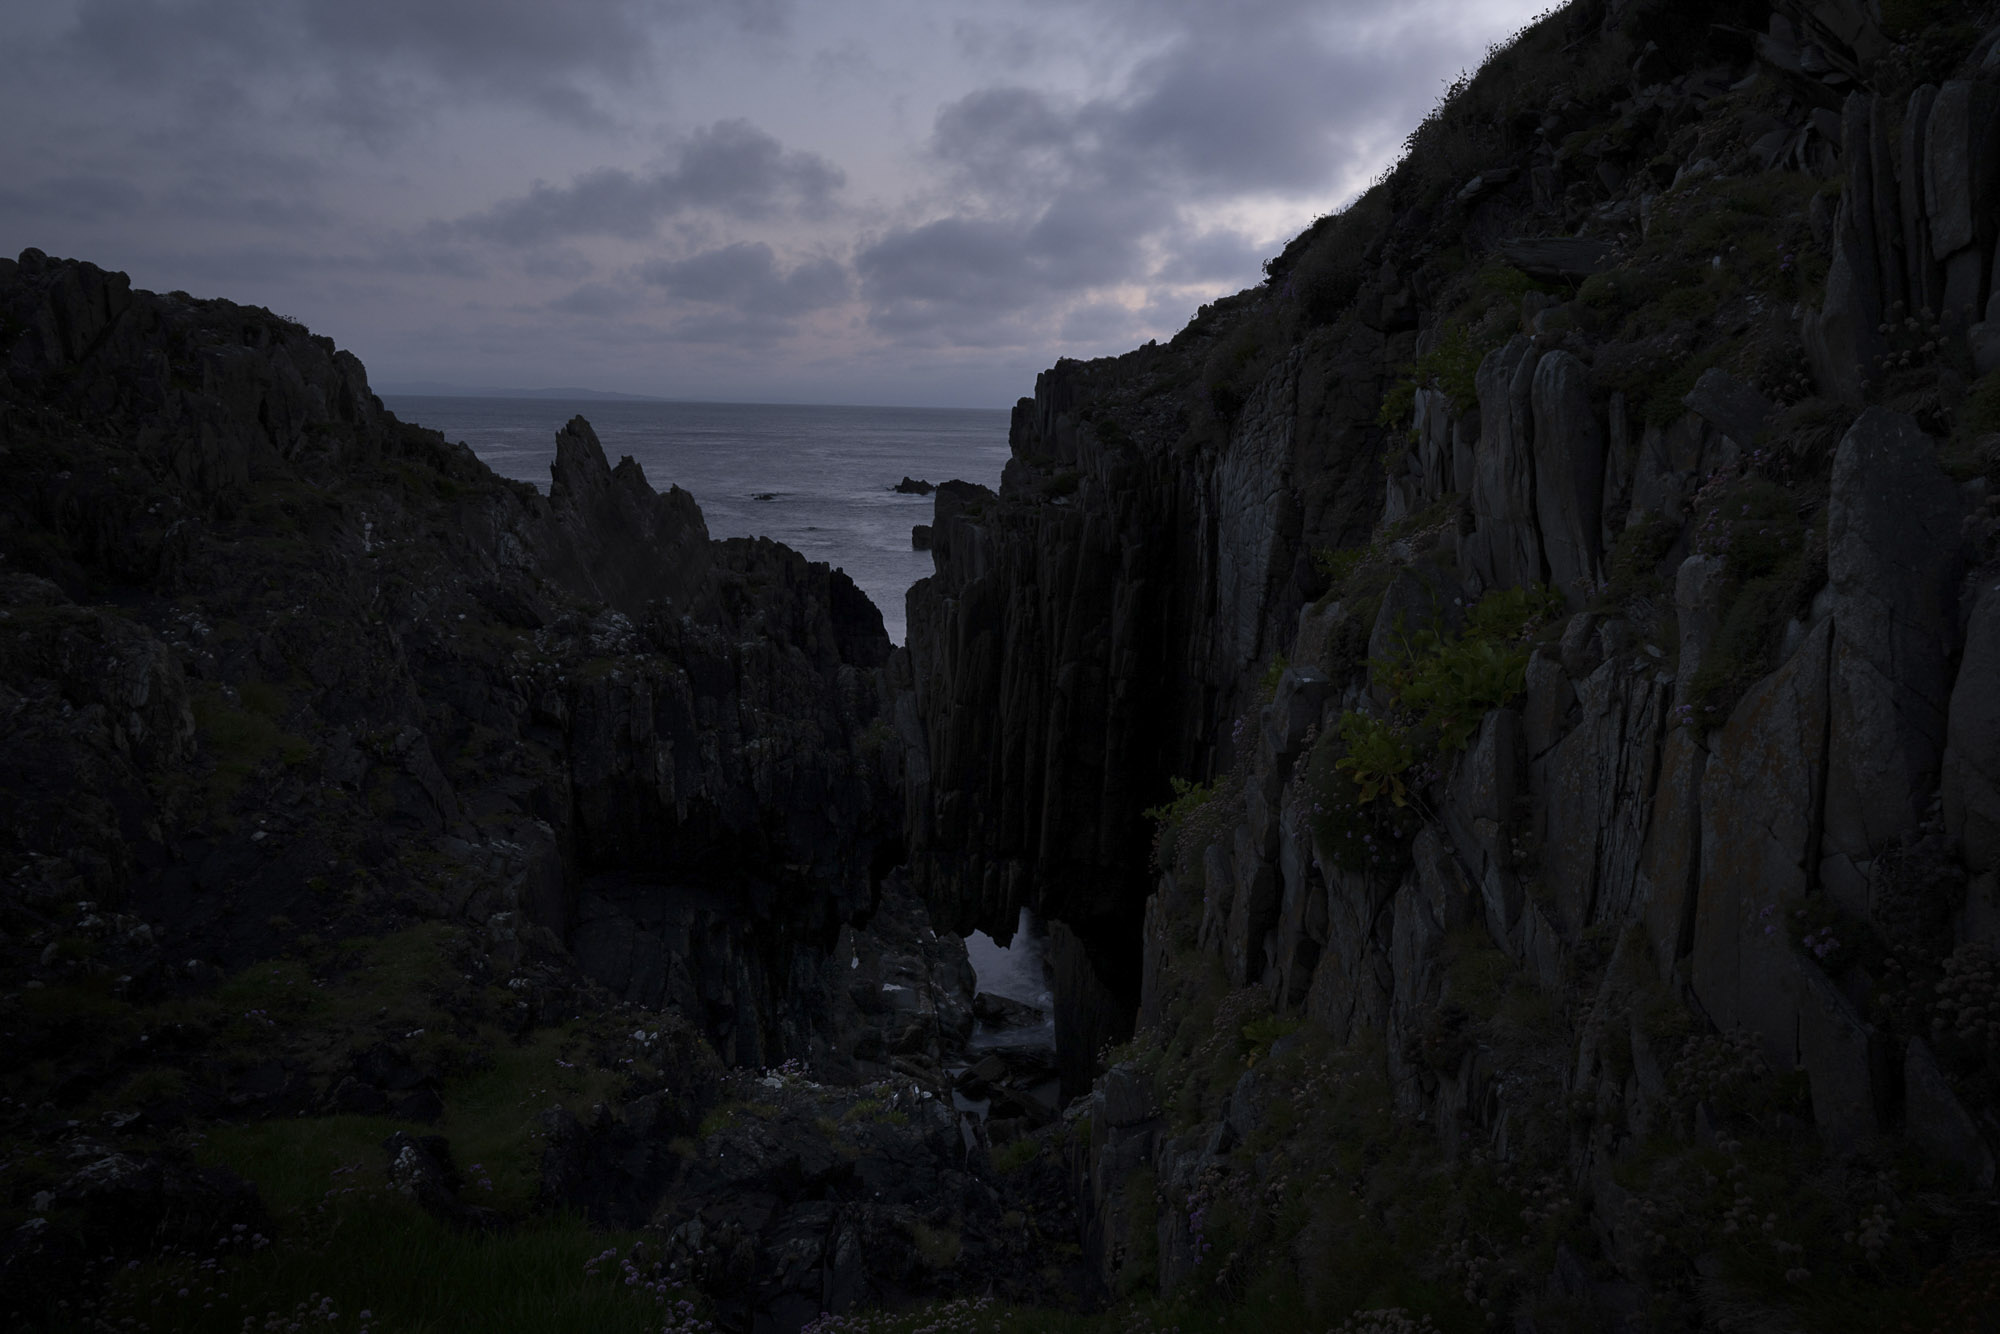
Begin by setting your camera to Manual exposure mode and work out an exposure that leaves the foreground looking dark and moody. Here our settings are aperture f/11, shutter speed at 1 sec, ISO100. From this base exposure, we can use our flash to pick out details in the dark landscape areas.
2. Connect a wireless trigger
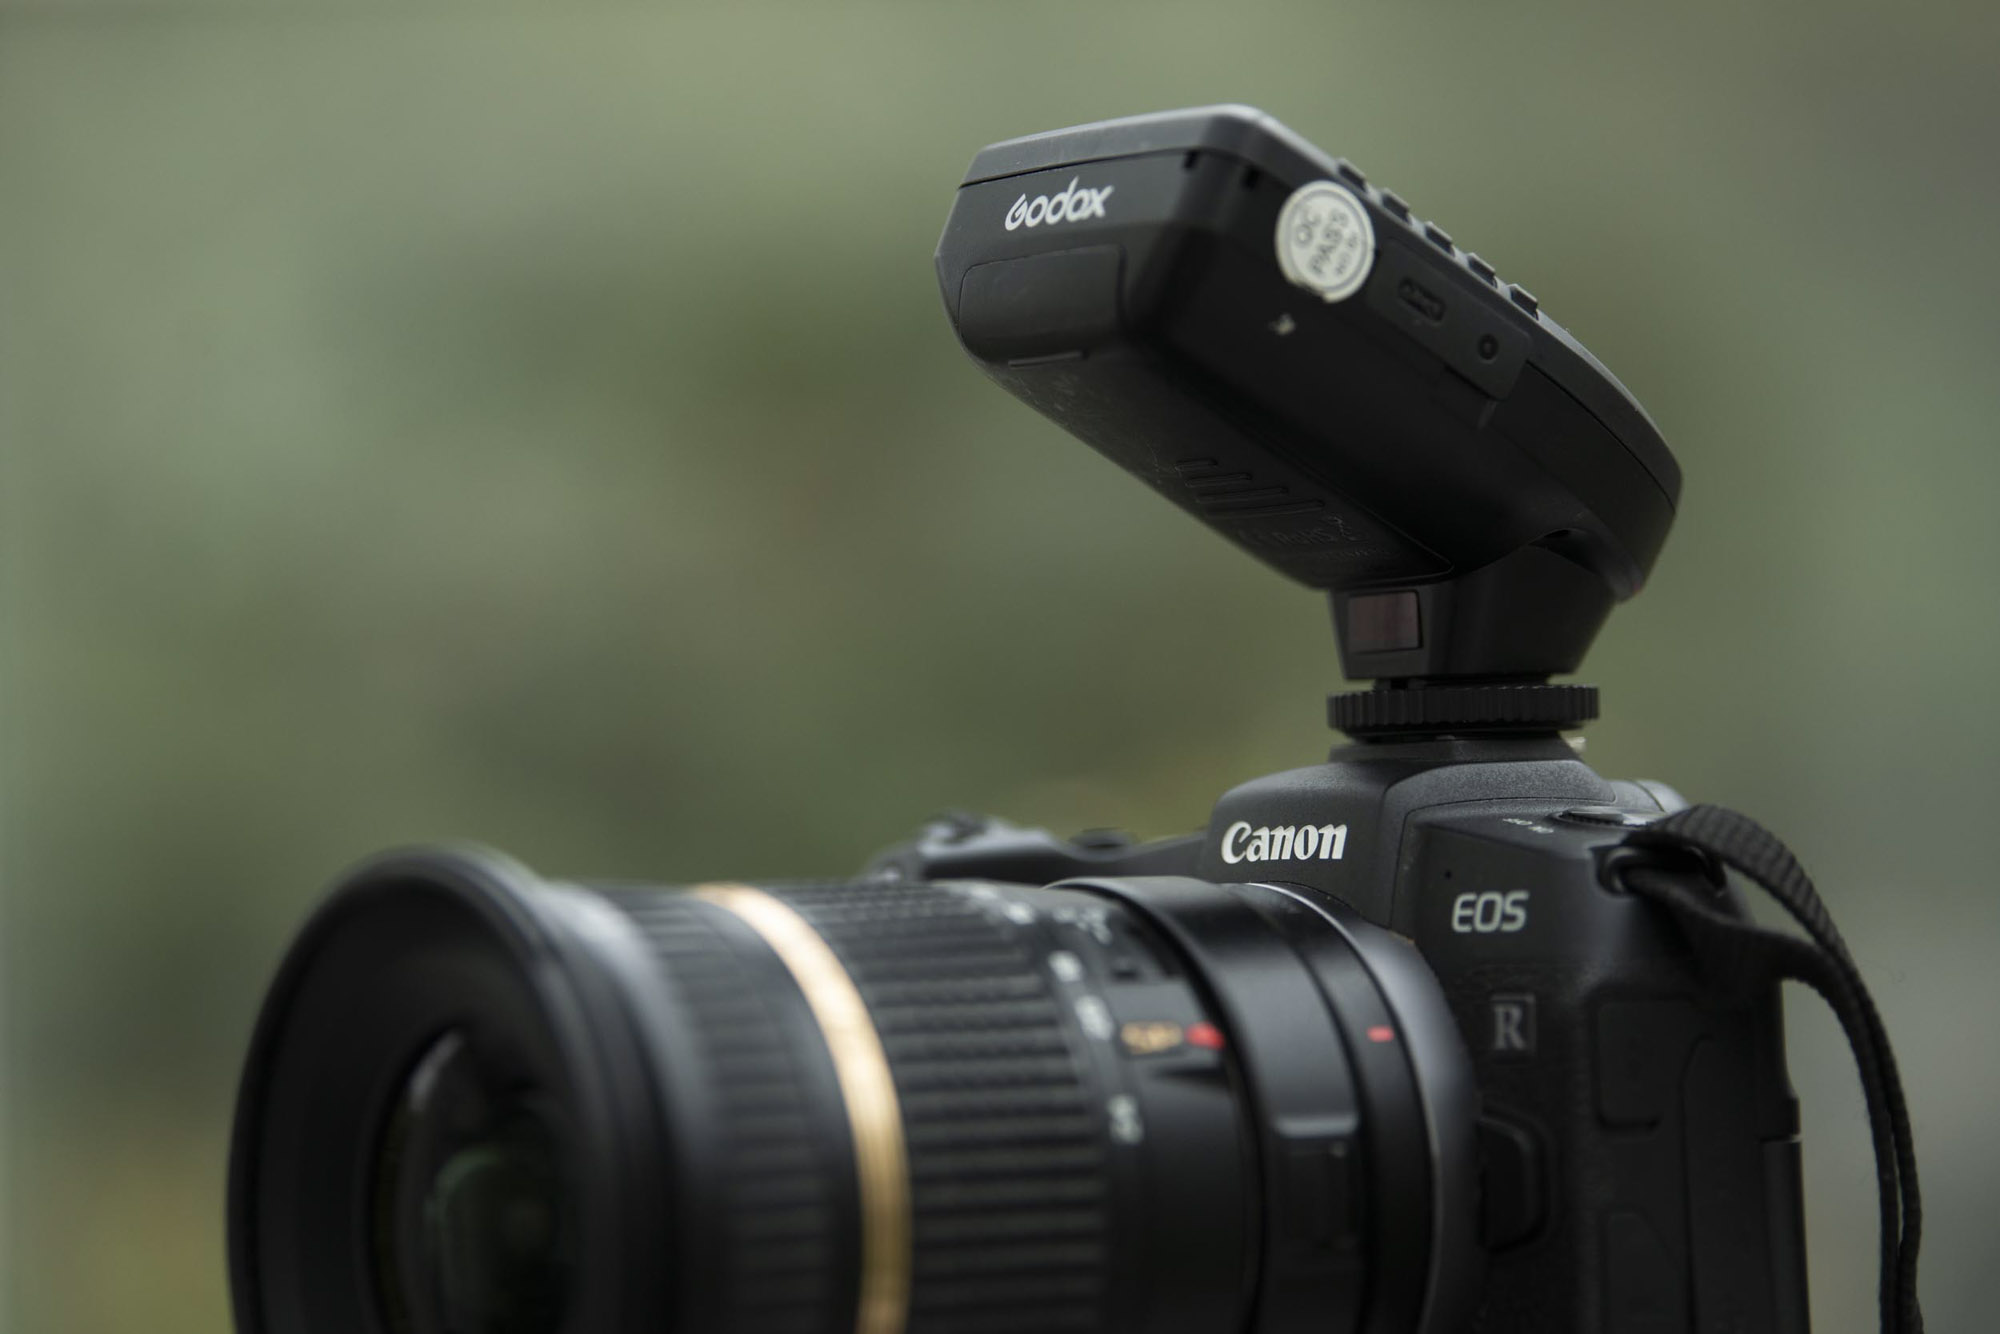
You’ll need to connect a flash trigger to your camera to fire your off-camera flash. This Godox trigger links with the Godox AD300 Pro flash we used, but any cheap flash trigger and receiver can be used to fire an off-camera Speedlite. At a pinch, you can use a pop-up flash (if your camera has one) to fire another flash.
3. Gel your flash
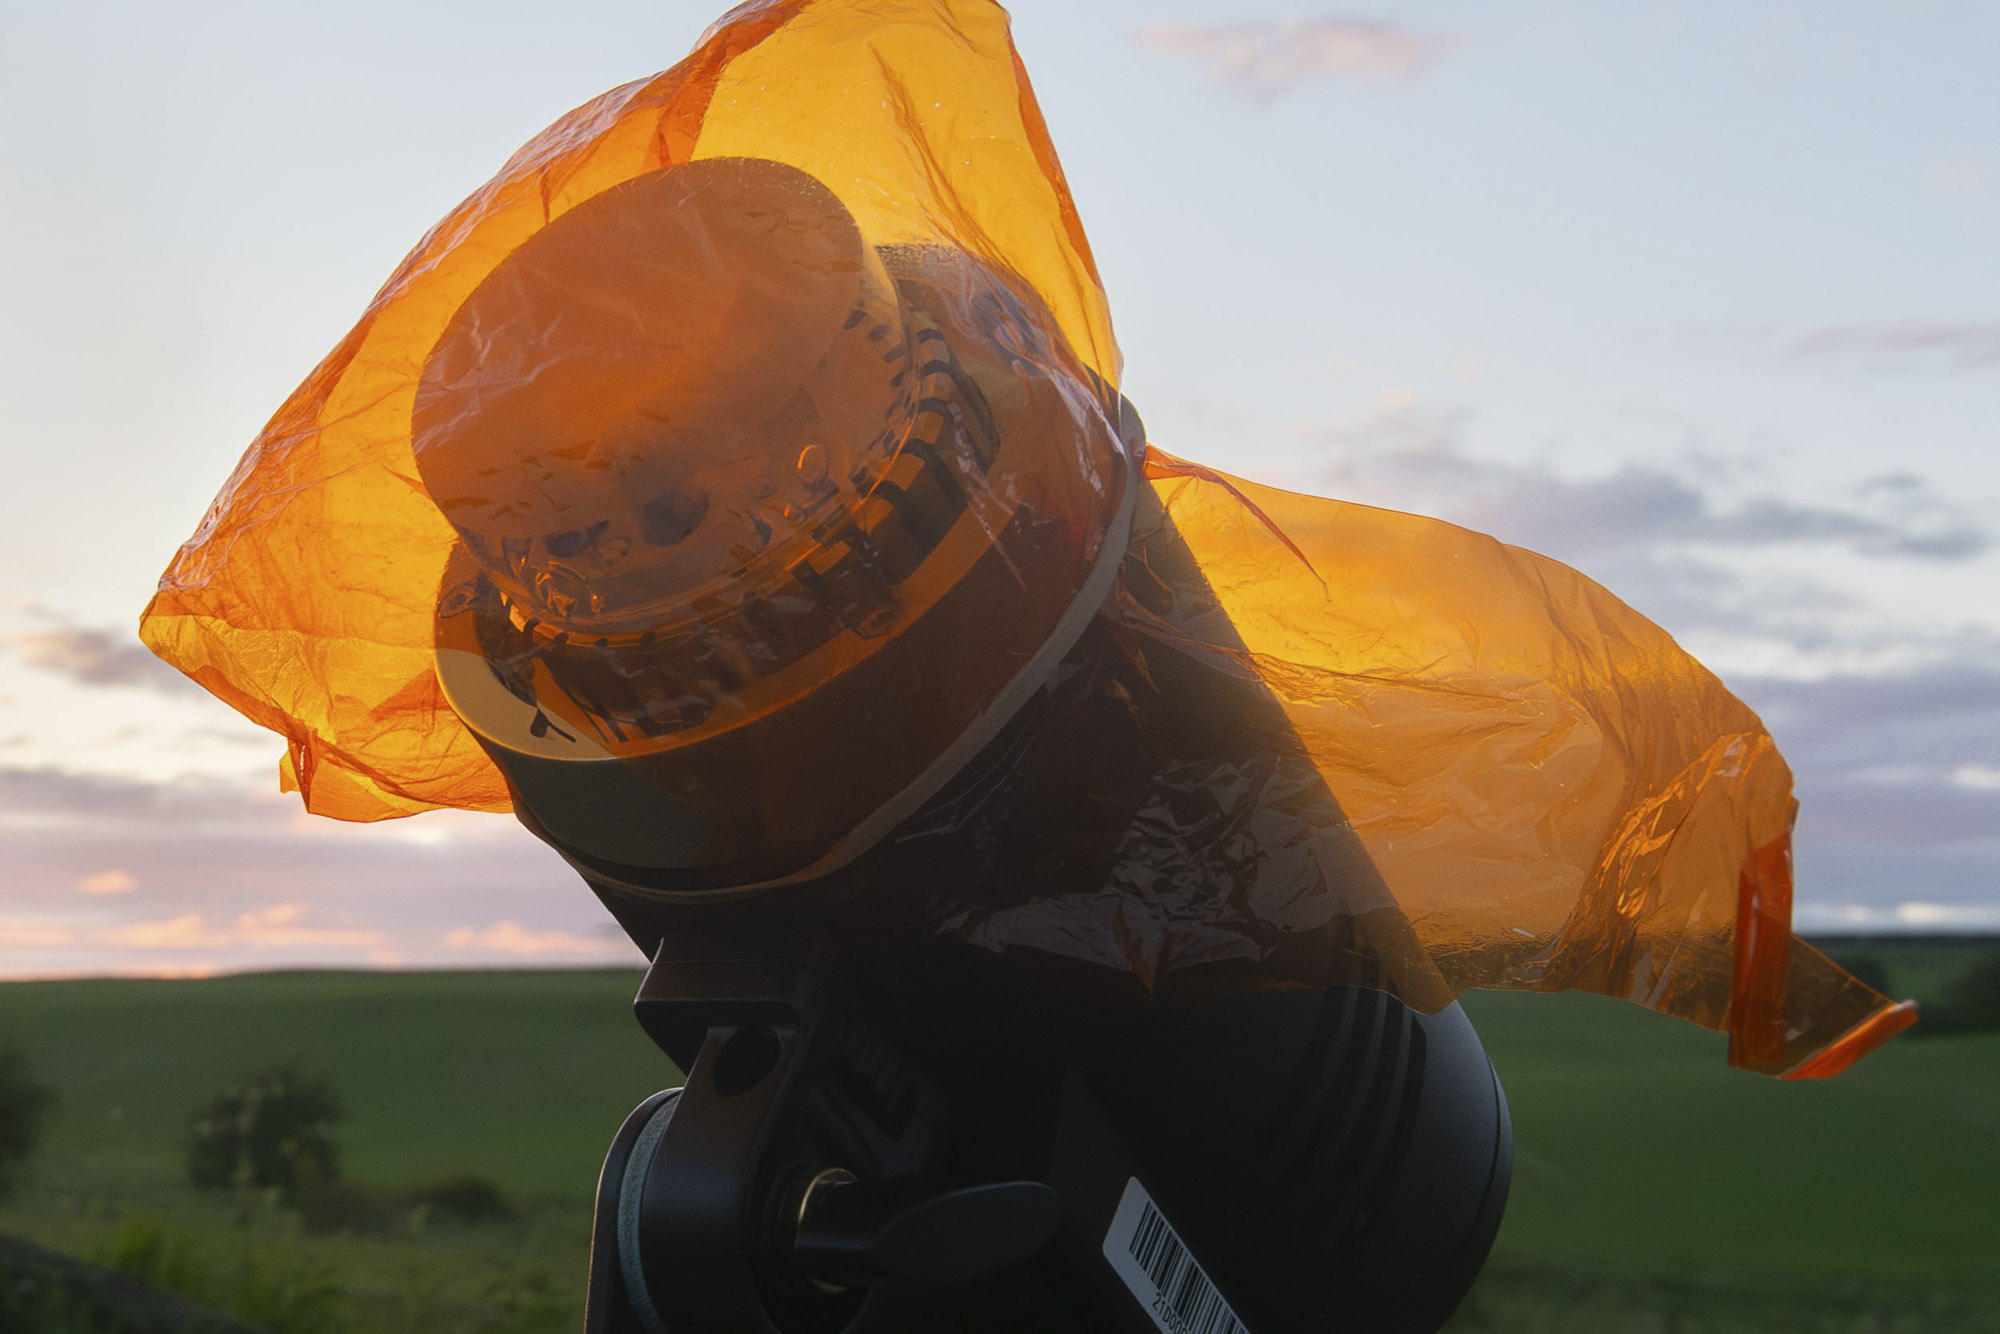
Bare flashes usually produce light similar in color to daylight, which has a color temperature of around 5600 Kelvin. But at sundown, the light can become warmer, then at twilight it becomes much cooler. You might want to try gelling your flash with a CTO gel to match the evening light, or to contrast with it.
4. Set up the Self-timer
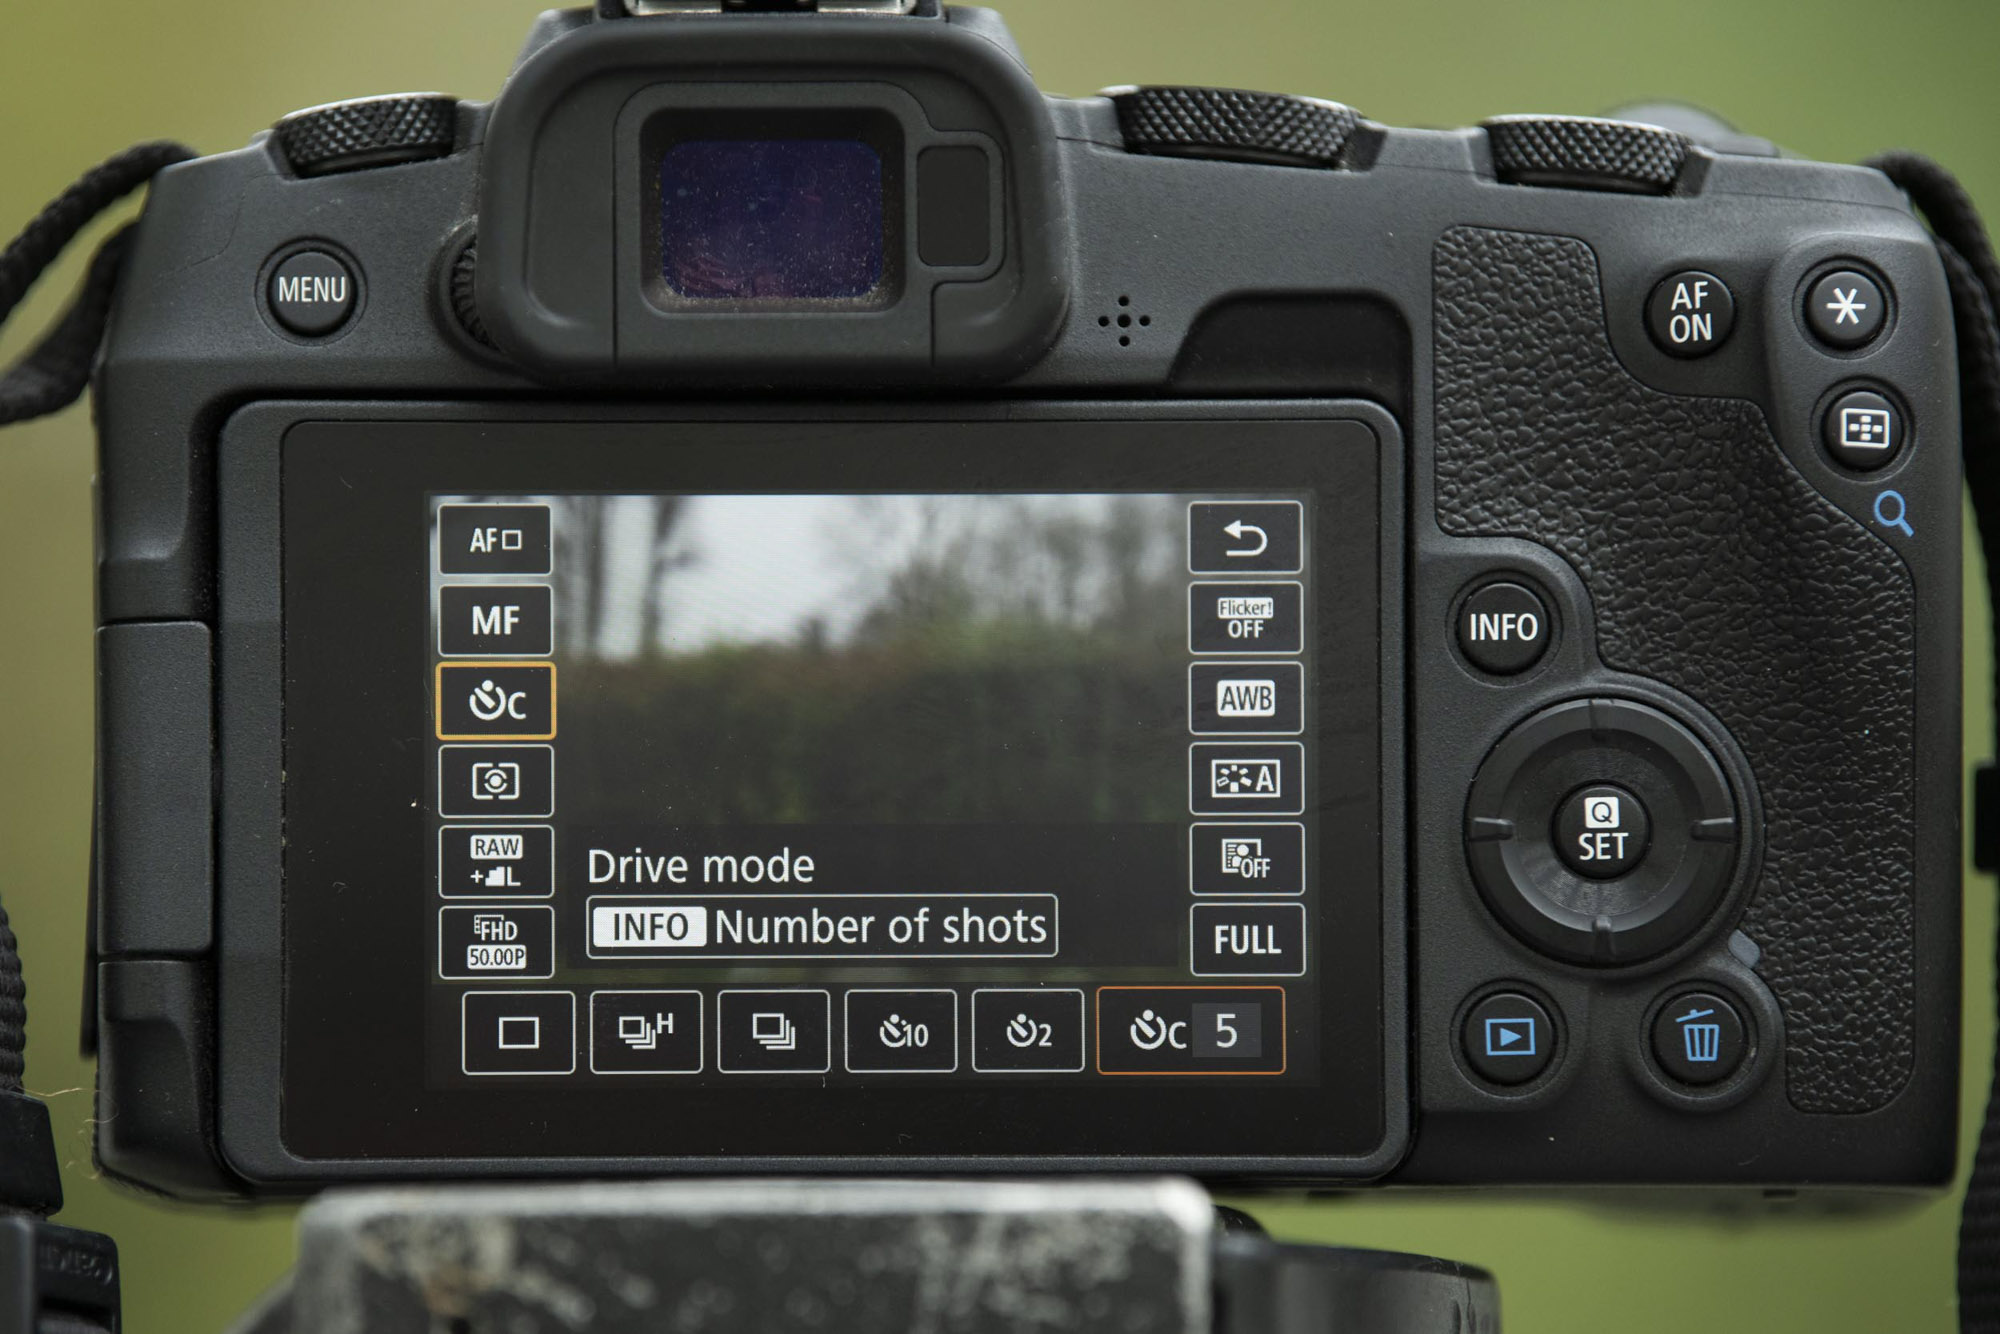
If you have a wireless shutter release then you can use this to set off the shutter while you hold the flash in place. If not, you could equally use the self timer (C mode lets you fire several frames). Alternatively, use the Canon Camera Connect app to trigger the camera with your smartphone.
5. Don't go full frontal
Here’s what not to do! If you use your flash from a similar position to the camera (or worse, use an on-camera flash) then the light will be straight-on. This results in flat, frontal light that falls away quickly, so close details are overly bright, and distant areas are near-black. Instead, fire your flash from the left side.
6. Match flash with skies

The great thing about using flash light in landscape photography is that you can fine tune your exposure for the optimum sky. The delicate colours of twilight are usually very difficult to capture without leaving the foreground very dark, but as we’re using a flash to lift the foreground this hardly matters.
7. Prepare your layers
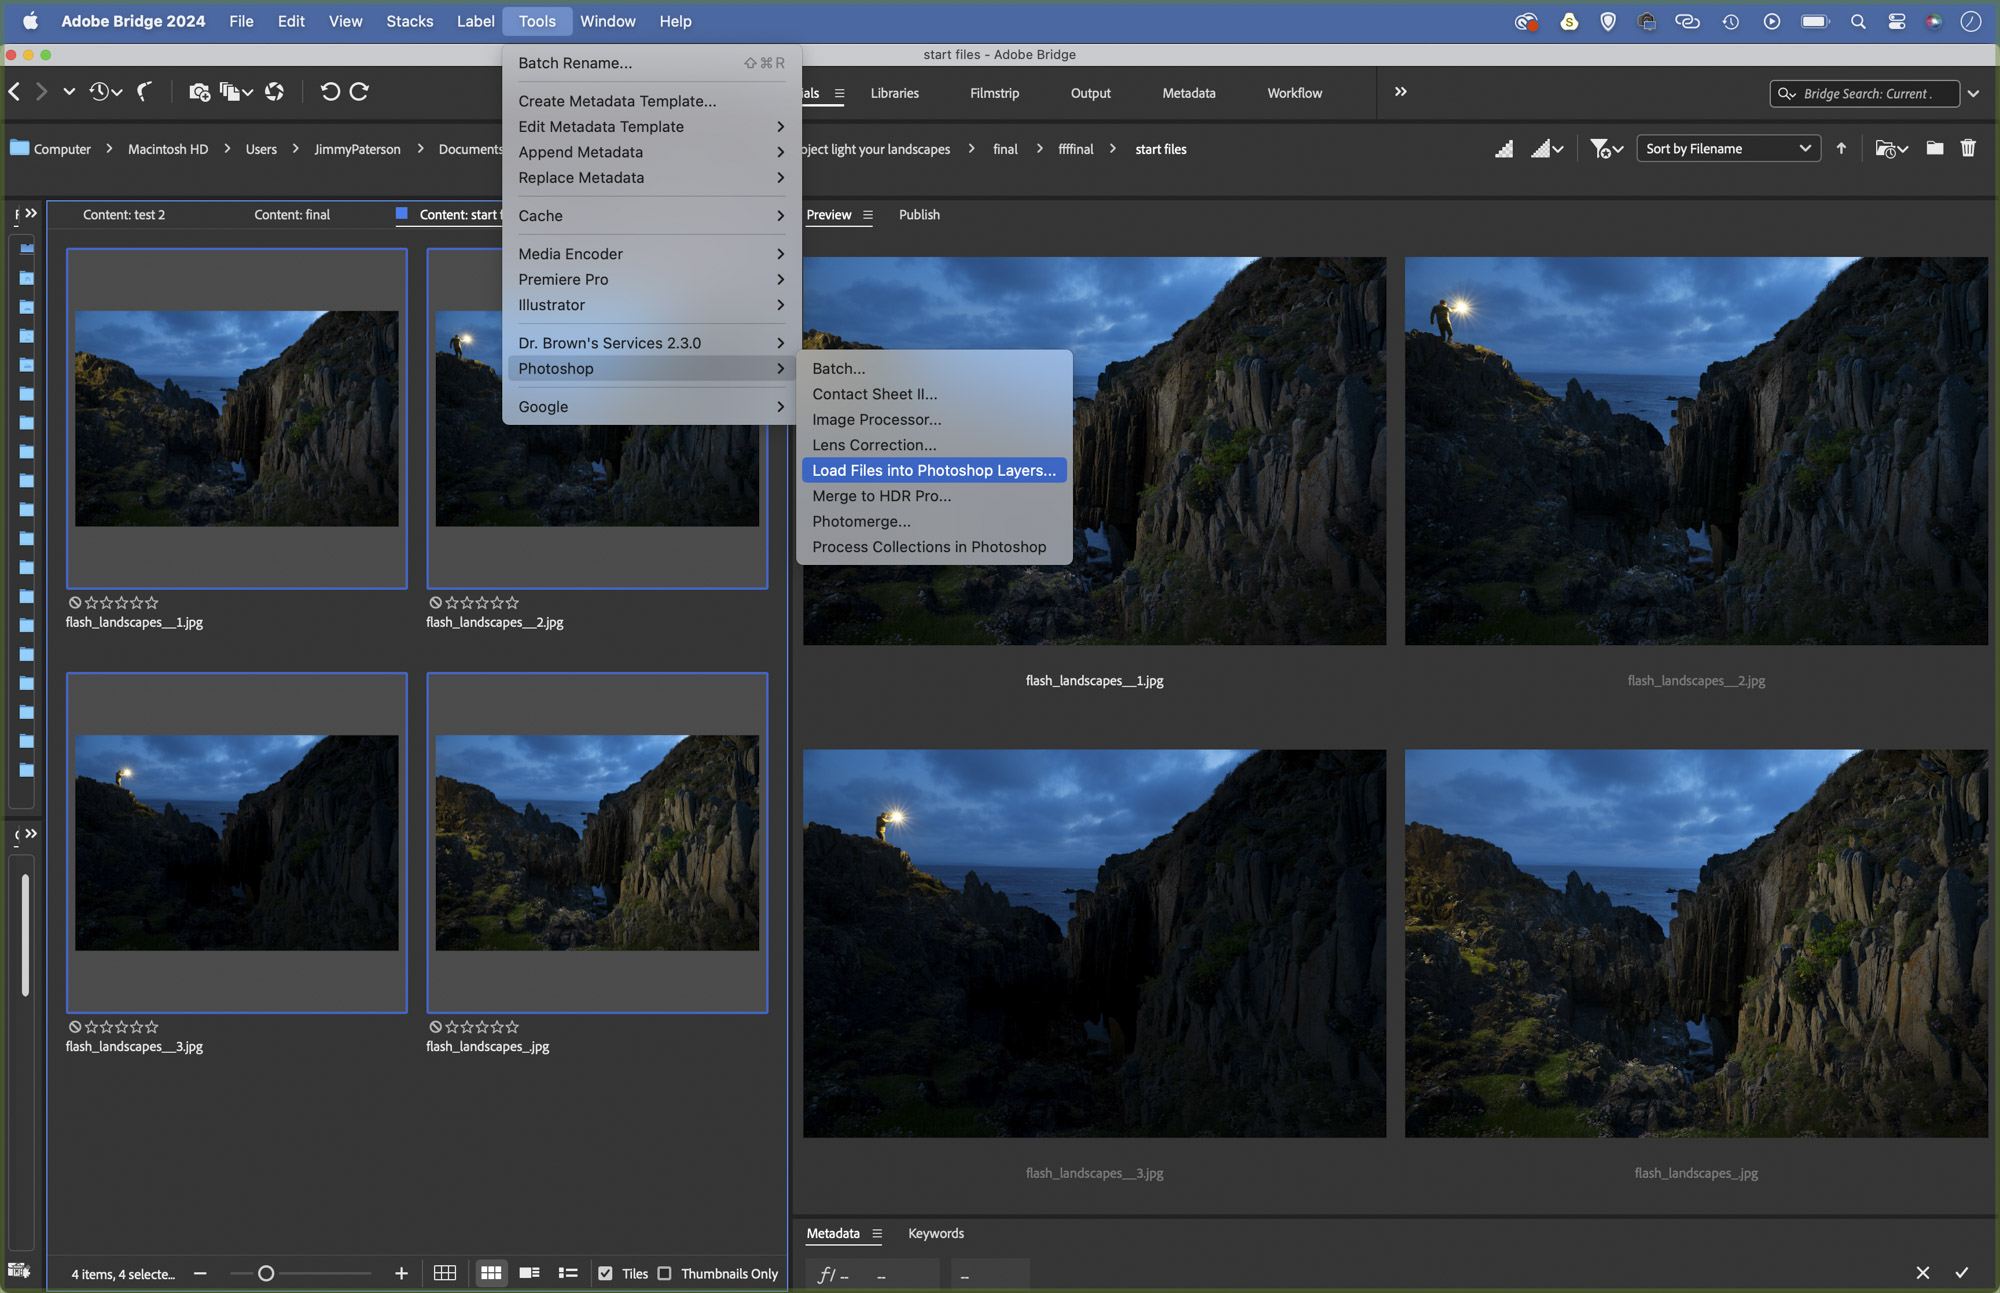
Choose the images you’d like to combine – we used four – then make any changes you like to the entire set using Adobe Camera Raw or Lightroom. Once done, Cmd/Ctrl+click to highlight the images in Bridge, then go to Tools > Photoshop > Load files into Photoshop Layers.
8. Combine the best bits
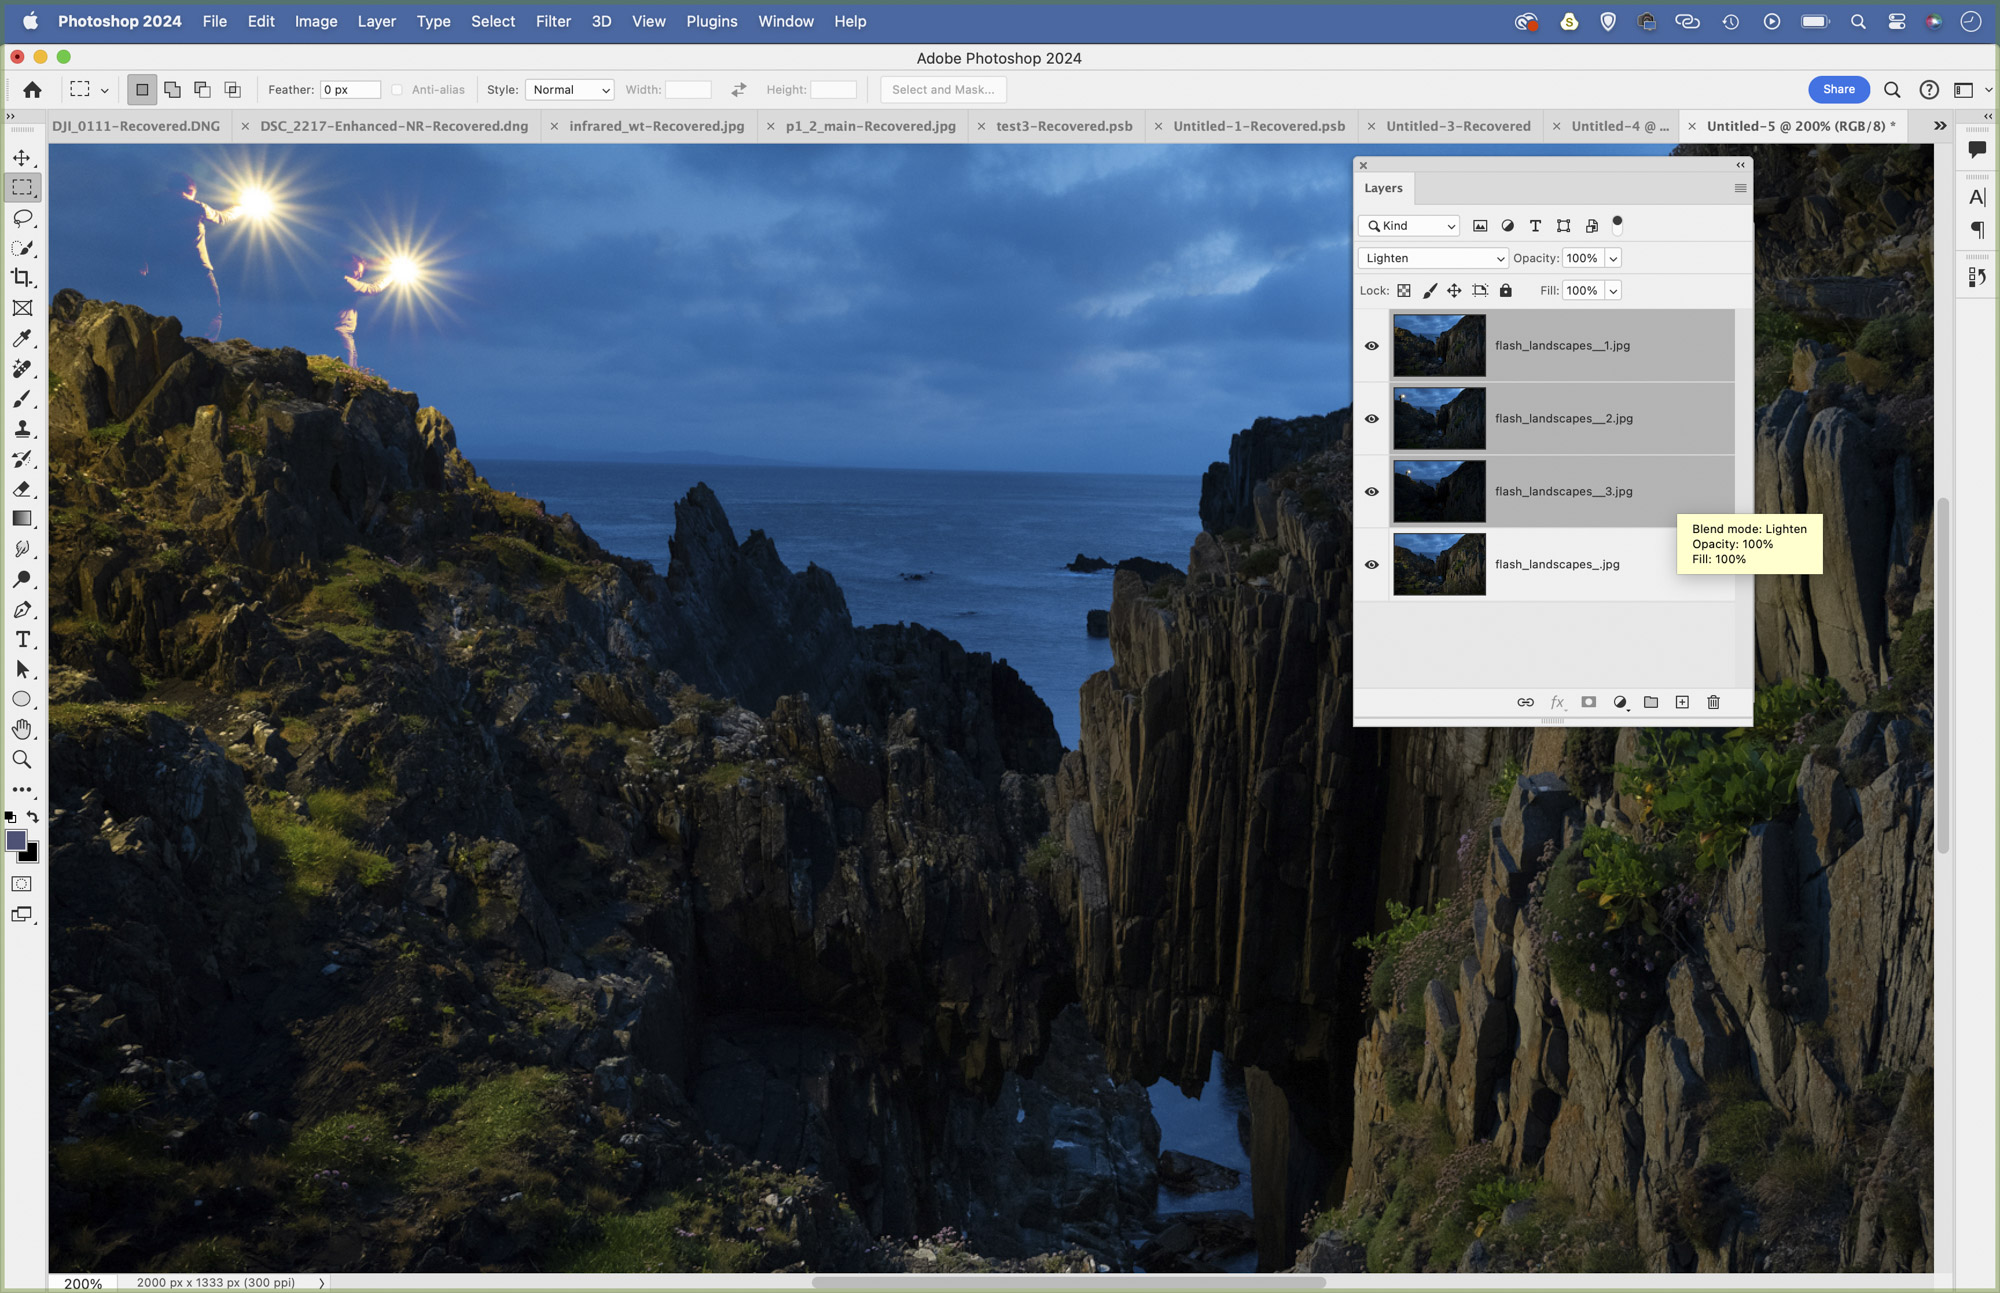
Now in the Photoshop workspace, go to the Layers Panel and Cmd/Ctr+click to highlight all but the bottom layer, then change the Blending Mode (from the drop-down menu) of them all to Lighten – this instantly combines all the brighter parts of those layers.
9. Reveal the figure
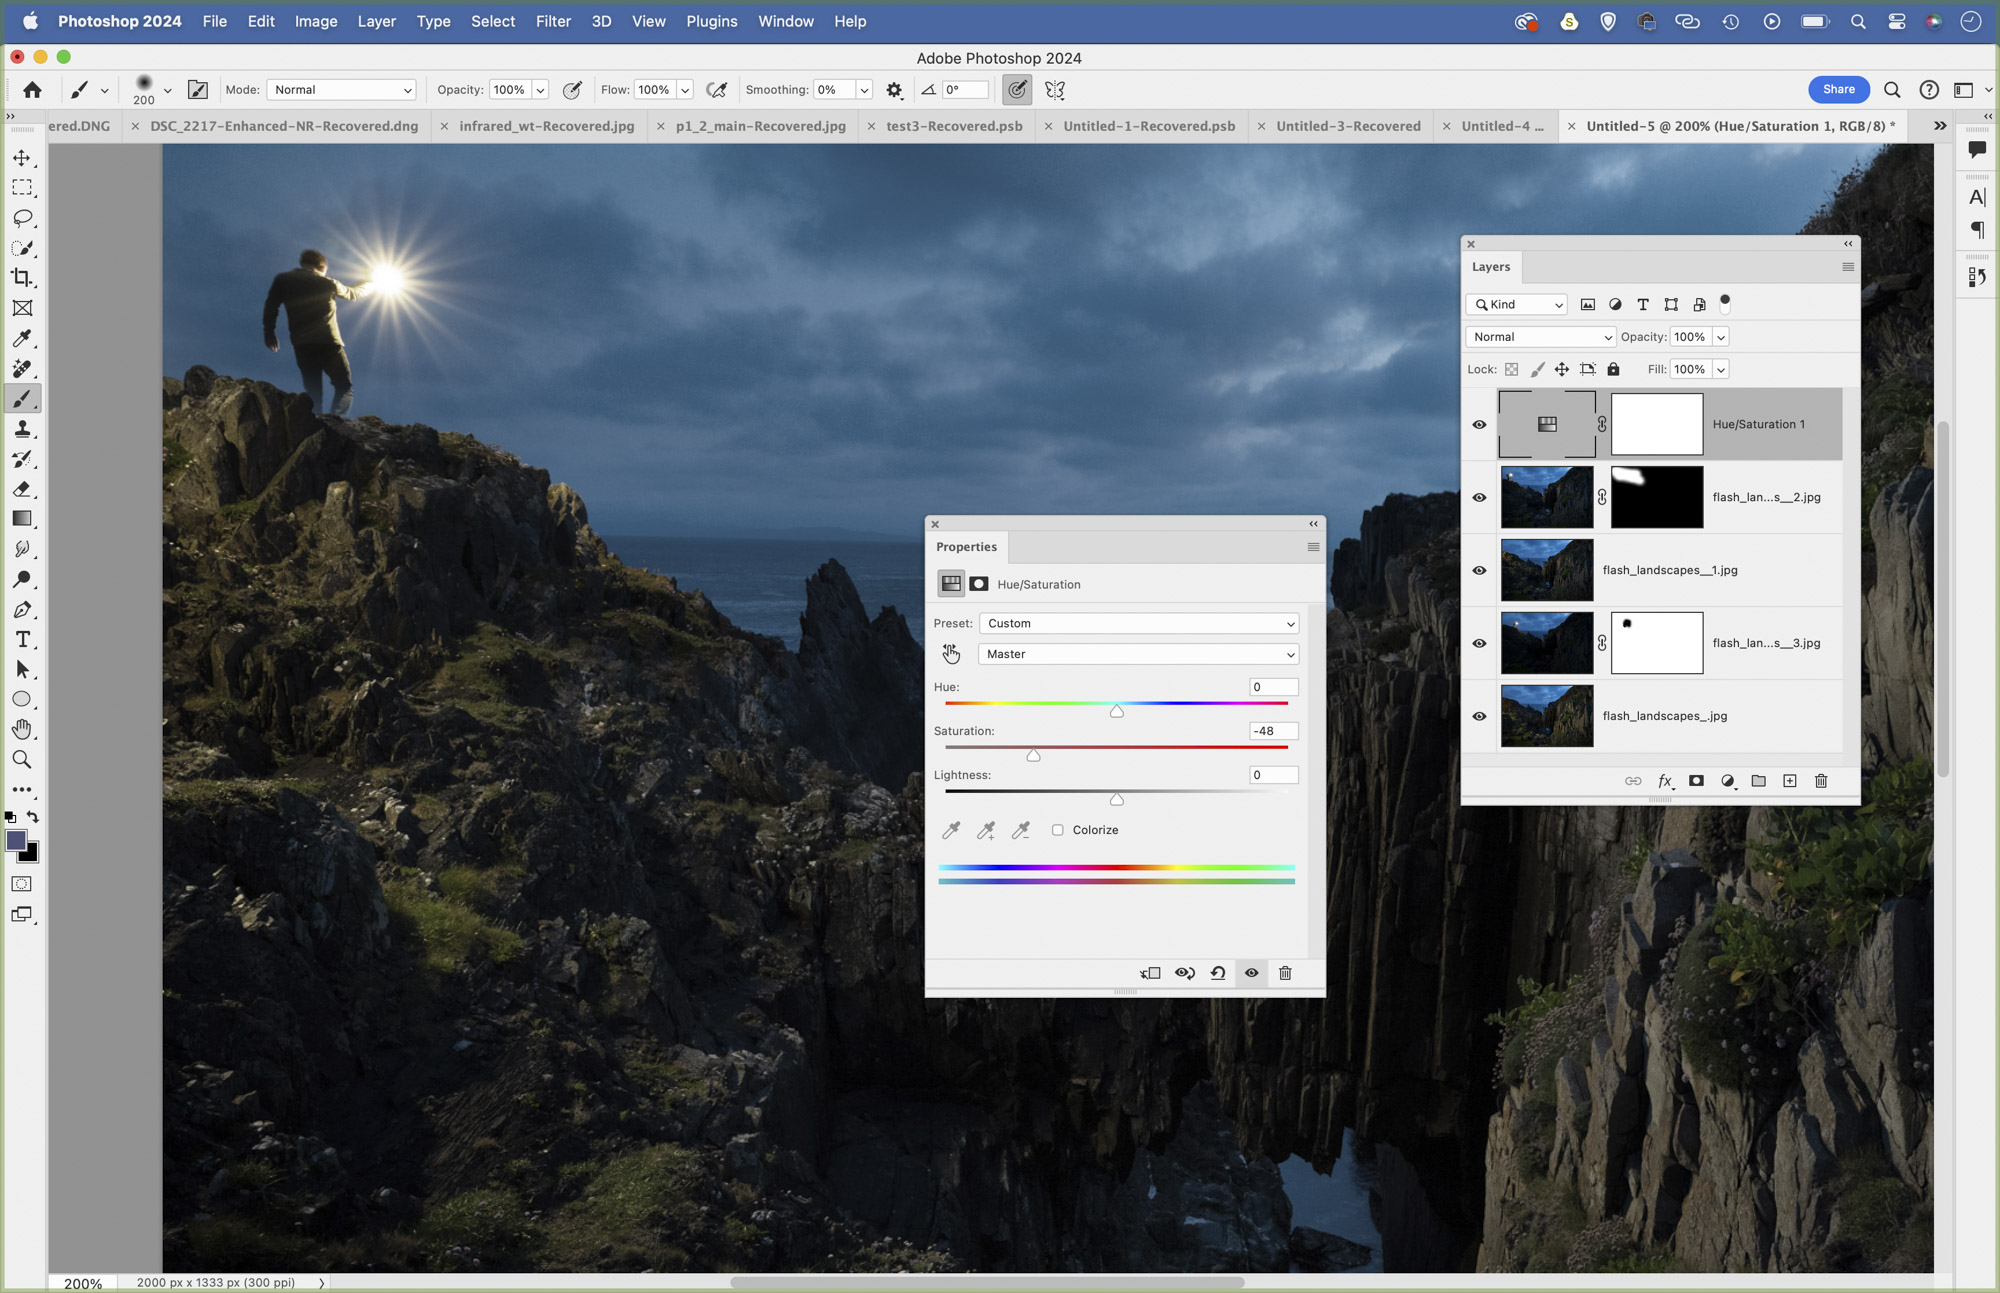
If you want to include a figure like this, drag the layer to the top of the stack and set the Blending Mode back to Normal. Hold Alt and click the Add Mask icon to add a full black mask, then paint with a white brush to reveal the figure. Make any tonal changes you like to finish the editing.
If you're serious about scenery, take a look at the best cameras for landscape photography along with the best lenses for landscapes.