Hey there, I'm Declan Walsh. I've been working in the animation industry for 25 years, and in that time I've amassed a wealth of experience working on classic movies, games, and various other projects.
However, here's the thing... I'm still learning! In this industry, learning never stops. My latest escapade brings me to Cartoon Animator (CTA), where I got to collaborate with Reallusion to showcase its features. The thing I absolutely adore about CTA is its inclusive approach that embraces artists of all skill levels. It allows me to keep honing my traditional animation skills, even in the face of the latest industry advancements. And let me tell you, their community is incredibly supportive – just like any top-notch animation studio!
My choice of 2D animation software
I must admit, the abundance of tools in Cartoon Animator is simply mind-boggling – it's a veritable playground for individuals like myself!
To illustrate, I recently created an animation featuring a character breathing under a blanket. To achieve the desired effect, I utilised the Free Form Deformation (FFD) editor. This powerful tool allowed me to manipulate and deform the blanket as the character breathed, enhancing the realism of the scene. By keyframing the transformations on the timeline, I seamlessly brought the prop and character to life.
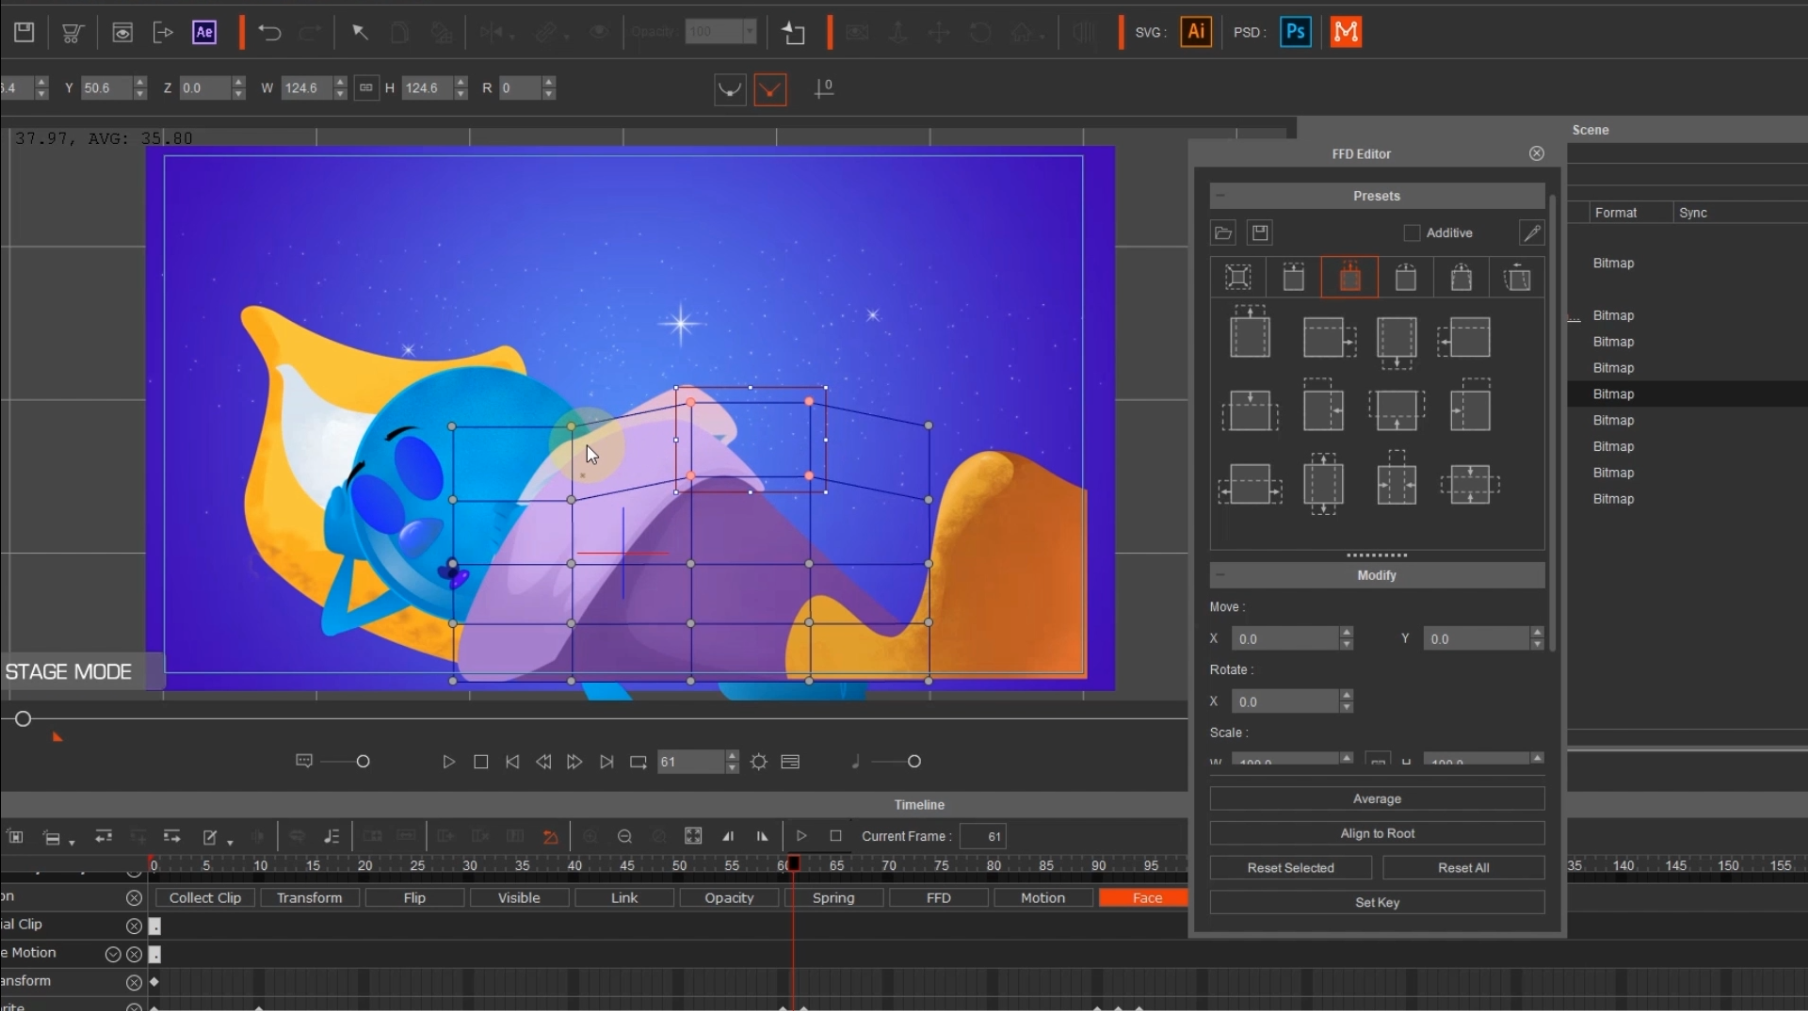
Furthermore, Cartoon Animator offers a range of presets that greatly aid in the animation process. For instance, I made use of the squash and stretch presets, making slight adjustments to tailor them precisely to my needs. These presets provided a solid foundation upon which I could build the desired results. Additionally, in a particular moment of my animation, bubbles needed to appear on the screen, and once again, the FFD editor proved instrumental in achieving the desired effect.
One thing I truly appreciate is infusing subtle movements into my scenes, as it adds a captivating level of vitality. I meticulously identify areas where I can introduce motion, always ensuring it complements the focus and main action without overshadowing them. It could be something as simple as floating bubbles, twinkling stars around the character's head, or gentle ripples on the water. These subtle touches breathe life into the animation, making the scenes more immersive and captivating.
Create GIFs and animated sequences
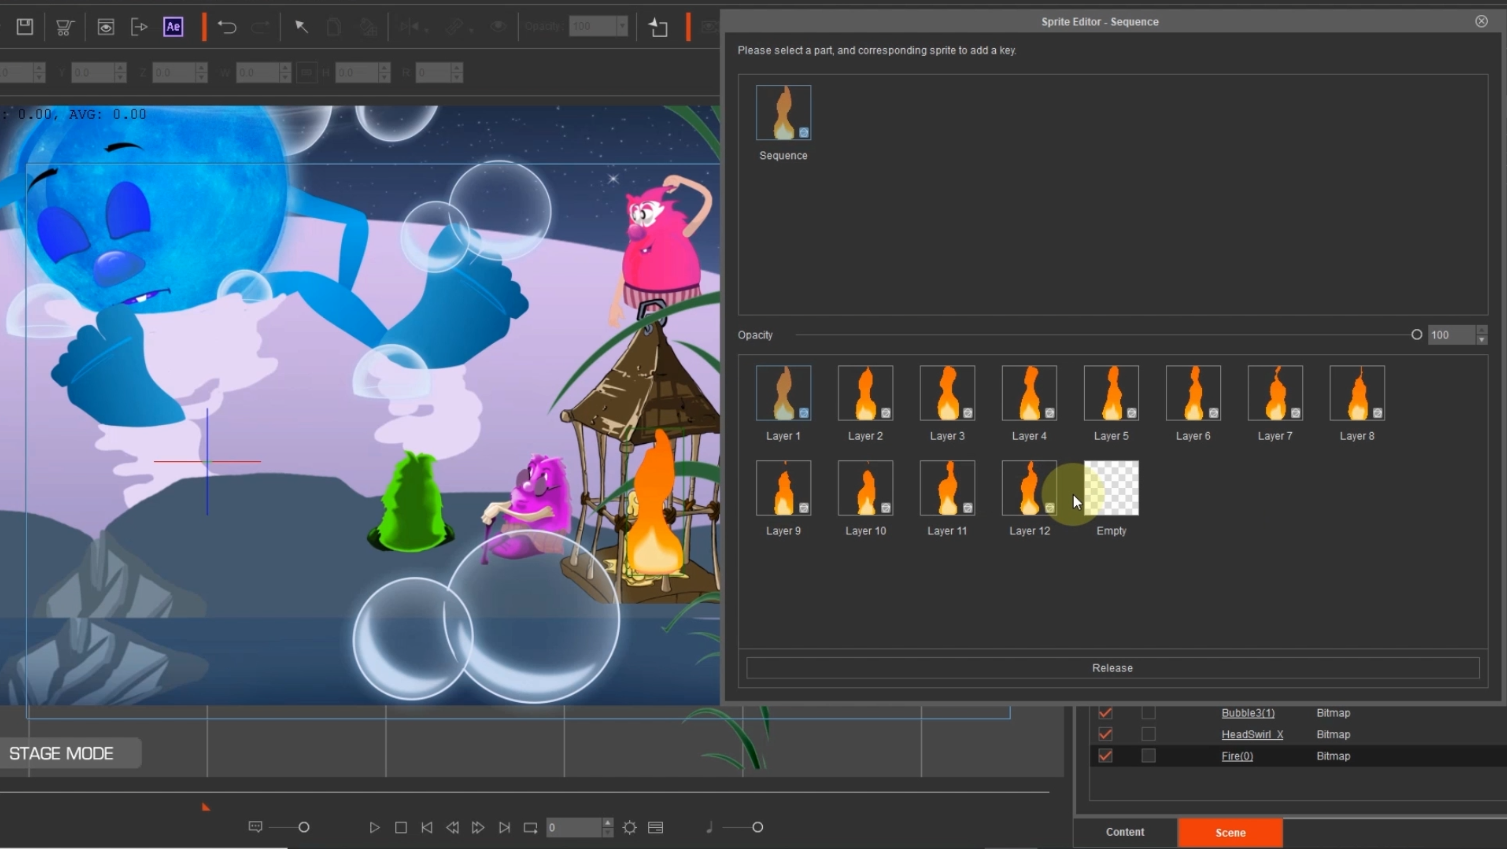
In one of my scenes, I depict a character seated on a massive lantern, gazing at the Moon character literally sitting in the water. It presented a perfect opportunity to add a candle flame, subtly enhancing the scene's atmosphere. However, I wanted to ensure the candle flame didn't overpower the main focus on the characters in the scene.
Thankfully, Cartoon Animator (CTA) now supports the import of GIF and APNG motions. In previous versions, when these files were dragged onto the stage, they remained static as individual graphics.
It's worth noting that GIF files have a limited colour palette, supporting up to 256 colours, while APNG files can accommodate millions of colours. For my specific purpose, I opted for a GIF format as the flame would be positioned behind a soft glow, ensuring it wouldn't dominate the scene.
Importing a file with sequence images directly into CTA doesn't grant access to its individual frames within the software. However, if you need to manipulate the GIF, such as erasing a colour background, removing, or adding frames, here's how you can do it:
- Bring your GIF into Photoshop
- Photoshop will separate the images into layers, allowing you to view the individual frames. You can then edit them as needed
- Group the images into a folder within Photoshop; it doesn't matter what you name the folder at this stage
- Place that folder inside another folder and label it 'Sequence'
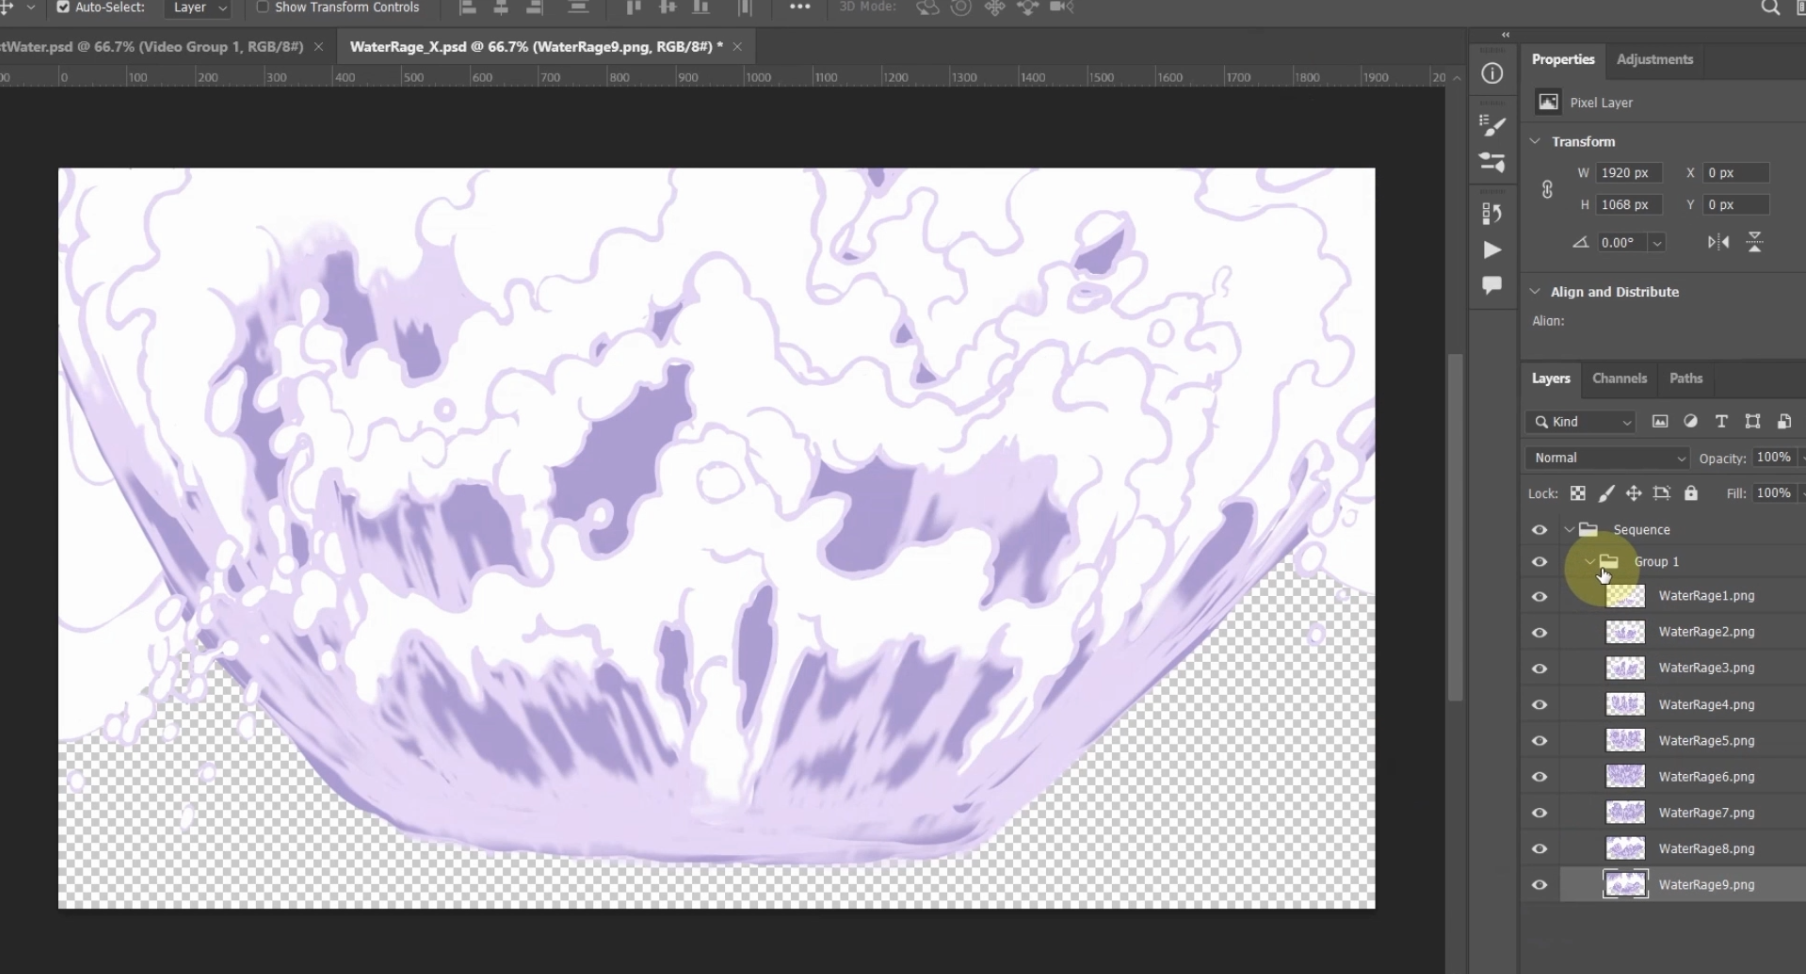
- Import the modified GIF into CTA and open the sprite editor. Now, all the frames will be displayed there for further adjustments and animation
Real-time editing with Photoshop and Illustrator
In the scene featuring the Moon sitting in the water, I wanted to incorporate ripples around the character's body and feet. Since the character's feet remained stationary, I separated them into their own element. Within CTA, I disabled the character's feet and animated the ripples around them in Photoshop. This approach allowed me to layer the ripples effortlessly, achieving the desired effect.
I anticipated that some adjustments might be necessary after completing the animation. It could be a matter of aligning elements properly or tweaking the timing. The thought of repeatedly switching between CTA and Photoshop, setting up frames in the sprite editor each time, seemed like a daunting task. However, this recent update offers a more streamlined workflow.
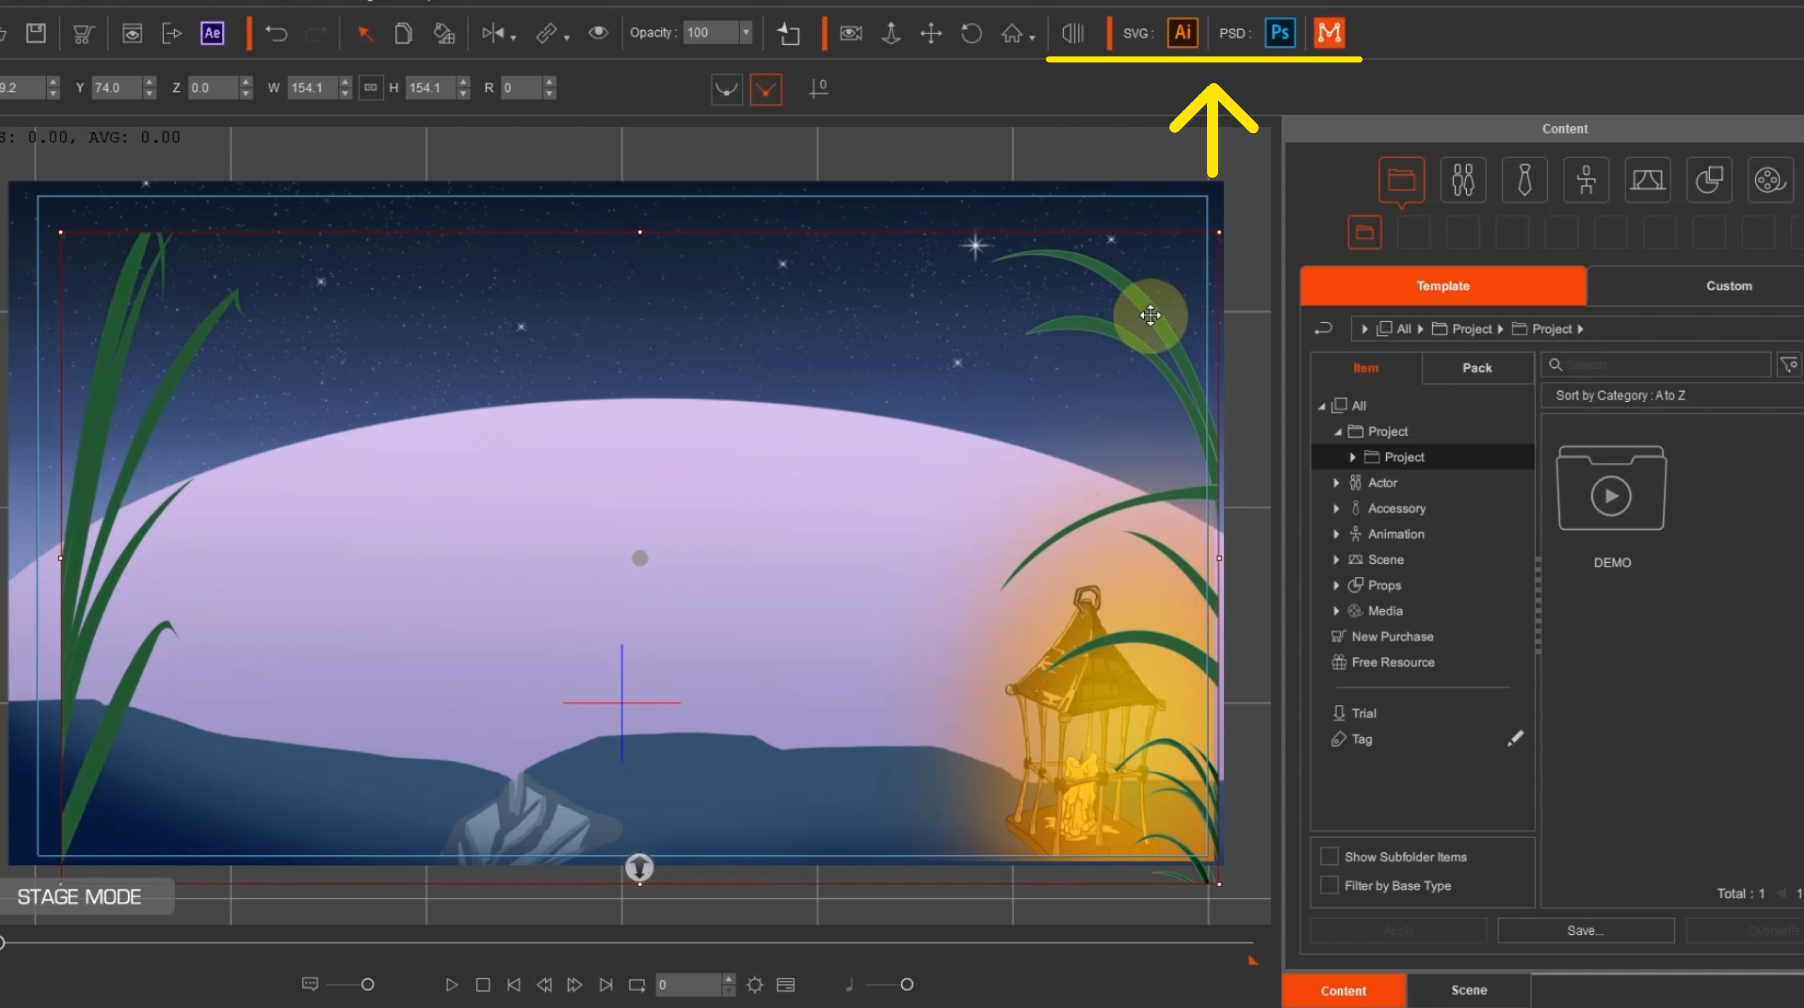
Within CTA, I utilised the 'create in PSD editor' feature by opening the file at the top right corner. This functionality also works with SVG files, extending the flexibility. By locating and selecting the PSD file, CTA seamlessly launched Photoshop while establishing a link between the two programs.
Any adjustments made in Photoshop now automatically update in CTA. I can fluidly switch back and forth, working on the animation and making necessary edits without the need to repeatedly set up the frames. This real-time production flow process with synchronised updates significantly enhances efficiency, whether using Photoshop for PSD files or Illustrator for SVG files.
Pro Tip: When transferring sprites from the sprite editor to the timeline, utilise the arrow keys for swift navigation between images, making for a faster process.
Animating spring bones on 2D characters
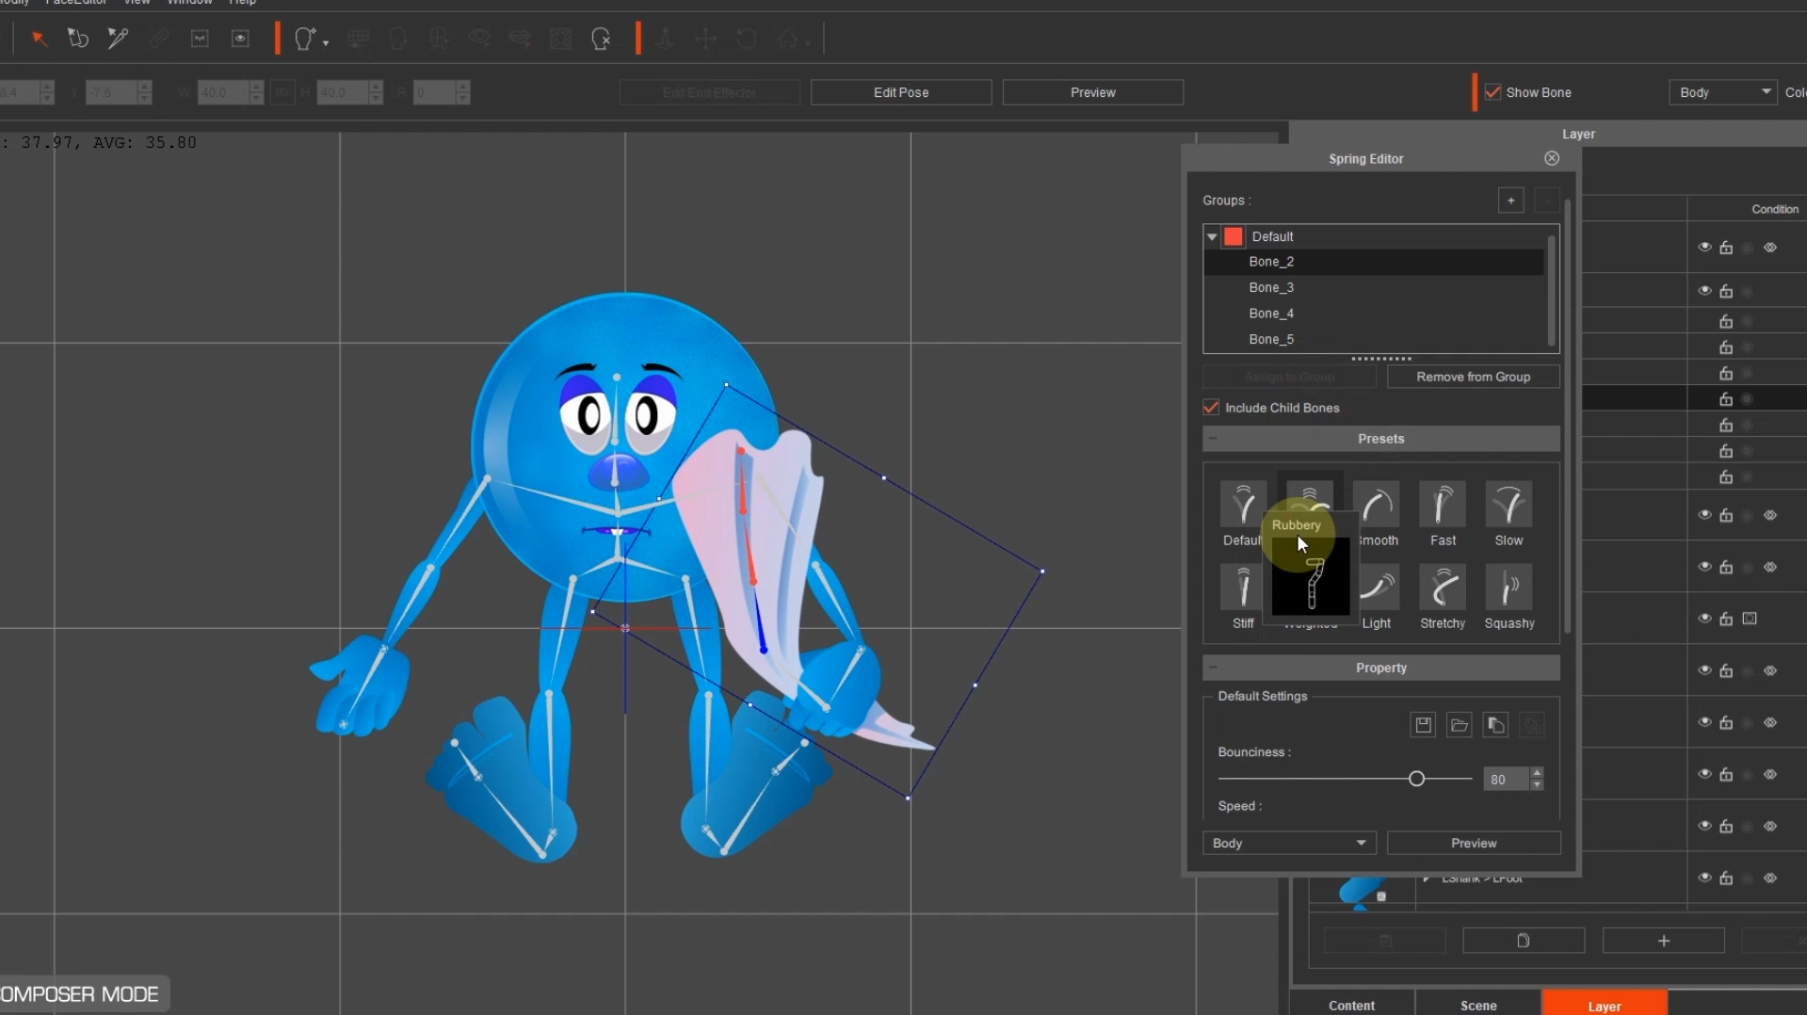
In the initial scene where the Moon tumbles out of bed, I had already animated the bedclothes cascading away. As the scene progressed, the Moon falls past the camera and through the clouds. Always eager to infuse motion into my scenes, I swiftly set up spring bones on the cloth held in the character's hand. Once he was in motion, the spring bones automatically handled the realistic flailing of the cloth during his descent. Spring bones are a remarkable feature that adds secondary motion to characters or props. With their pre-set options and precise adjustment controls, achieving the desired effect is effortless.
Now, a final note. Personally, I haven't utilised the camera feature in CTA extensively, although it is an exceptional tool. In this particular project, I embraced its capabilities, and I must say, it truly enhances the overall outcome. If you, like me, have underutilised this feature, I highly recommend taking the time to familiarise yourself with it. The camera feature can elevate the storytelling and presentation of your animations to new heights.
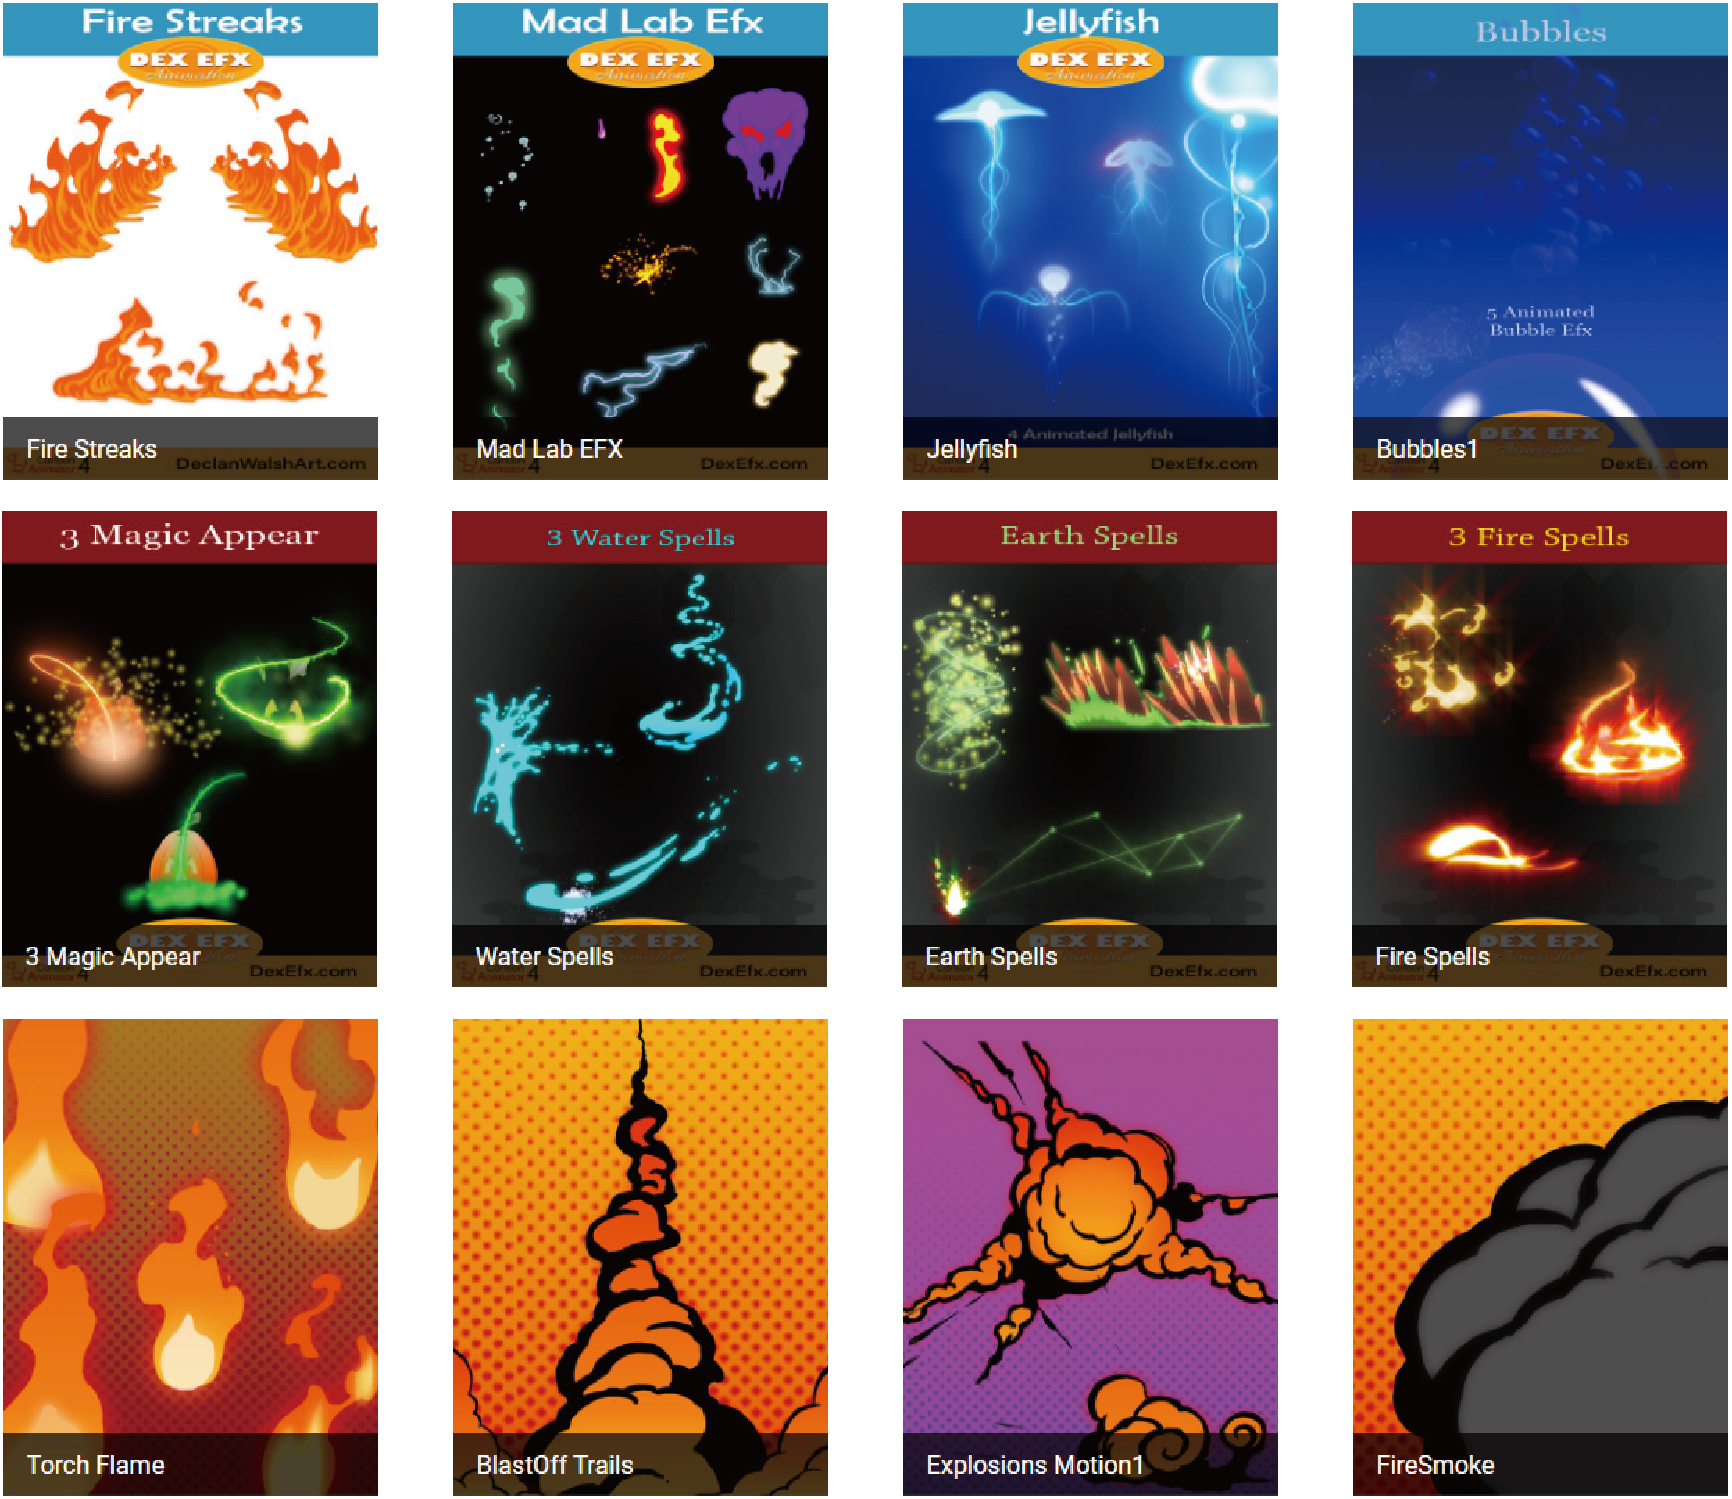
The process of creating animations has become incredibly accessible, especially with CTA providing us with a vast library of characters, backgrounds, and props. Additionally, I have curated over 200 hand-animated special effects available in the store, each containing 3 to 5 unique animations. Feel free to explore DexArt for these remarkable resources.
With a solid workflow in place, anything is achievable, from simple animations to the most intricate and elaborate scenes. So, go ahead and unleash your creativity. It's time to create and bring your visions to life — just as I have done!
Try Cartoon Animator for yourself for free for 30 days and access over 1,700 ready made assets. Explore Cartoon Animator now.


