
Watch video: Learn how to achieve razor sharp shots
Everyone wants sharper photos but buying a new camera or lens is not necessarily the answer. You likely already have everything you need for pin-sharp shots. Getting sharper shots often just means taking a little more time and trouble over camera settings and understanding some basic theory about ISO settings, lens apertures and shutter speeds.
All of these are covered in this photo project, but first let’s address a couple of points with depth of field, sharpness and the appearance of sharpness. You’ll hear a lot about depth of field. It’s the zone of sharpness that extends in front of and behind the thing you’ve focused on. Shallow depth of field is where only the subject is sharp and even things just in front of or behind it will appear out of focus. Deep depth of field is where things a lot nearer or further from the subject are still sharp – or appear to be.
There are lots of formulae for working out depth of field very precisely, which give the idea that there are very precise cutoff points where things will be sharp or not sharp. But in fact, sharpness falls off gradually, and ‘near and far’ depth of field distances are simply an arbitrary cutoff point where really there isn’t one.
So if you do want maximum depth of field for a landscape or a travel scene, remember that only the area you’ve focused on will be completely sharp. Don’t go looking at the background, thinking you’ve done something wrong just because it doesn’t have quite the same definition.
1. Aperture advice
No camera lens is perfect. You’ll see from our regular lens tests and reviews that all optics show variations in sharpness at different lens apertures. So how do you make sure you choose the best lens aperture for overall sharpness? These days, this will typically be two stops down from the lens’s maximum aperture for a consumer lens, eg from f/4 down to f/8.

The easiest way to set this is with your Canon’s Av (aperture value) mode. But beware if you do use a smaller aperture, say f/22, to gain more depth of field, as you’re likely to run into ‘diffraction’, an overall softening effect caused by the fact that light tends to scatter when pushed through small holes.
2. Better focusing
Depth of field is designed around ‘acceptable’ sharpness, not ‘maximum’ sharpness. Even if you shoot at a small lens aperture, only the thing you’ve focused on will be totally sharp. The rest will be ‘nearly’ sharp or ‘acceptably’ sharp. With close-ups in particular, you will never get complete front-to-back sharpness, so you might as well make background and foreground blur a feature with a combo of a longer focal length and wider aperture.

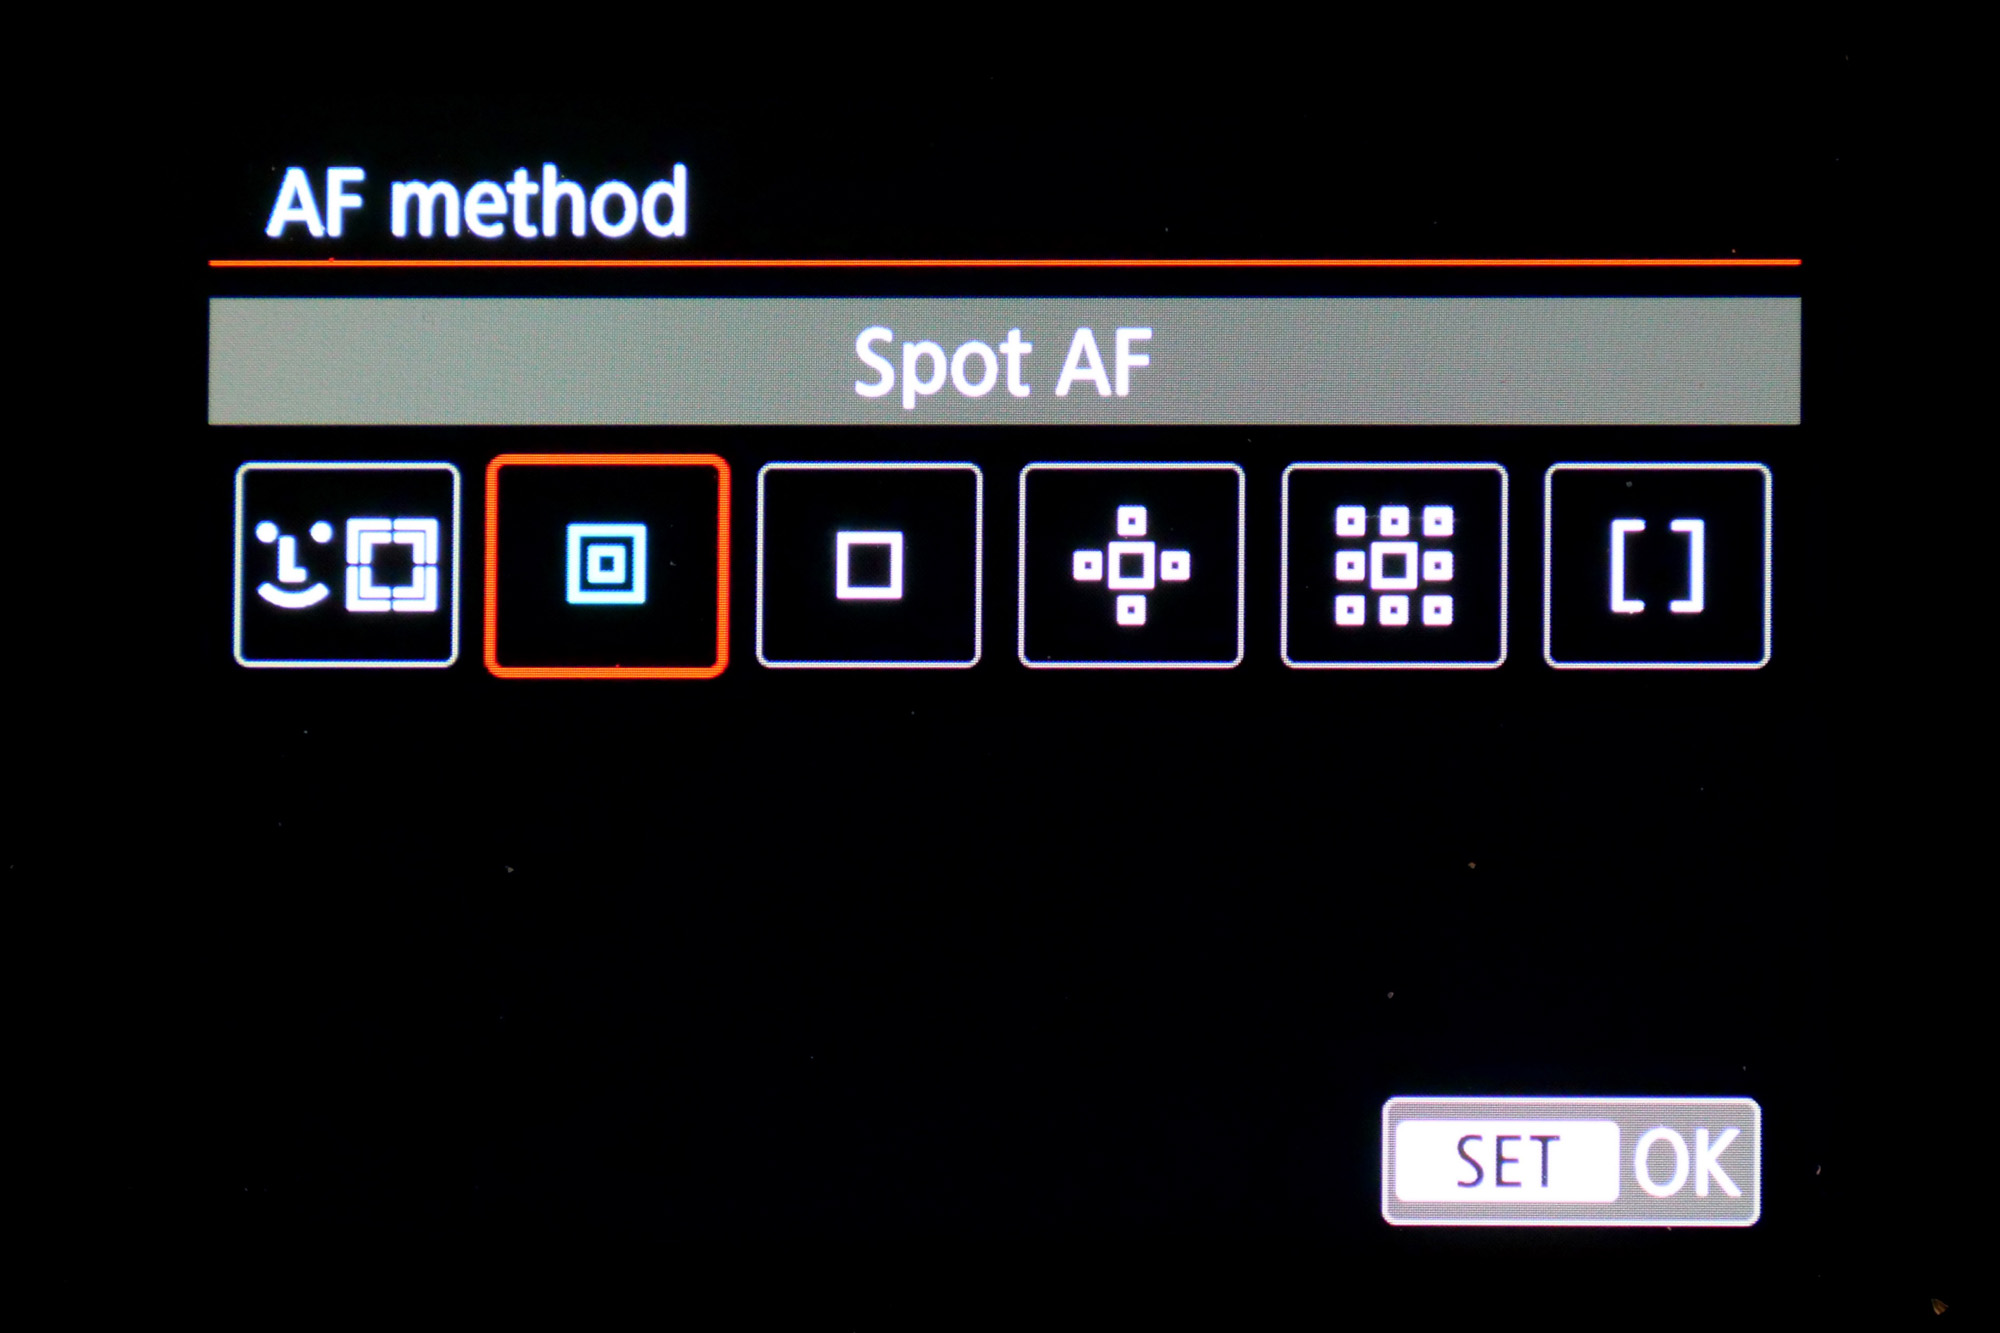
Focusing becomes much more important at wider lens apertures. Sometimes you’re better off with a one-point focus area because then you’re not hoping the camera will guess correctly. If you use Zone or Area AF, how do you know the camera will focus on the right thing?
3. Sharp handheld shots

Camera shake is the biggest enemy of sharpness, and if you can’t use a tripod you will have to shoot handheld, and this is where we need to talk about ‘safe shutter speeds’. The idea is that you use a shutter speed at least as fast as the reciprocal of your focal length. To put that in English, if you have a 50mm lens (in full-frame terms) you should be safe with a shutter speed of 1/50 sec. So how do you get that?
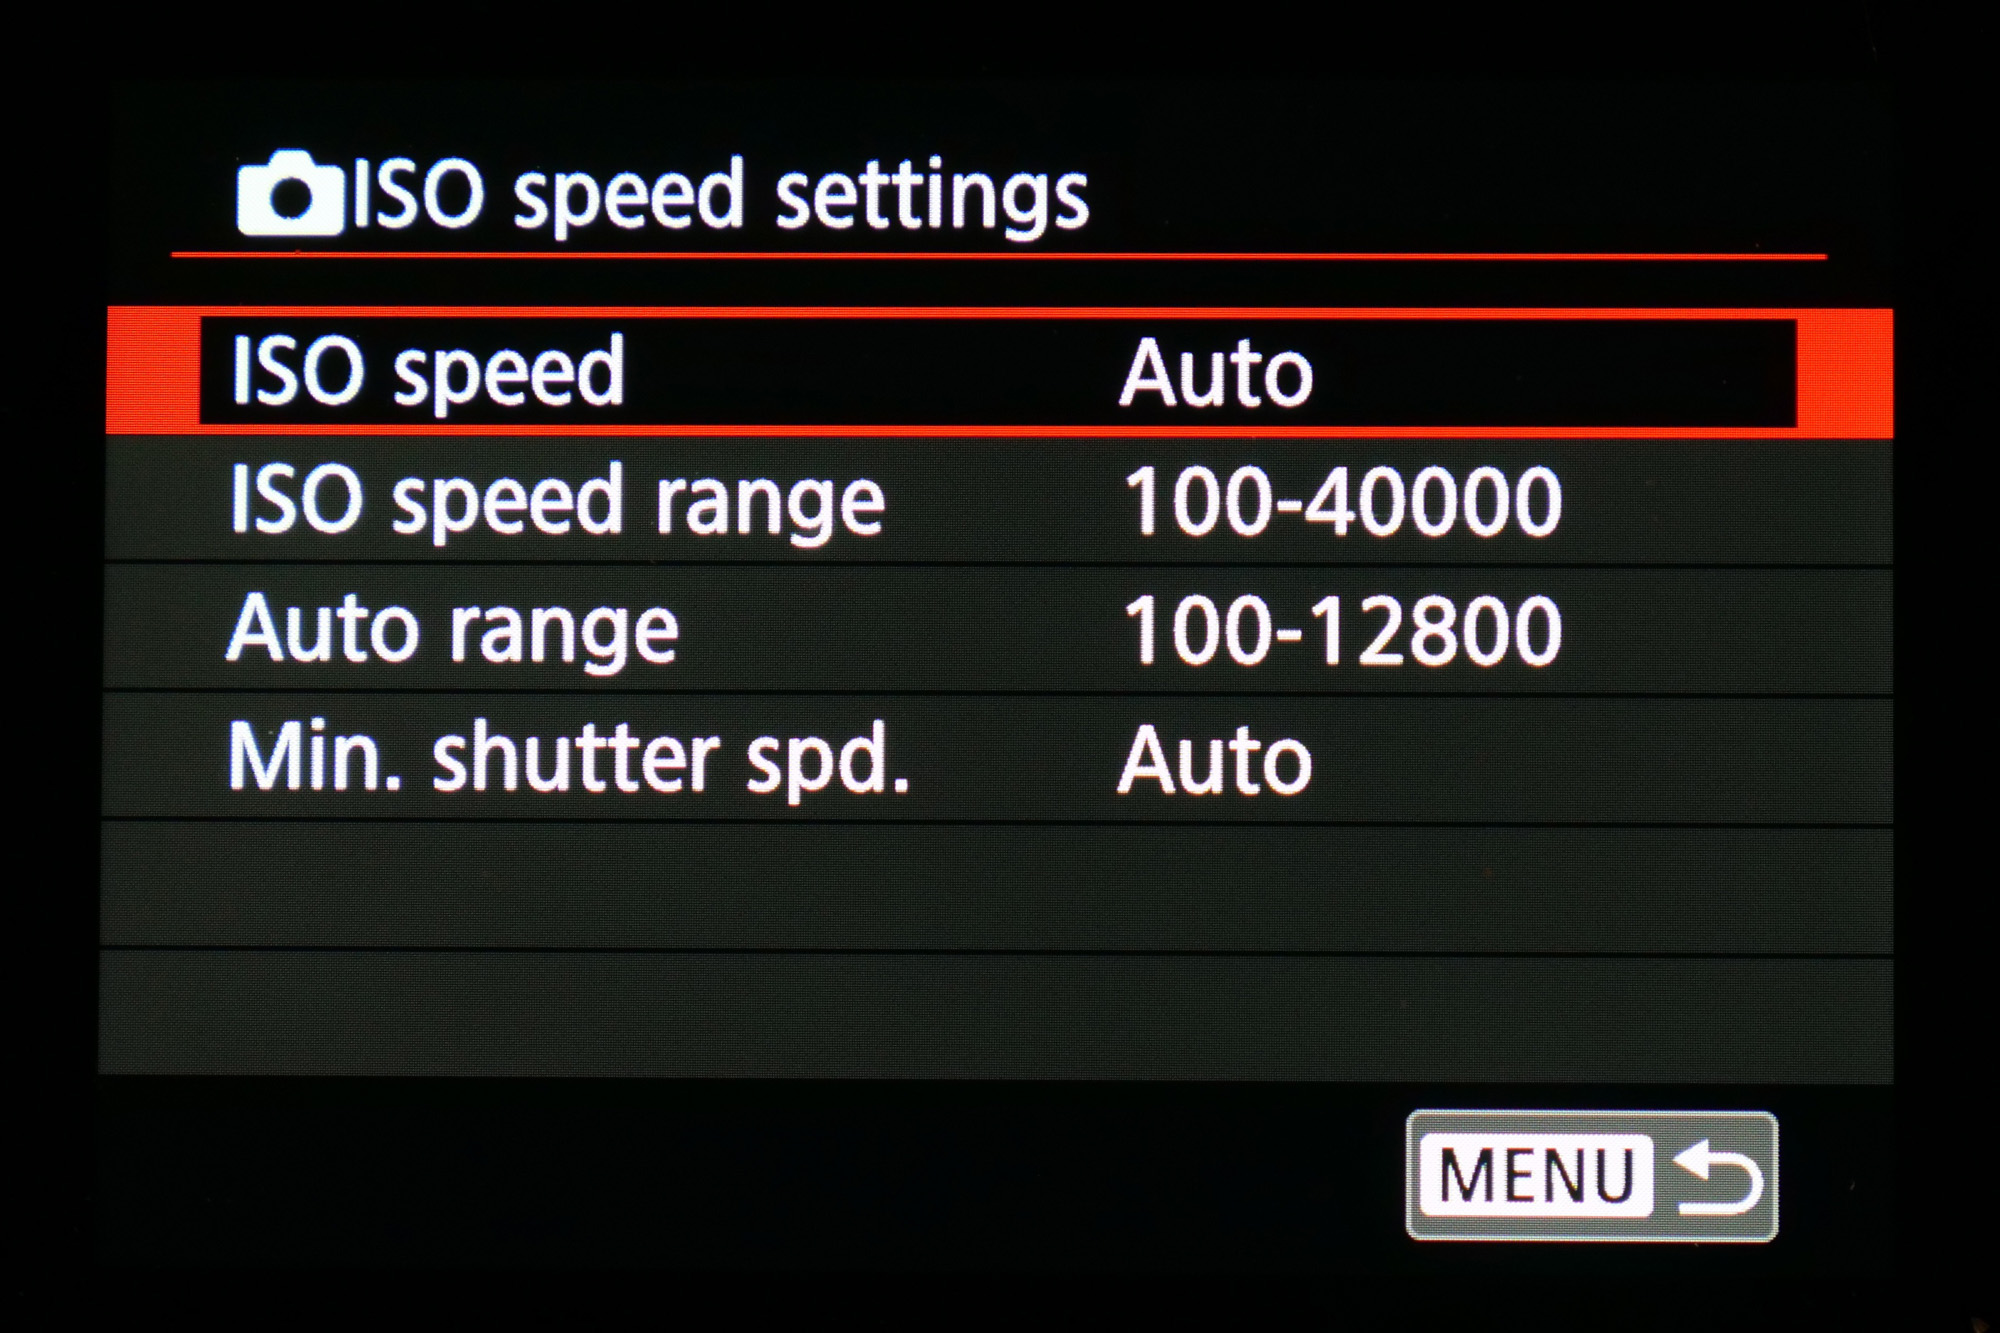
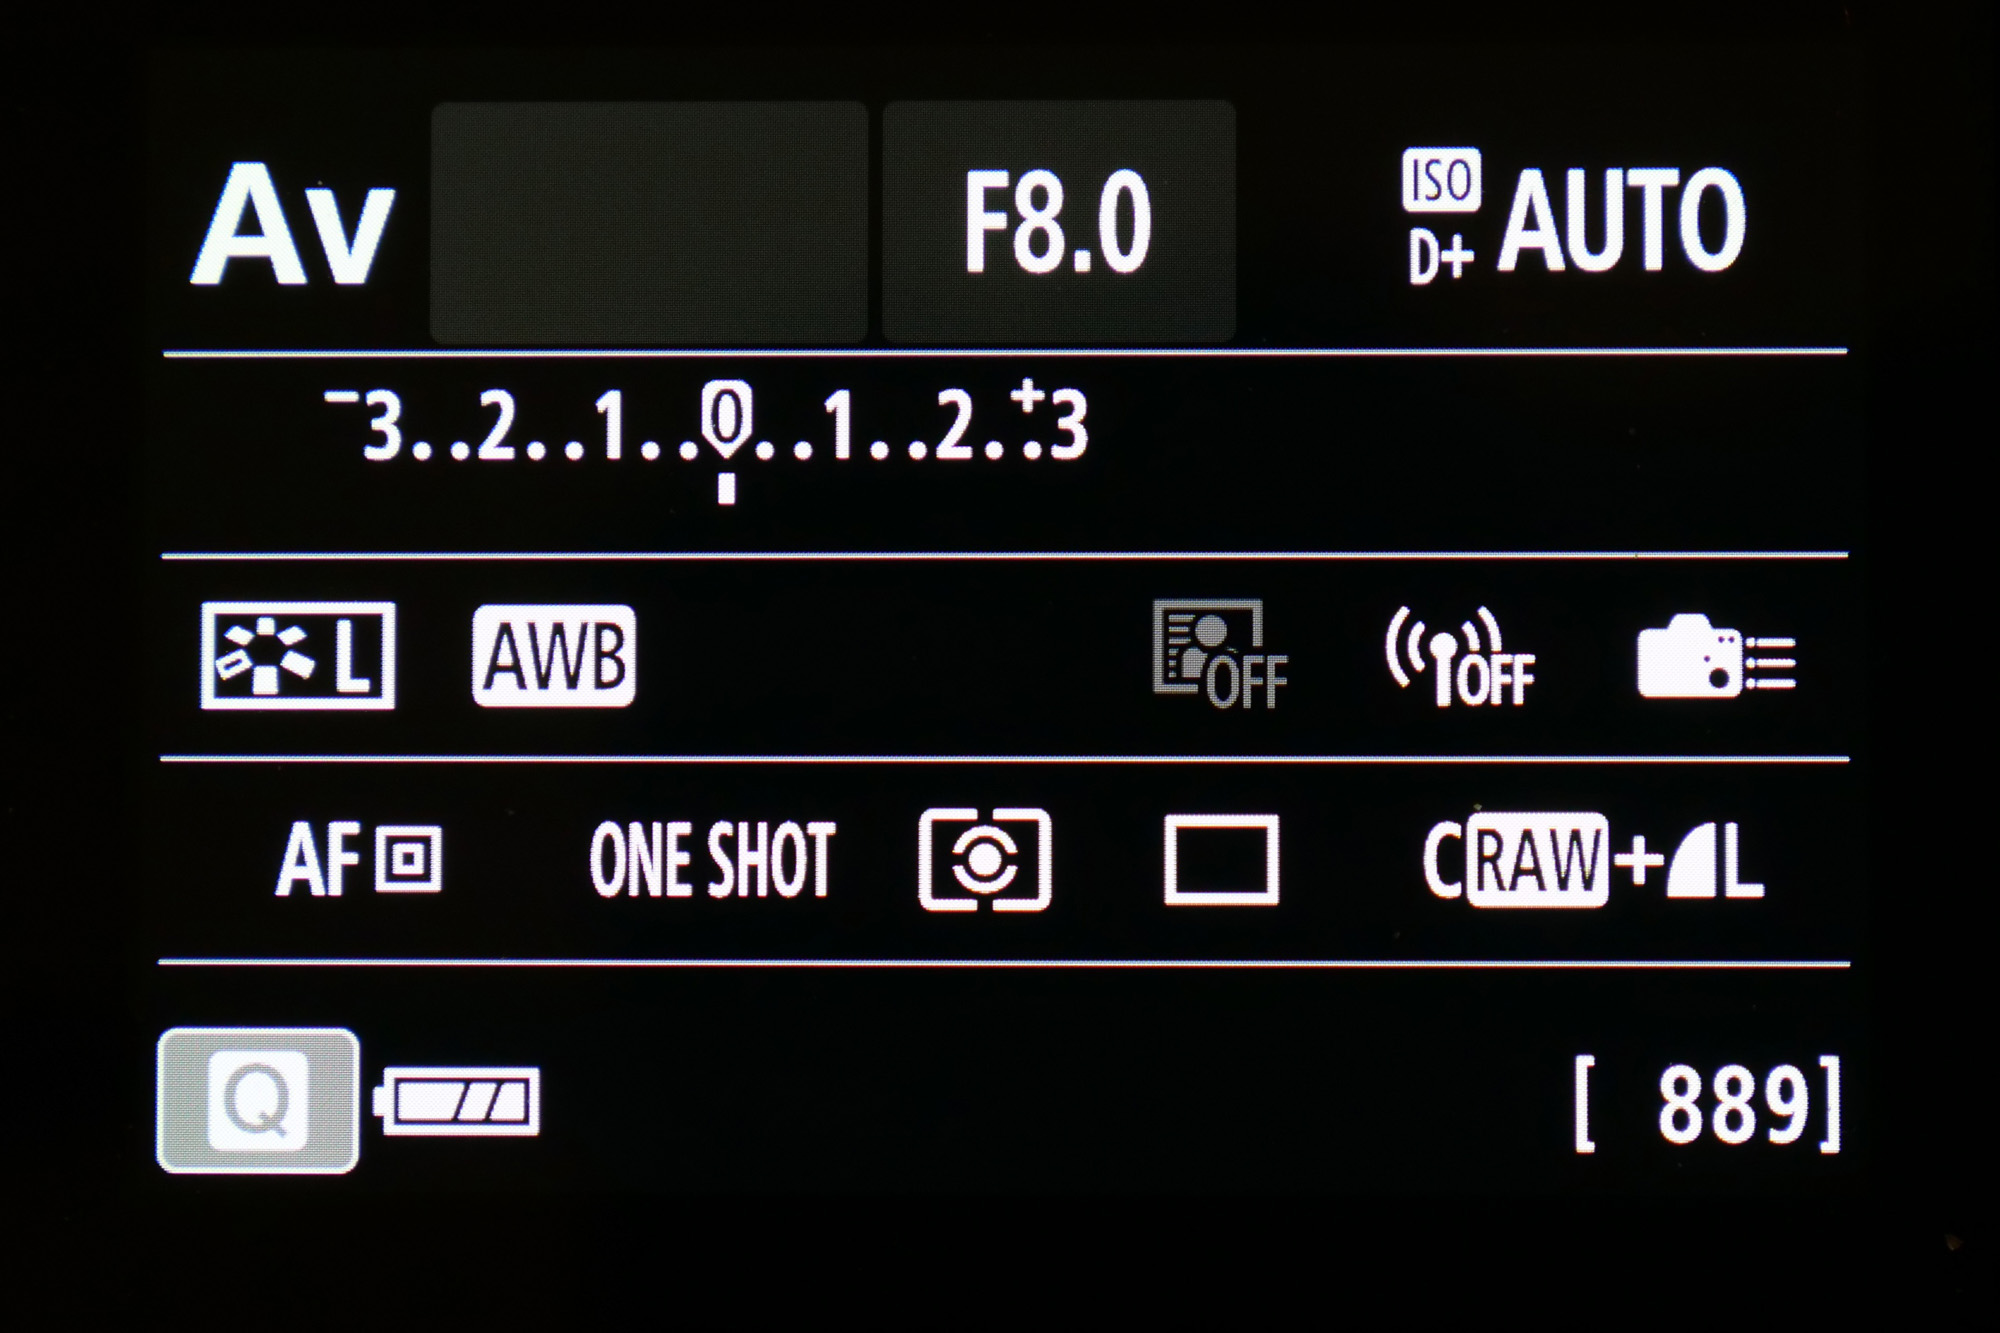
With your camera’s Auto ISO setting – shown above on our EOS RP menu. With handheld night shots like our example image, right, shooting at higher ISOs will produce more noise, but your images will be sharp. You can reduce noise in software, but camera shake will spoil your shot.
4. Image stabilisation systems

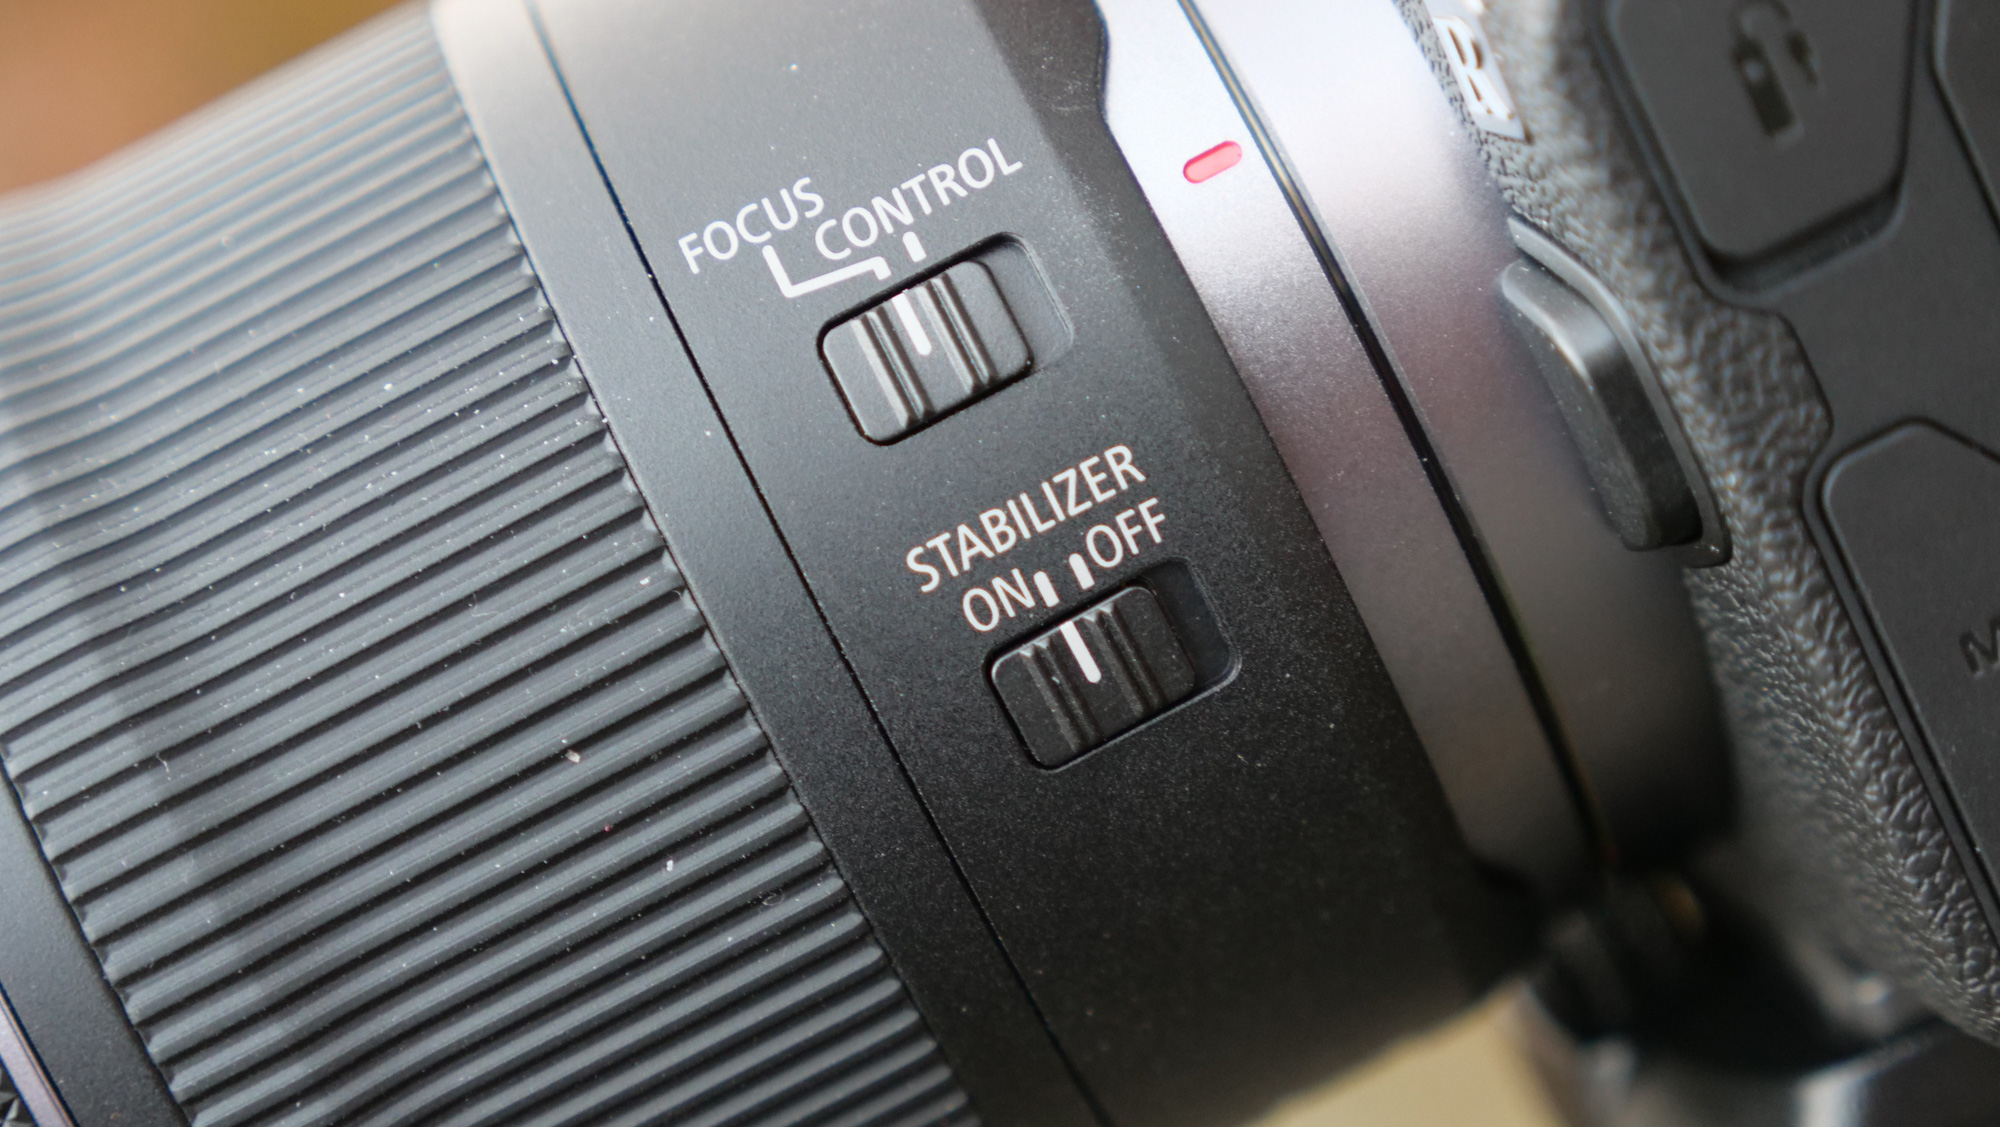
Image Stabilization can produce sharper shots either by steadying a group of elements within the lens, or by shifting the sensor itself to compensate for any camera movement during the exposure. The thing to keep in mind about image stabilizers is that they are simply a little extra insurance, not a guarantee. Just as the idea of ‘safe’ shutter speeds is just a guide, IS that offers up to six stops of shake compensation (for example), may only provide about half of that in everyday shooting.
You might also like the best photo editing software: image editors for novices through to pros. These are the 10 best online photography courses – from beginner guides to masterclasses.