
Learning how to create Apple Music collaborative playlists allows you to share playlists with your friends and family. Available in iOS 17.2 which is currently in beta but rolling out to recent iPhones soon, the new feature works along the same lines as Spotify shared playlists, with two or more friends able to add, remove, reorder and share songs in a shared playlist. This is awesome when you have a party coming up, for example, as all your friends can add the songs they want to hear.
It’s a wonderful, much-requested addition to Apple Music and very easy to learn and master, but it will require everyone to have a subscription and make use of the latest app. Once a collaborative playlist has been created, though, you can remain in total control. You can decide who joins your playlist and even when you want it to end. So let’s take a look at how to create Apple Music collaborative playlists.
How to create Apple Music collaborative playlists
You will need to be running iOS 17.2, which is currently in beta. We can show you how to enable beta updates on iPhone if you're not sure how to get it.
1. Go to a playlist
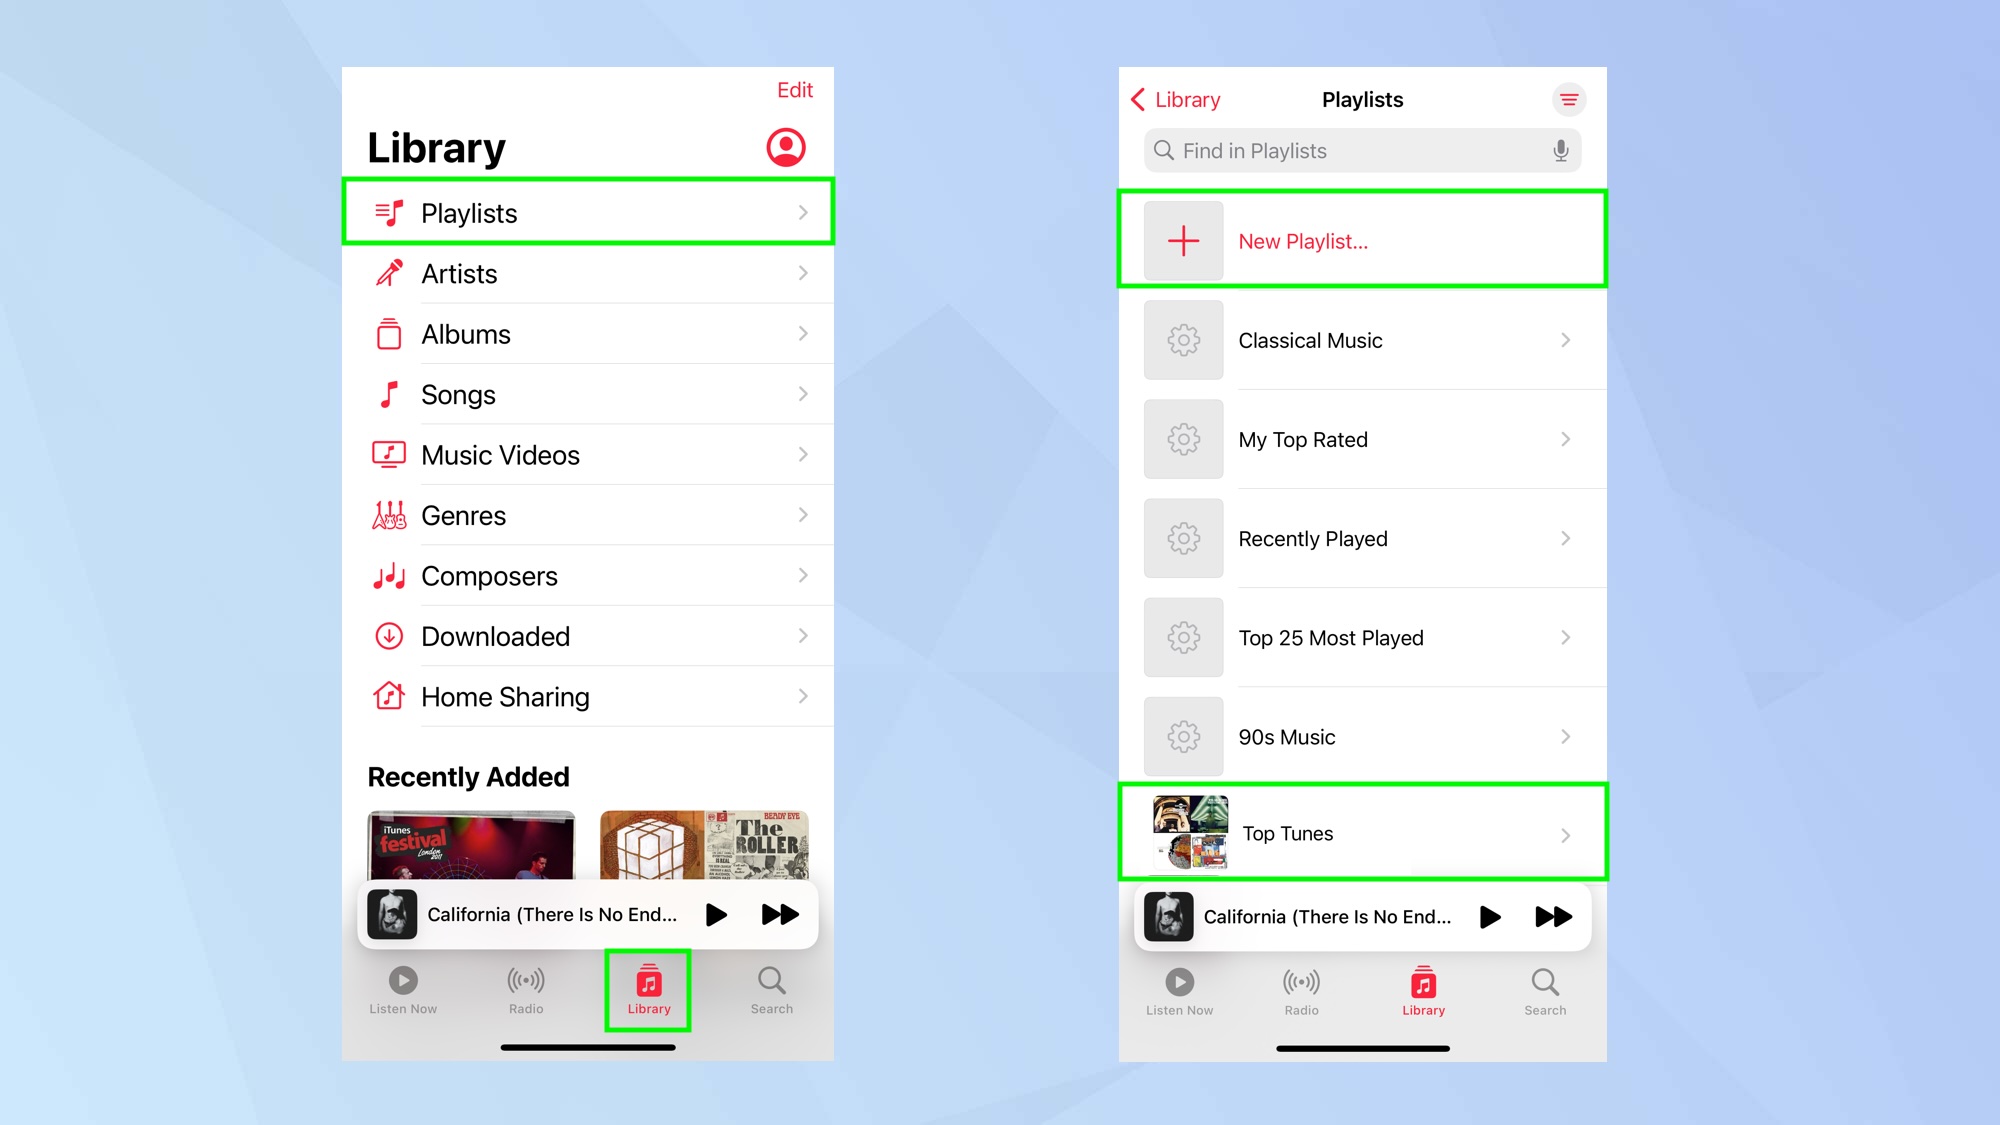
First of all, create a new playlist (to do this, tap the Library tab, select Playlists and tap New Playlist) or open an existing playlist.
2. Select the ellipsis
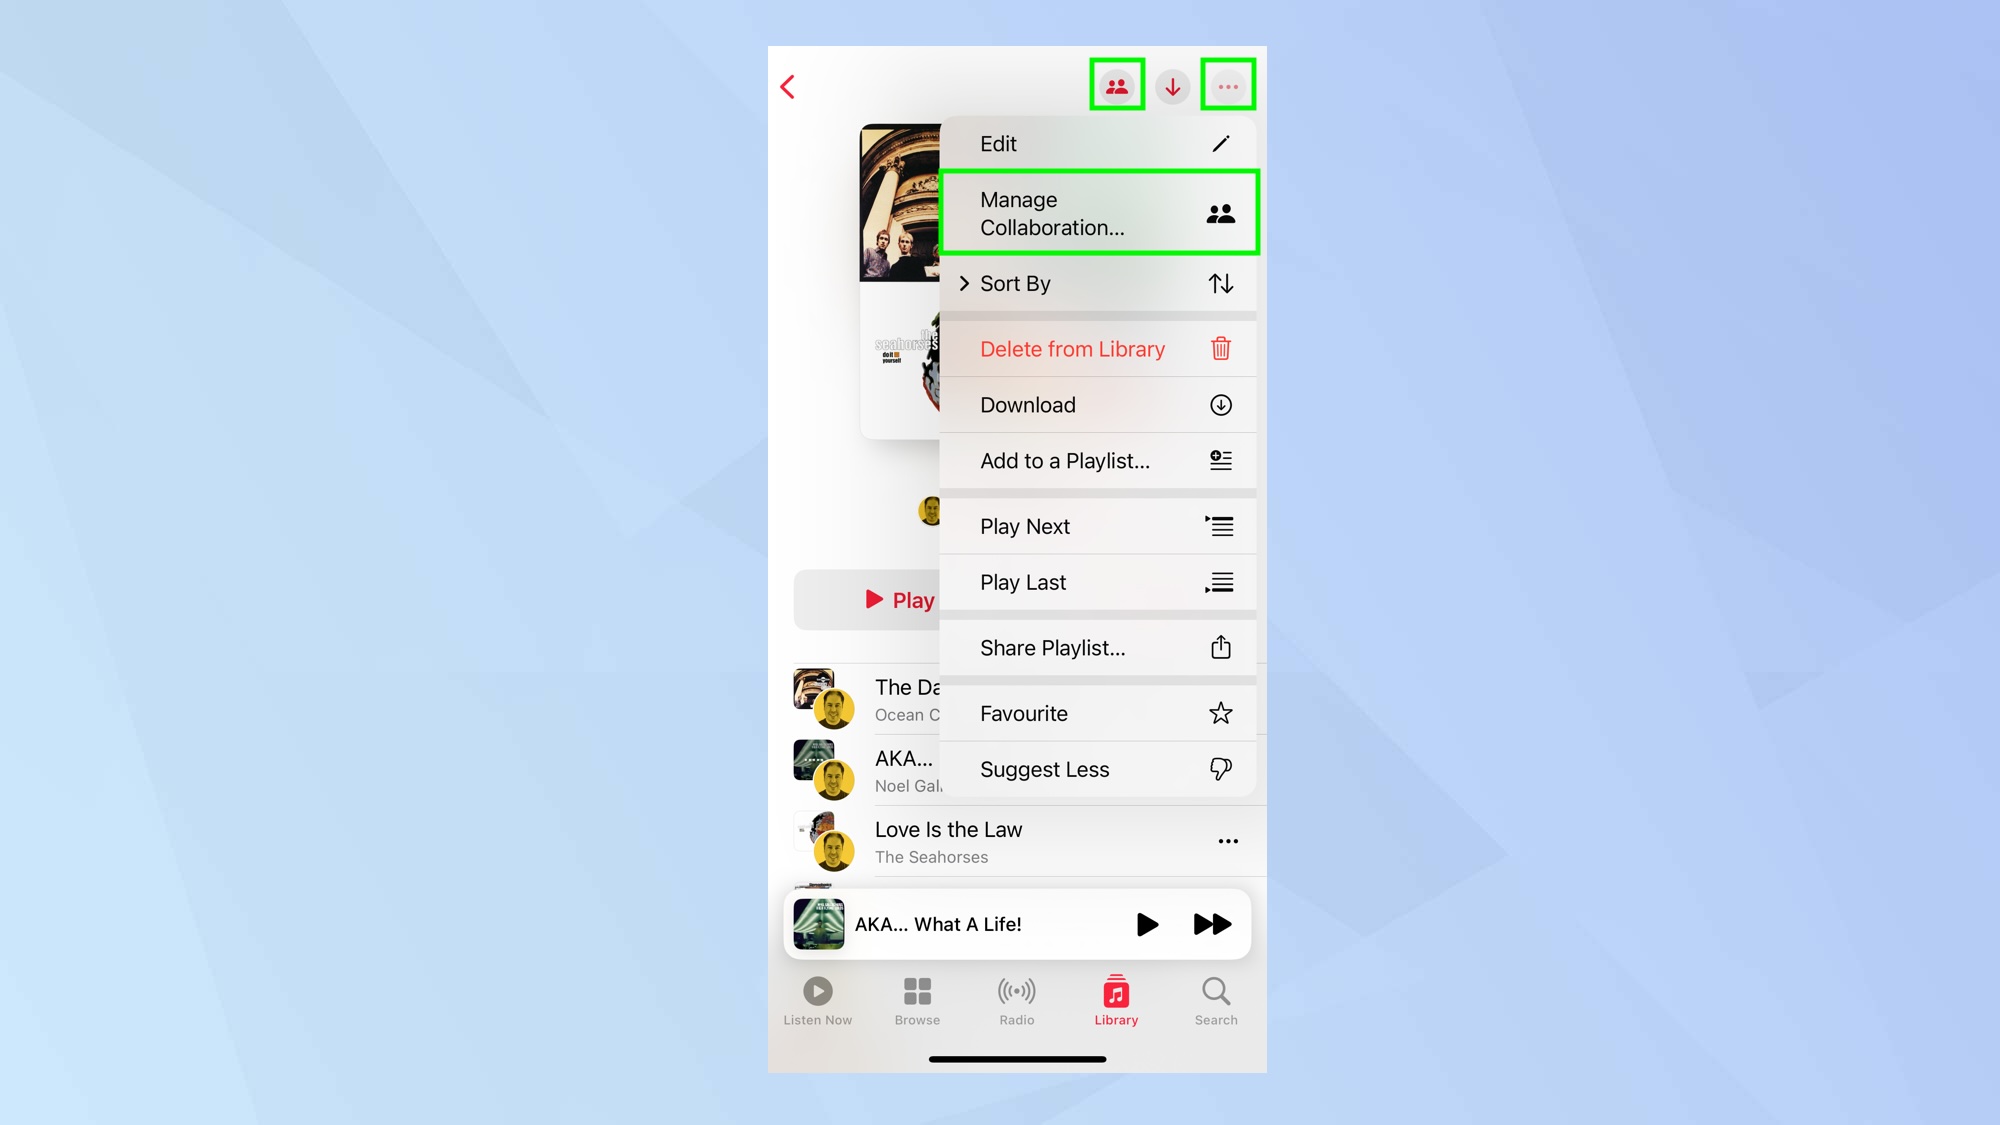
Now either tap the Collaborate button or tap the ellipsis icon in the top-right of the screen and select Collaborate.
3. Invite friends
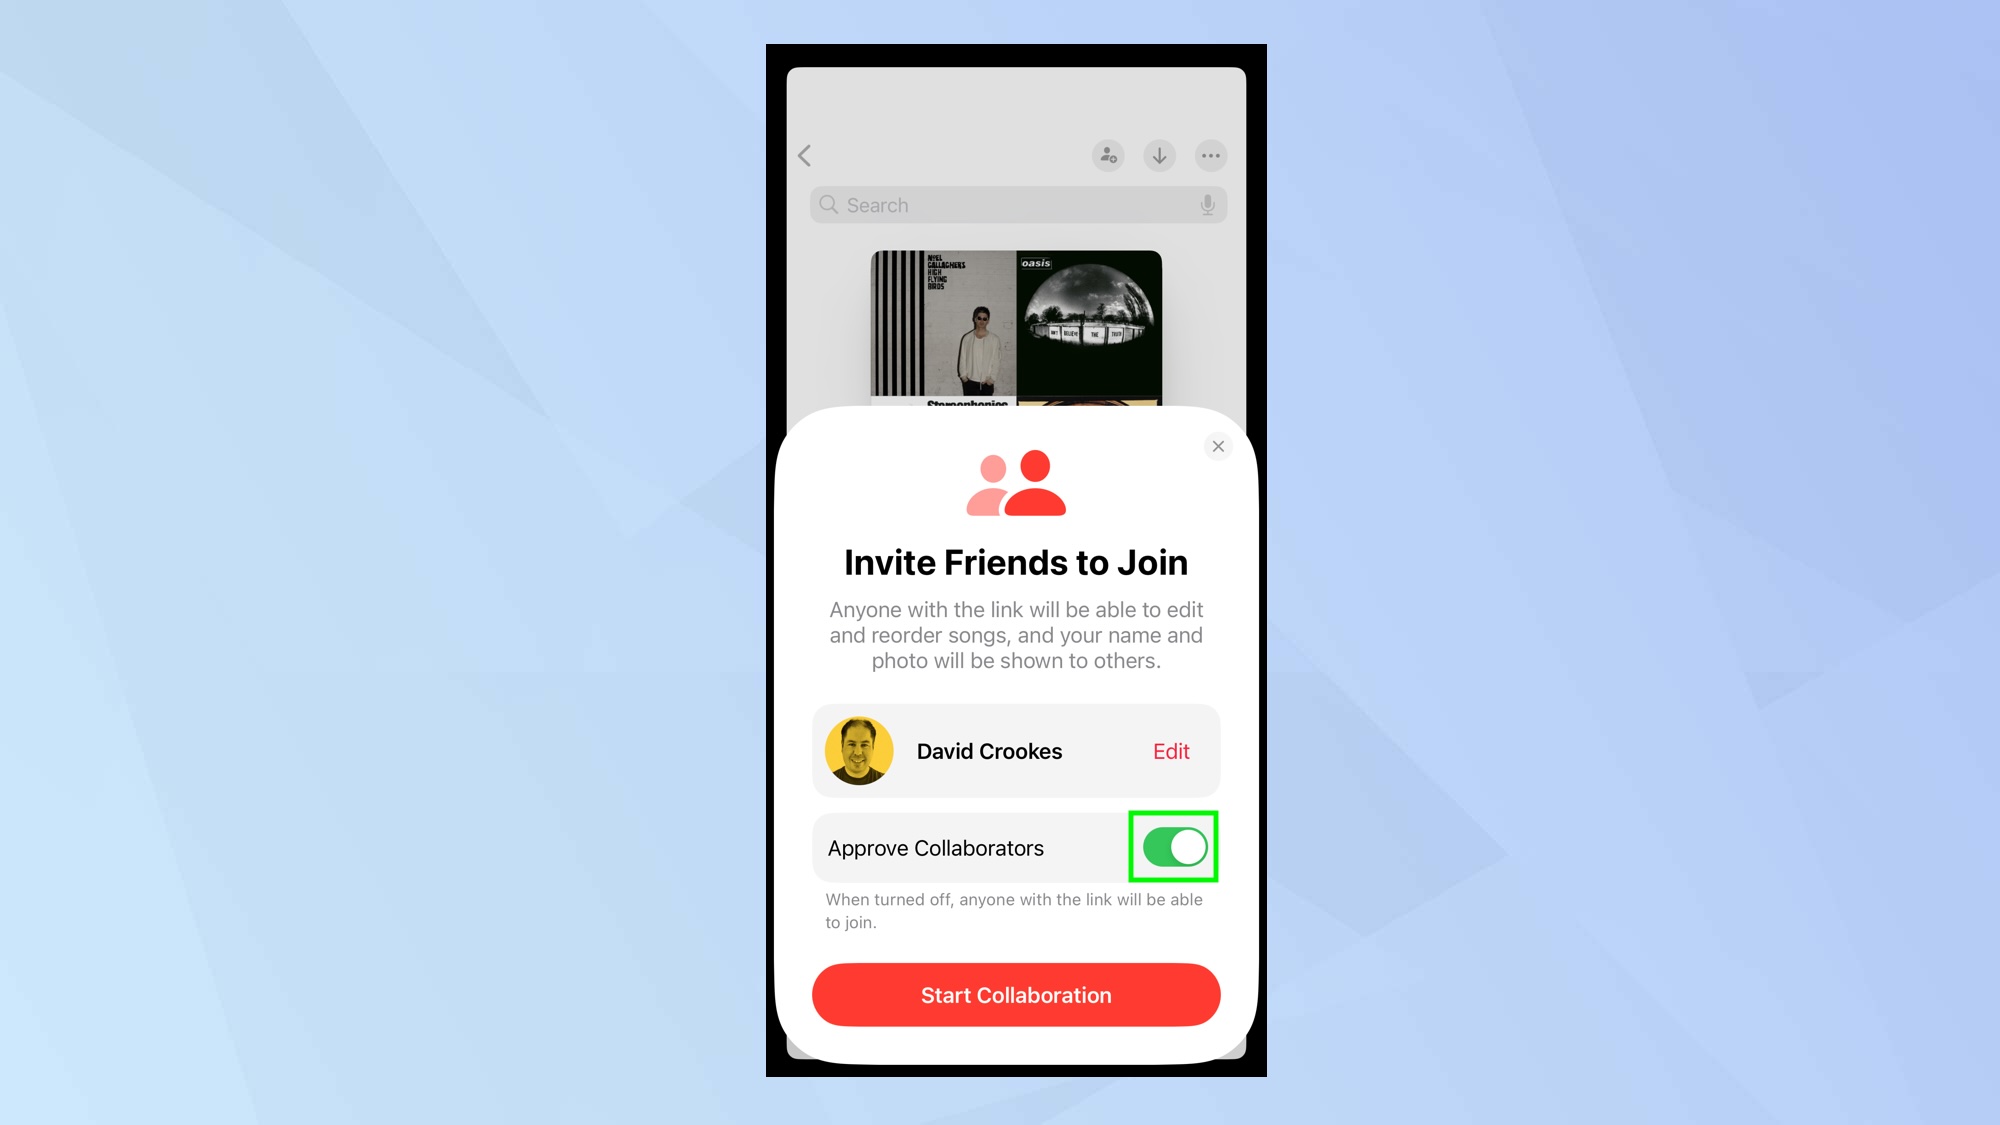
You will be able to generate a link to your playlist so that friends can view and edit it.
If you would to fully control who is able to join your playlist, toggle Approve Collaborators to on (so that it turns green). This means anyone who happens to come across your link can’t just automatically gain access.
4. Change your image
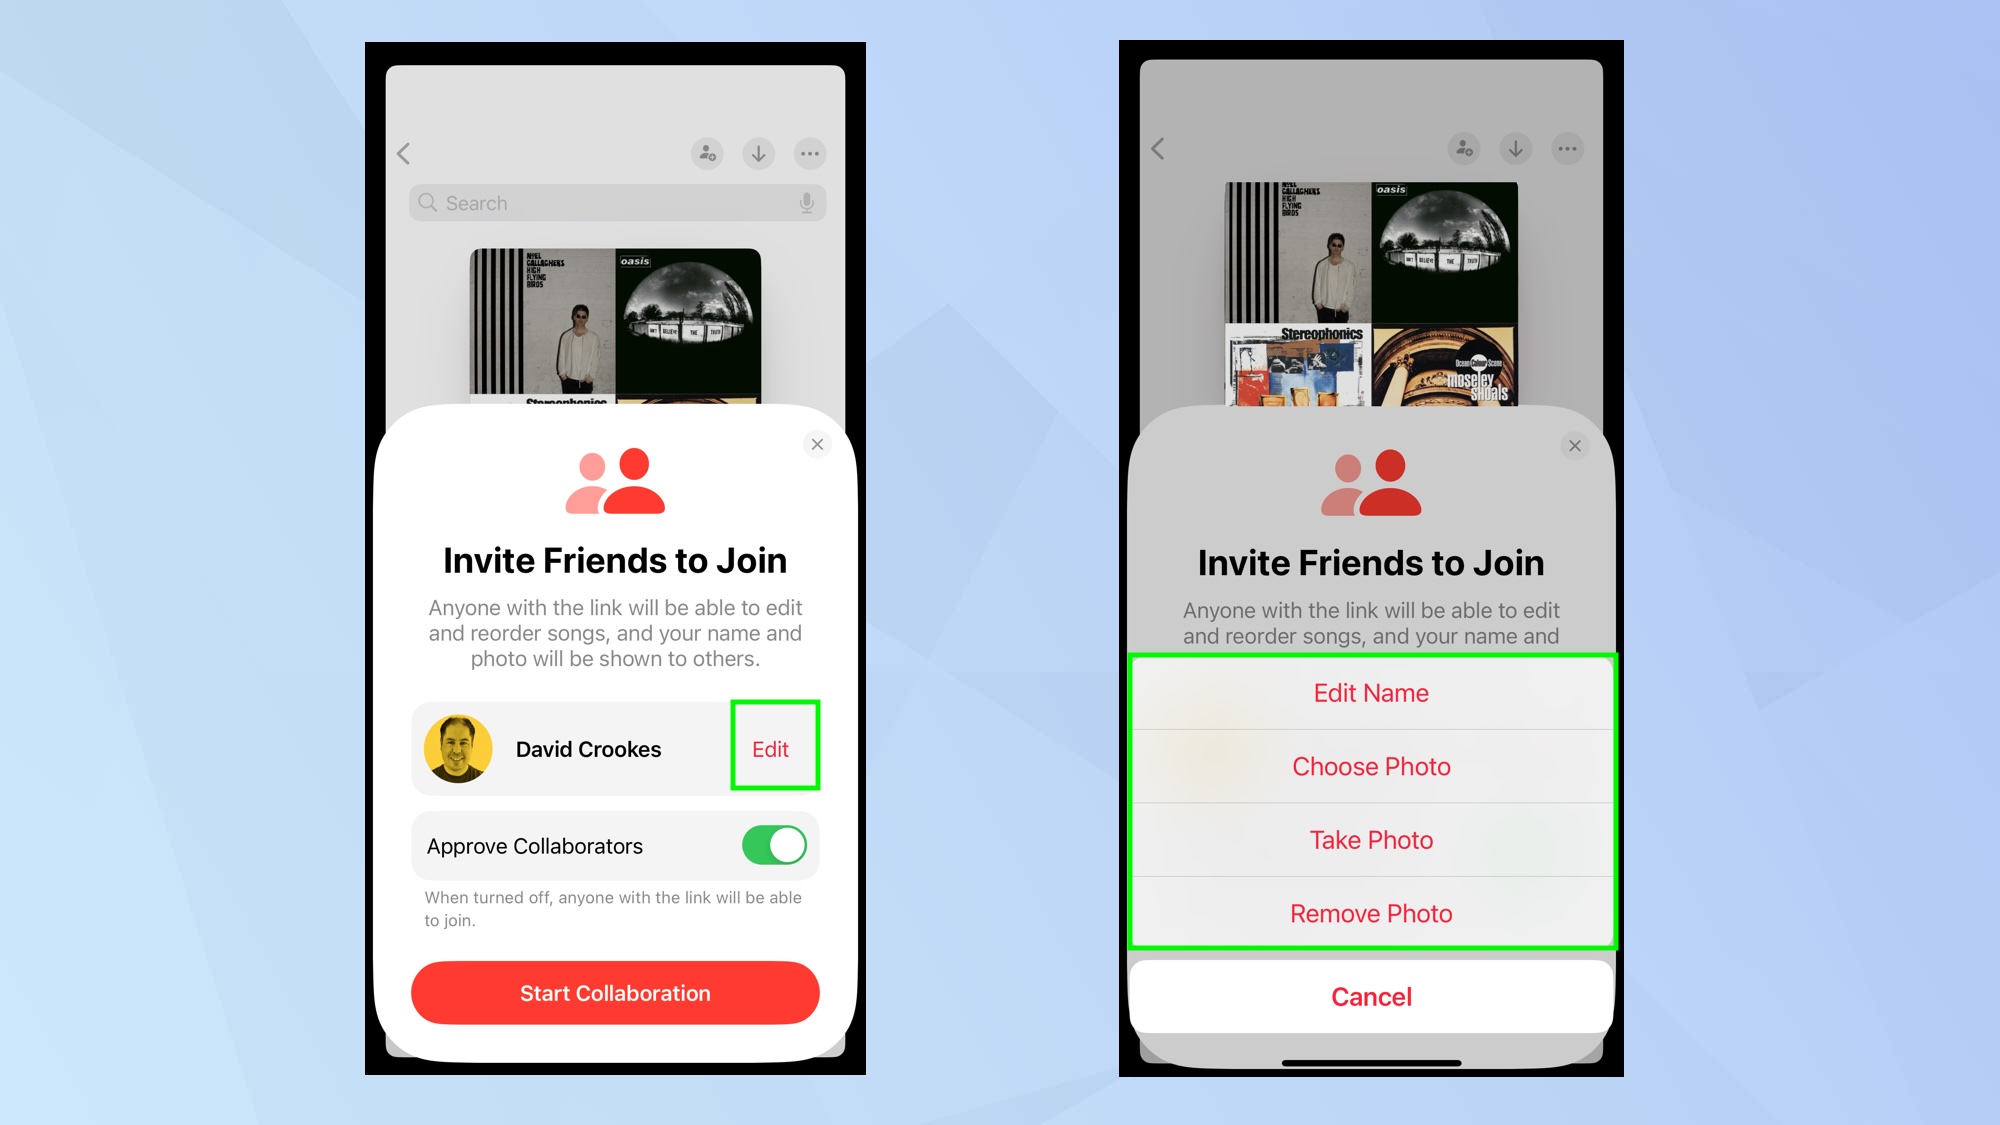
You can also tap Edit next to your name. Doing so will let you change your name and photo. Just tap Edit Name or select Choose Photo. You can take a fresh pic if you tap Take Photo and you can also tap Remove Photo if you don’t like the current image.
5. Start the collaboration
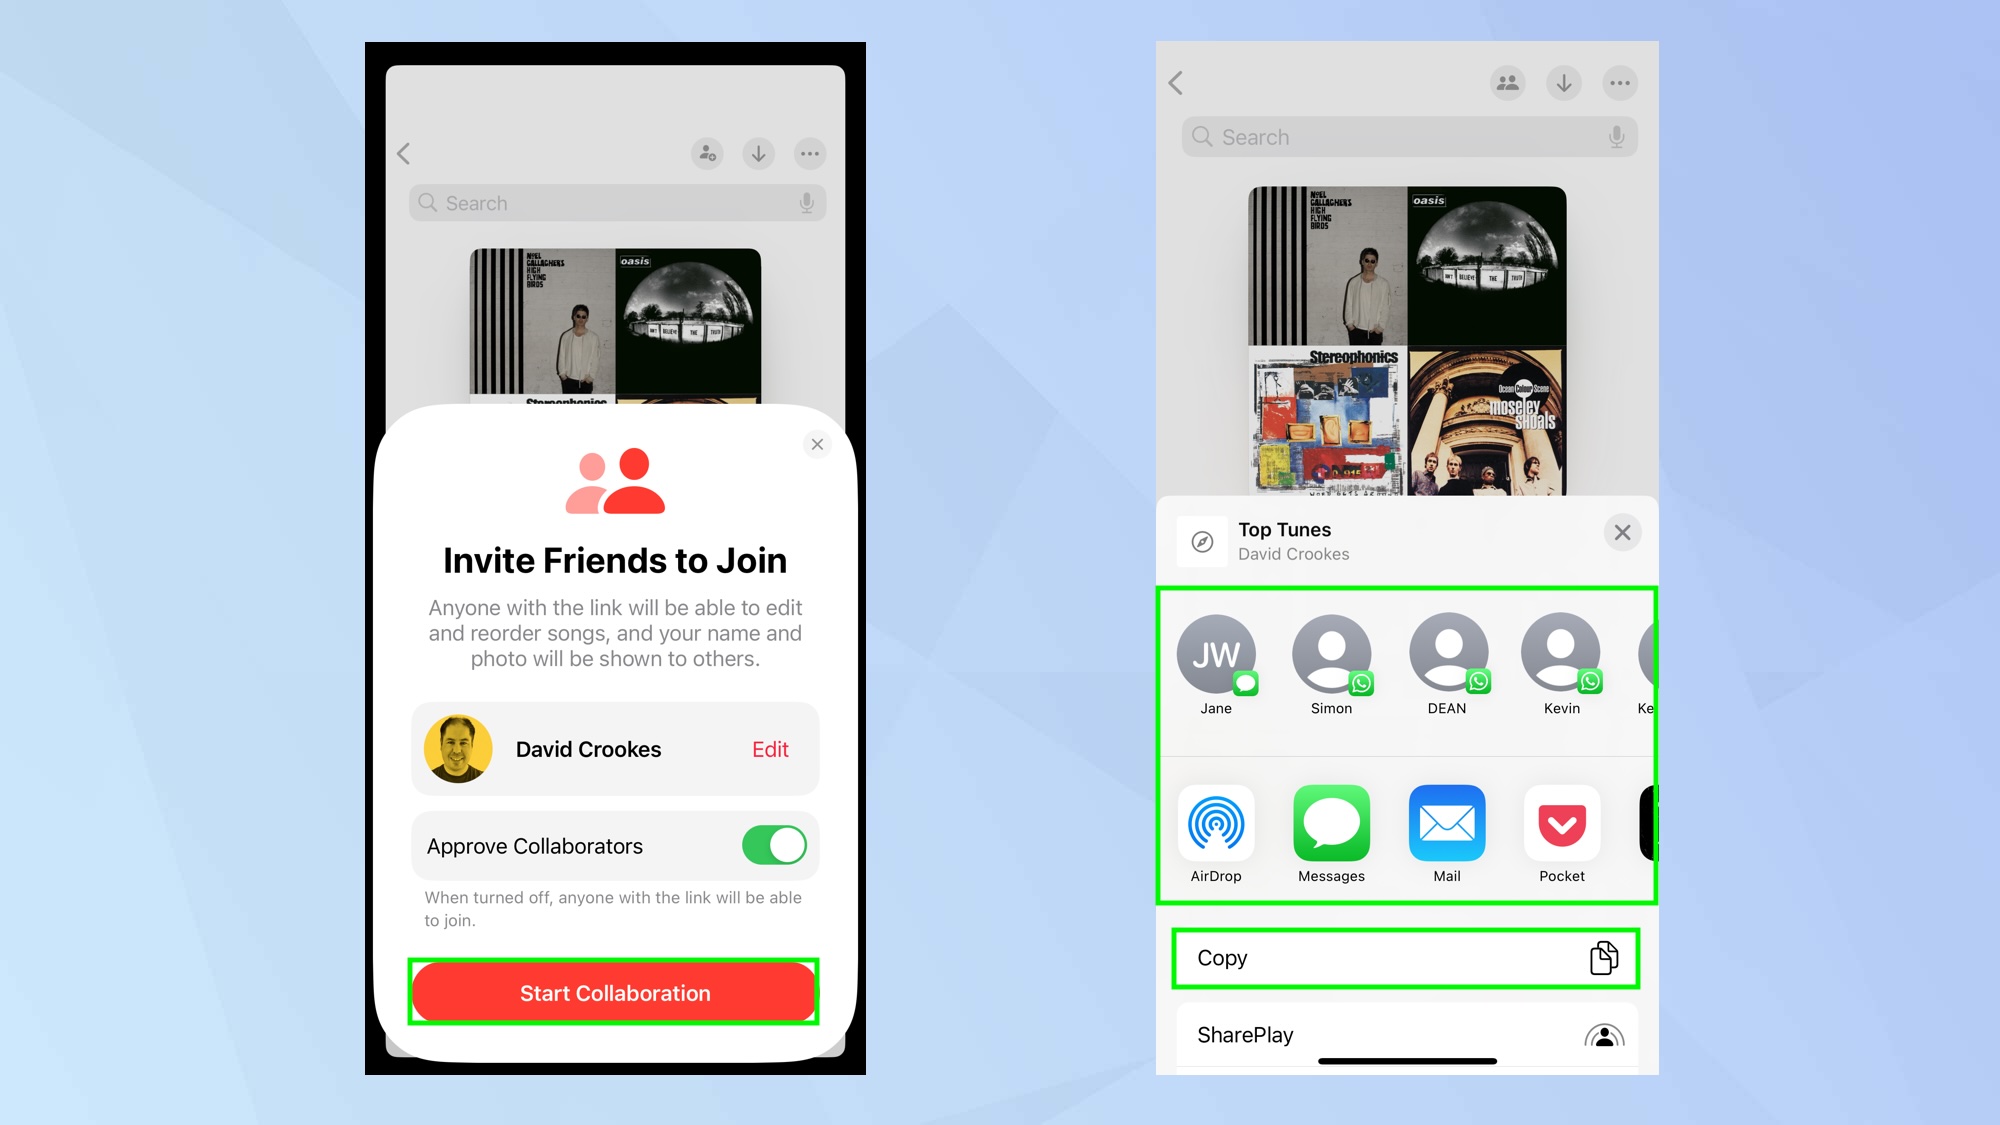
When you are ready, tap Start Collaboration. You will then be taken to the share screen which lets you send a link via Messages, Mail, AirPlay and many other ways. You can also copy a link for later pasting.
6. Manage a collaboration
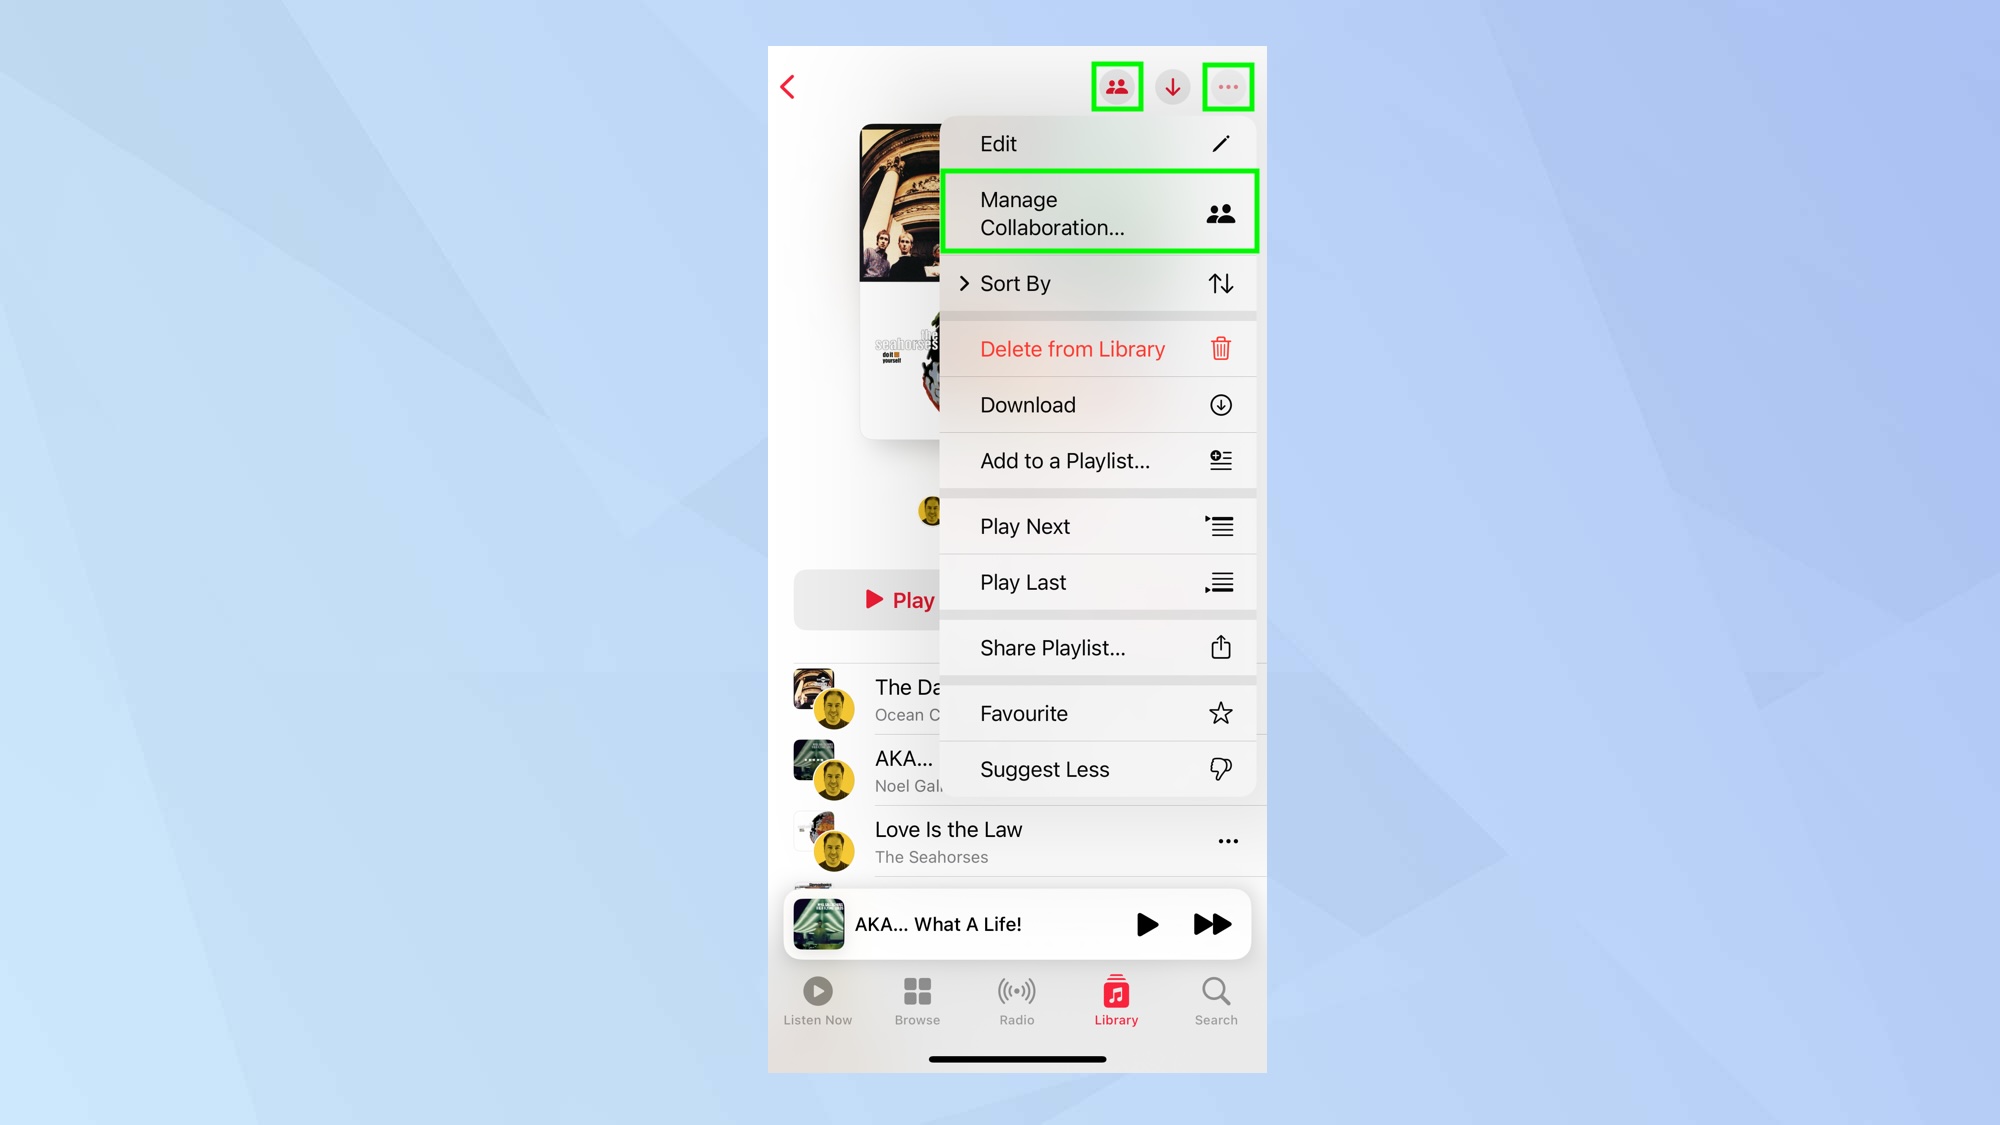
You remain in control of your playlist so if you would like to make alterations, tap the Collaborate button again or tap the ellipsis icon and select Manage Collaboration.
7. Make amendments
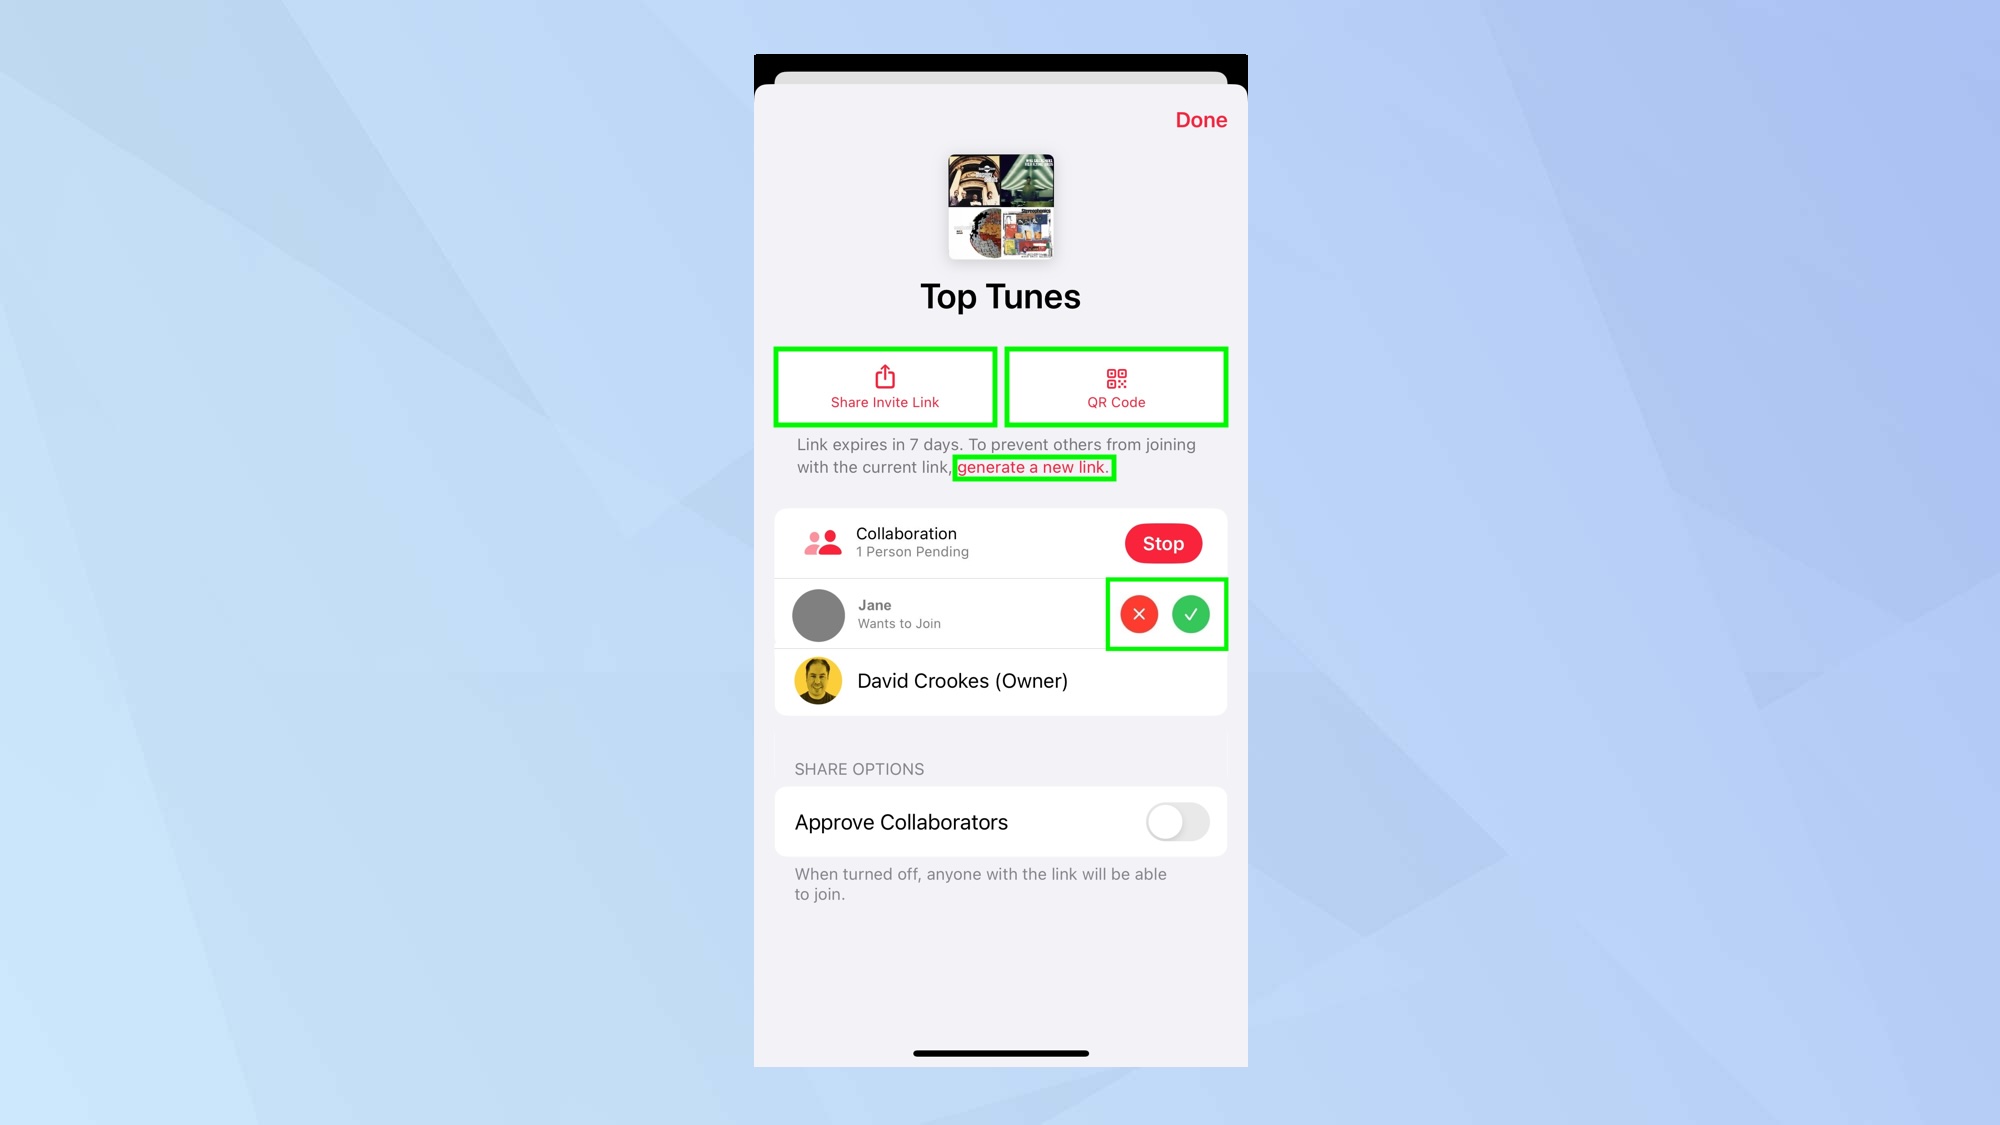
Either way, you will be able to view who has access to your playlist, approve requests to join (tap X or the tick) and remove people (swipe left on a person’s name and tap Remove).
You can also tap QR Code if you would like to create a scannable QR code that people can use to join your playlist or tap Share Invite Link to allow even more people to gain access.
And you can also select generate a new link. This comes in handy if you suspect your previous link is being shared too widely. Once a new link has been generated, anyone using the previous link would be prevented from joining.
Tap Done when you are finished.
8. Stop a collaboration
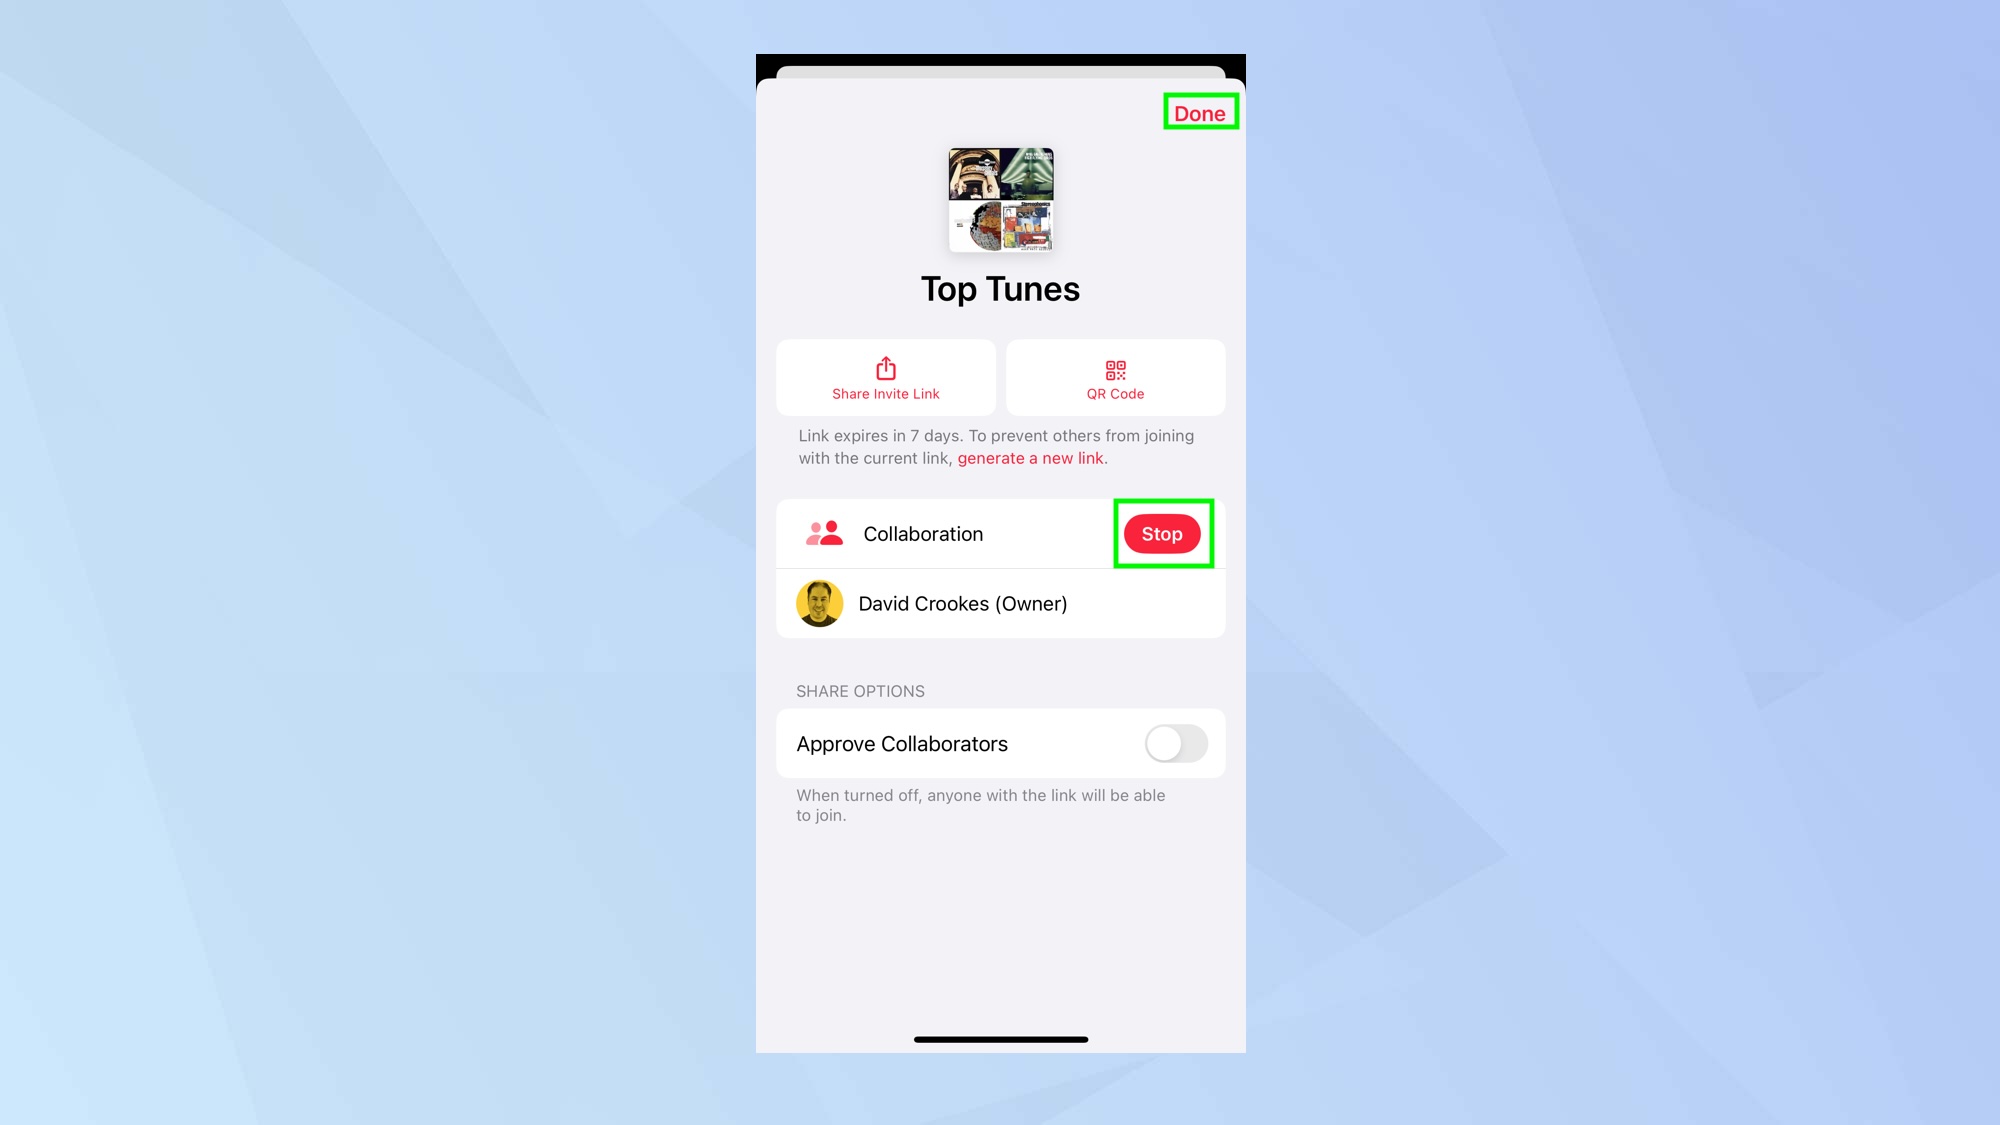
If you want to bring a collaborative playlist to an end, tap the Collaborate button or tap the ellipsis icon and select Manage Collaboration. Then select Stop next to your playlist. Tap Done.
And there you go. You now know how to create Apple Music collaborative playlists. You can also learn how to use Apple Sing on iPhone or figure out how to discover Spatial Audio tracks in your Apple Music library. Why not find out how to get Apple Music on Chromecast with Google TV? And check out how to disable listening history in Apple Music.


