Can you hear that? It’s the ever-pacing tick-tock of change. Or is it a kick-snare beat? In modern music, it’s pretty obvious that the drums are an intrinsic part of any beat-led music’s success.
Sure, every single part of your music is vital, as is the treatment and processing that helps them stick together, as we regularly spend pages and pages explaining. The drums, though, set a piece of music on the road. Done right, drums can add energy, create pace, and generally define the energy level of a piece, whatever the mood.
But that’s not to say that perfectly-produced drums are the goal every time. Depending on the genre, drums might need to be stunted, vibey, repetitive or simply subtle. Staying within the confines of a genre’s rules may put some limits on the drum sounds and programming you use, but those drums still define the same traits of the track that they do in any other.
In the tutorials below, we’re going to lift the lid on techniques behind getting a modern drum sound, and we’ll do it through the lens of some of the best instrument plugins that you can grab today for getting your beats to the next level.
We’ll tackle not just heavy-hitting ‘drum’ instruments, but some ways to play them better as well – there are MIDI effects on display to help you get a grip on making rhythms or coming up with something new, and there are bigger packages involving a mixture of everything.
Using MIDI FX to make new rhythms with Modalics Beat Scholar
’MIDI drums’ is a phrase that would be unthinkable in many circles. But once you embrace the idea of programming rhythms in your DAW, you’ll be tempted to use some of the great tools out there that aim to make it simpler, more creative, and even a little bit fun.
MIDI data contains a set of instructions for what an instrument – plugin, hardware, analogue or digital – should play. Given the mathematical precision of digital data, and the ability to program it in advance, plugin tools have sprung up that offer a new way to get creative with beats and rhythms. Some allow you to sequence in new ways, others help you to improve what you’ve got already, by creating variations and humanising programmed performances.
One key way to use MIDI plugins in general, whether that’s for drums or for other uses including chords, keys and arpeggios, is to use them to put you out of your comfort zone. When things get a little too comfortable, getting your creative work done using a MIDI plugin can be just the jolt you need – it drives you down avenues you may not have visited on your journey to an interesting and motivating beat.
Below, we’ll look at one of the most recent MIDI plugins to cause a stir, with its very logical way of getting things done.
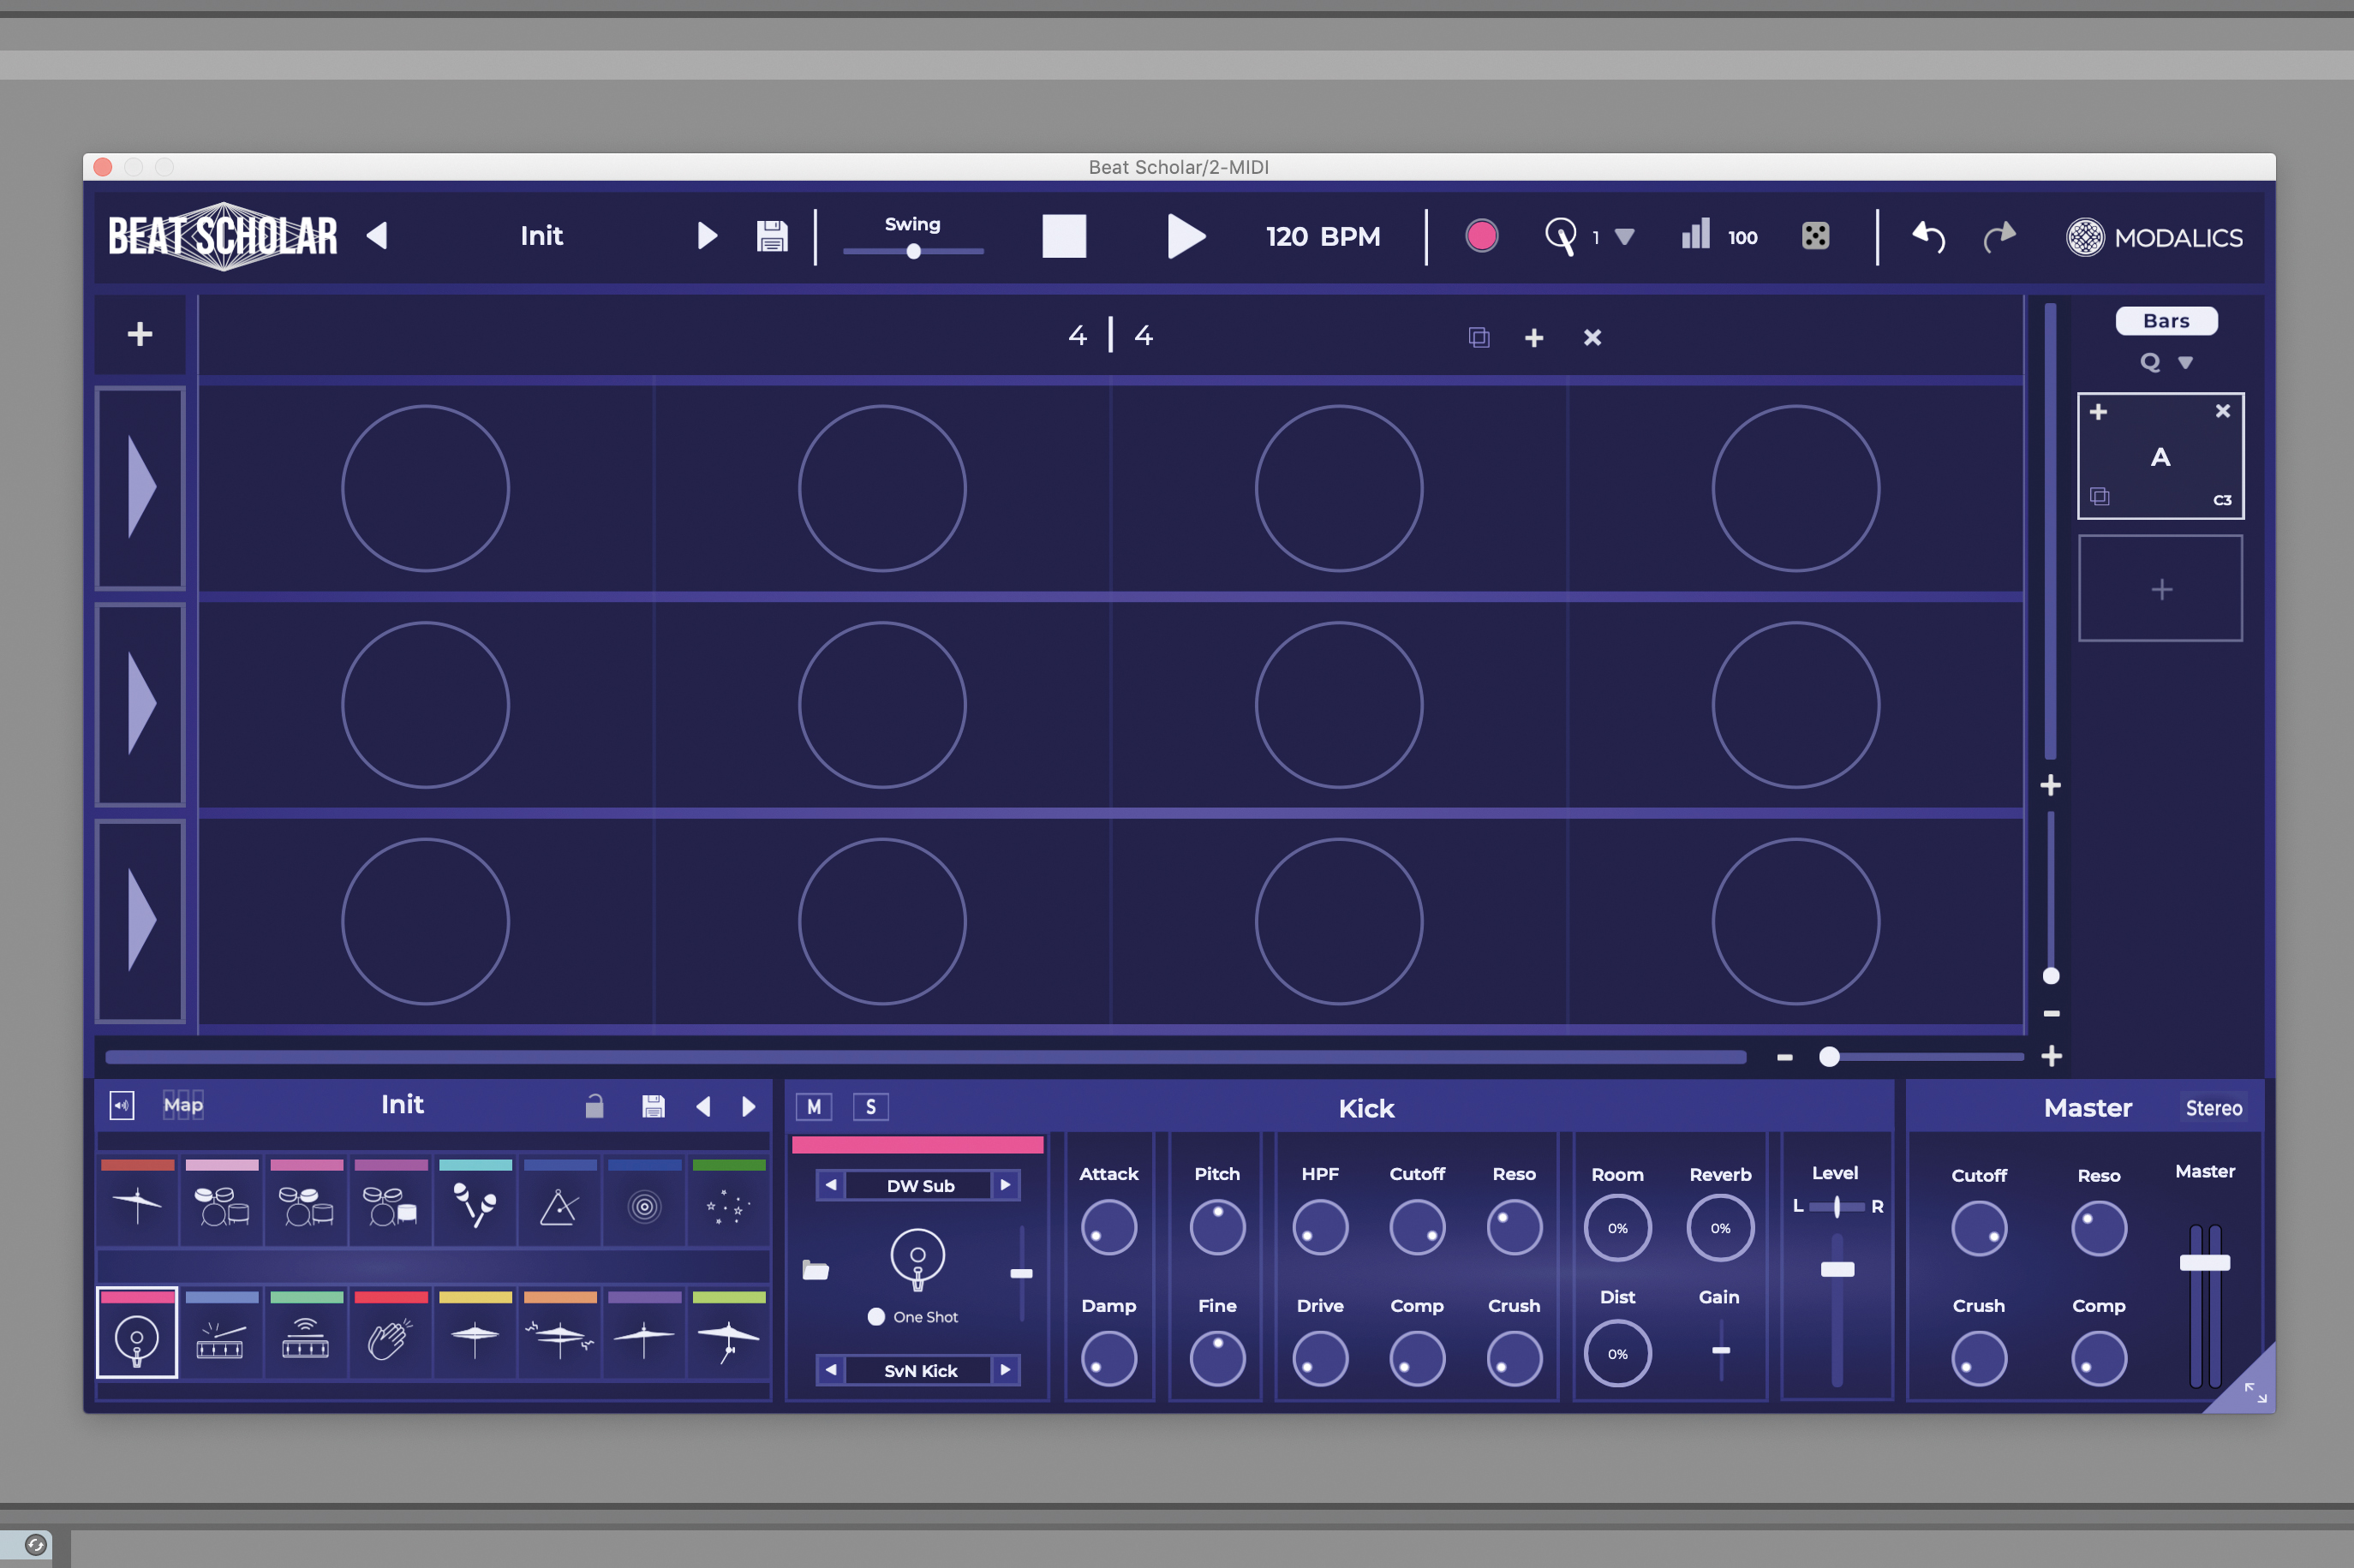
Modalics Beat Scholar provides a novel way of programming drums, one which will send you down new creative avenues. At first glance, the plugin is a basic step sequencer format, but each step is divisible into up to 42 slices, or beats.
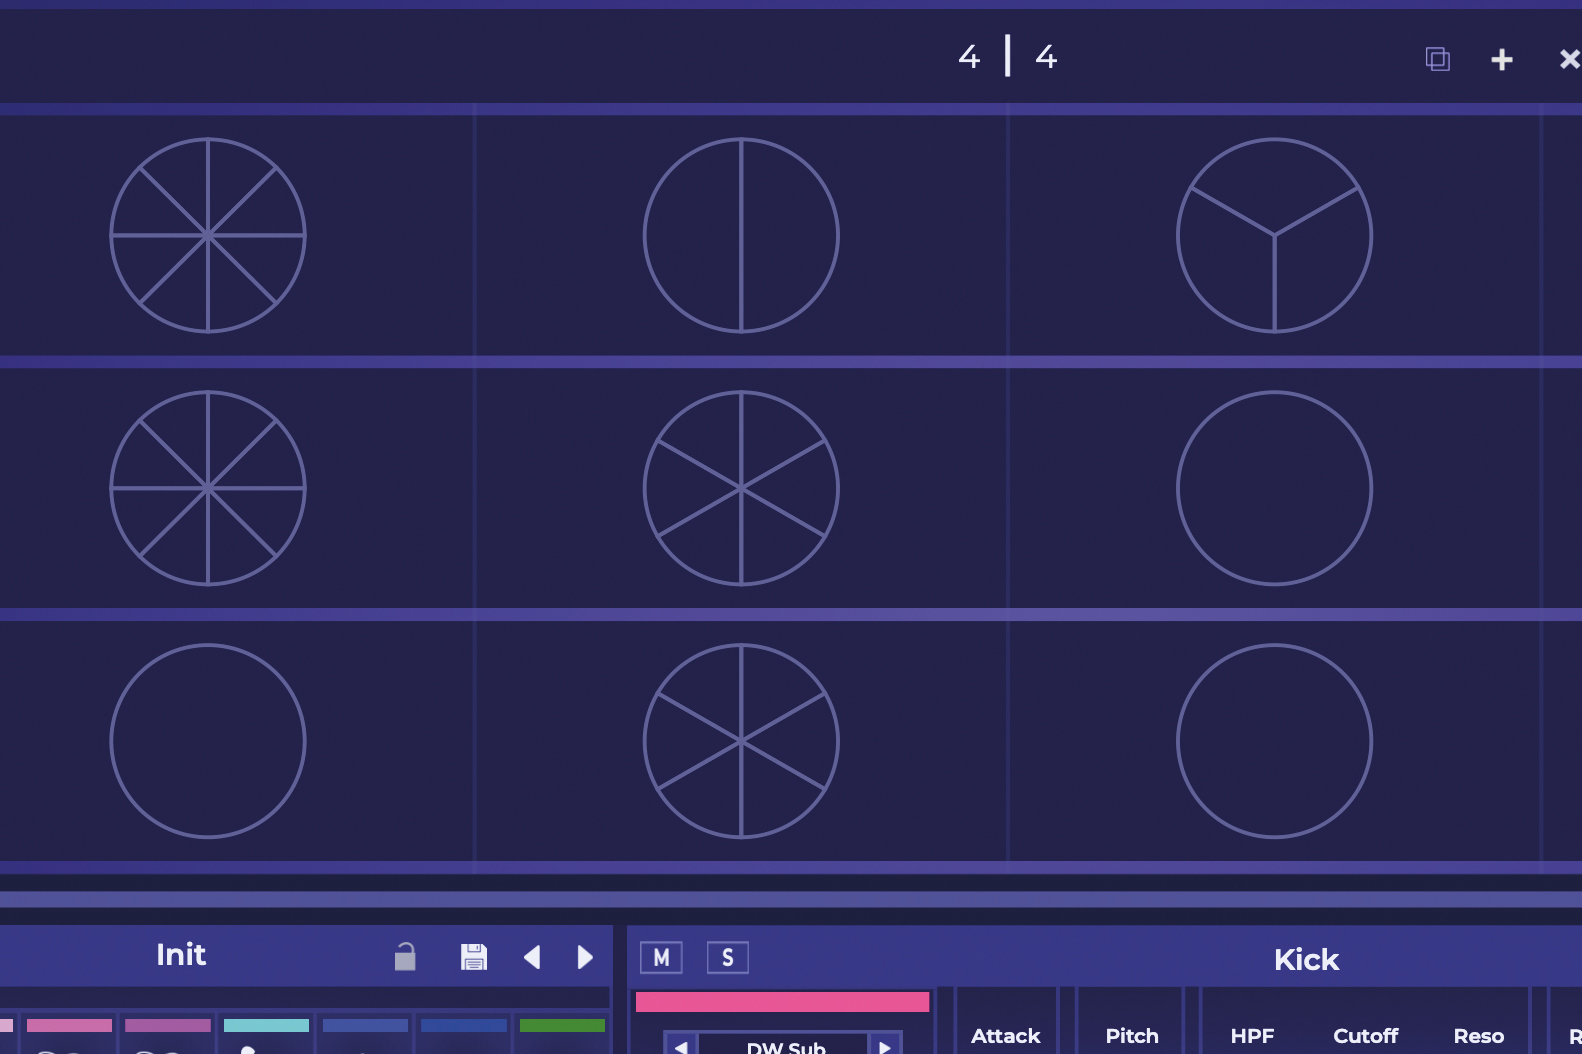
Hold down a number key on your keyboard and click one of the circles on the grid to change the number of beats in that step. You can also right-click a circle and select a number, or select the Slicer brush and drag up or down on a step.
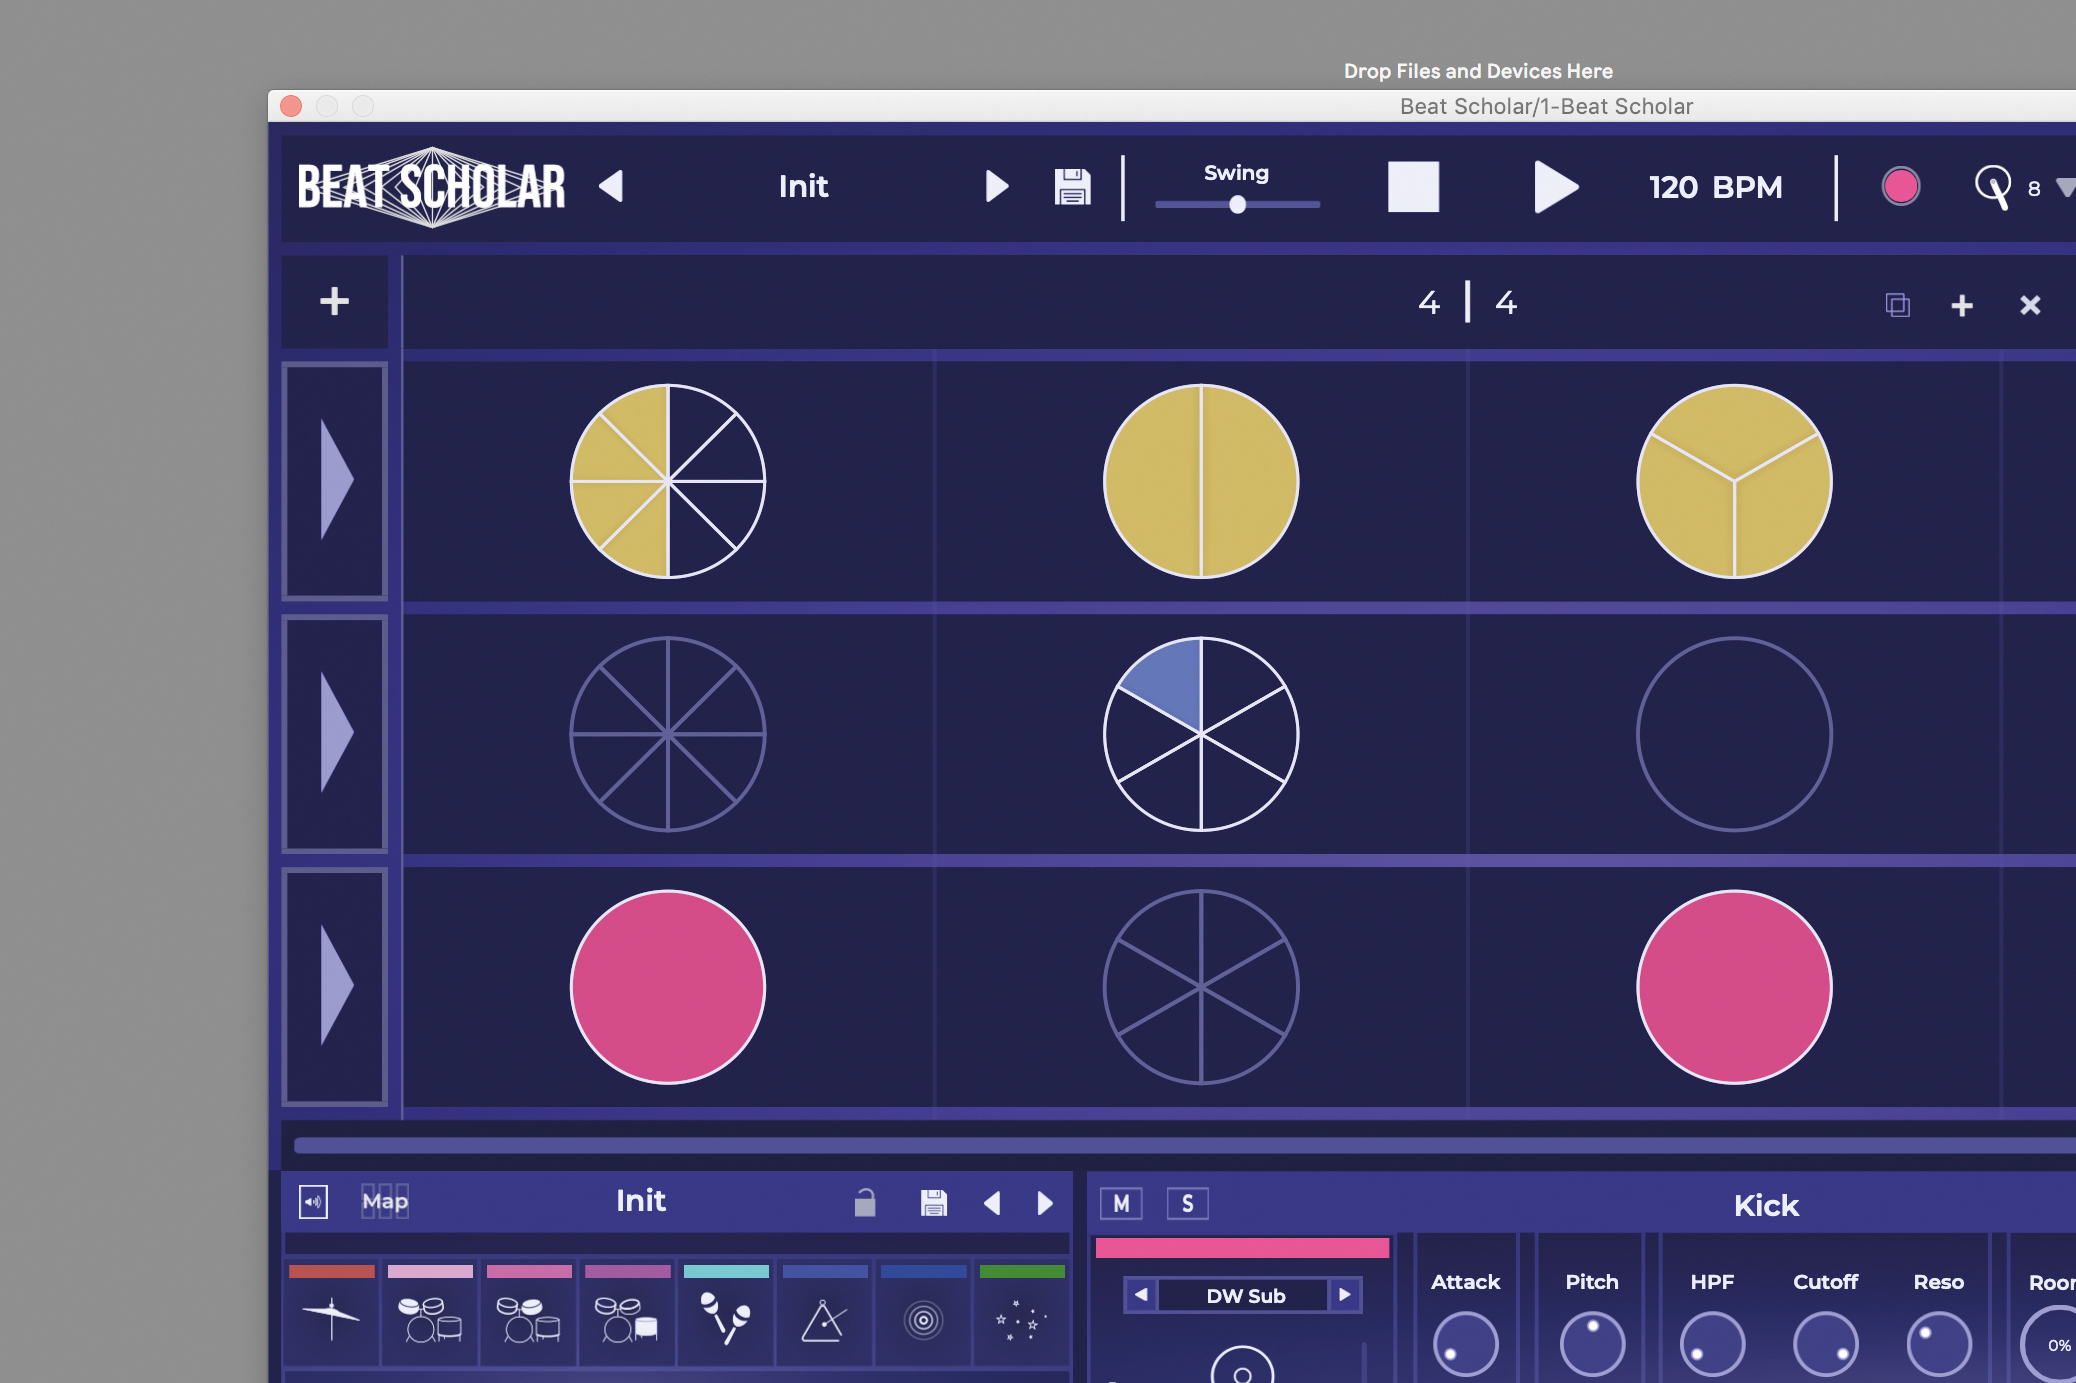
Adding beats to a step is easy, simply choose a drum from the available options in your kit, select the Drum brush, and click into one of the slices to fill it. Once divided, circles will light up to show where each slice lies on the beat.
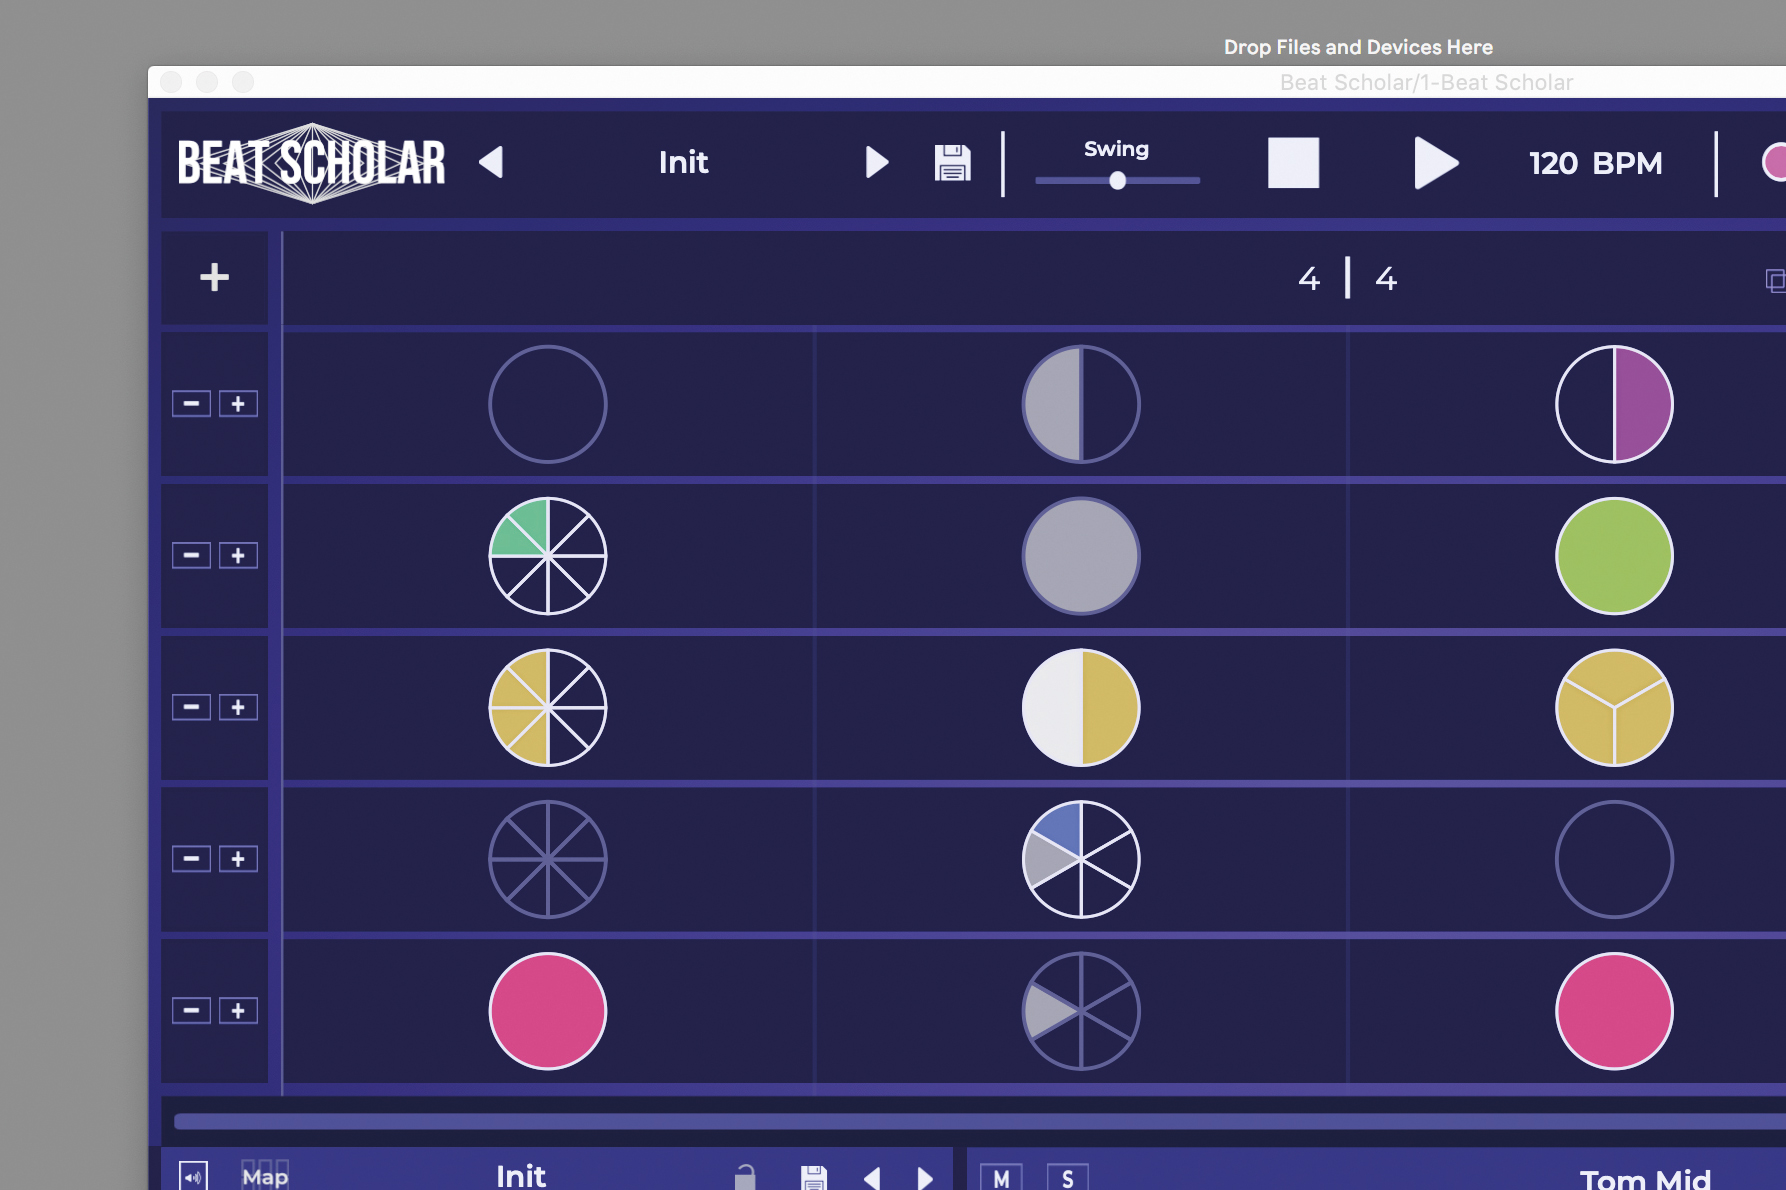
Add new channels to the sequencer by hitting the plus icon on the top left of the interface. Each channel doesn’t have to be exclusively one instrument, you can fill any slice of any step with whichever drum hit you like.
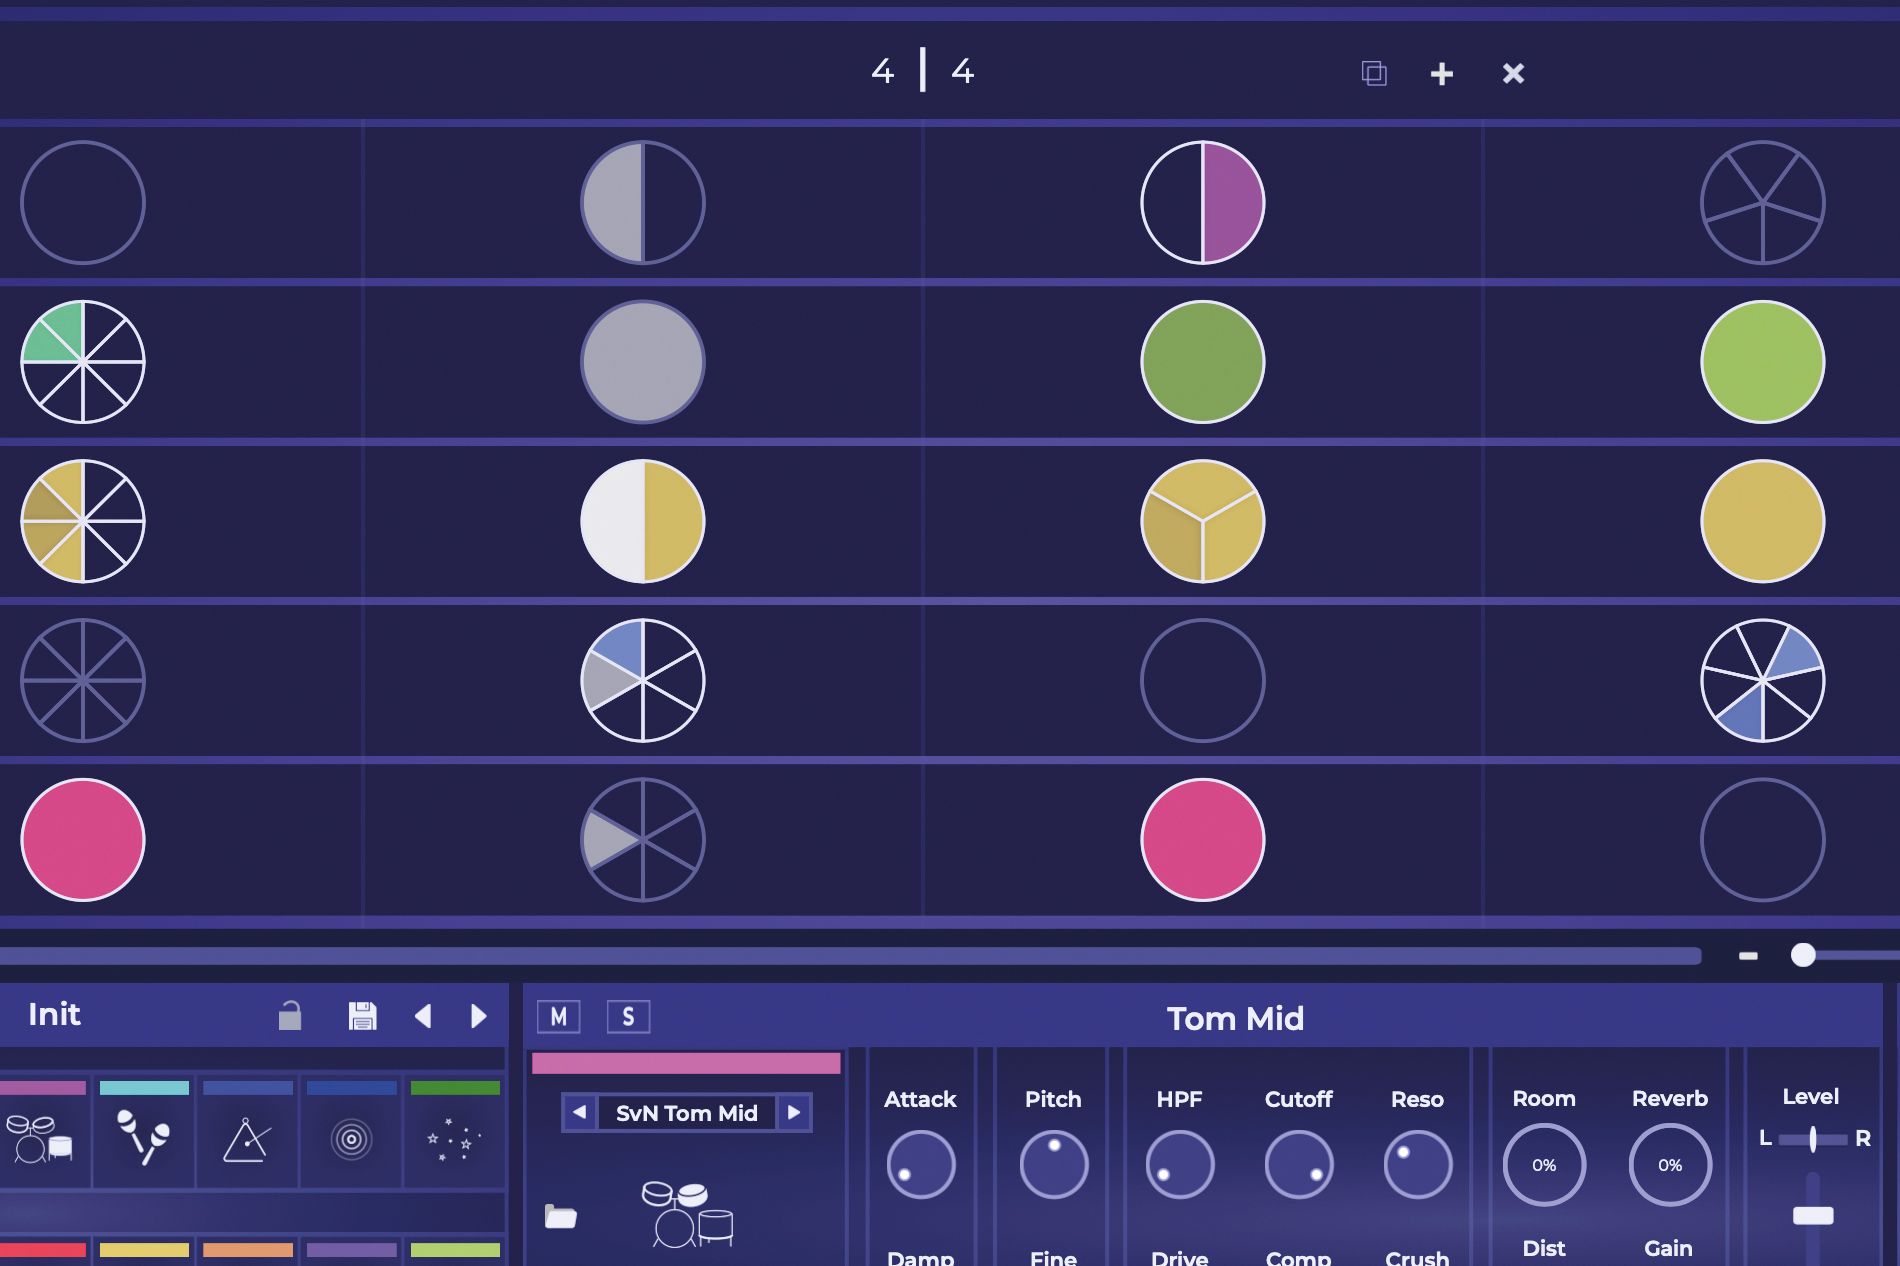
You can copy a pattern that you like by holding C on your keyboard, clicking a circle, and then holding V and clicking into another step. Control velocity by holding Alt or Option on your keyboard, then clicking and dragging on a slice.
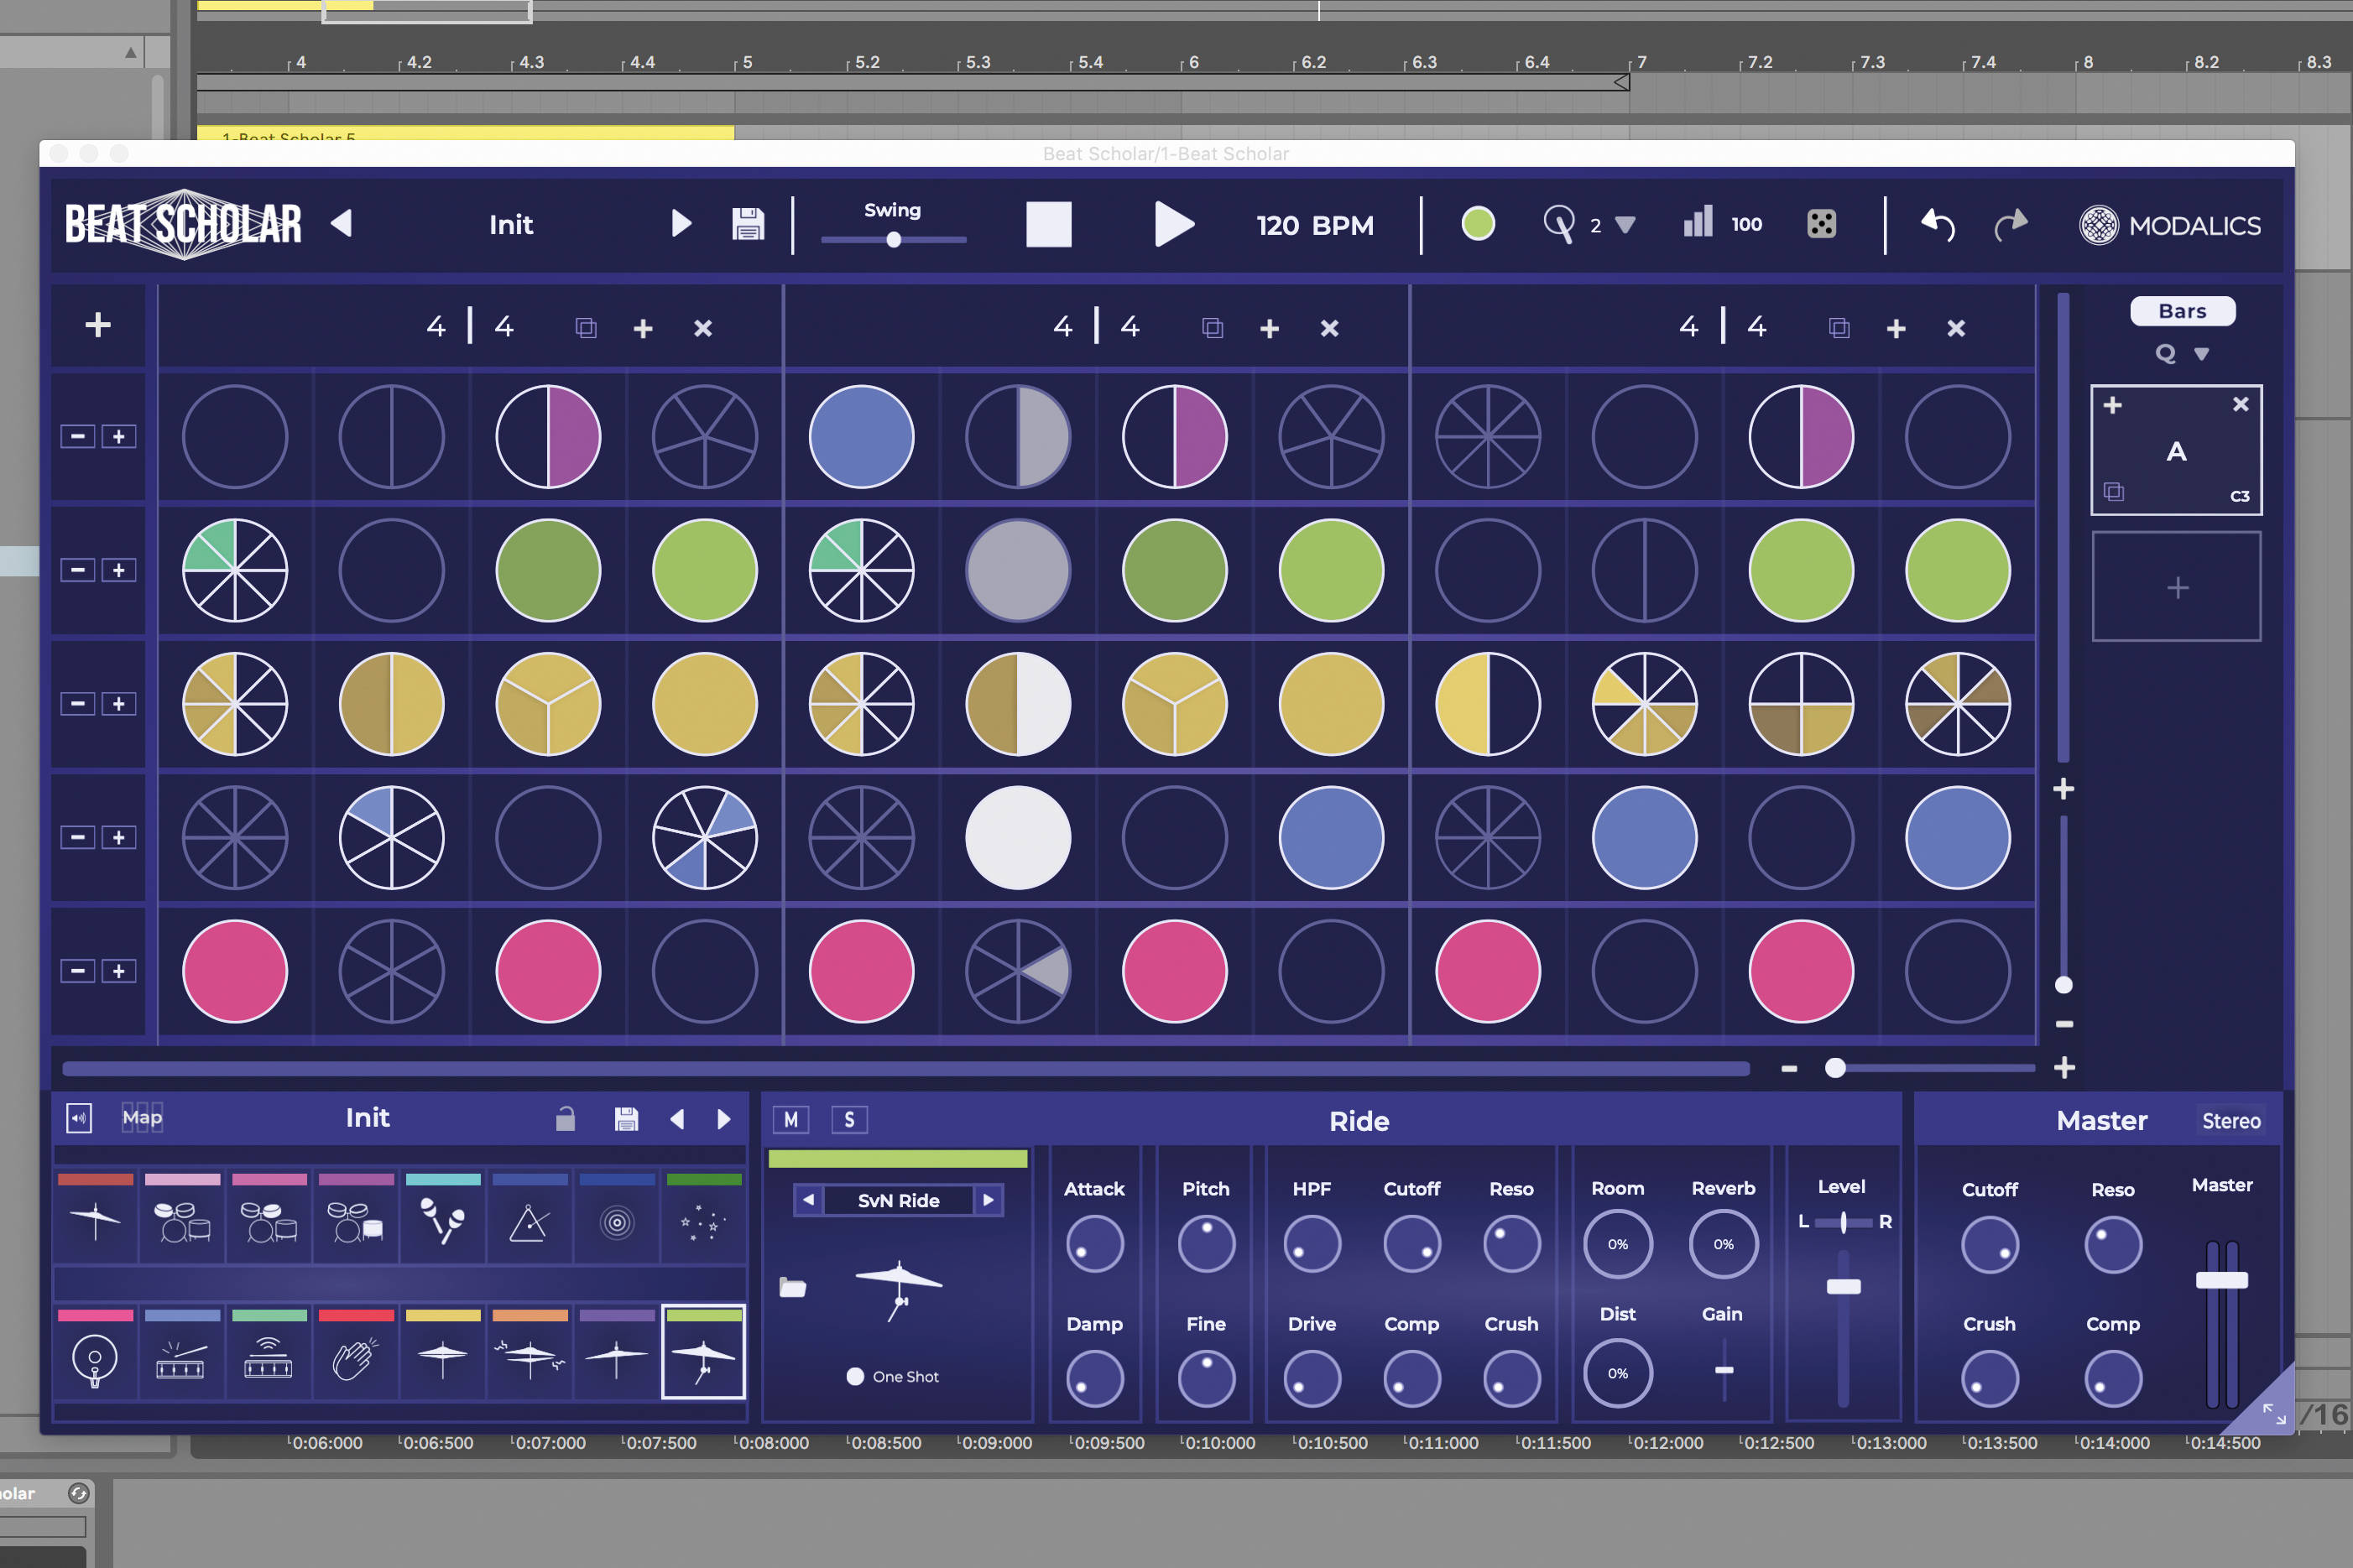
Add more bars by clicking the '+\ or the Duplicate button. The dice button randomises slice and beat input according to the drum hit you've selected, which can each be tweaked individually and treated with effects.
Exploring sounds with XLN Audio XO
The two plugins below have a focus on finding the right sample to play each part of your drum kit. While great for sequencing and mixing in their own rights, XO and Atlas are inescapably ‘about’ something more.
6 drum processing techniques to help you program state-of-the-art beats
On each, your available sounds are laid out in a visual space and grouped by instrument (as detected by the plugin). You can then browse your available samples visually, with closer options relating to more similar sounds, and more distant ones taking you down a different sonic path.
Both plugins do this a little differently, and as part of larger packages, but for those who have a ton of samples on their hard drive (or those who know the importance of finding the right sound from the very start of the process), both are great ways to work.
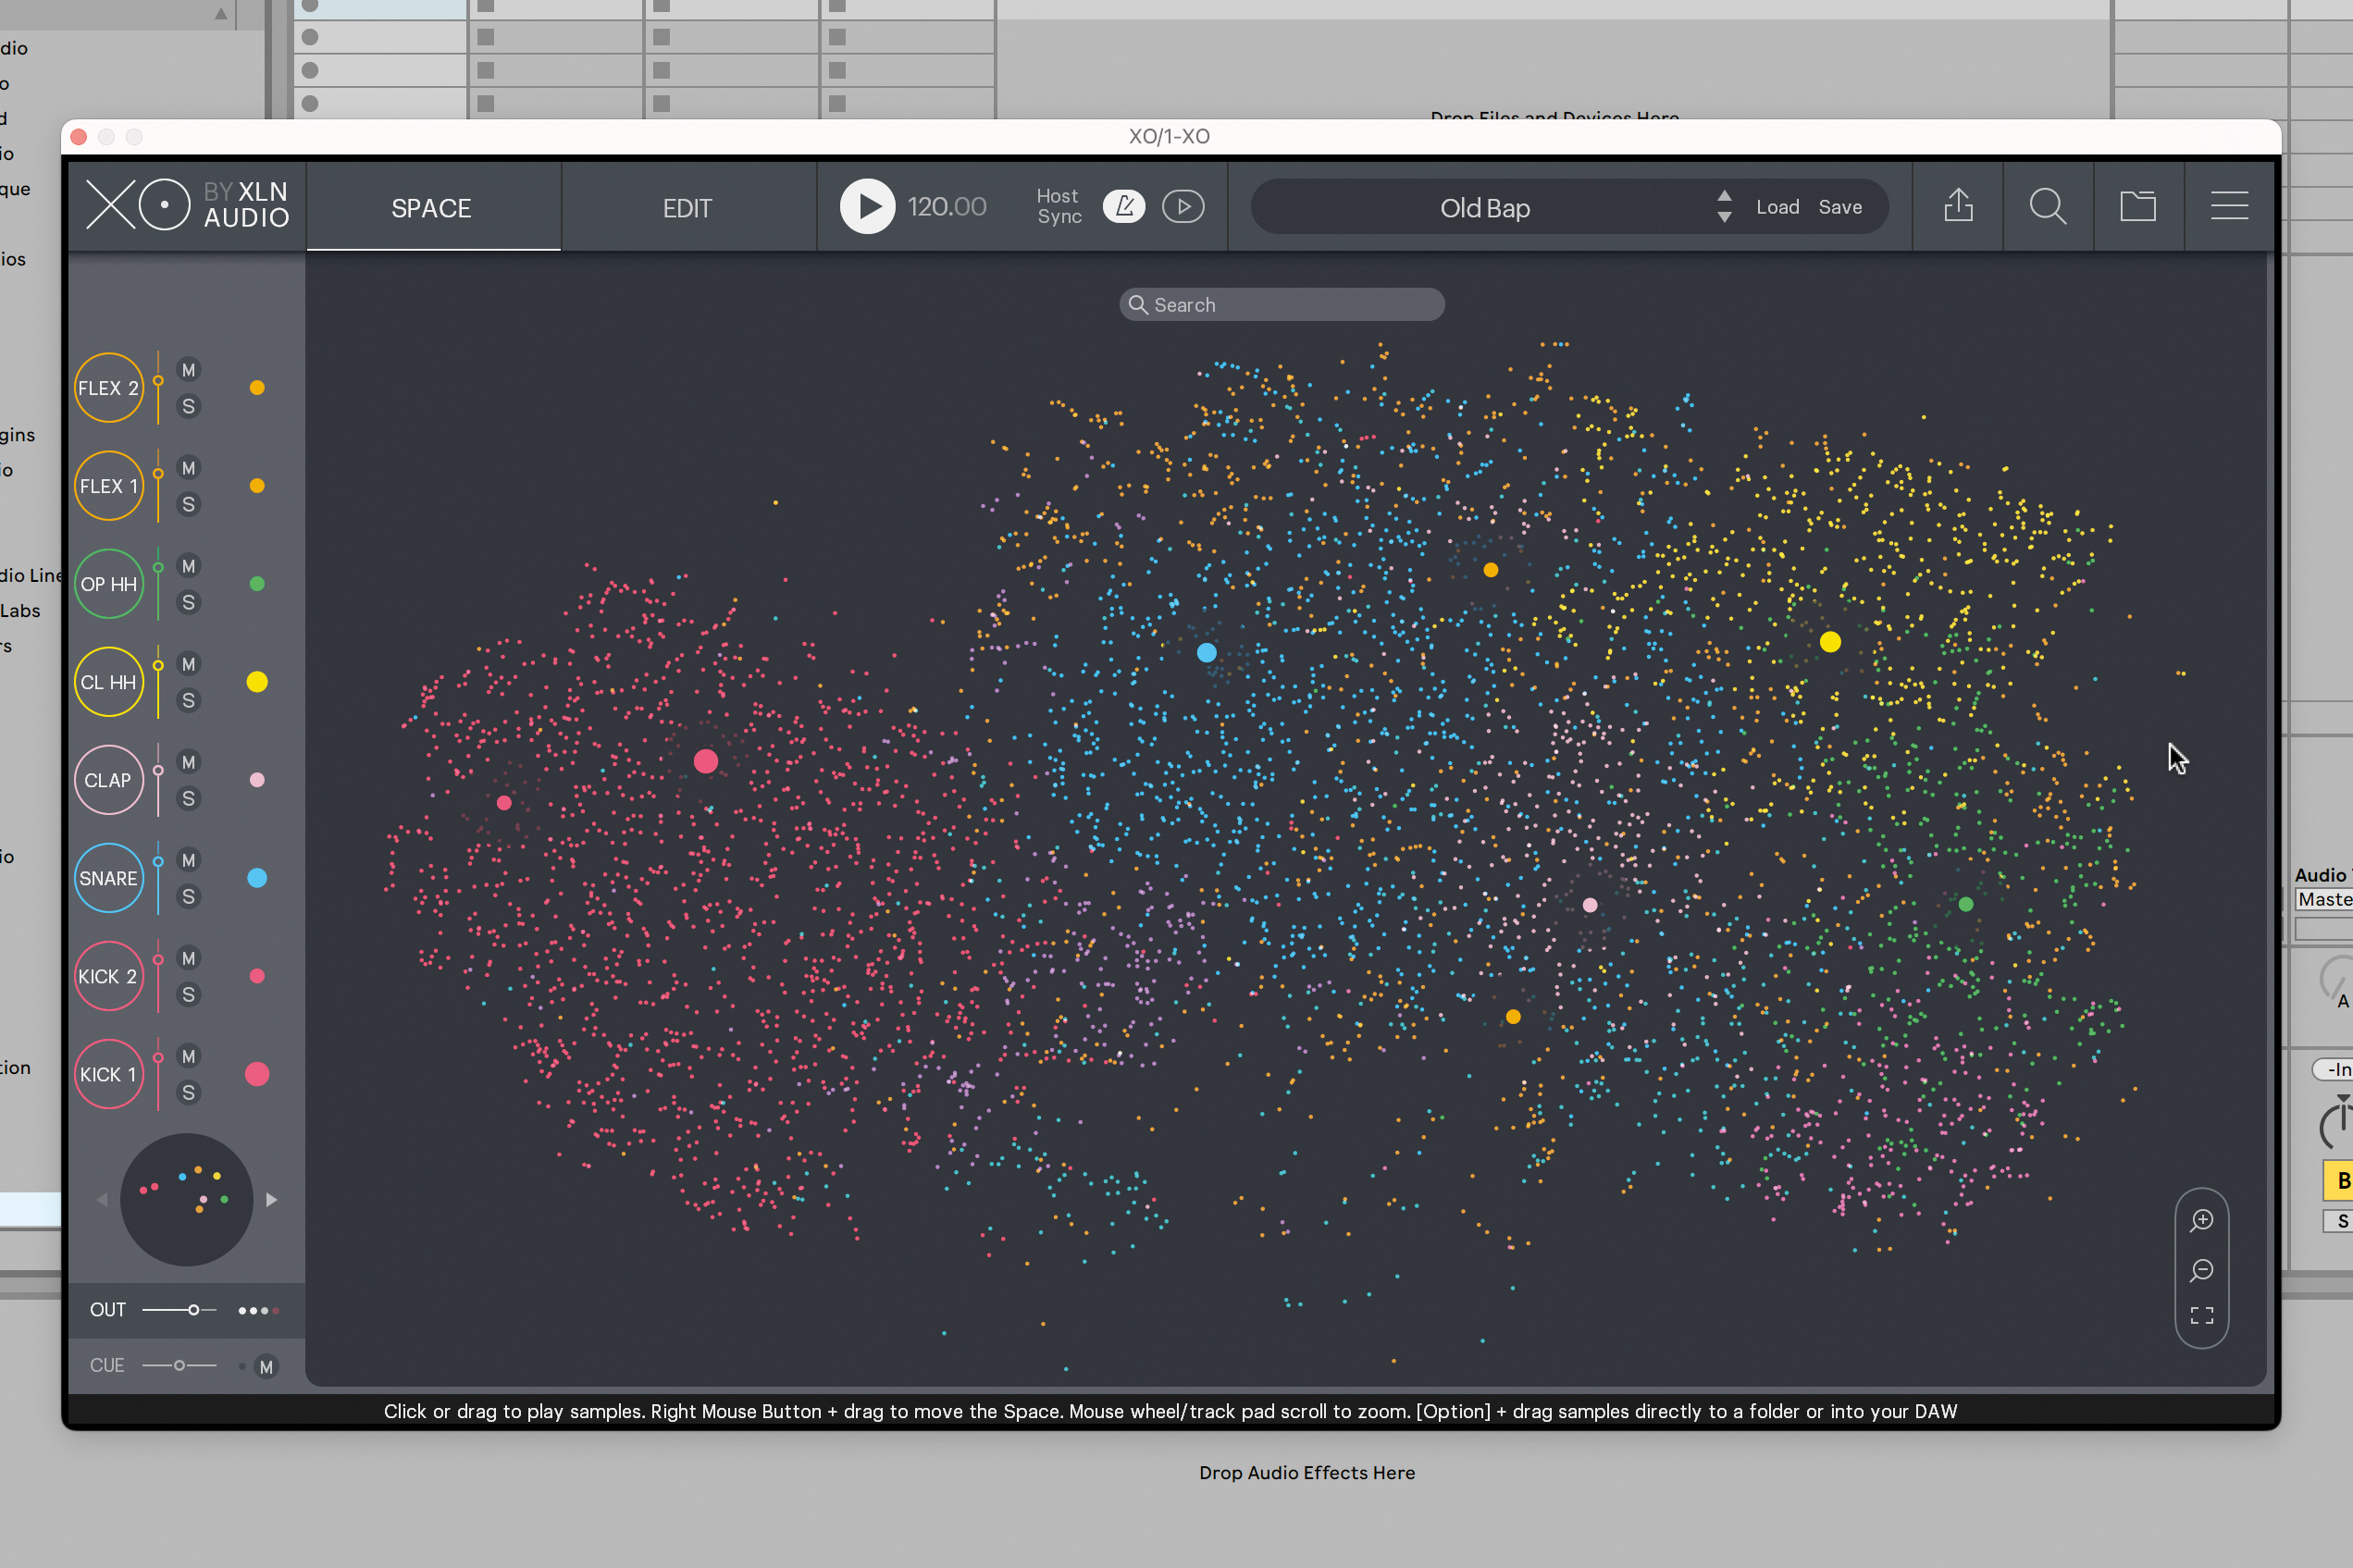
When you start with a preset in XLN Audio’s XO, you’re presented with a huge cluster of dots in different colours, each dot representing a sample, and each colour representing an element of the drum kit. We can zoom in to get a better look…
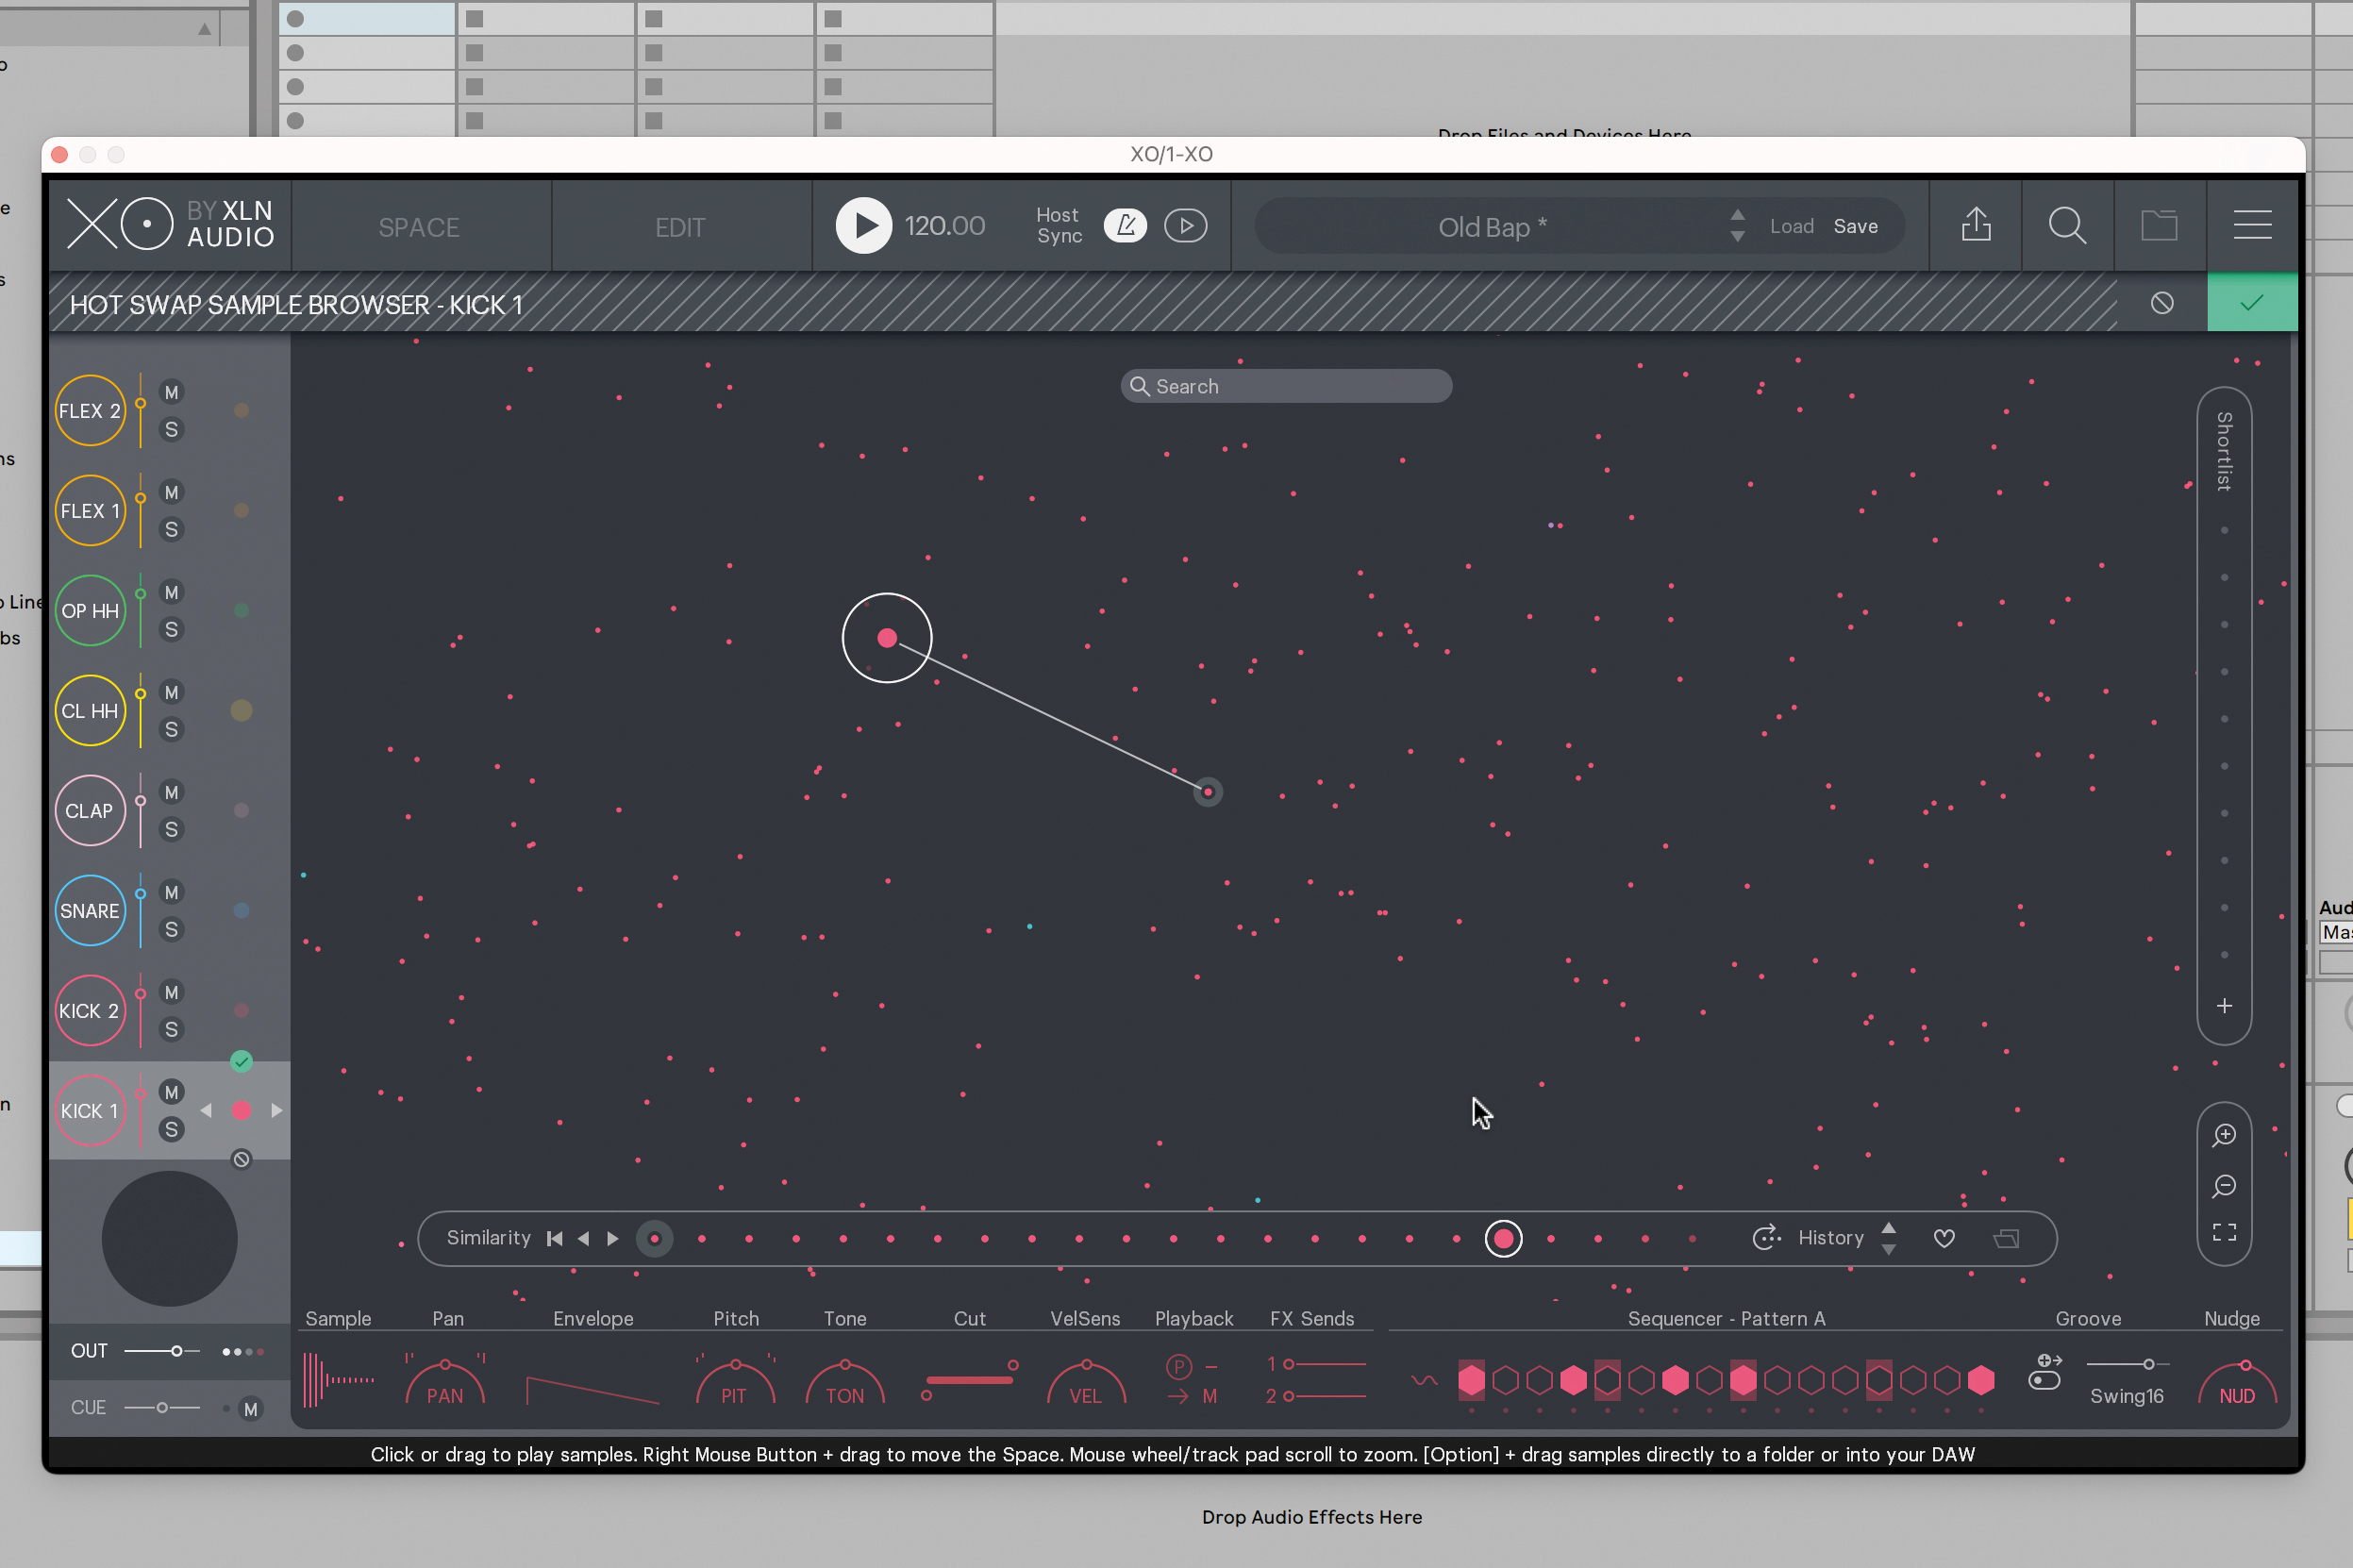
Here’s our kick and its surrounding ‘similar’ kicks. We can select a new one, or hot swap the kick sound, auditioning dots in situ as the MIDI plays back our main kit. And we can do this with any element of our setup.
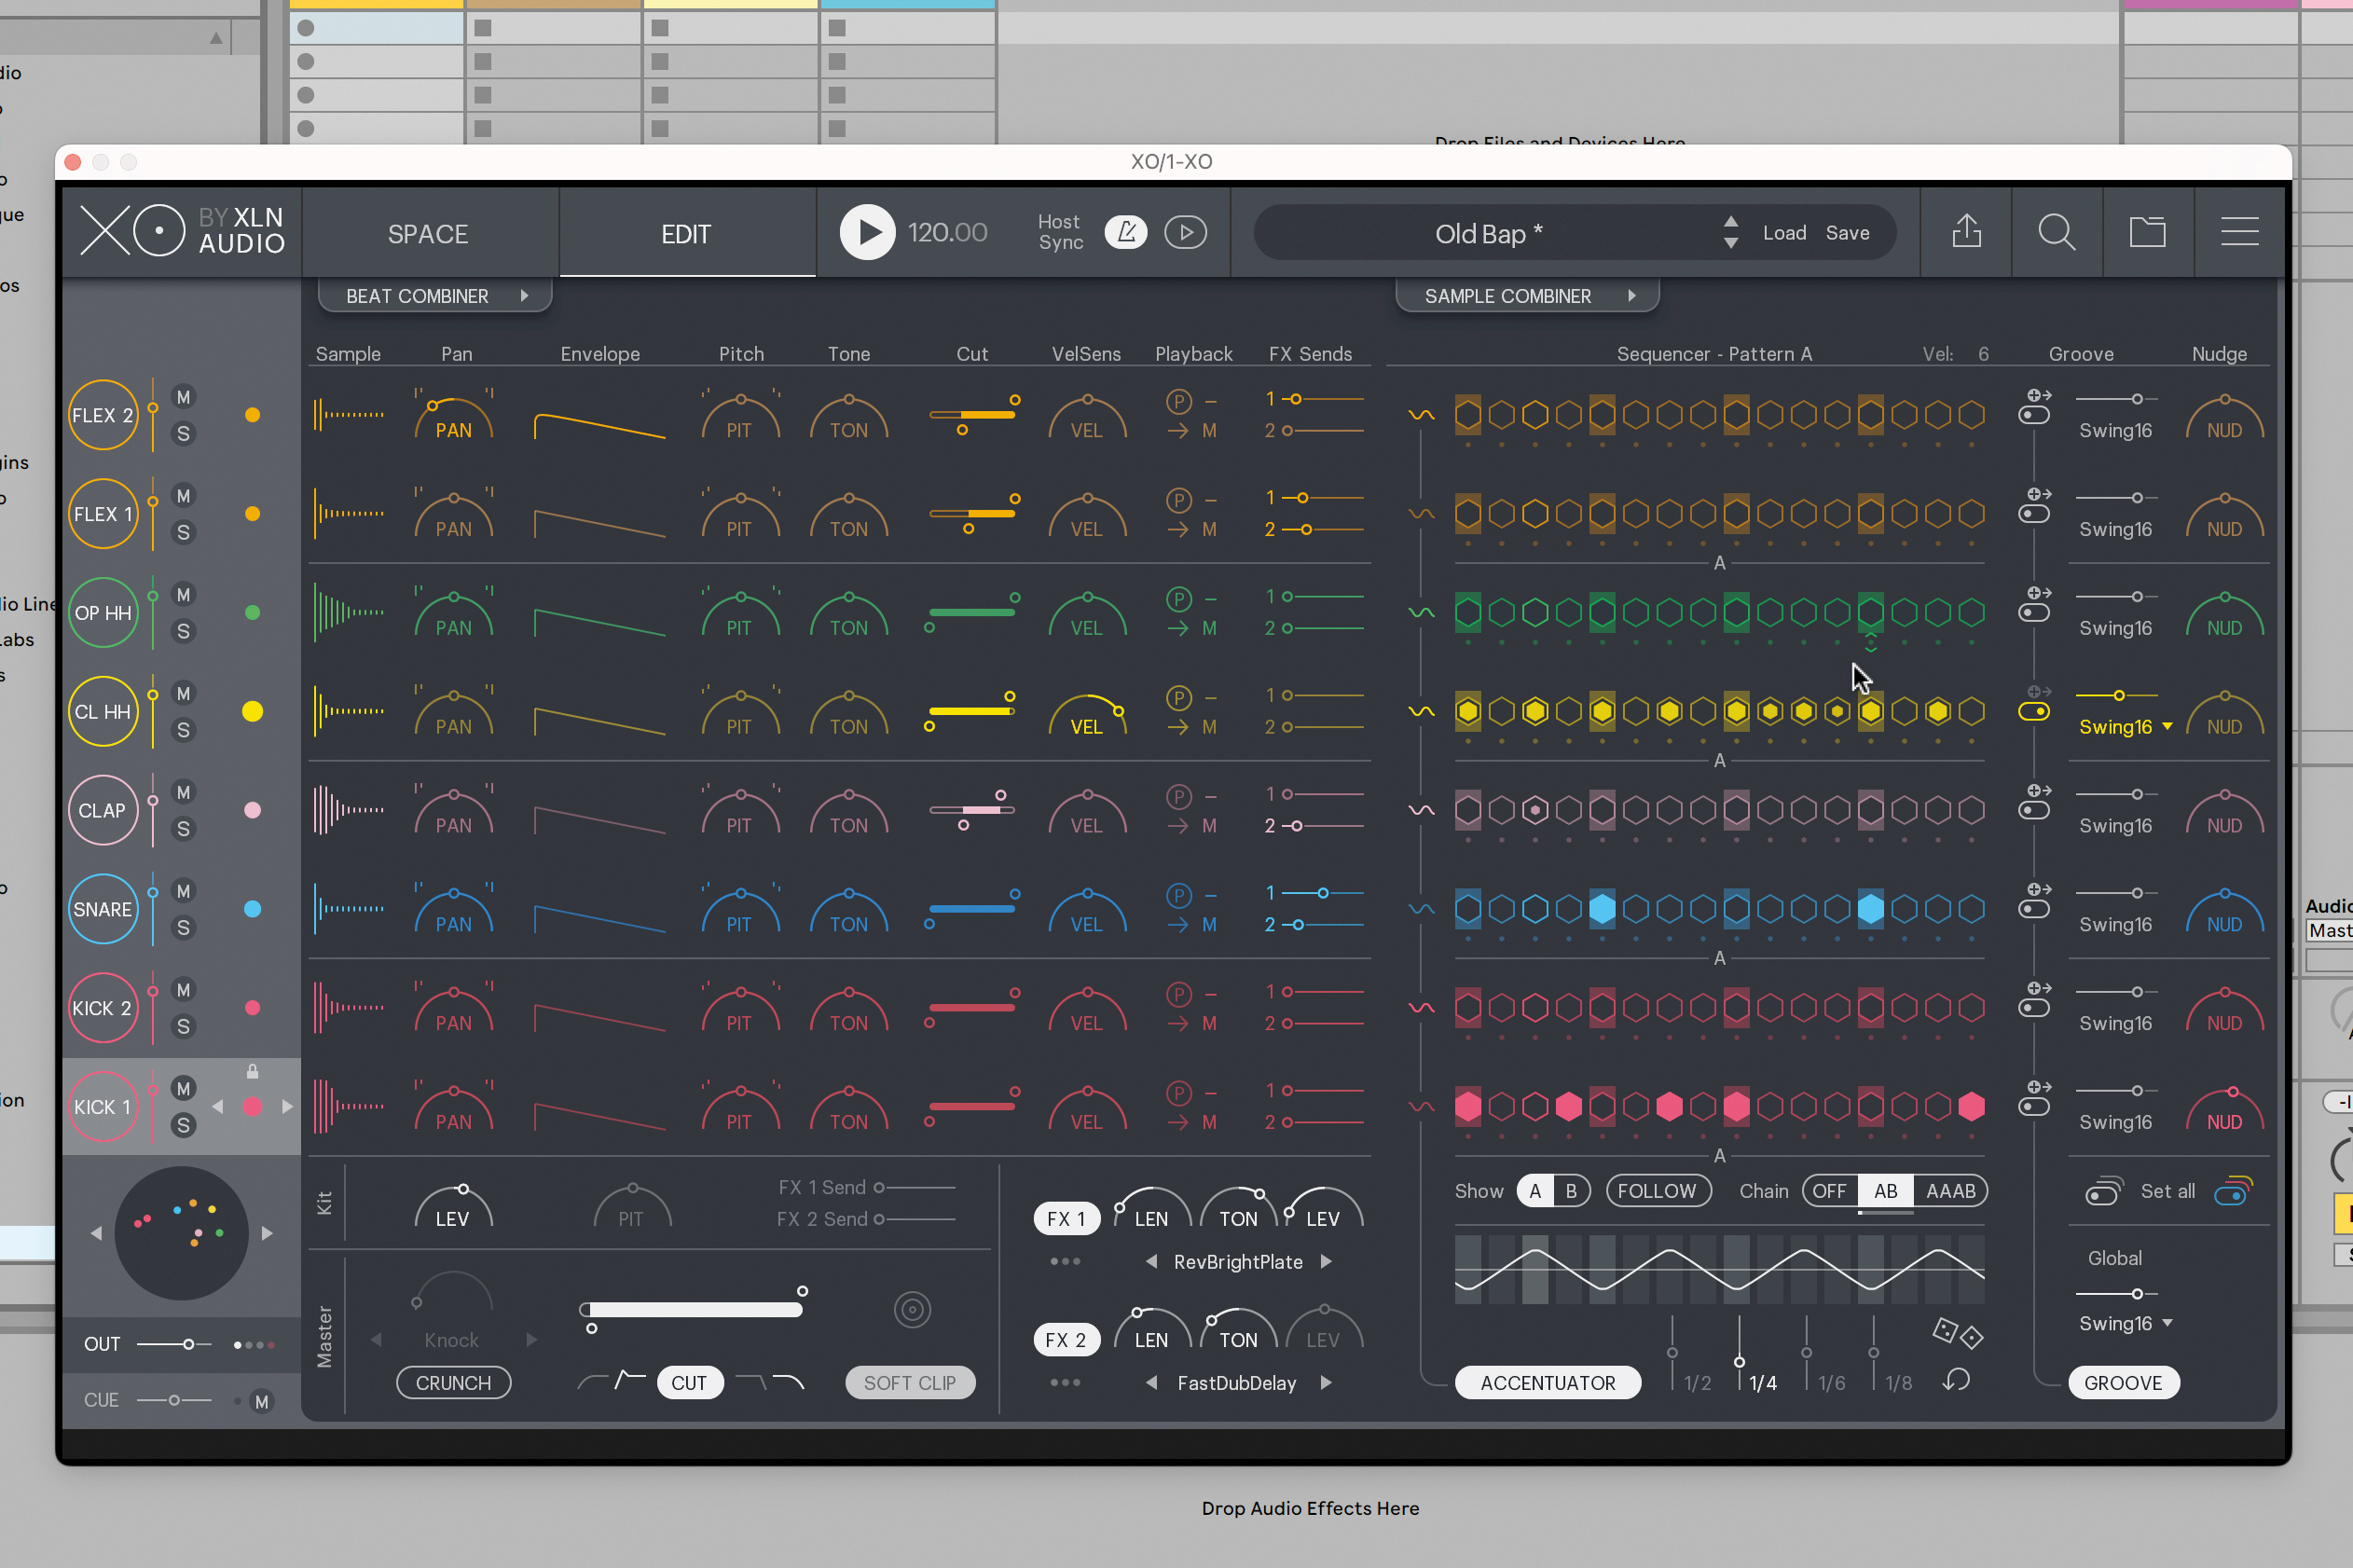
In the Edit window, we have a right-hand side where we can sequence the eight kit elements, programming notes by clicking, and velocities by dragging. This is also a chance to amend sounds. Any excuse to return to space.
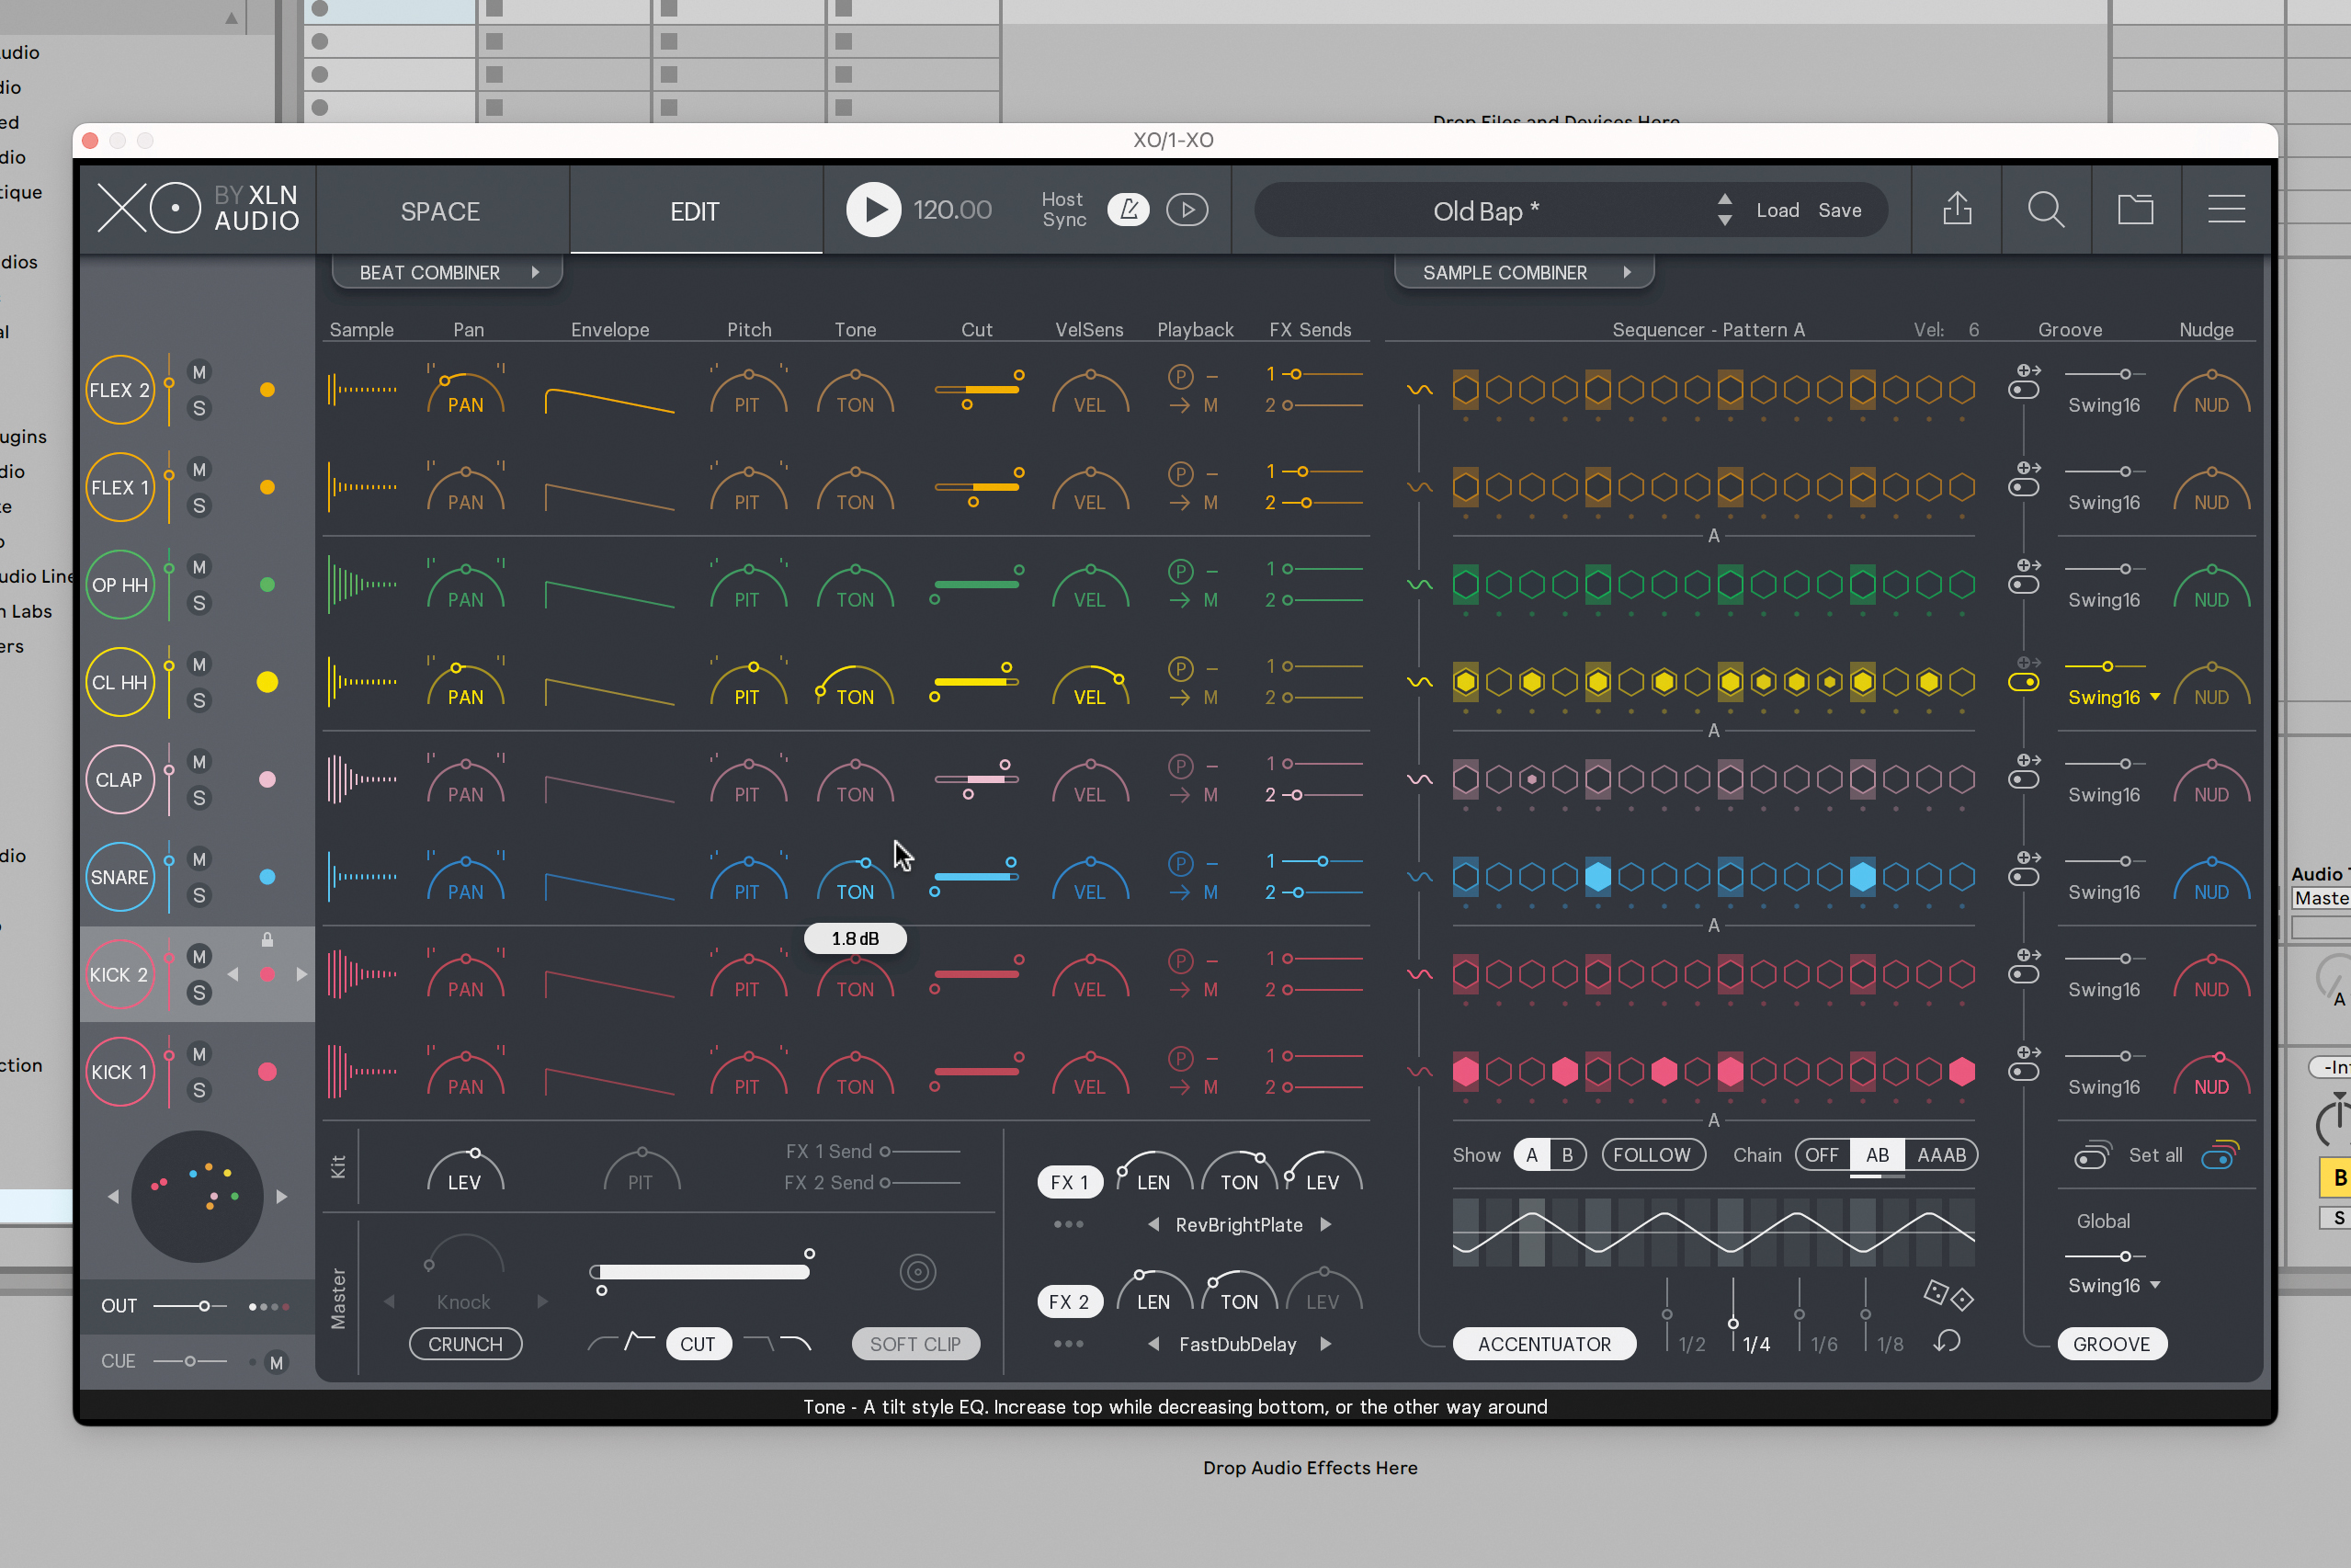
On the left-hand side of the Edit window, a sample editing section lets you tune, filter, pan and do lots more to each kit element. There are also send effects giving you access to both reverb and delay per element.
Navigating samples with Algonauts Atlas 2
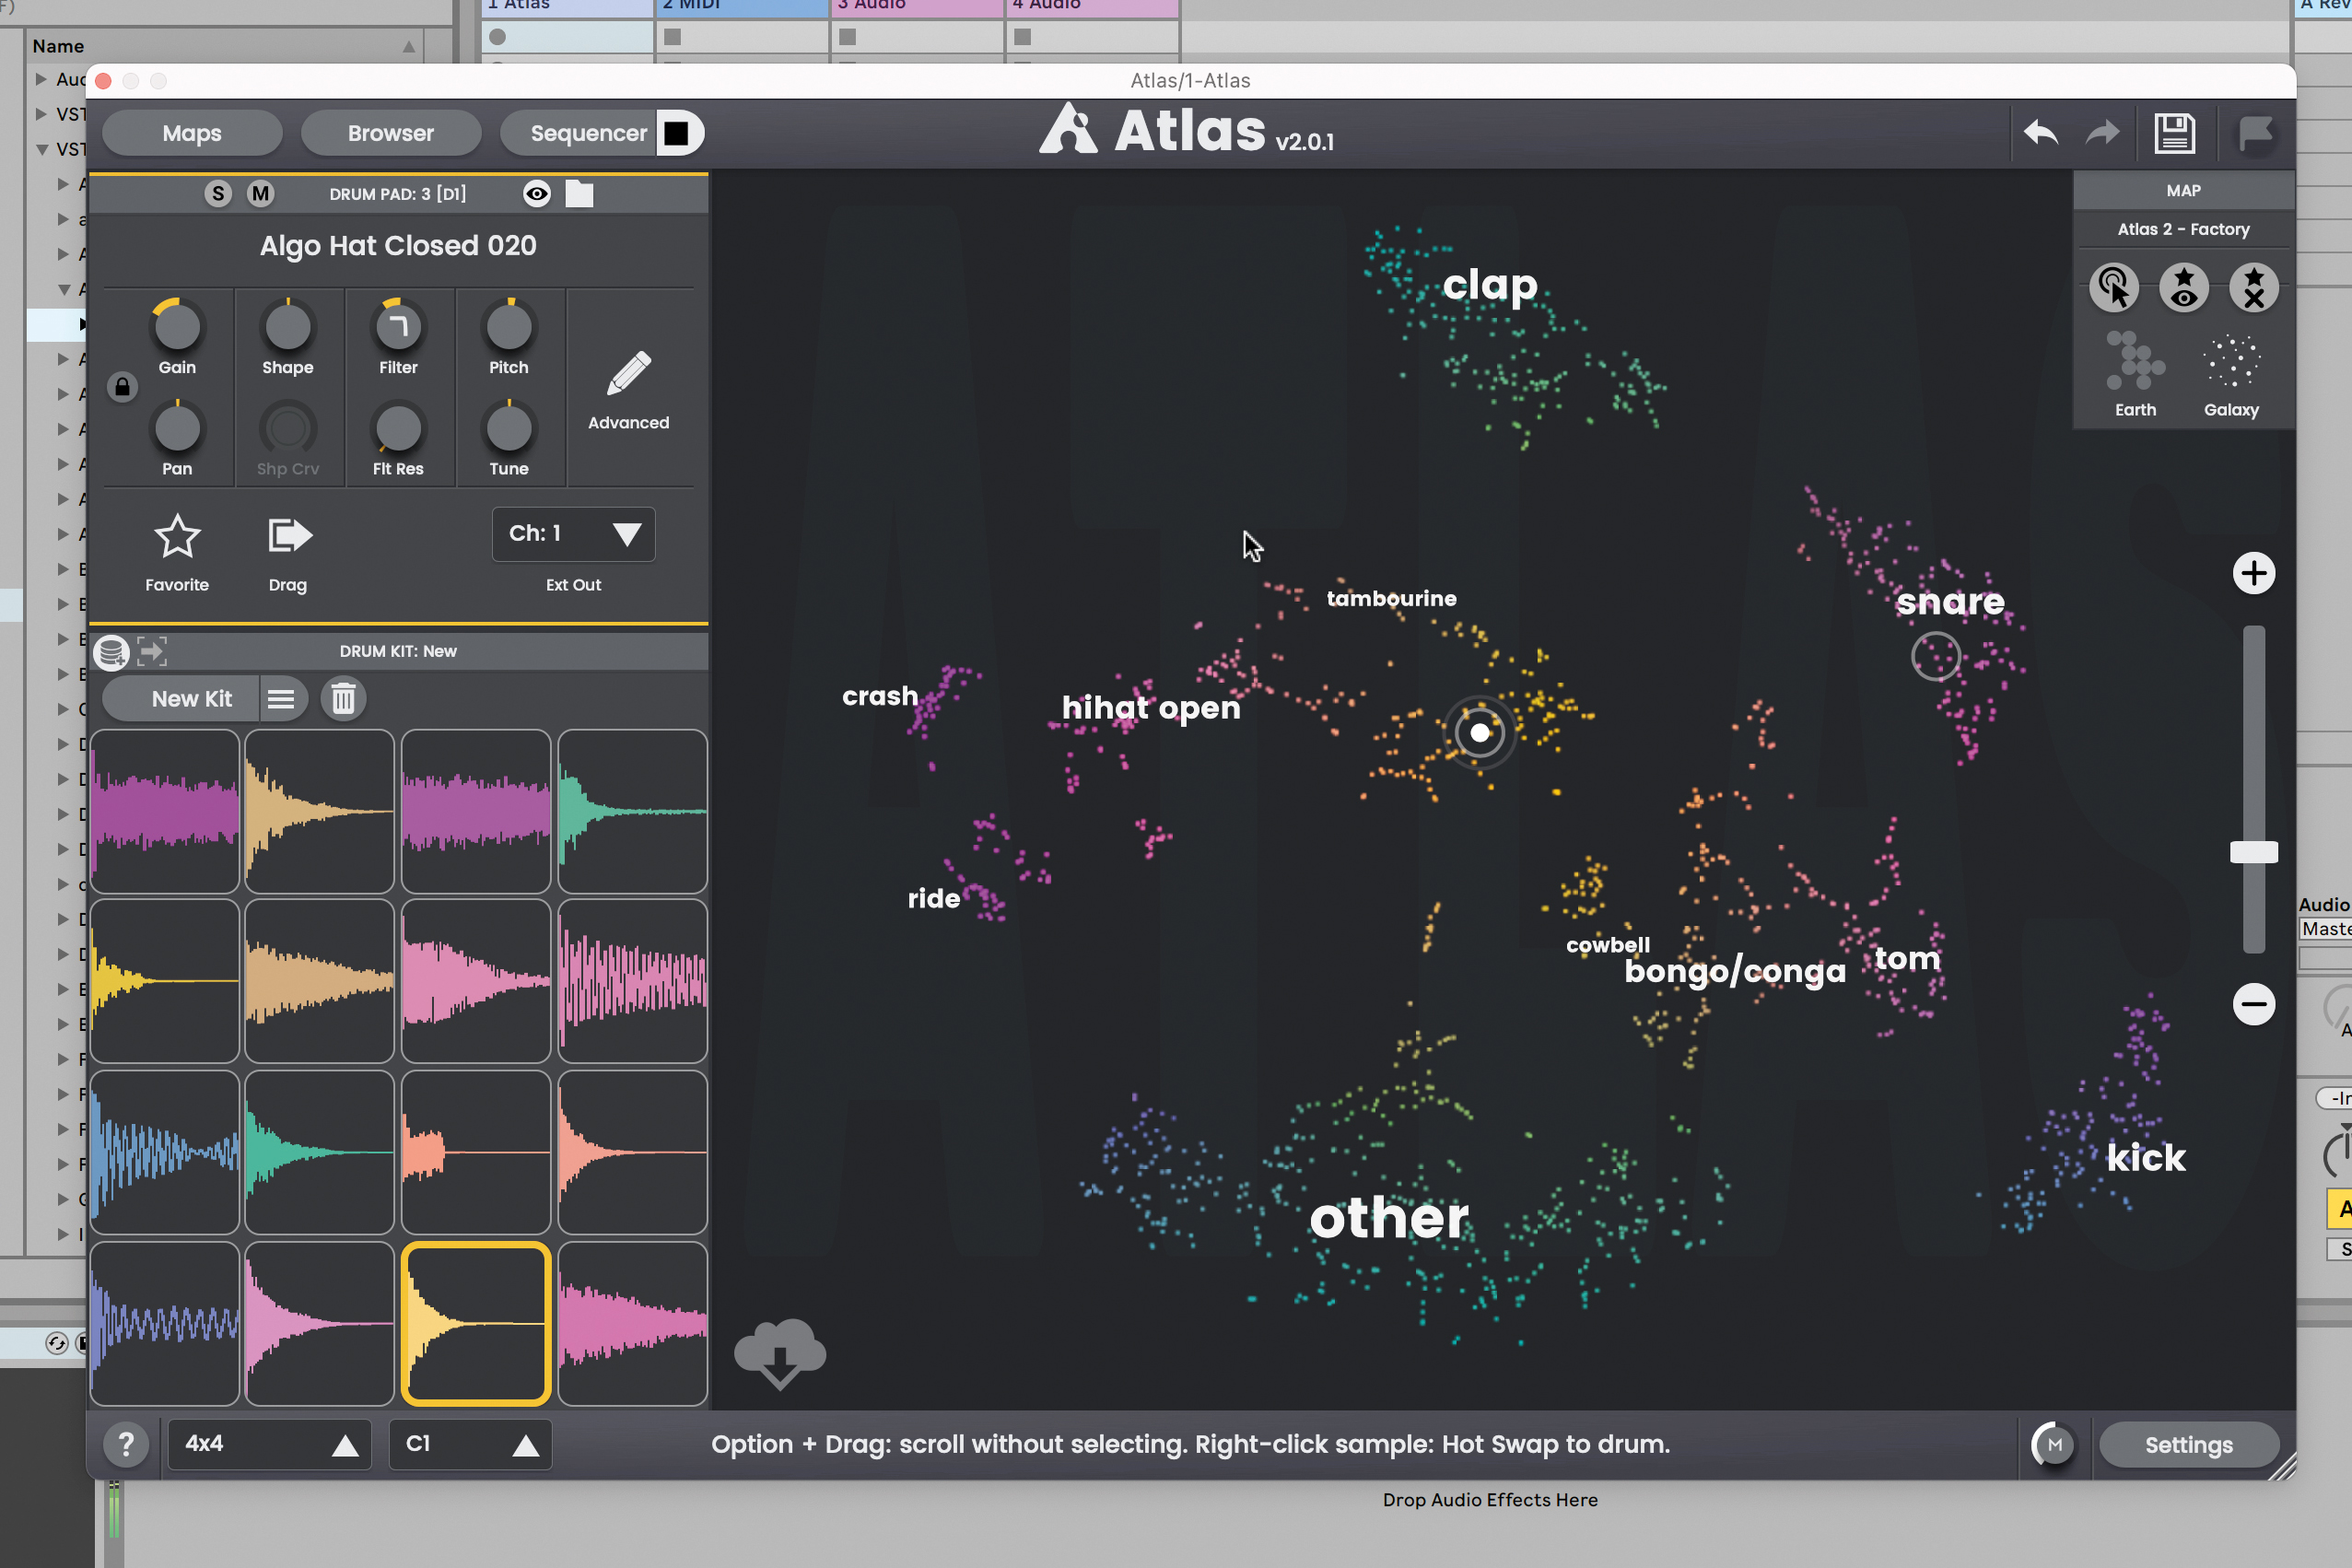
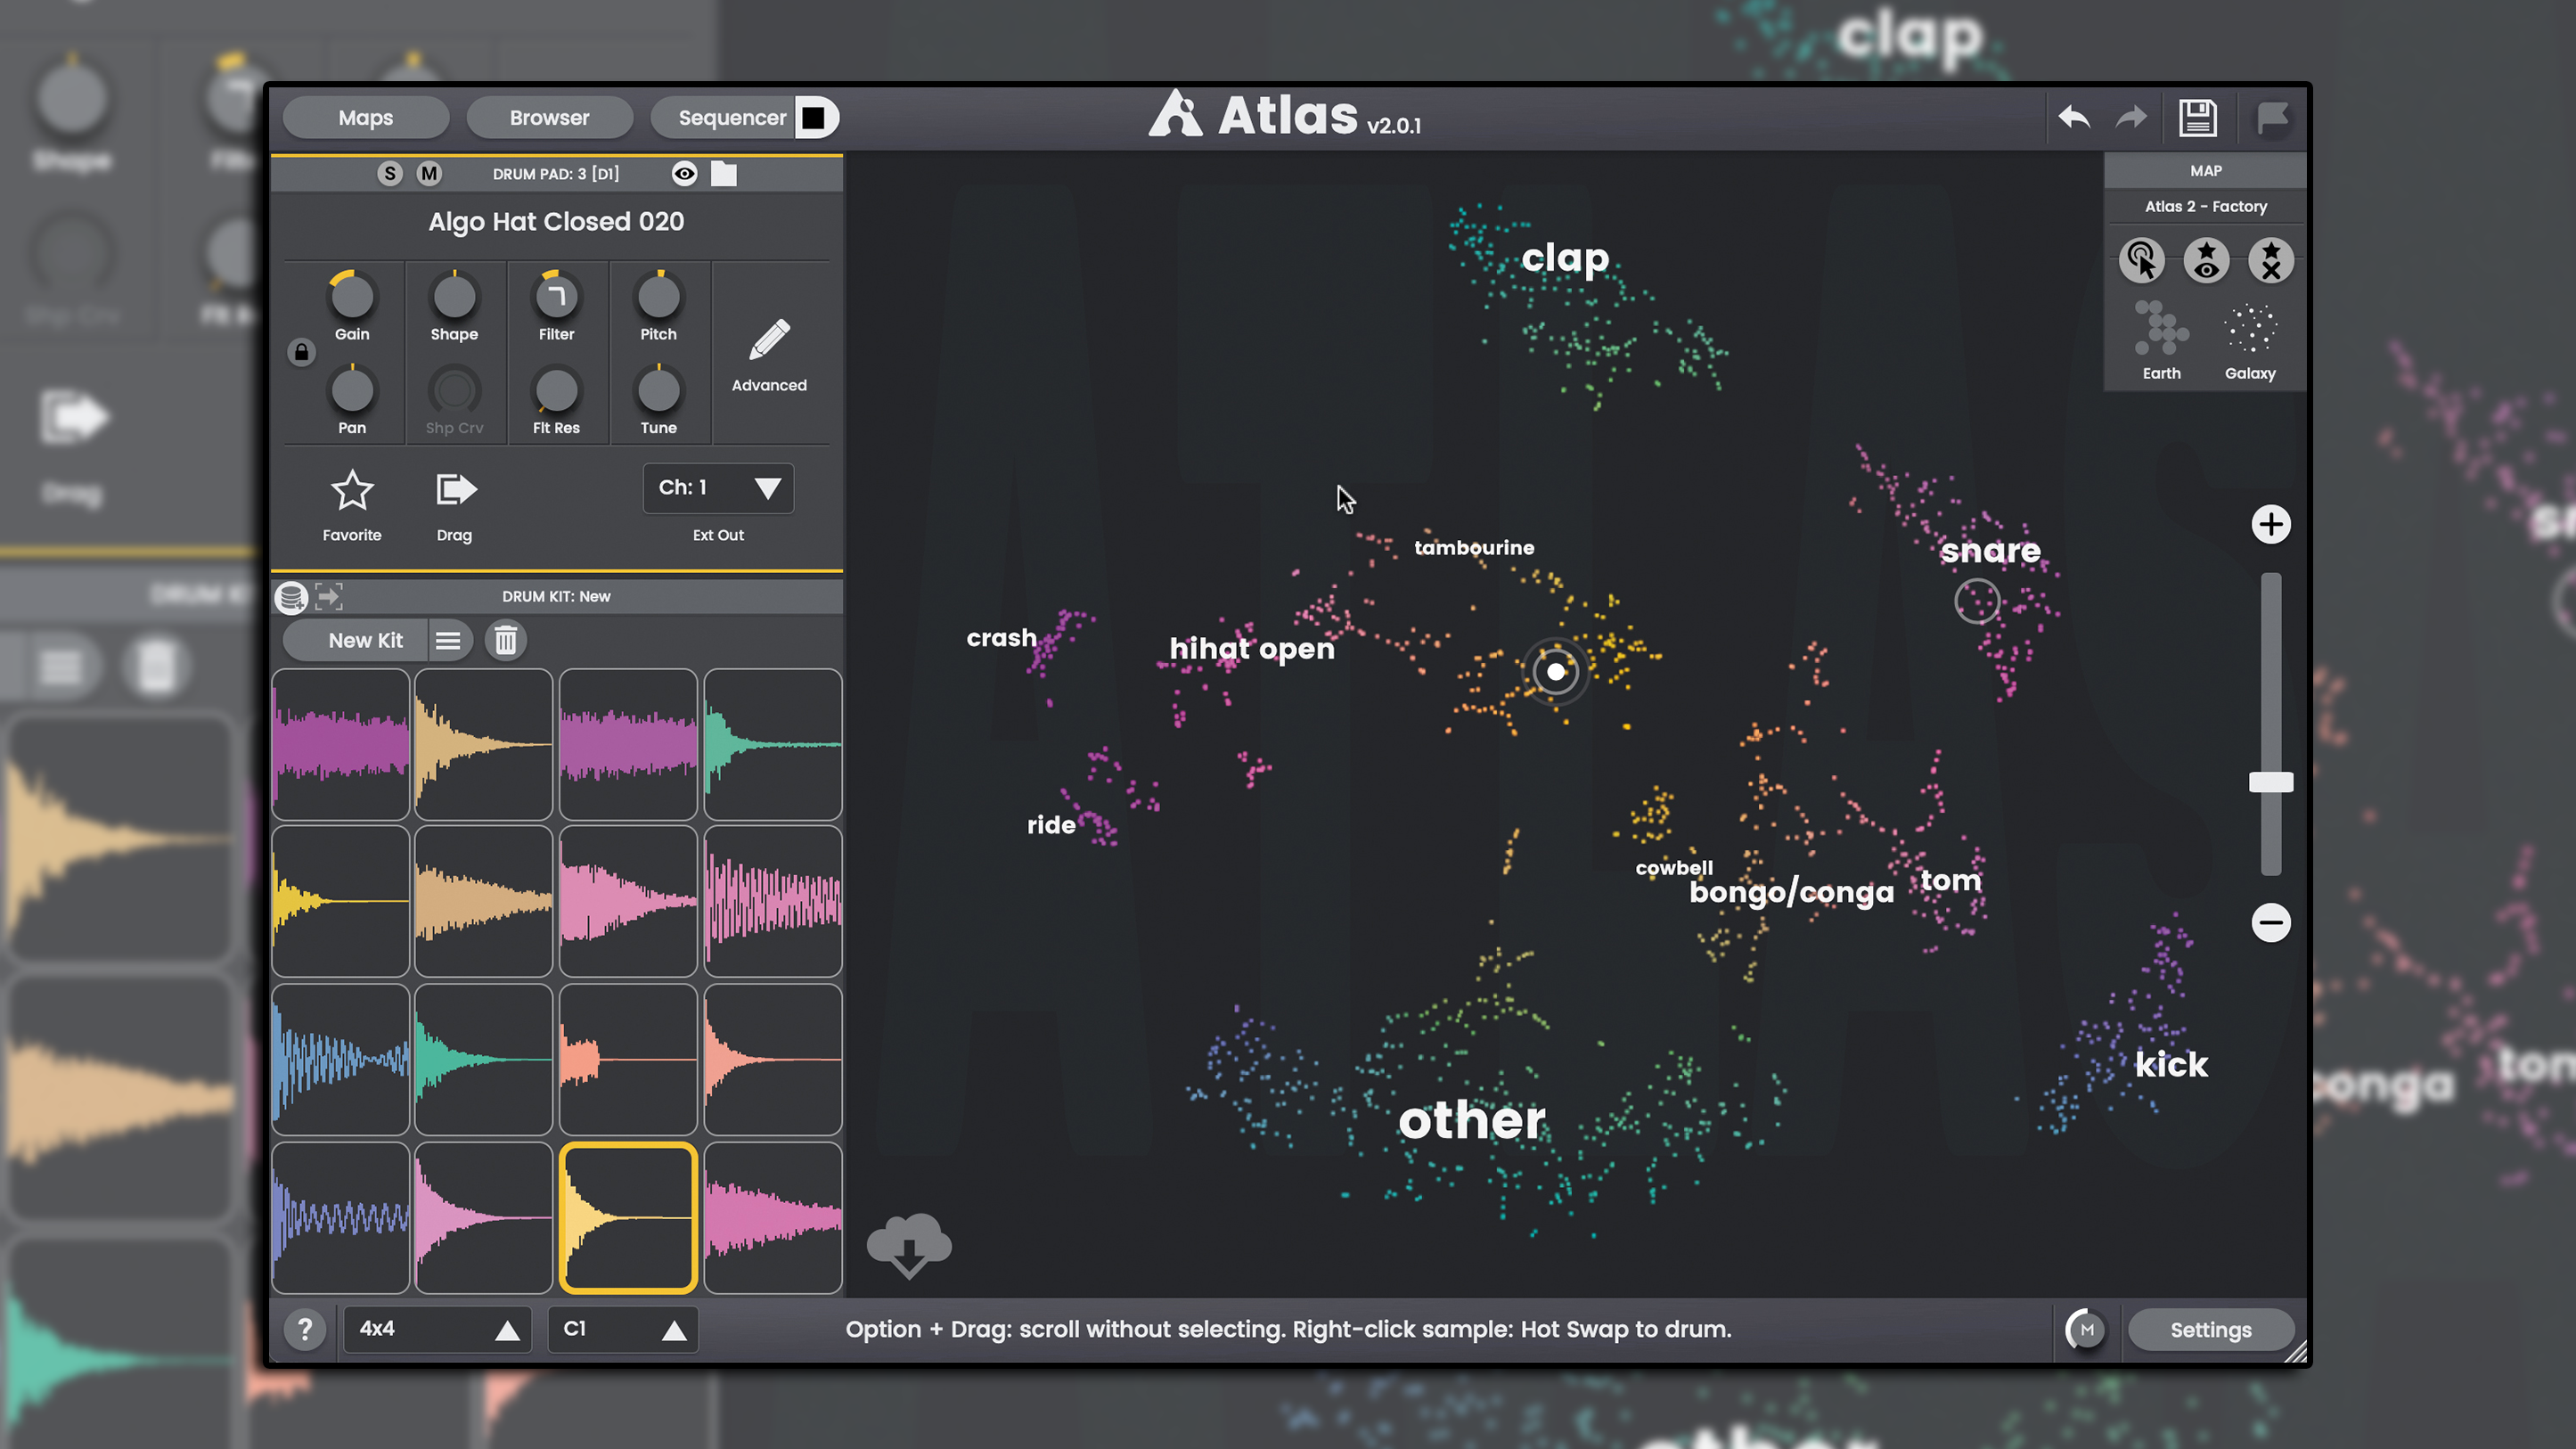
Algonaut’s Atlas puts drum pads and properties up front, letting you drag and drop sounds from its map of samples. Each area has been identified as a certain drum kit element, and you can audition any dot before dragging and dropping it onto a pad.
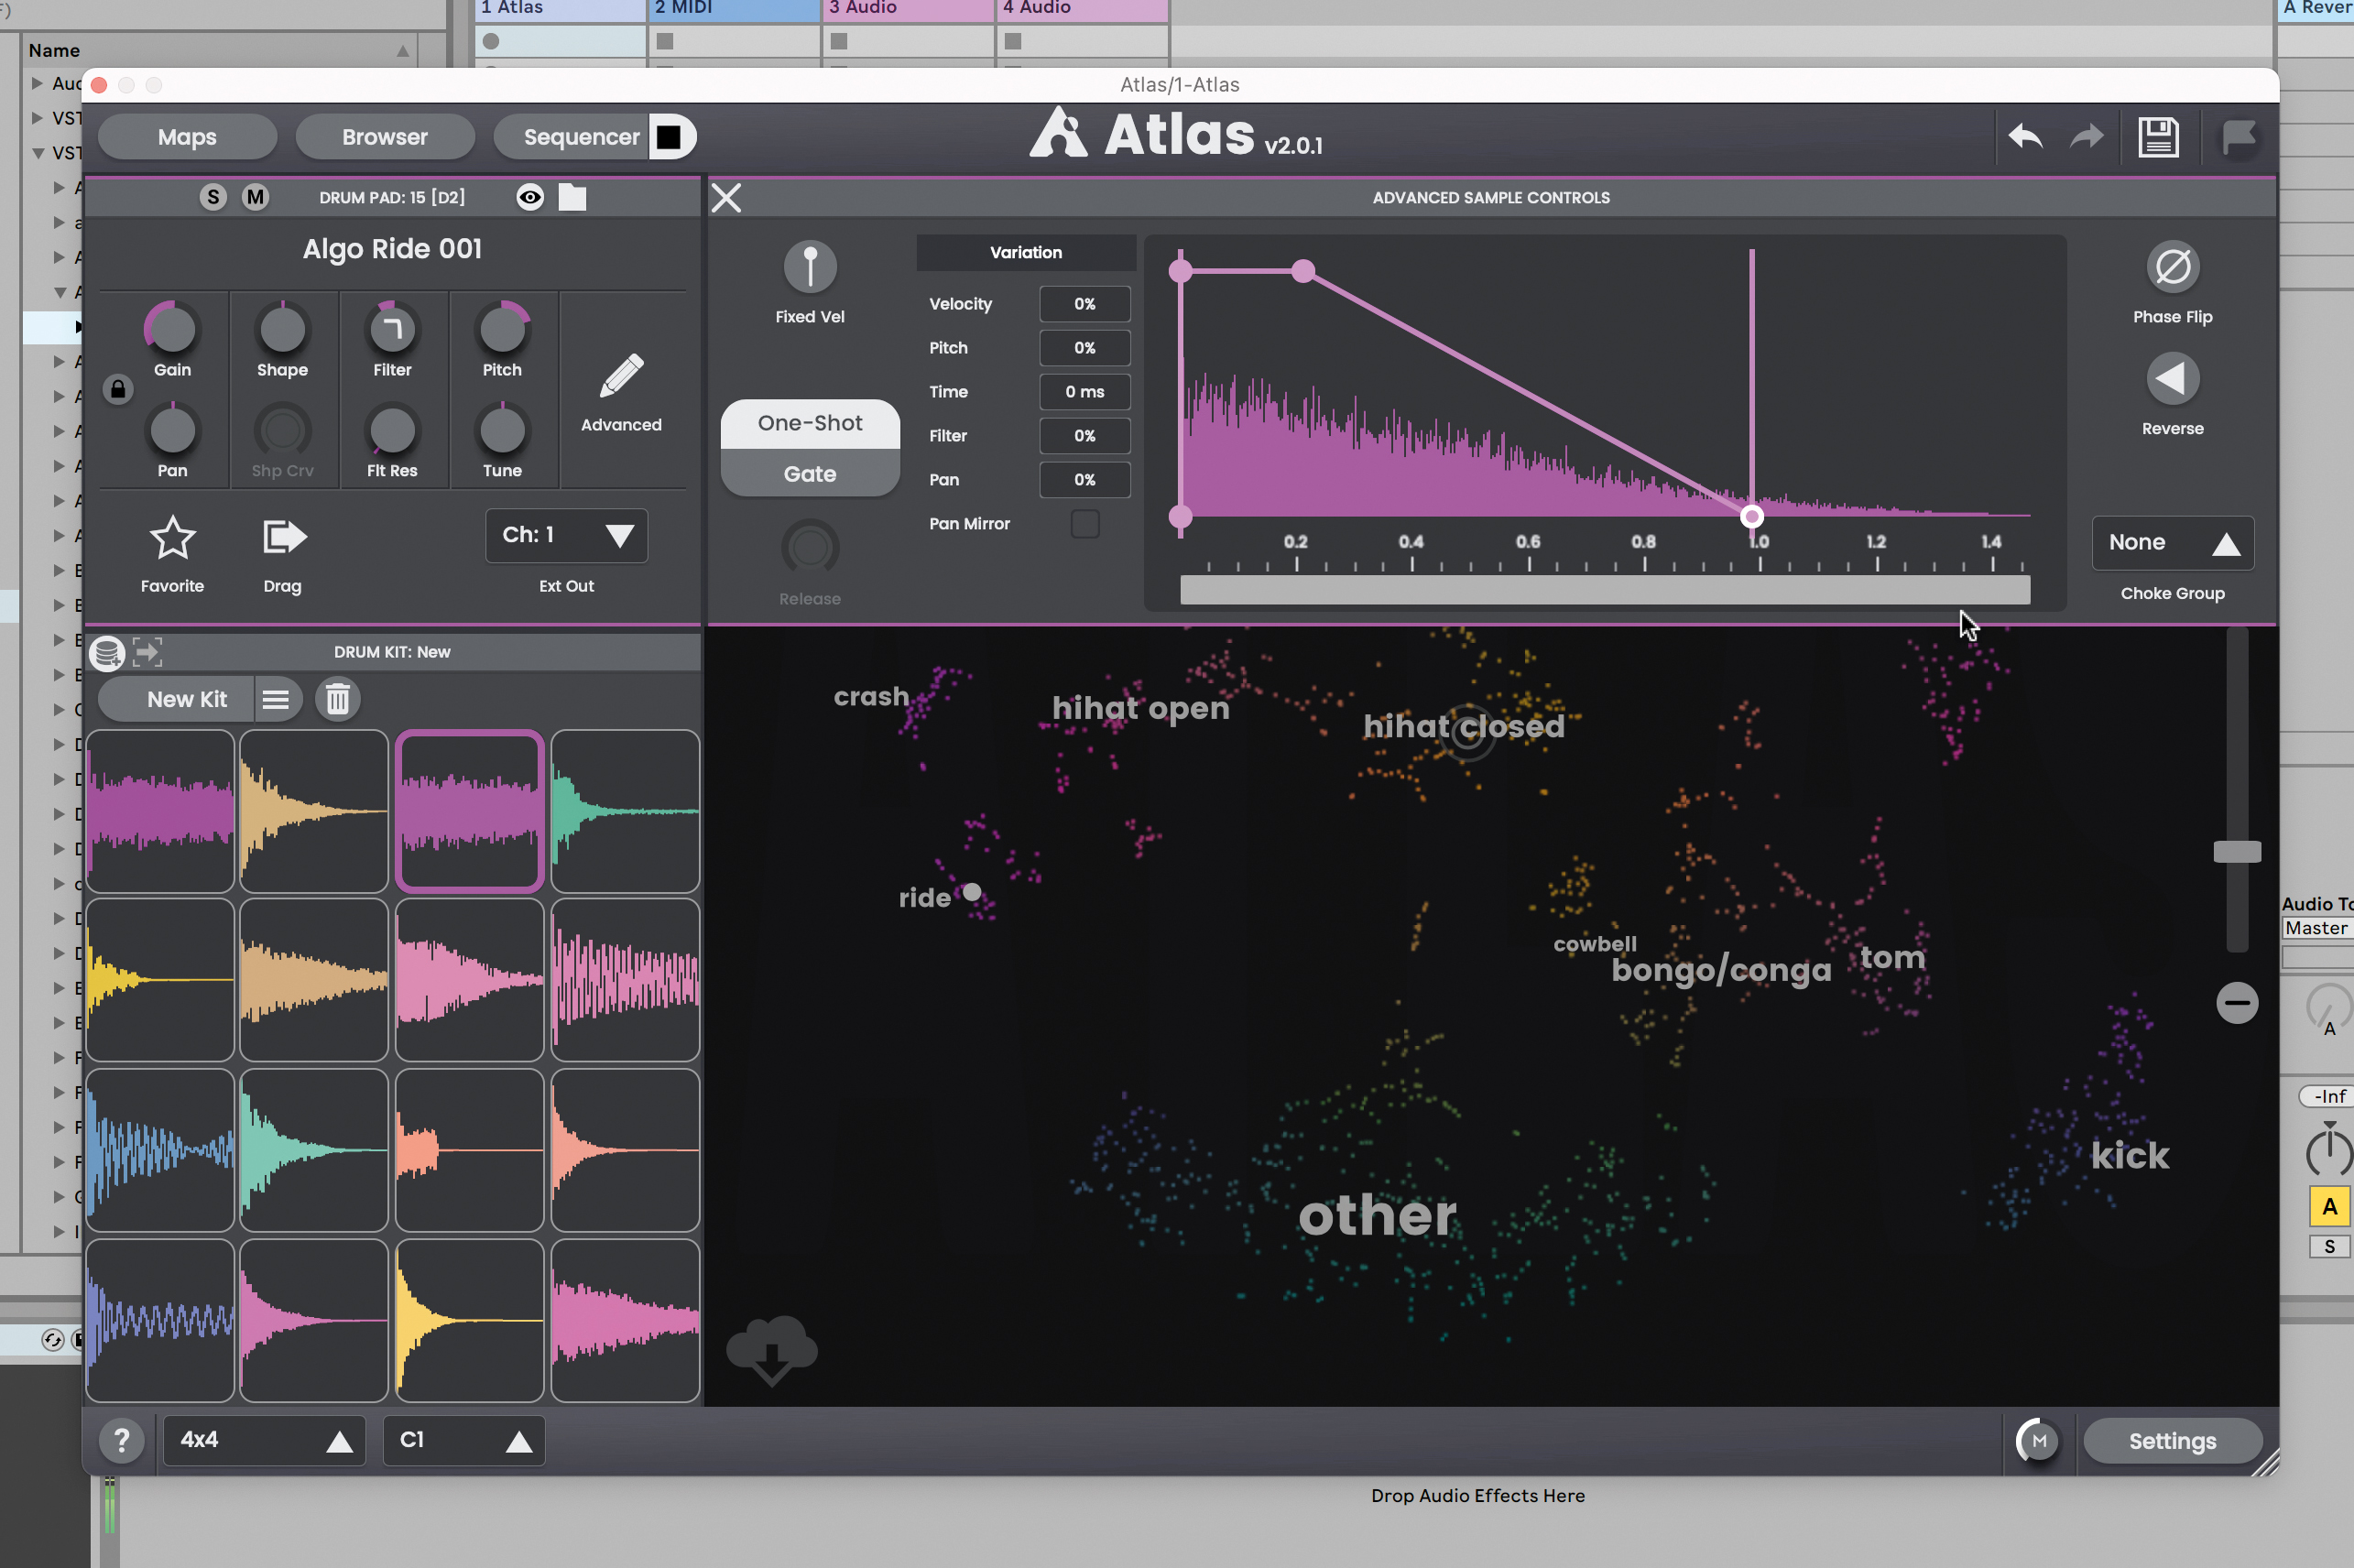
From here, you can edit its parameters, from pitching and filtering, panning and the usual, to advanced sample editing parameters: draw an envelope, choose starting time, velocity sensitivity, and so on.
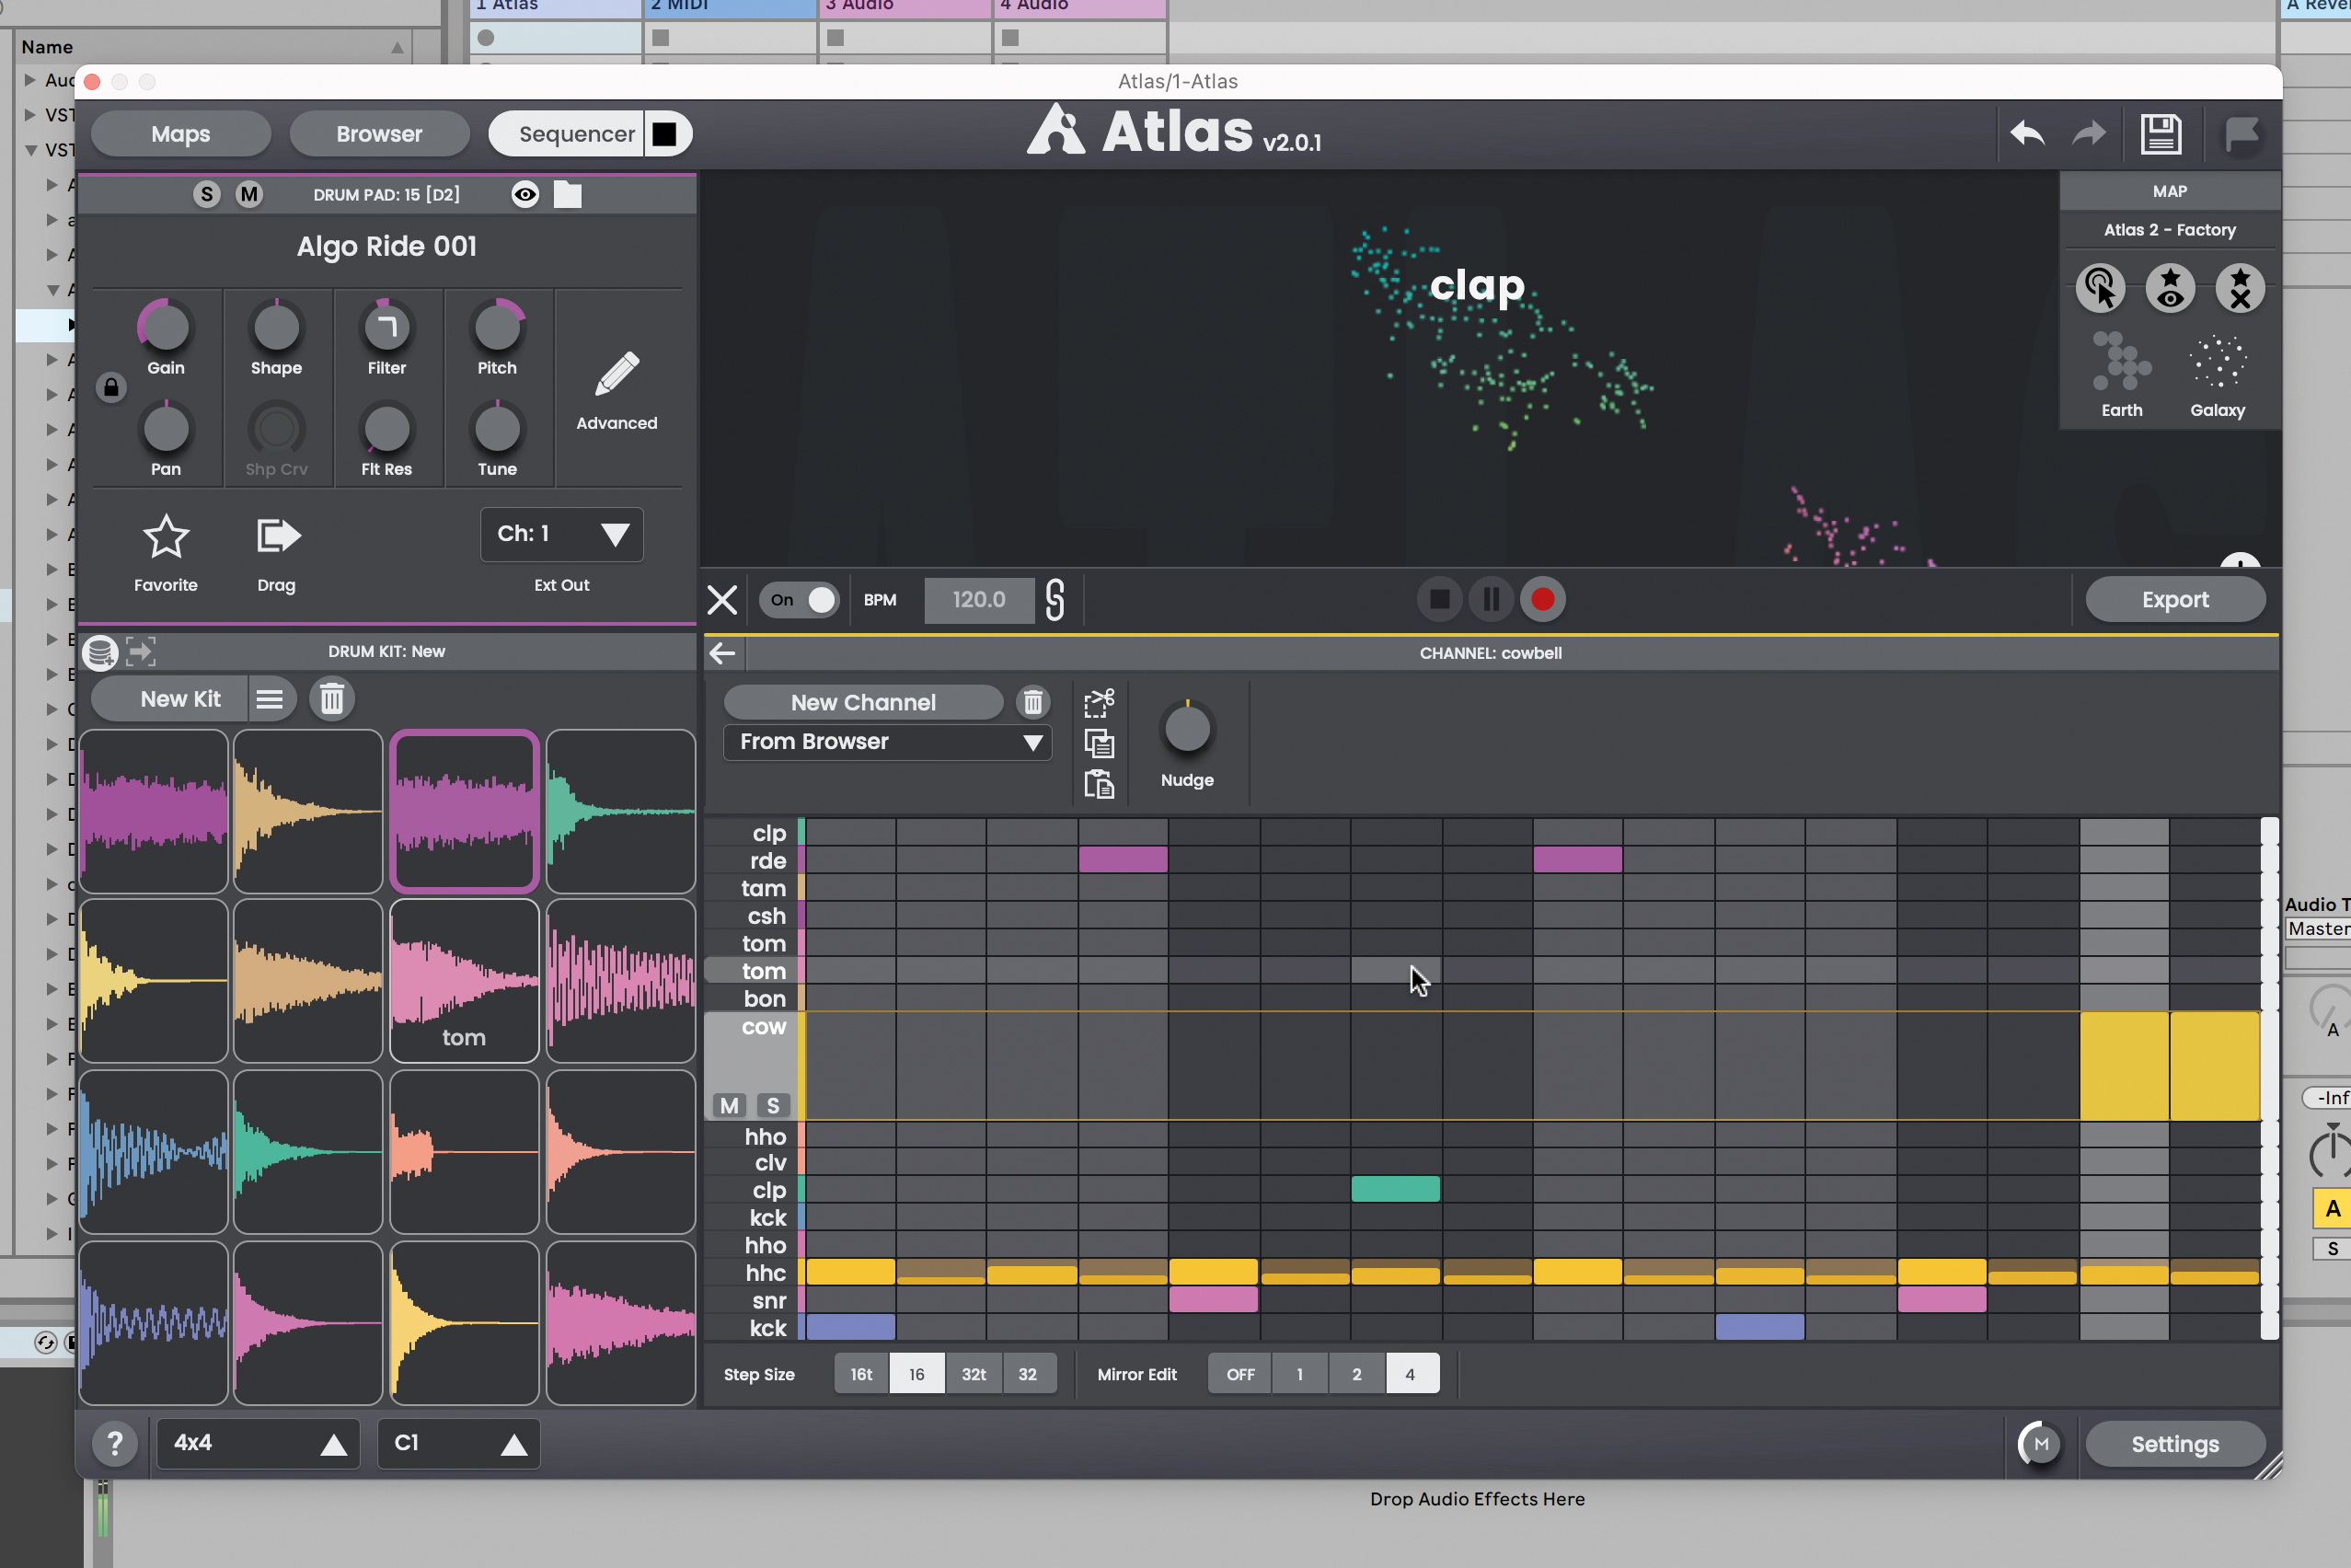
The Sequencer pops up from below, giving you access to pattern editing, for whatever number of elements are dialled in. Atlas is somewhat open in this, giving you more drum pad layouts for larger ‘kits’, and familiar launchpad-style setups too.
Layering drums with MeldaProduction Dream Machines
Thanks to the surgical precision of computer-based production tools, you can now combine different drum sounds into a hybrid that works exactly the way you want it.
Each drum has a certain formulaic nature to how its sound is made up. For example, a kick drum usually consists of a low note pitchbending downward, plus a higher, noise-like ‘click’ element higher up the frequency spectrum. Since different drum machines’ kicks – and indeed acoustic kicks – act in much the same way, you can isolate the low end of one kick and layer it with the click of another. The precision tools necessary for this layering include filtering for each channel, and timing to ensure the two layers play with the right timing.
Plugins like Native Instruments' Drum Lab use this technique to bring out hybrid drum kits modelled from both acoustic and electronic drums; the best of both worlds. When looking for the perfect drums, layering gives you the customisation to whip one up exactly how you like.
Below we’ll give you some examples of the layering process, using MeldaProduction’s recent Dream Machines instrument, which has A and B slots for each element, letting you blend between the two in level and process each with the necessary tools to fit the two together.
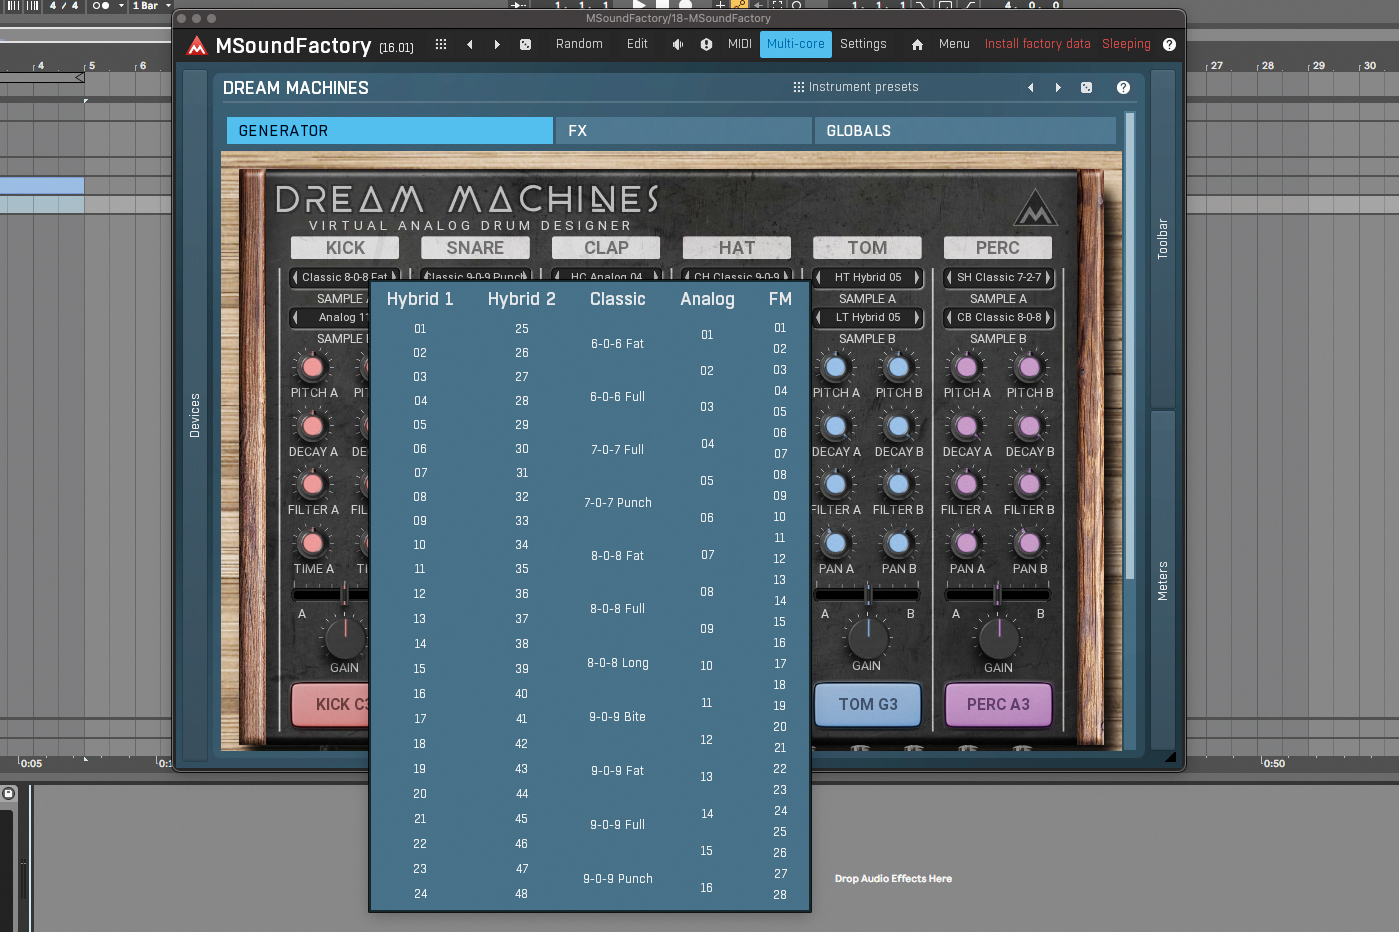
MeldaProduction Dream Machines has individual channels for Kick, Snare, Clap, Hat, Tom and Perc. Each contains an A and B part, which can be loaded with analogue, digital or acoustic samples. To load a sound, click on a sample name.
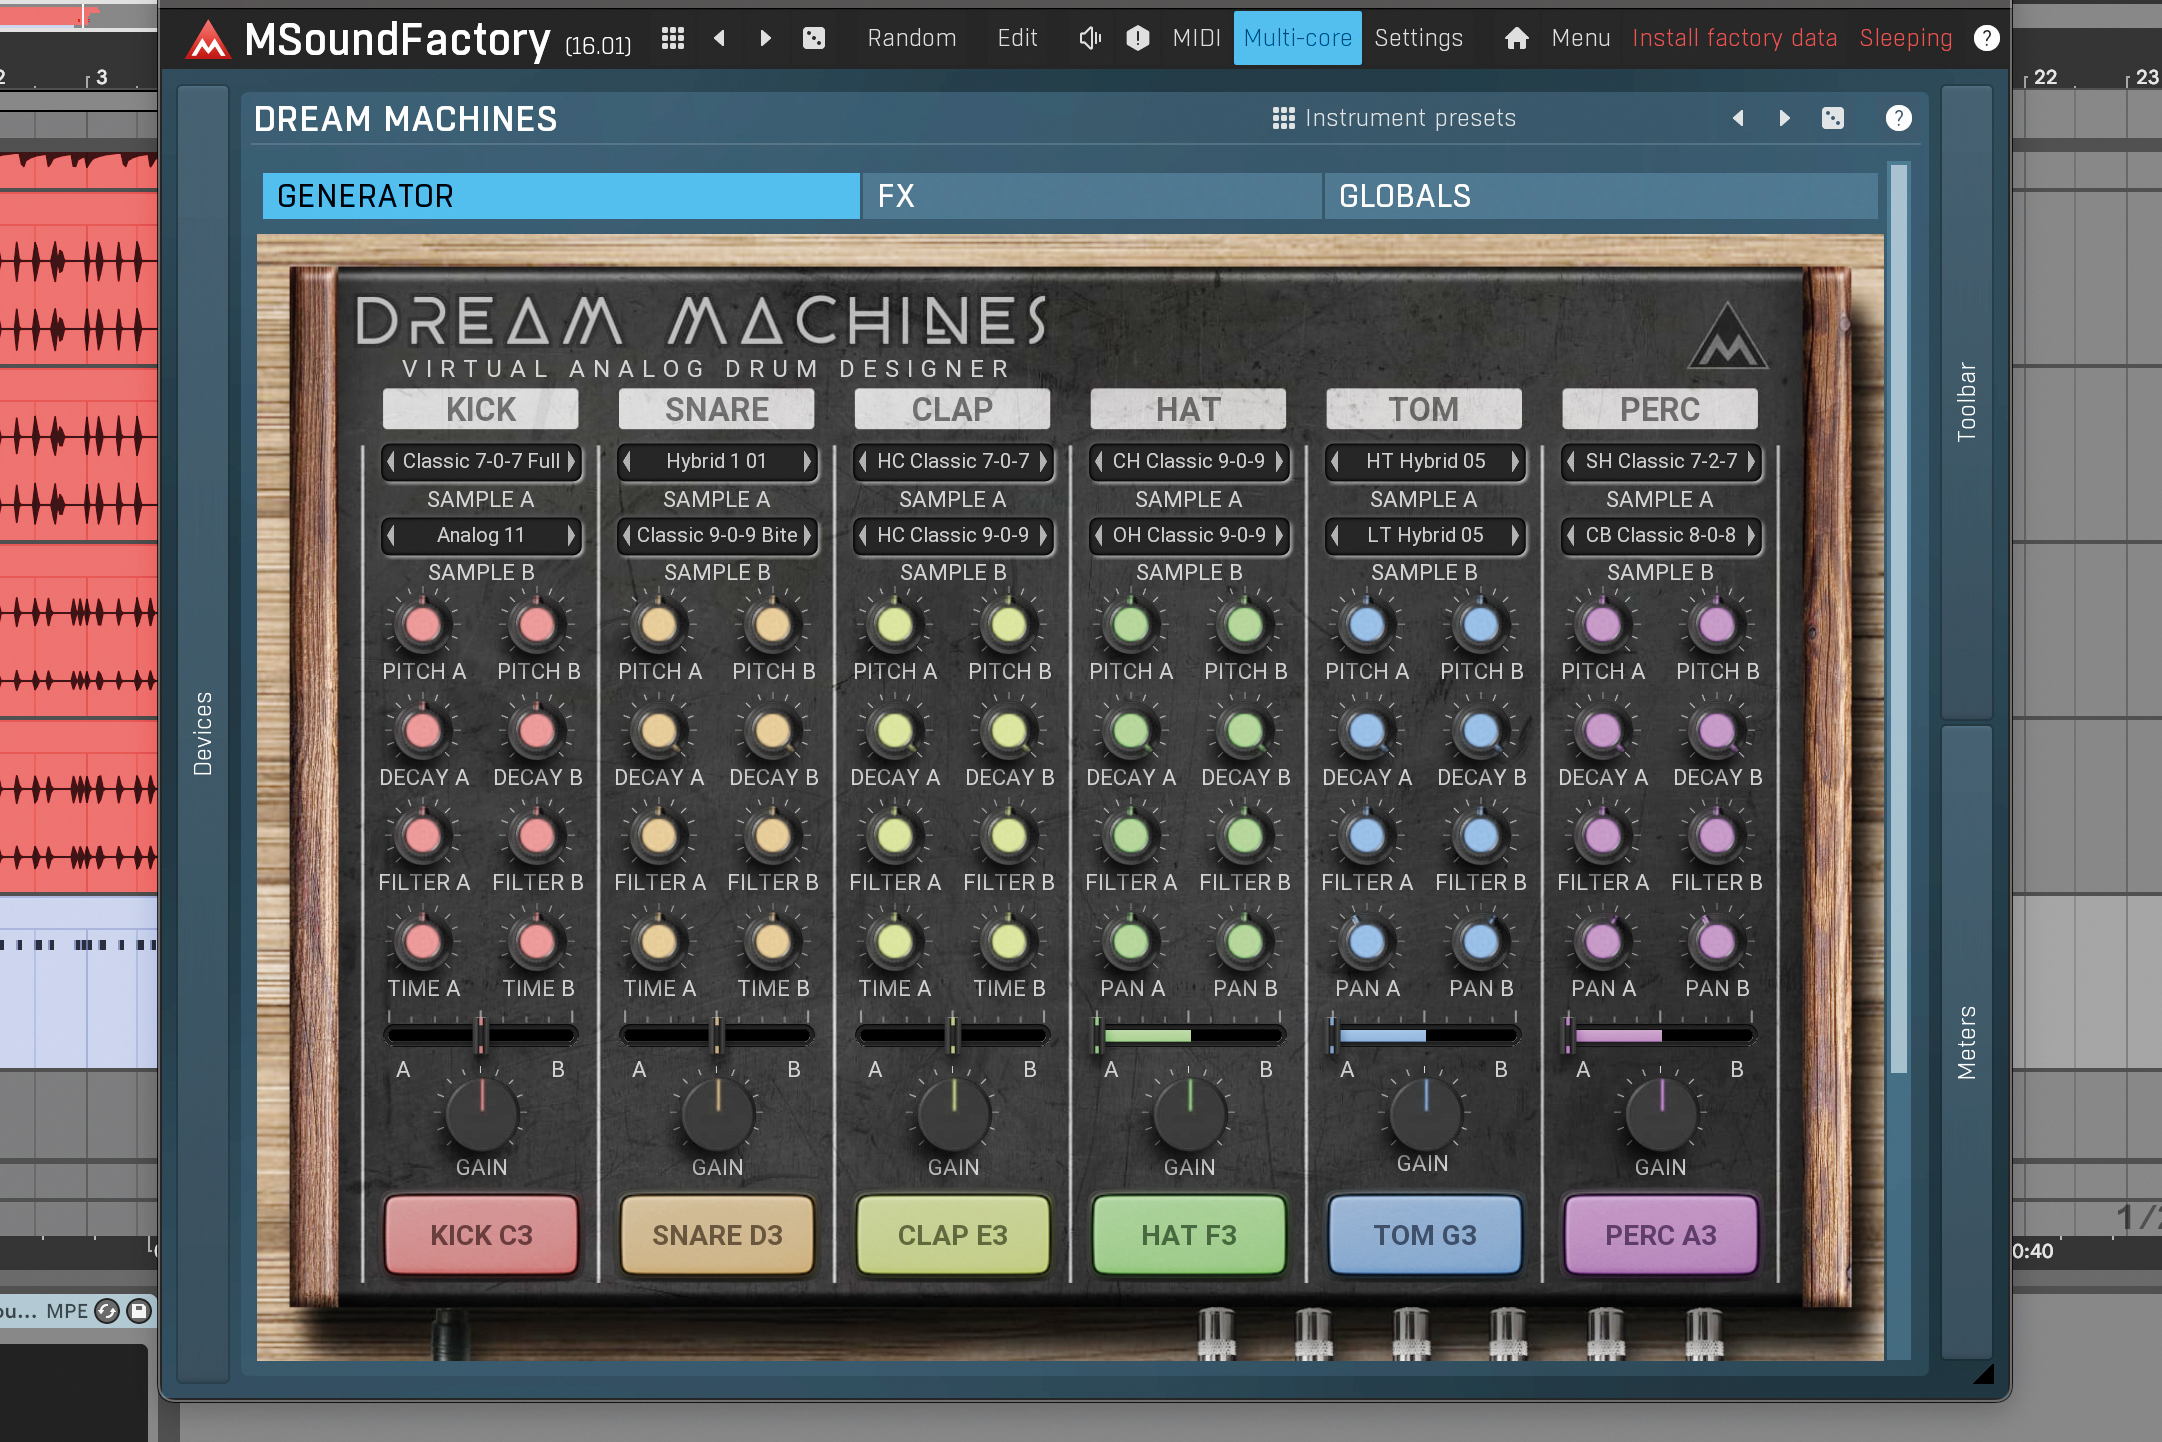
Adjust each channel’s level using the gain knob, and mix sample layers together using the A/B slider at the bottom of each channel. Each sample’s Pitch, Decay, Filter and Time knobs let you carve space for each of the samples in the mix.
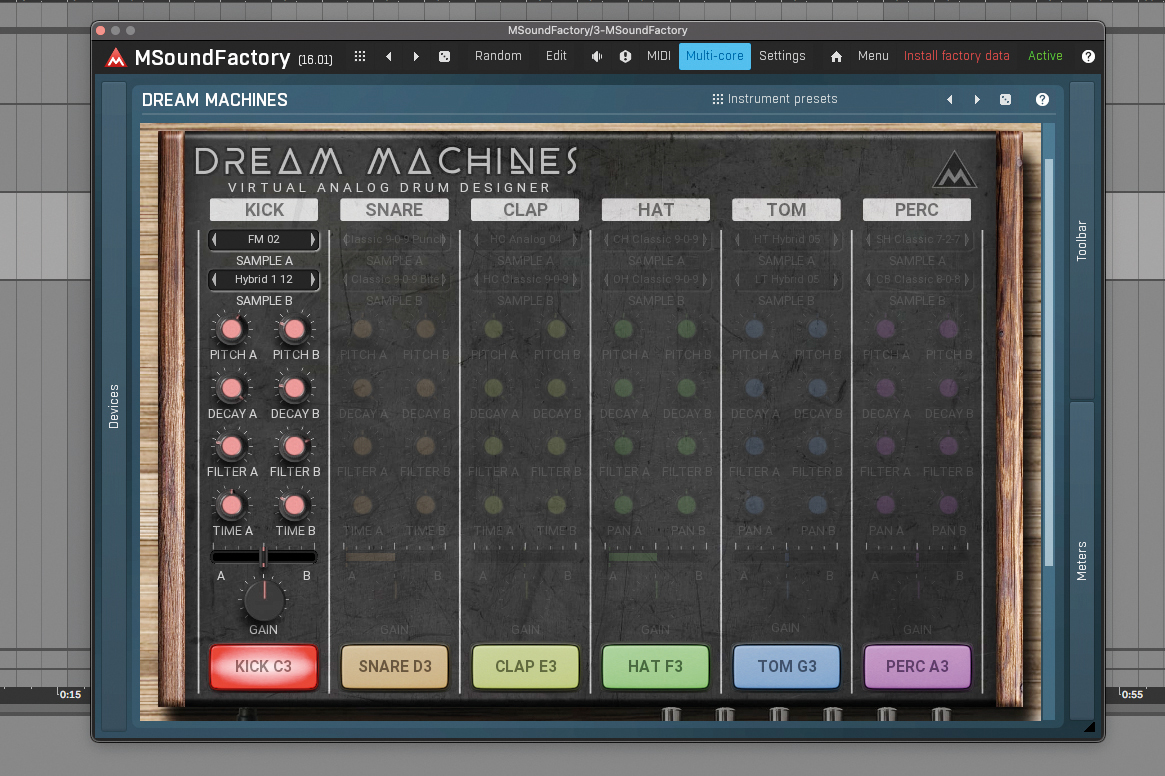
We’ll blend a low kick’s boom and another’s transient, choosing one sample in slot A for our boom, and another kick in slot B for our ‘click’. The A/B slider lets us blend two kicks, and helps us blend parts with filtering and enveloping.
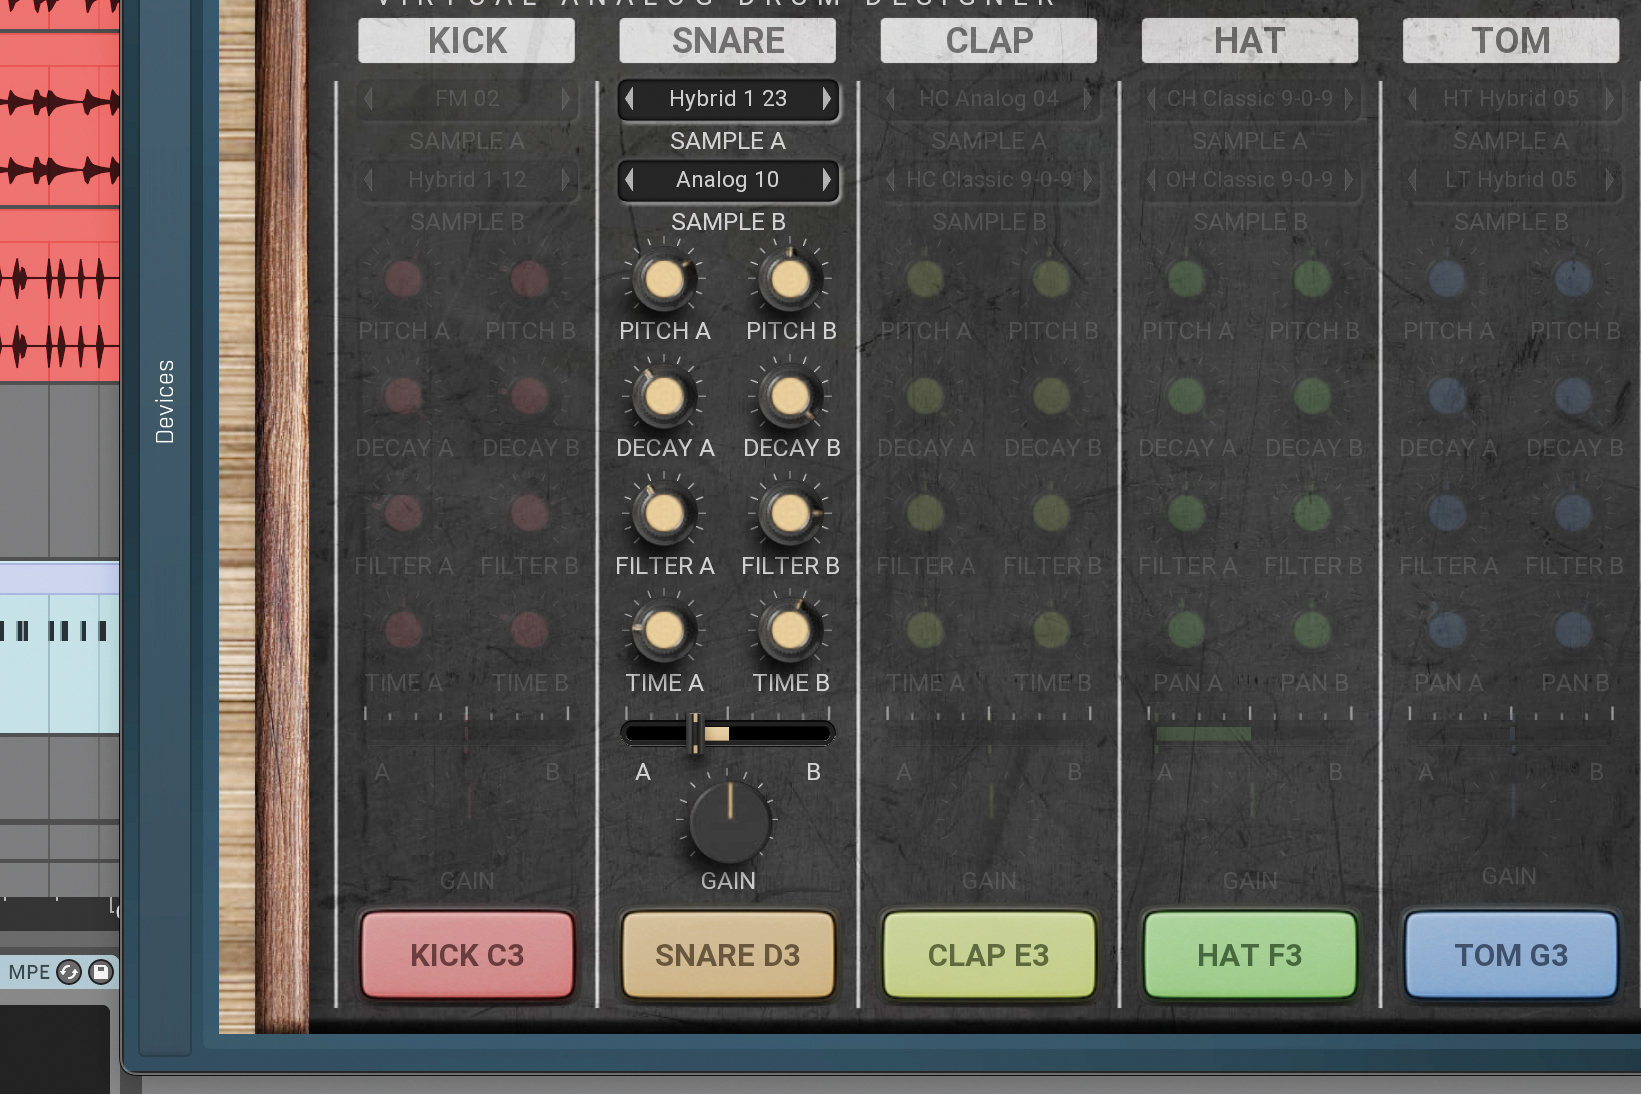
Dream Machines lets you do the same with snares. Select a punchy sample for slot A for hybrid sound’s body, and a transient ‘crack’ to go with it. As well as the pitch, decay and filter controls, you can also offset the sample start with Time.
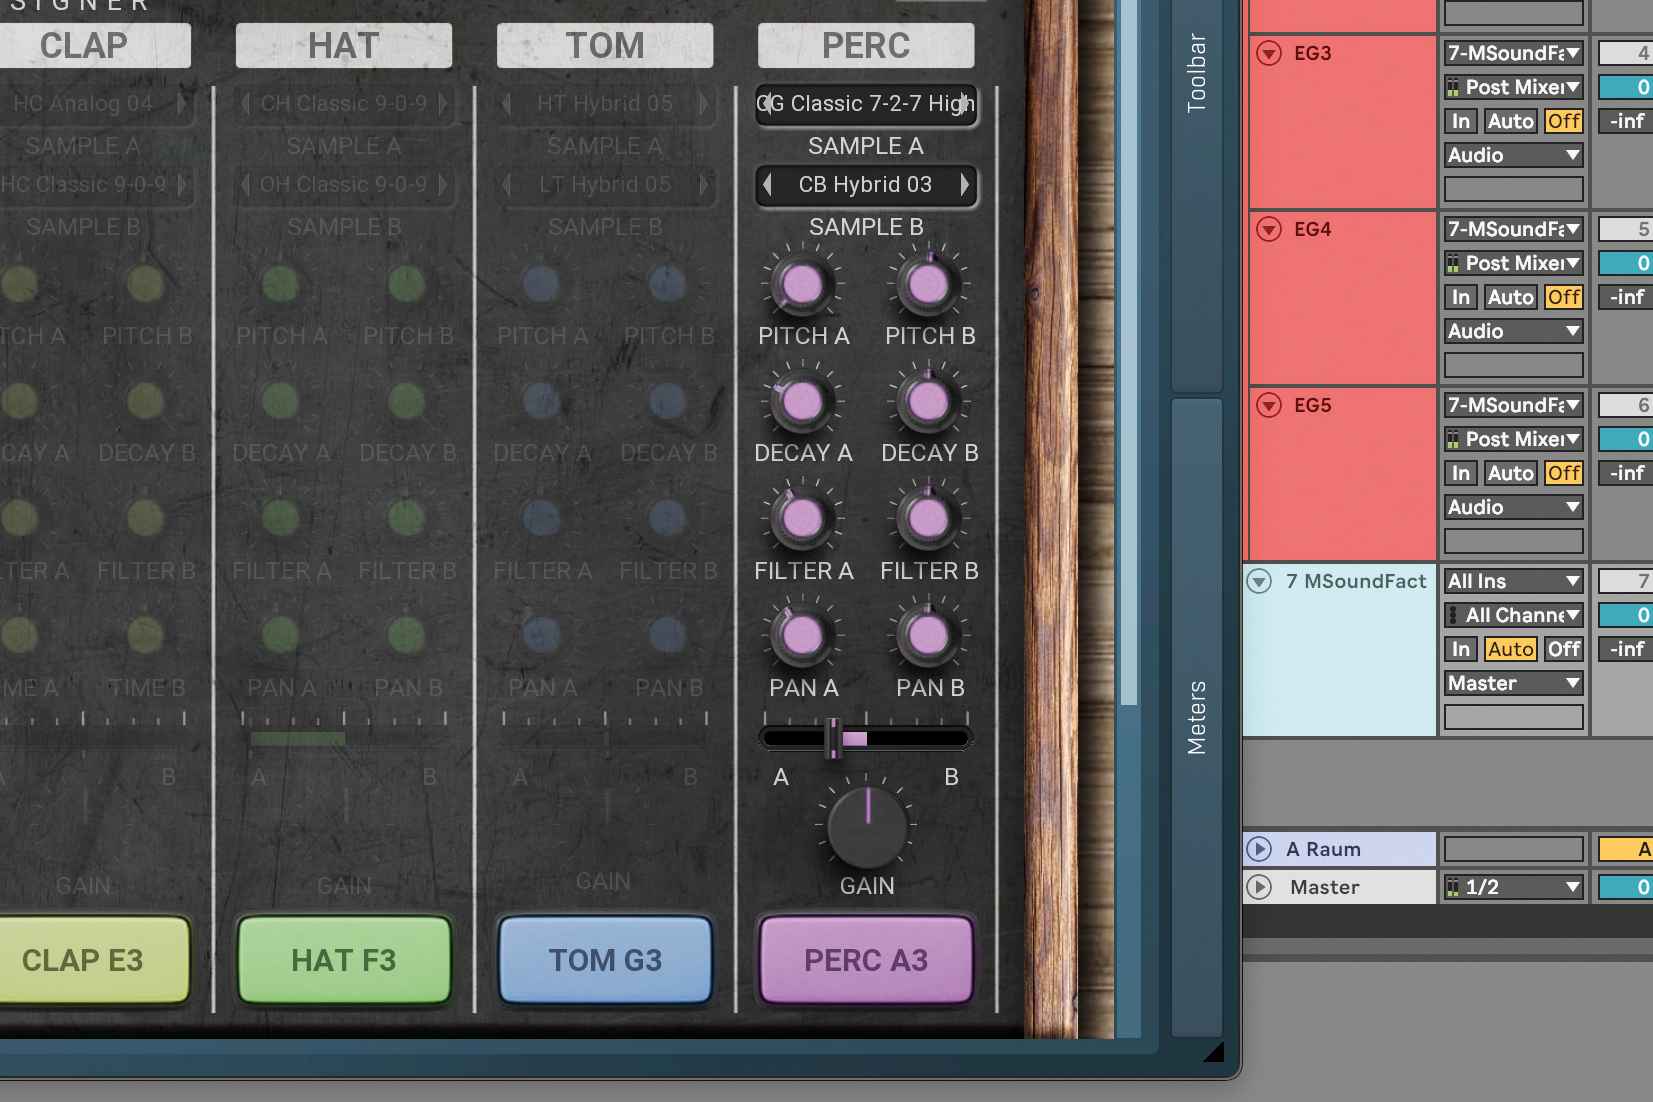
The Perc channel lets you choose from source instruments. Instead of a Time control at the bottom of the channel, the hat, tom and perc instruments have pan controls, allowing you to create interesting layered hits with a wide stereo field.
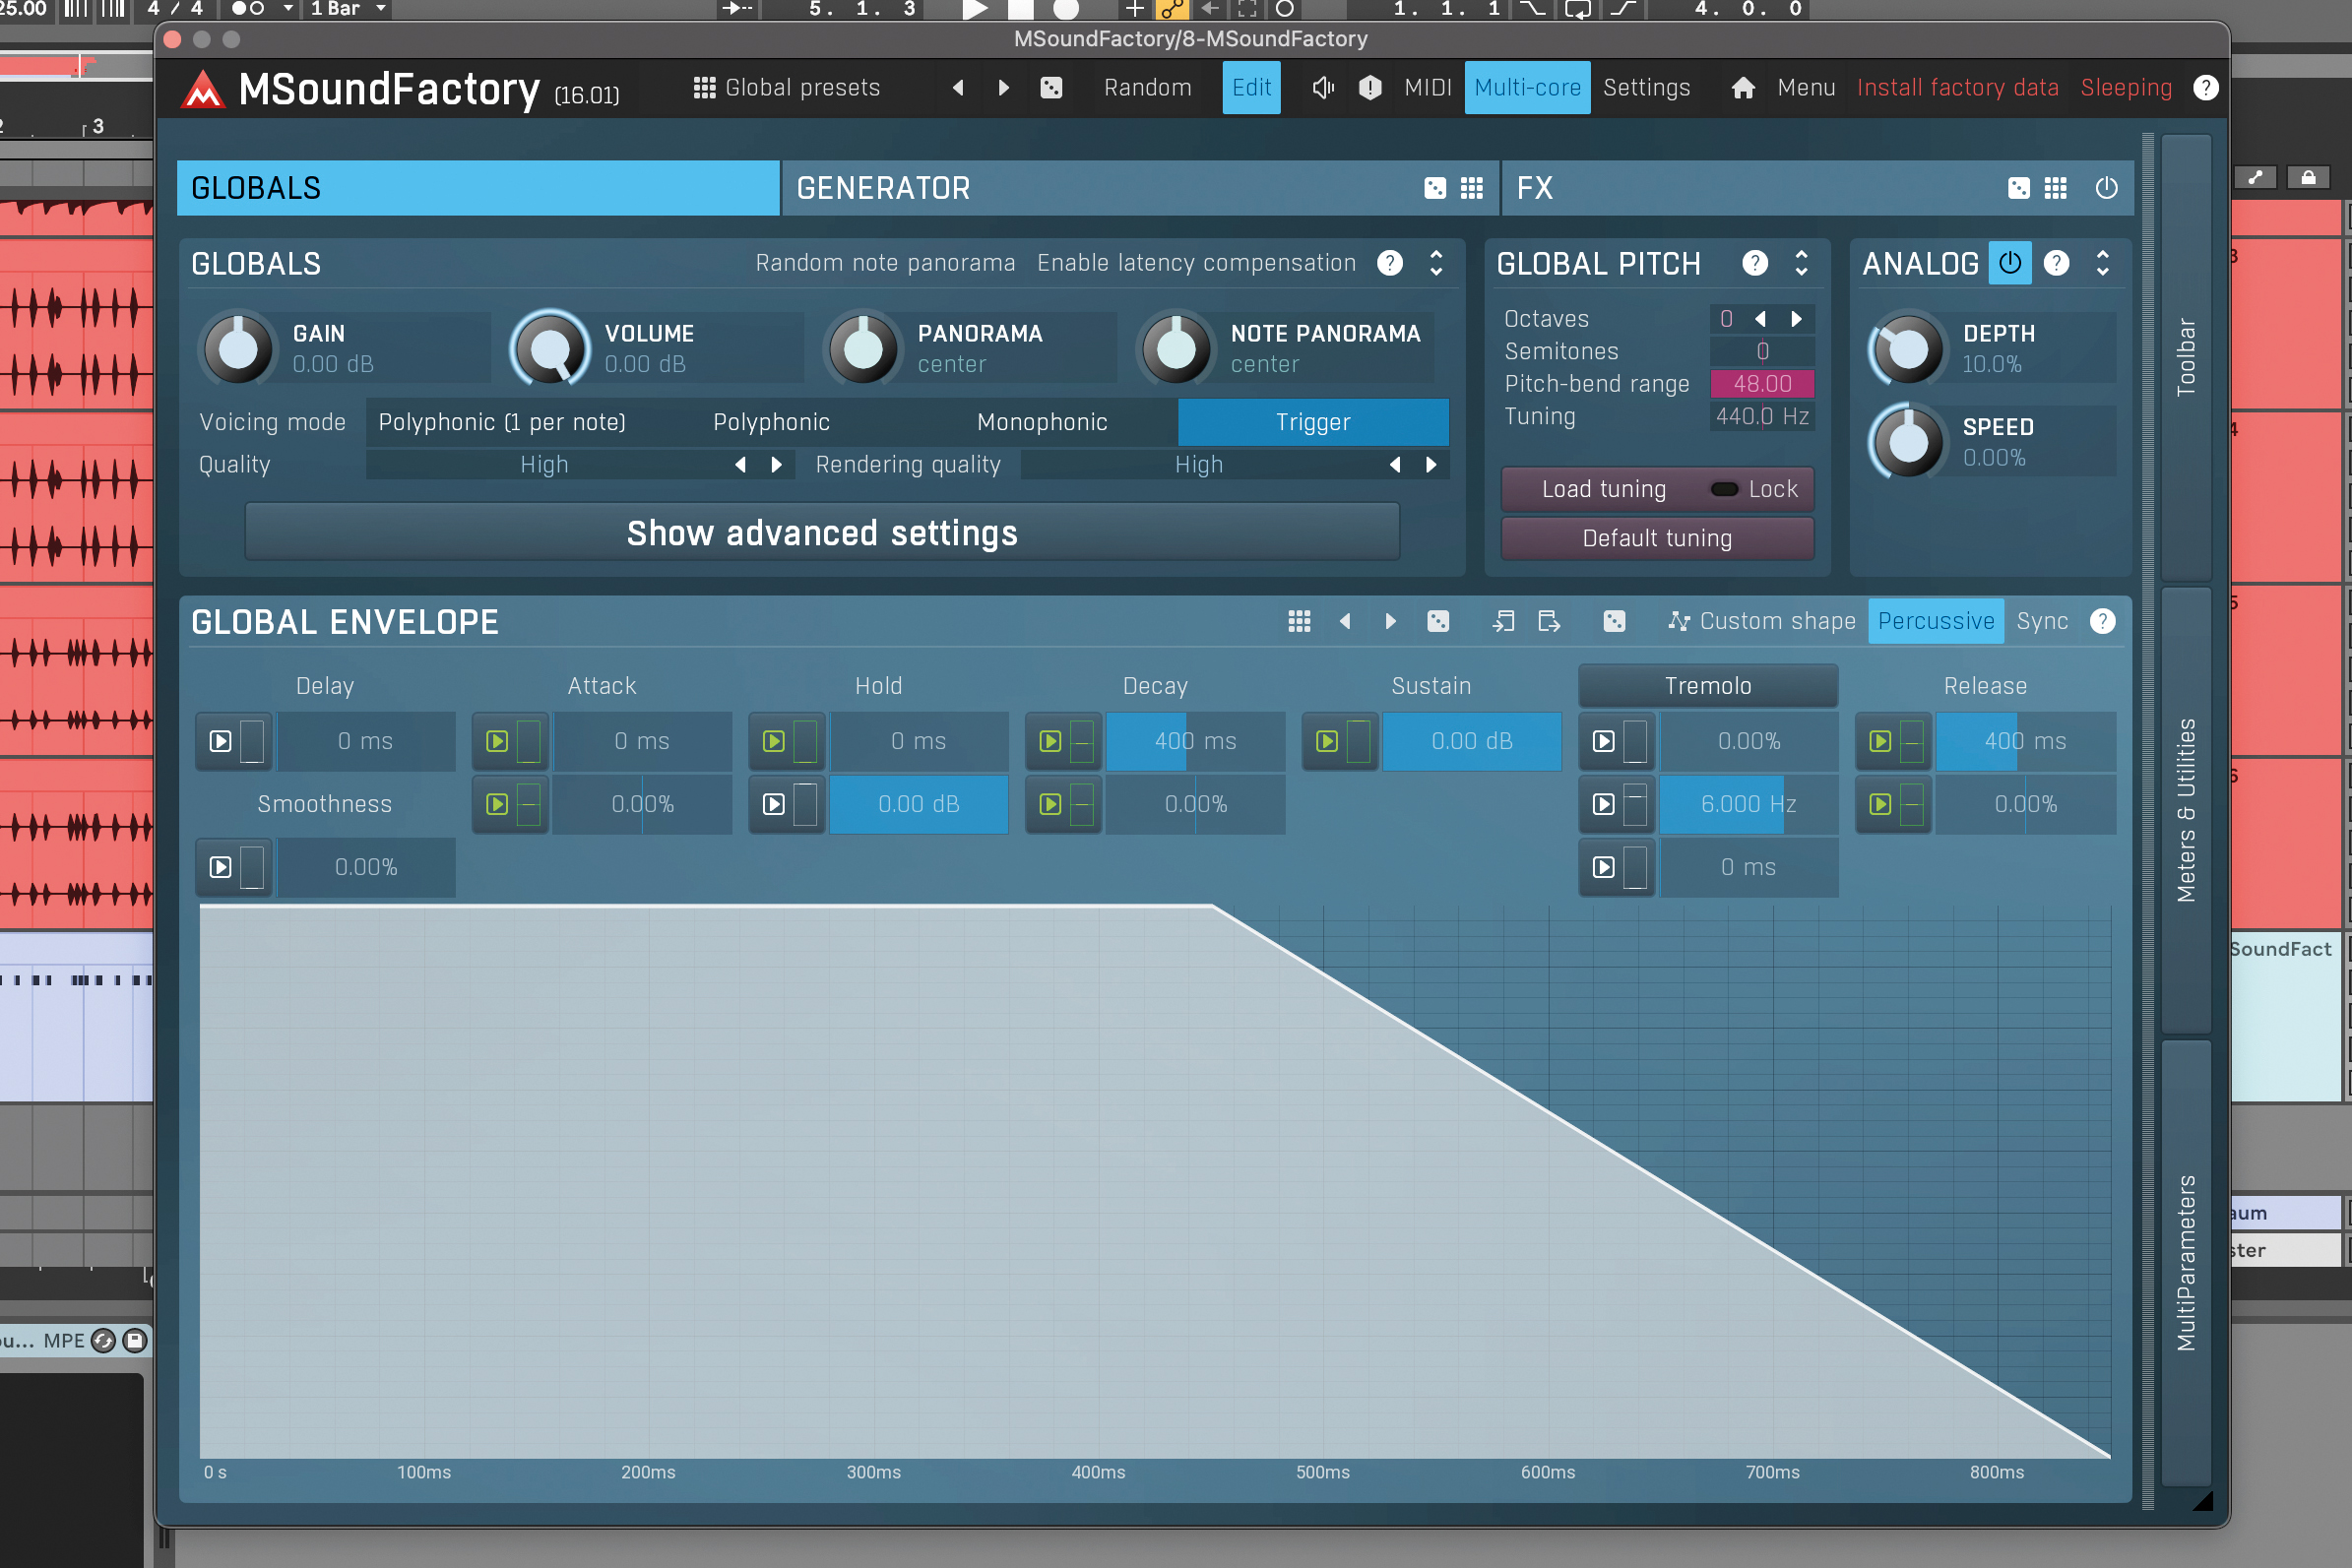
Dream Machines’ Edit page opens a deeper level of control, including voicing modes, envelopes, global pitch and analogue controls which emulate the imperfections that are commonly associated with analogue drum machines.
Programming 'smart' beats with Audiomodern Playbeat 3
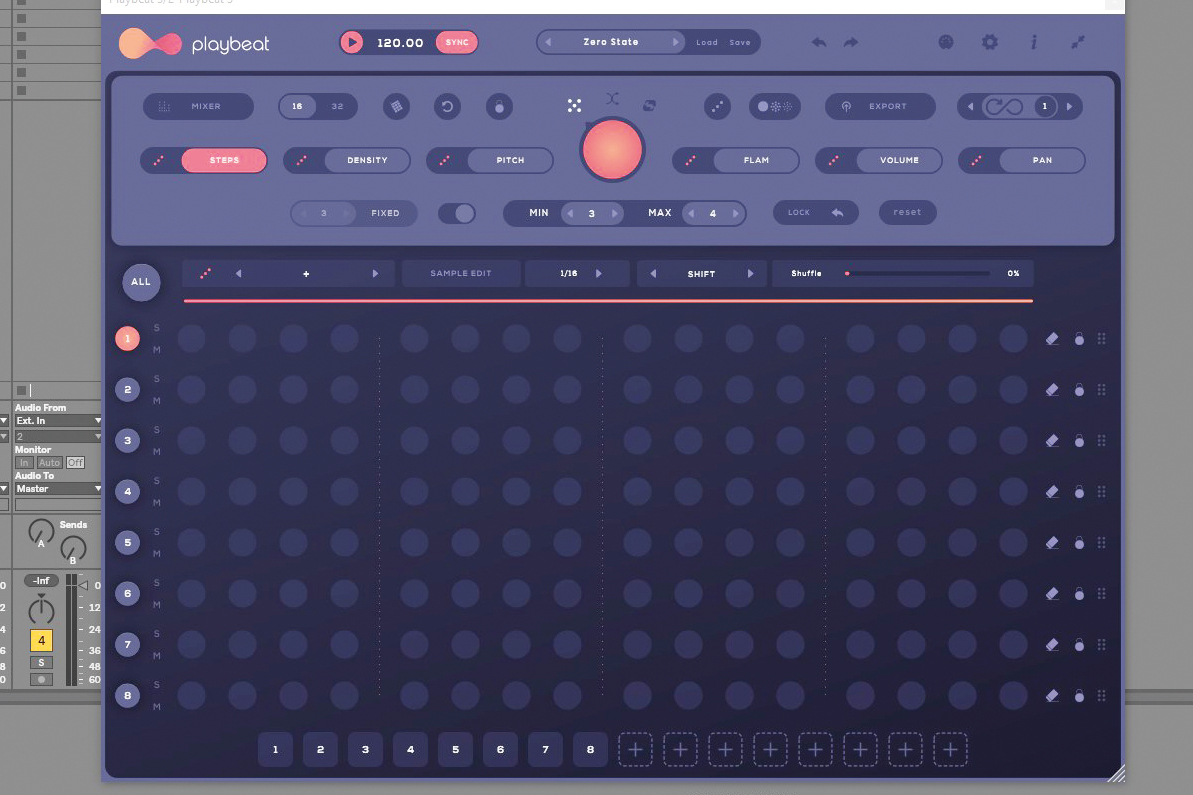
Audiomodern Playbeat 3 is a virtual groovebox that can handle intricate drum sequencing and generate rhythmic patterns tailored to your style. Click any of the eight channels and either drag a sample from your library to the sample slot, or pull one from the library.
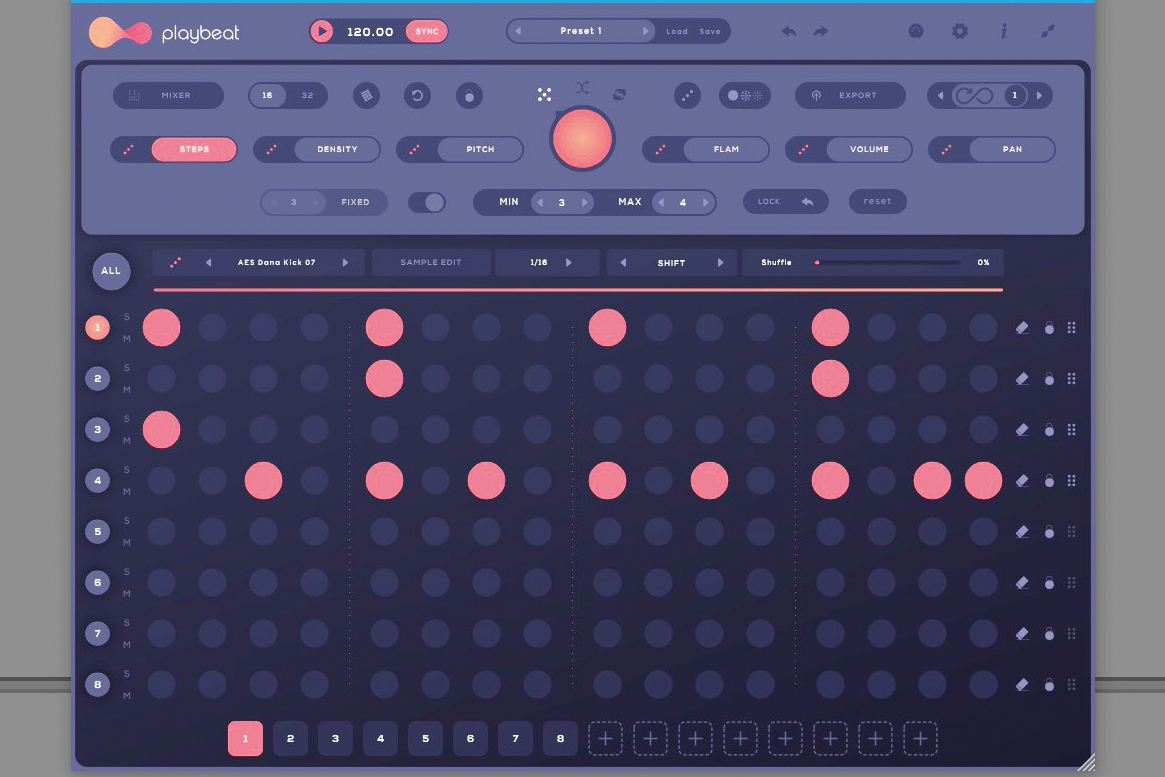
Playbeat’s sequencer can be viewed in Steps, Density, Pitch, Flam, Volume, or Pan mode. So, to program a kick drum pattern, hit the Steps icon, click Channel 1 and simply draw beats on the grid. Let’s try a simple kick, snare and hi-hat pattern.
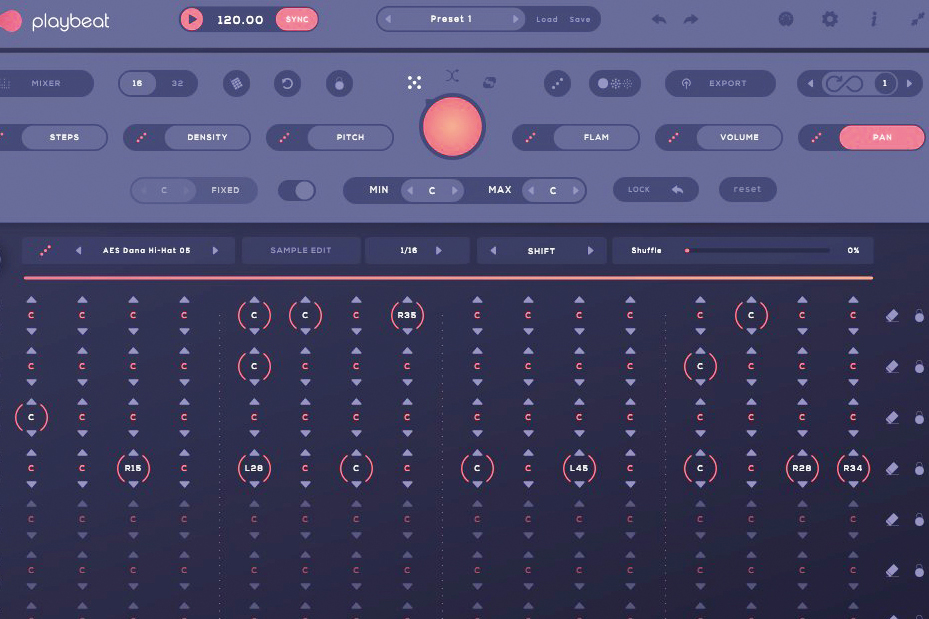
Hitting the red button randomises your patterns, either on individual channels or as a whole. You can provide input for this according to mode, via a fixed value or given range. To randomise one setting only, like Pan, hit the dice beside the mode icon.
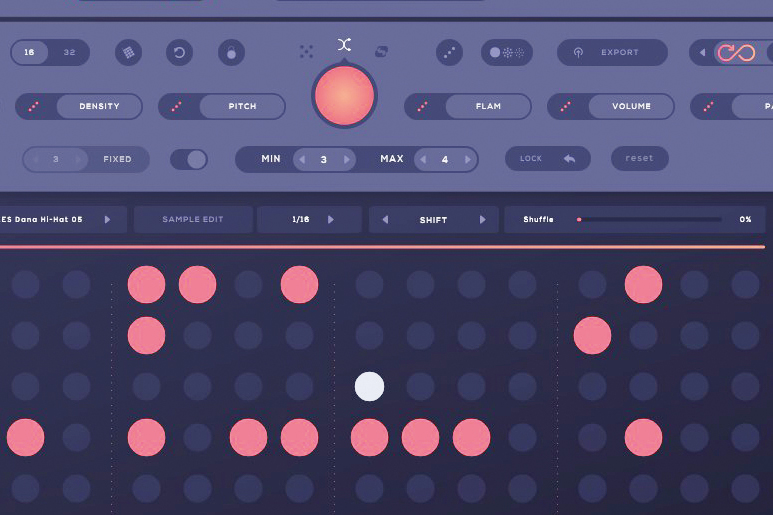
Perform corrective beat surgery with the Remix button, which makes a slight adjustment. Infinity Mode generates a new pattern any time a new loop comes round, informed by Playbeat’s SMART algorithm which learns from your habits.
Designing kicks with D16 Group Punchbox

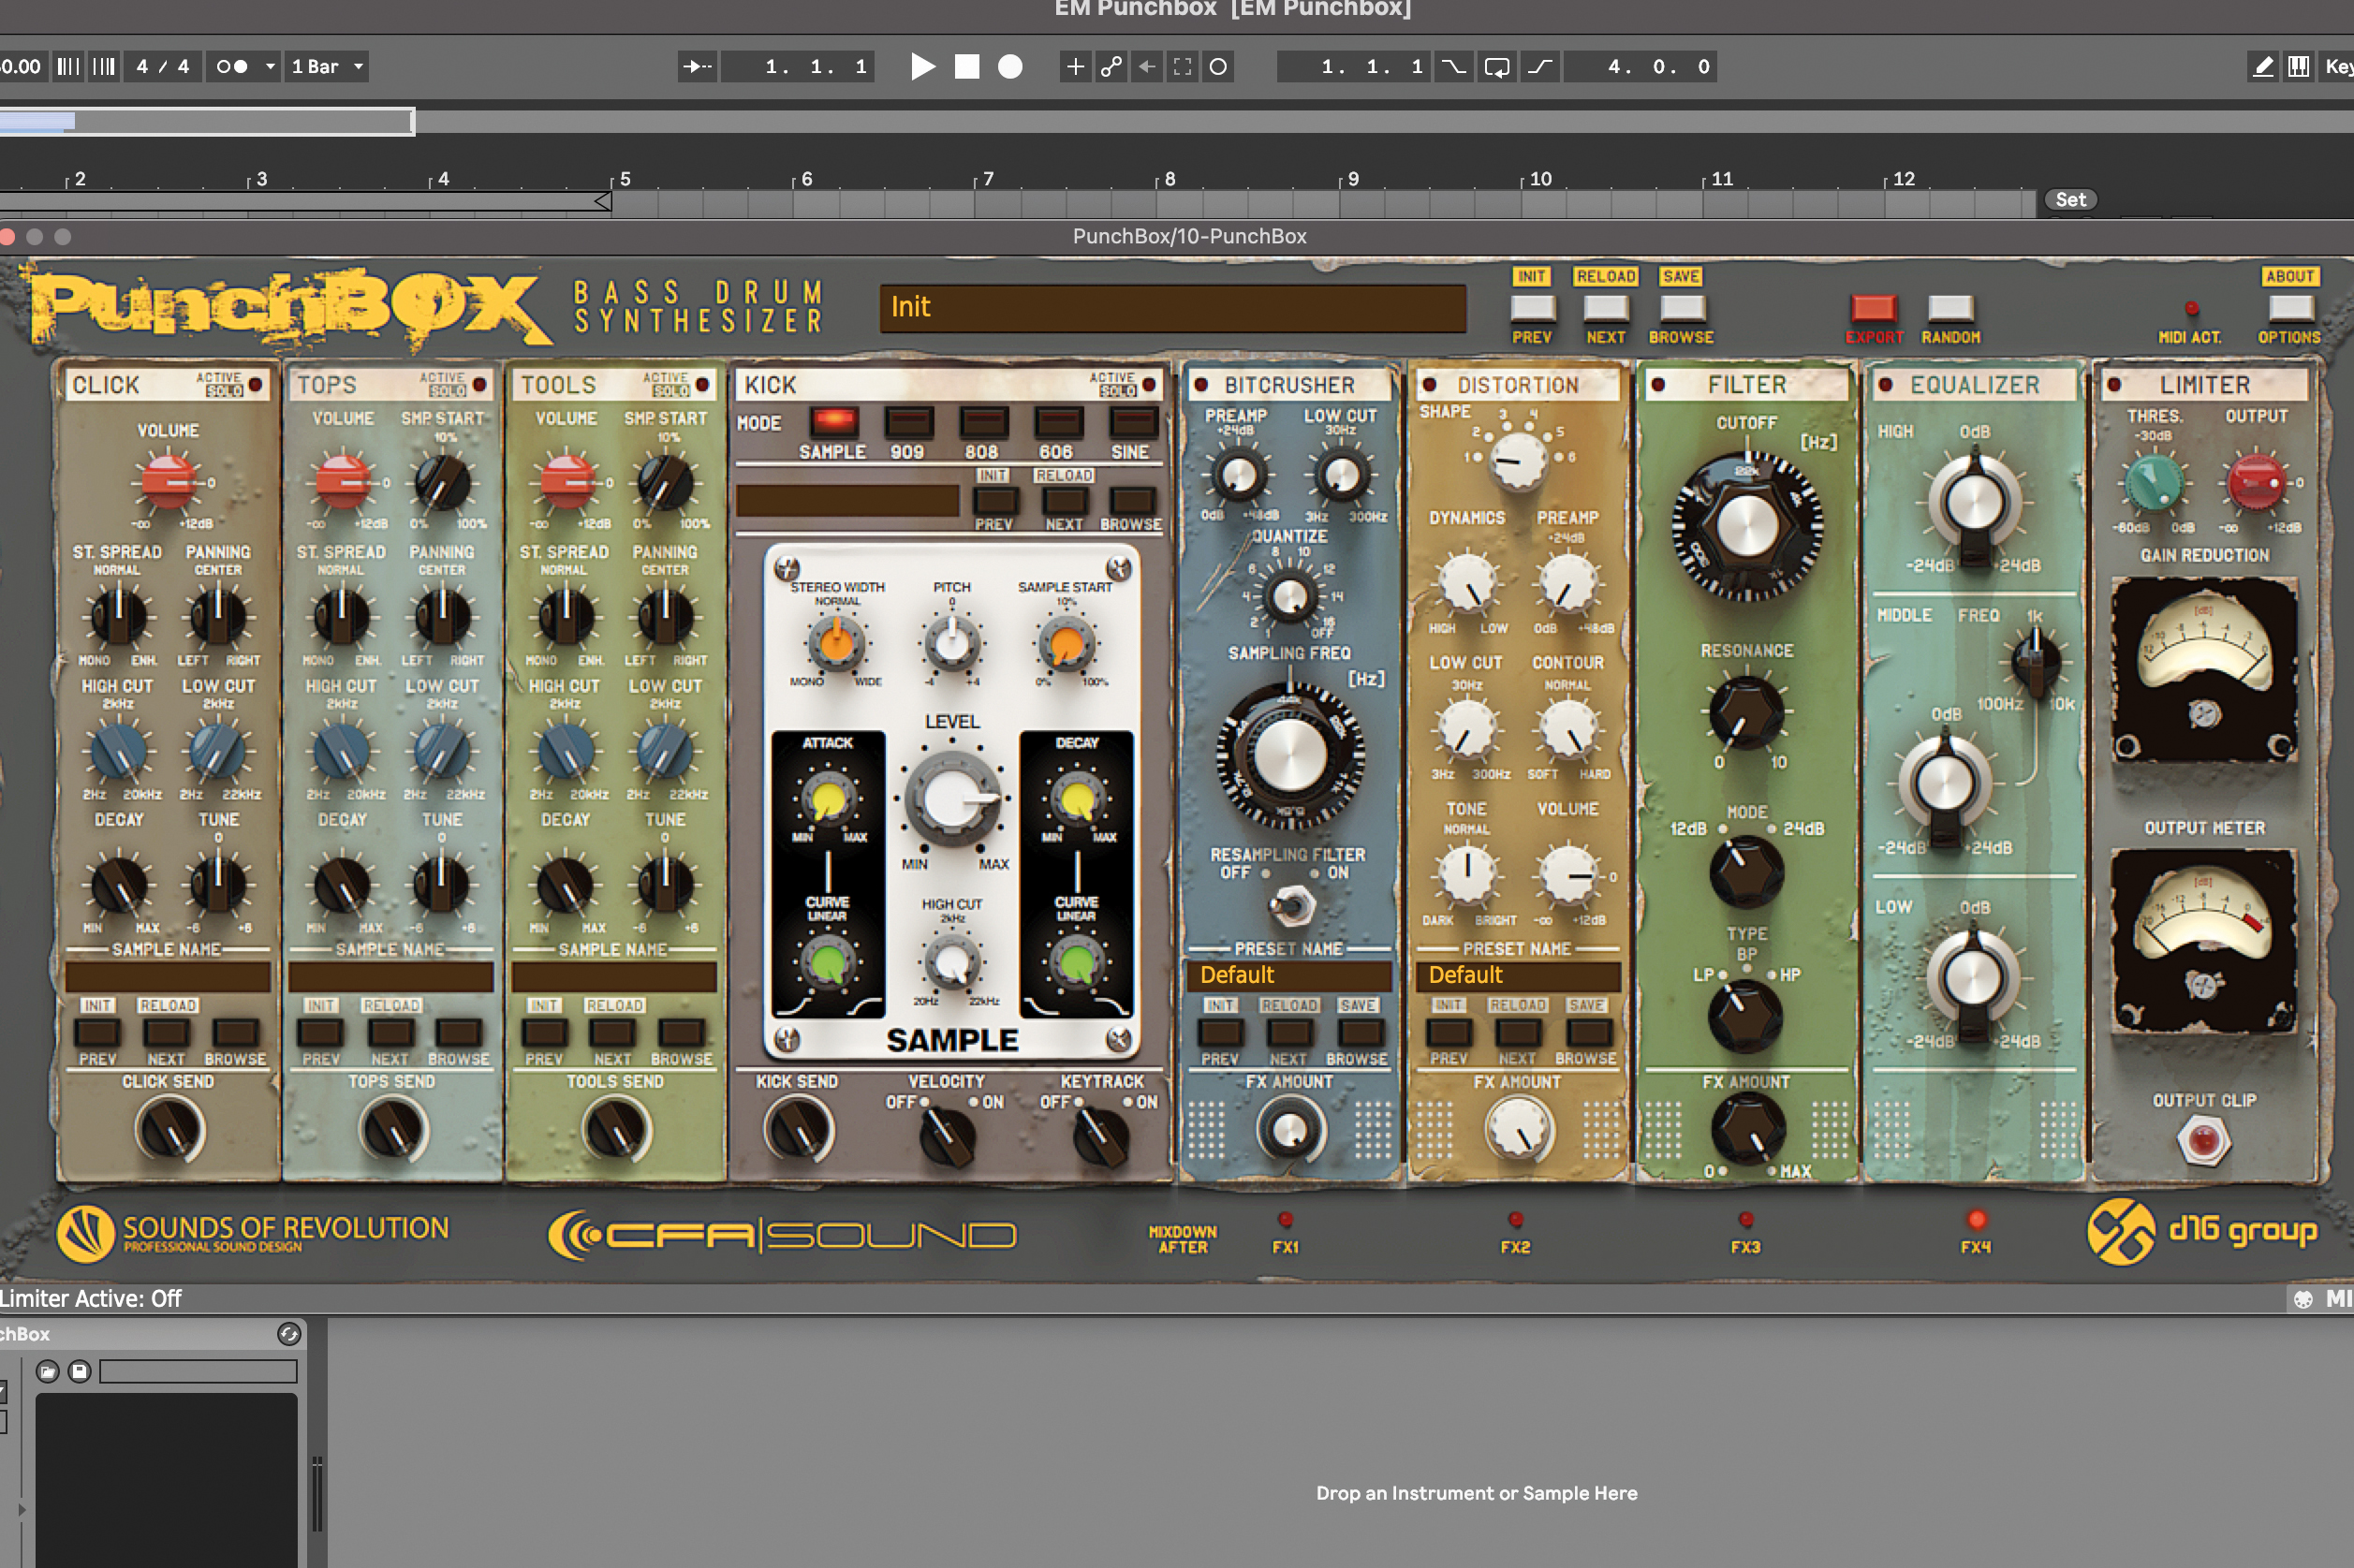
D16 Group Punchbox’s signal flows from left to right, starting with four layers of kick elements before passing through four effects, then an output limiter. Each stage of the signal flow can be turned on or off by clicking on the red LED or their title bars.
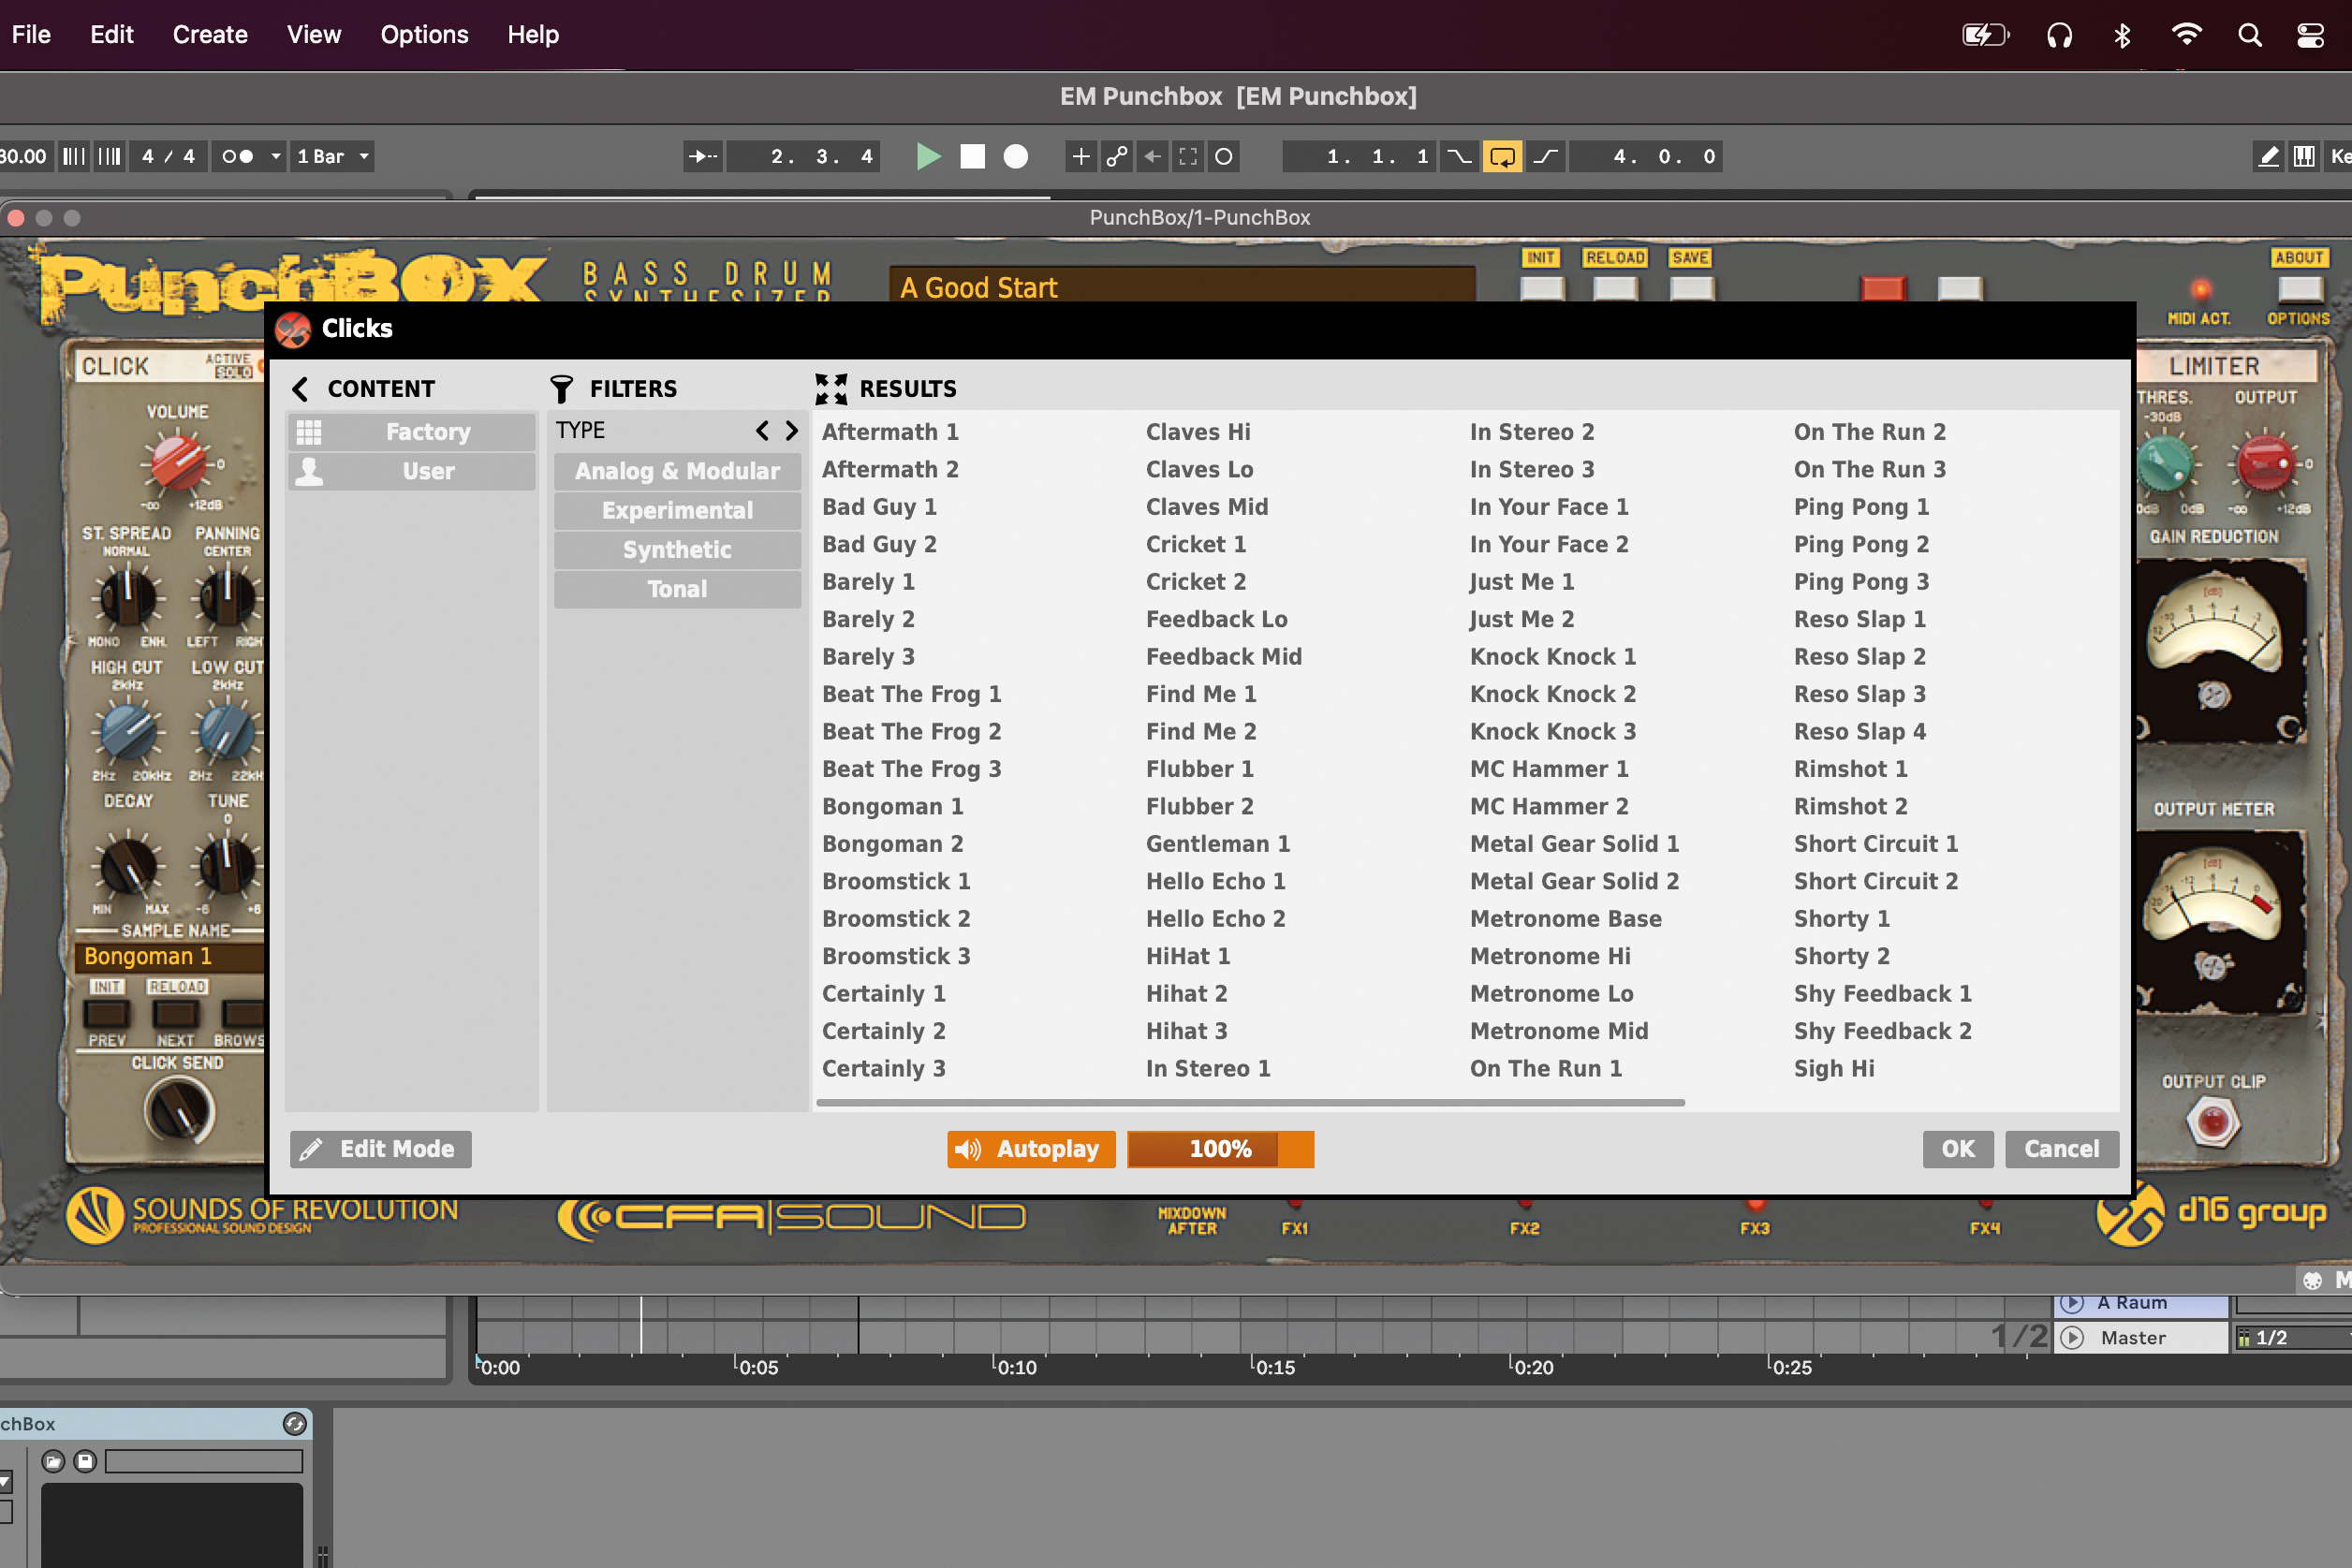
The click layer lets you add an initial transient portion to your kick, creating a high frequency snap that can be heard on playback systems of all sizes. To select a Click sample, press the Browse button then audition sounds by clicking on them.
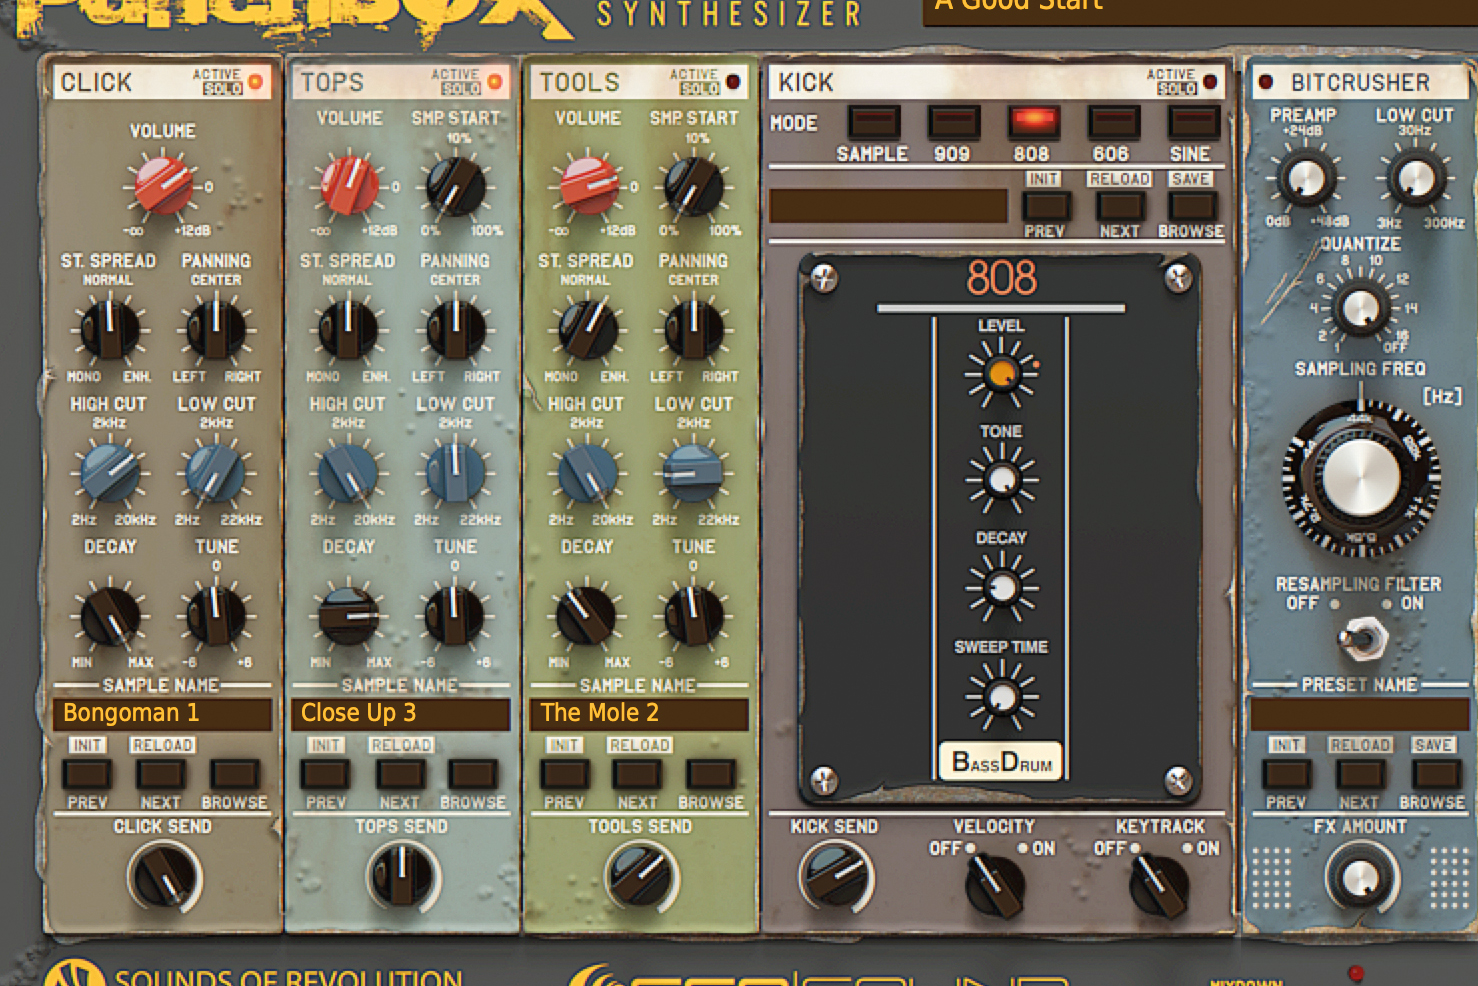
Now add a Tops layer using the same process within the Tops module. Use the module dials to adjust each of the first three layers’ volume, panning, stereo spread, EQ, decay and tune to your taste. For the Tops and Tools layers, you can also adjust the sample start point.
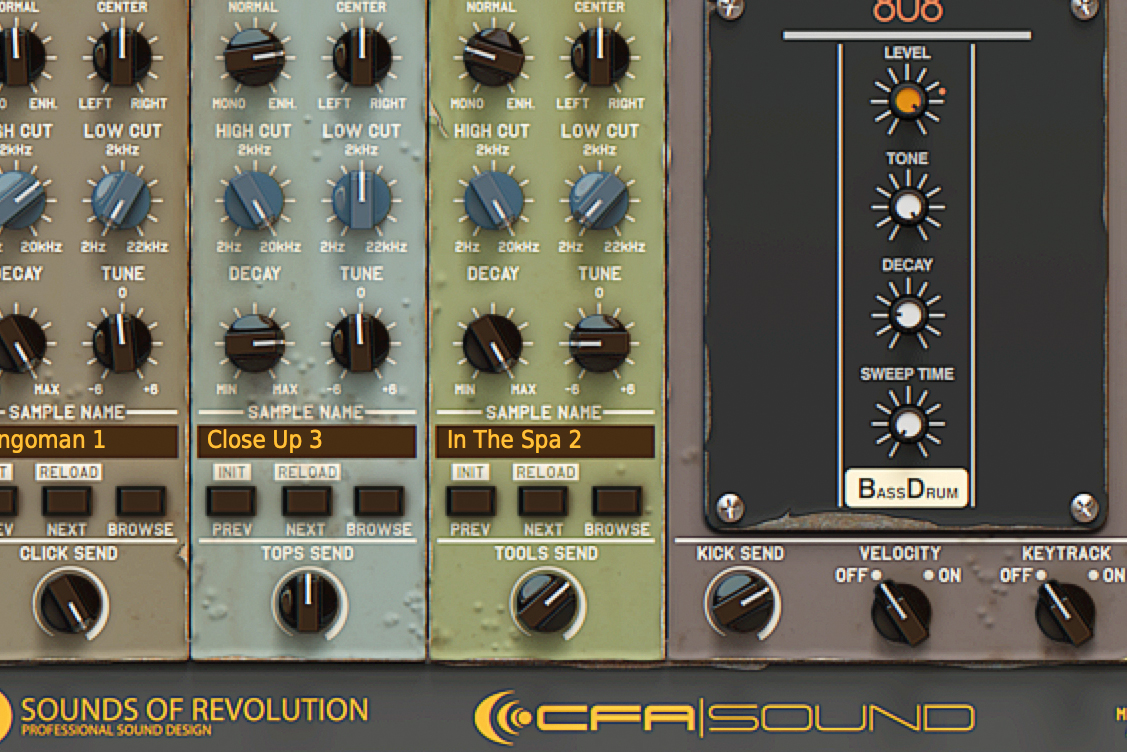
The samples contained within the Tools layer are for adding a midrange thud, which helps to give your kick a knocking presence. Select a sample from the browser, or use the Previous and Next buttons to quickly cycle through the selection of Tool samples at your disposal.
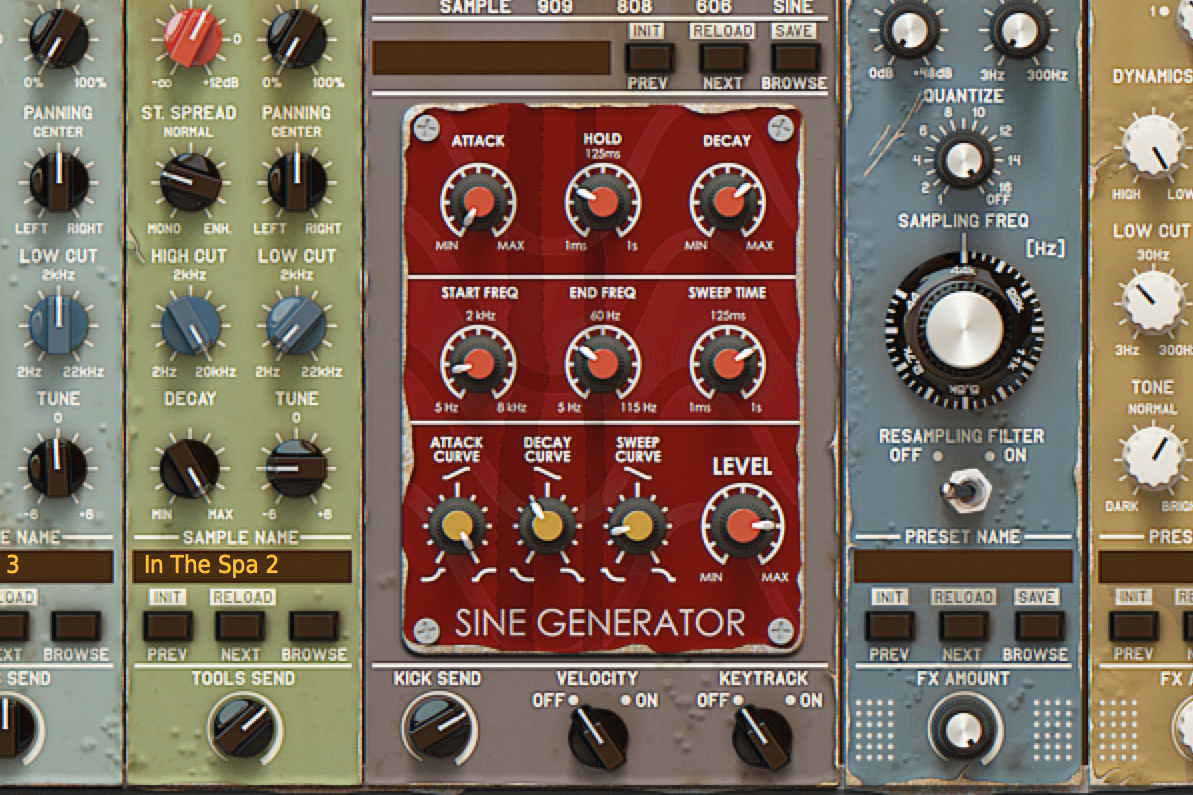
Now onto the main act, the kick layer. You can choose from three classic kick engines – the 909, 808 and 606, plus you can select a simple sine generator, or even add your own samples. Each of these kick generators have a different set of controls for shaping your sound.
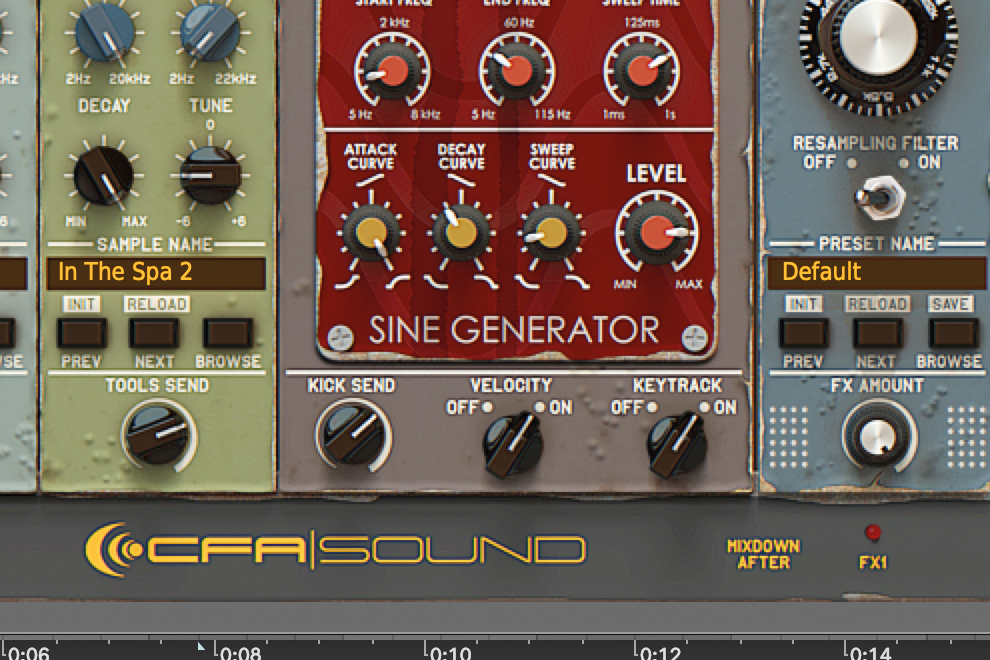
Within the Kick layer, you can also toggle velocity sensitivity and keyboard tracking, letting you easily tap out a consistent kick pattern with these functions off, or create velocity sensitive tonal kick patterns with them on. The velocity setting also affects the first three kick layers.
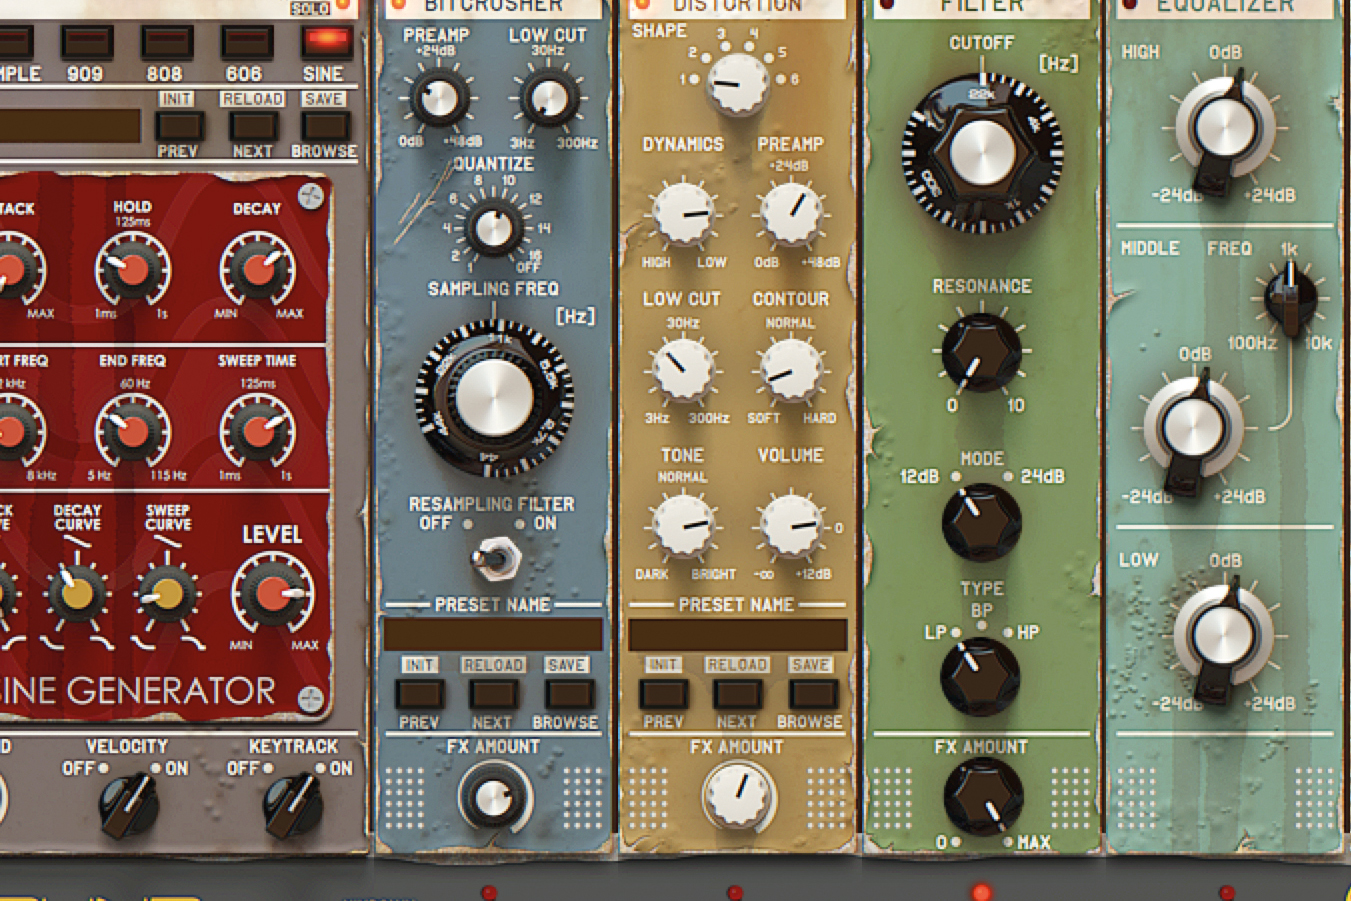
Punchbox’s effect cascade starts with Bitcrusher and Distortion modules. You can switch them on in the usual way, then use each of the kick layers’ send dials to send them to the effect cascade. Use Bitcrusher and Distortion to add some grit and texture to your kick.
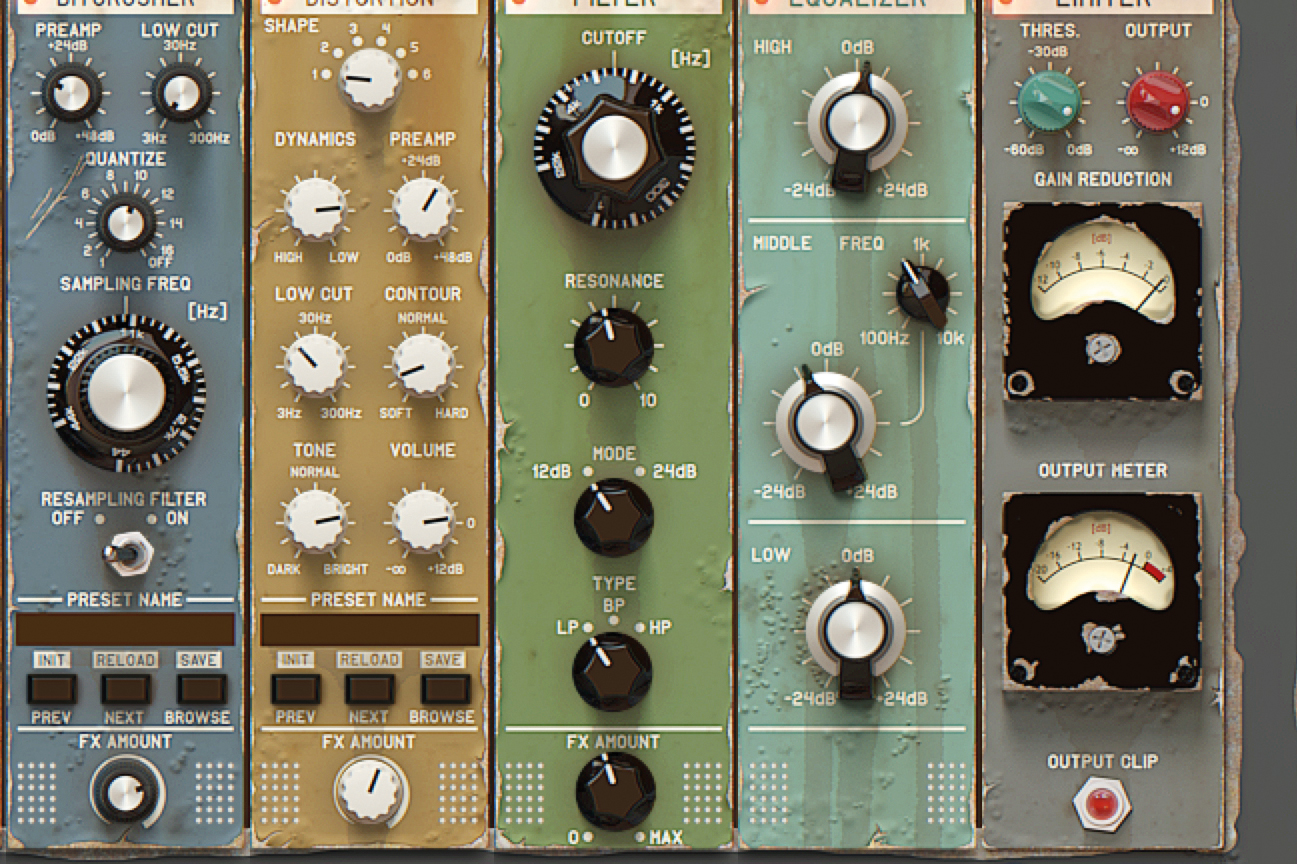
The next three effects in the signal flow are Filter, EQ and Limiter. Use these modules to shape the overall tone of your kick, and add level and punch using the limiter at the end of the chain. Pushing the limiter results in a colourful analogue-distortion-style effect.
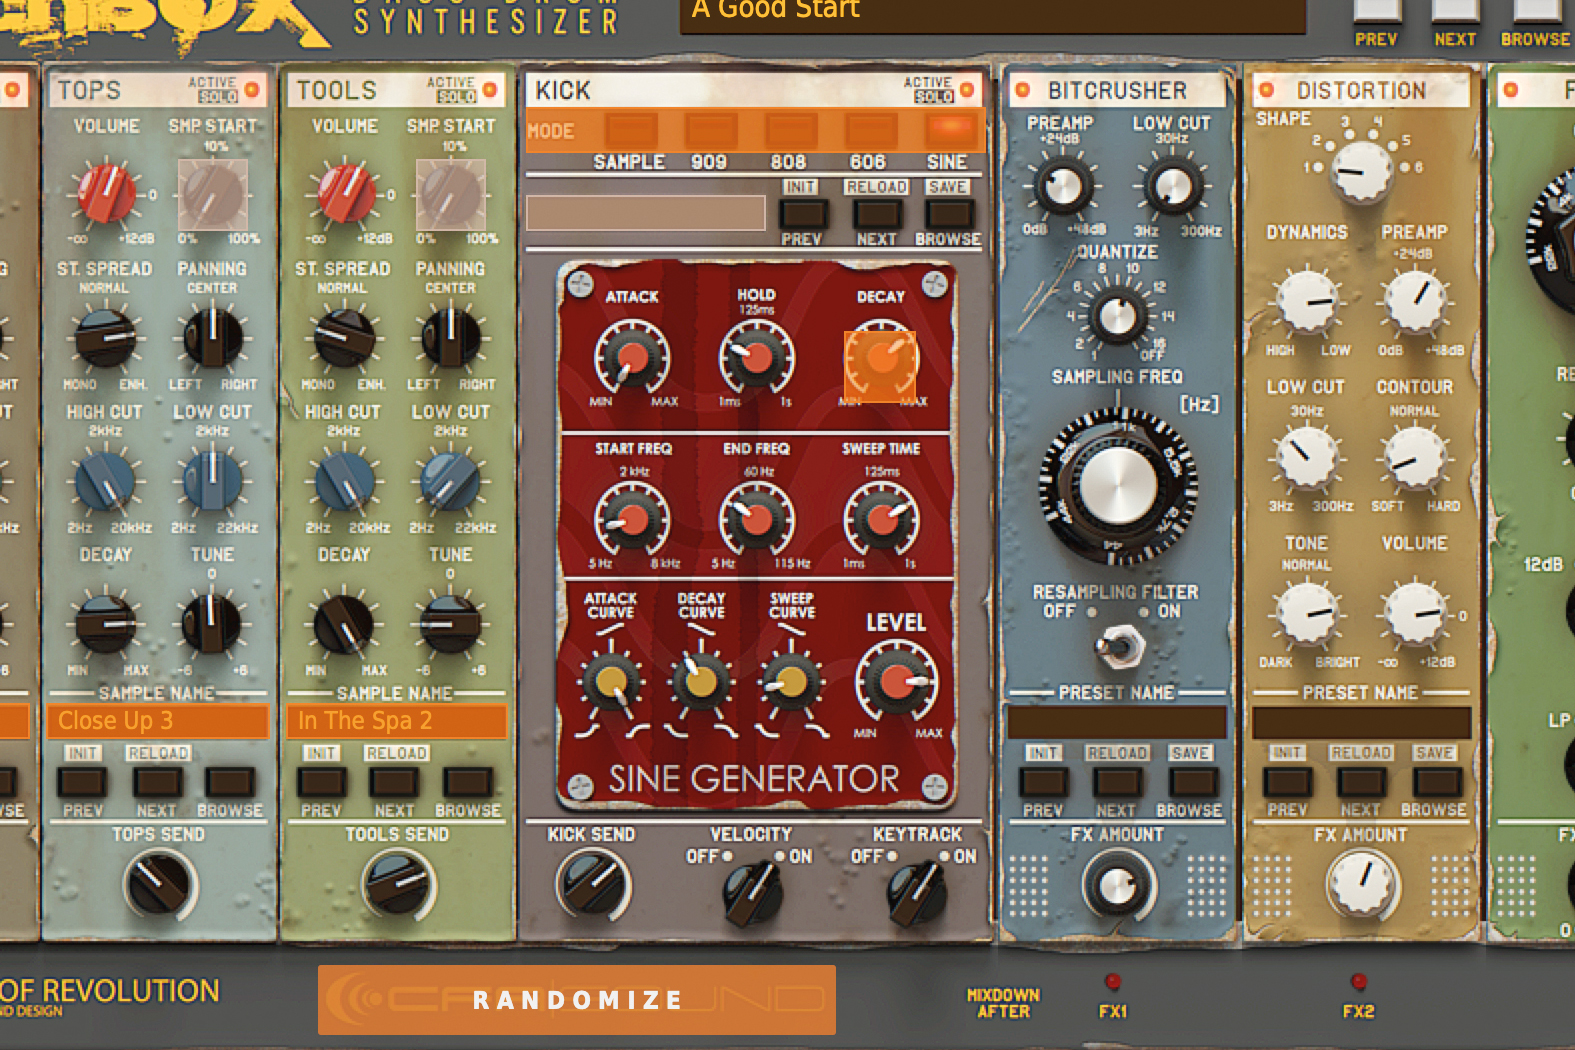
If you’re looking for inspiration, you can use Punchbox’s global preset browser, or the Randomize function along the top bar to randomise a number of the kick layer’s parameters. You can prevent parameters or samples from being randomised by toggling their orange box on or off.
3 of the best acoustic drum plugins
No drum round-up would be complete without a look at today’s acoustic drum simulators. These plugins contain all the nuance and range you’d hope for when aiming for realistic drum sounds in your DAW or driven by an electronic drum kit.
Firstly, size matters, but it goes both ways. A 120GB drum library will afford you many kits, all multisampled at a huge level of detail and nuance… but it’ll also cost you 120GB of hard drive space! For some users, a lighter option will often prevail when the rubber hits the road.
Secondly, onboard mixing controls are often useful, though any seasoned DAW engineer may prefer to take the kit’s raw sound to process using their favourite knobs, faders and plugins.
Toontrack Superior Drummer 3
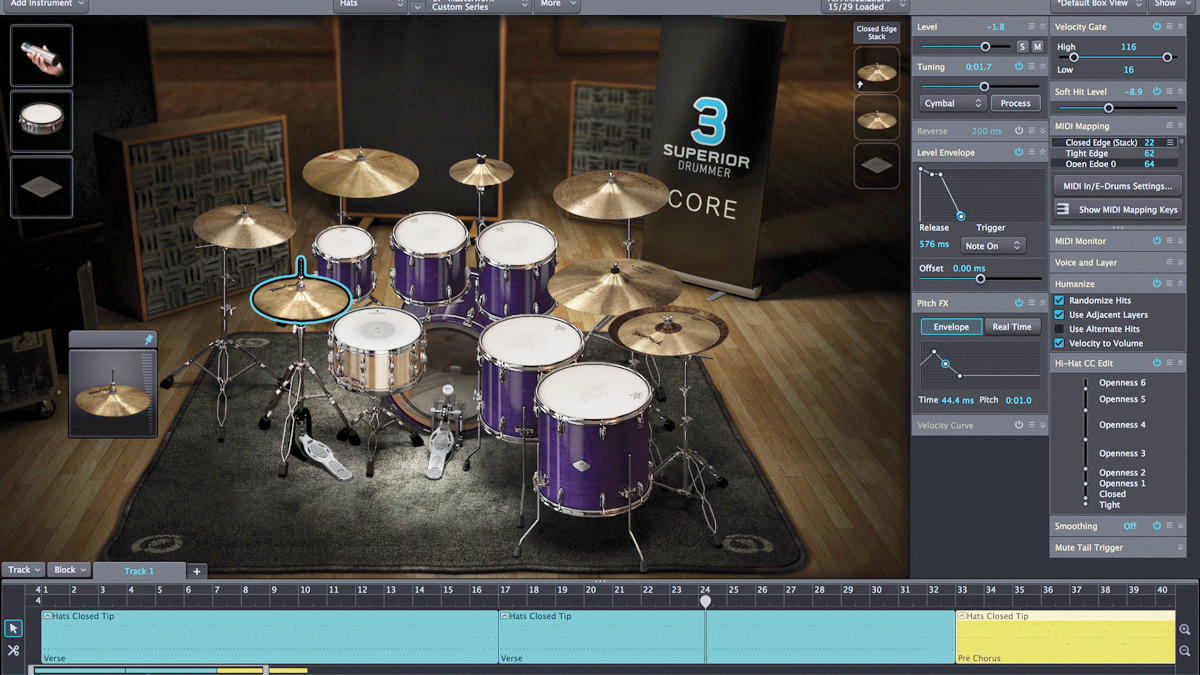
Perhaps the ultimate drum library, with mixing controls and processors onboard, but its huge footprint for even the basic one-kit setup can make it the wrong choice for some. Toontrack also do EZdrummer for smaller hard drives.
Steven Slate Drums 5.5
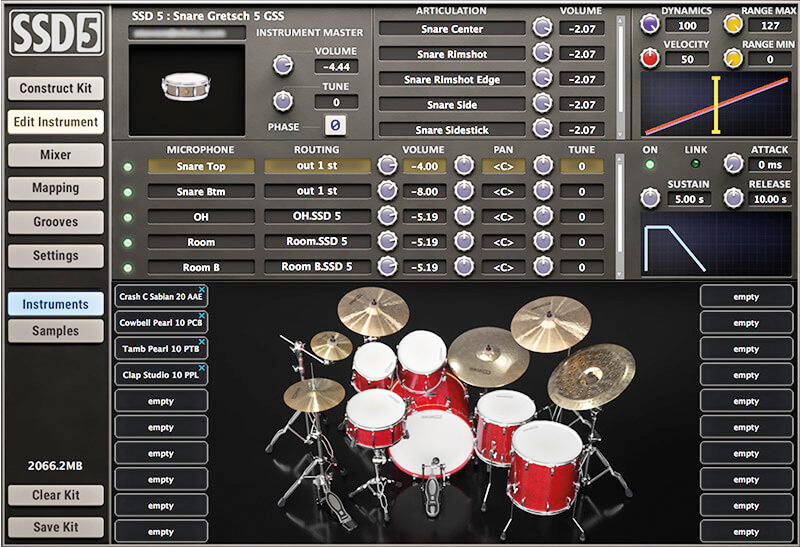
The product line that led Steven Slate to the big league, SSD is a well-trusted package. The latest version brings in presets from landmark kits and artists to get you straight to ‘those’ sounds. Combine it with Slate’s Trigger for instant drum replacement power.
Native Instruments Abbey Road Modern Drums
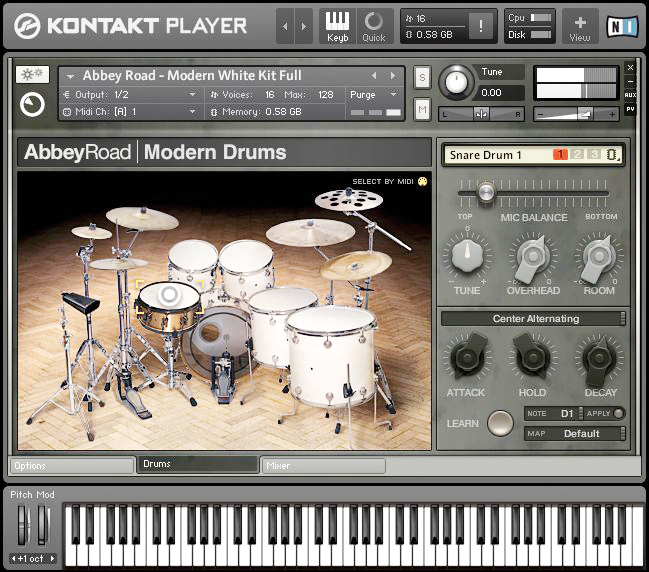
This Kontakt instrument comes with a few other great virtual drum kits in the Komplete package. The packages are big enough to impress, but not so big to bloat, and come with MIDI grooves in tow, plus Kontakt mixing features.


