If you want to master pencil shading techniques, it will take some practice. This is because different pencils create marks that are noticeably different from one another, and understanding which pencil does what is extremely important.
My best advice to learn shading is to go out and experiment with some of the best pencils and explore different methods. In this article I'll share my insight to help clarify the learning process. Hopefully you'll be inspired to try shading with intent – and create drawings by employing a range of shading techniques. You can widen your technical expertise further with our roundup of the best how to draw tutorials.
01. Choose your pencils carefully
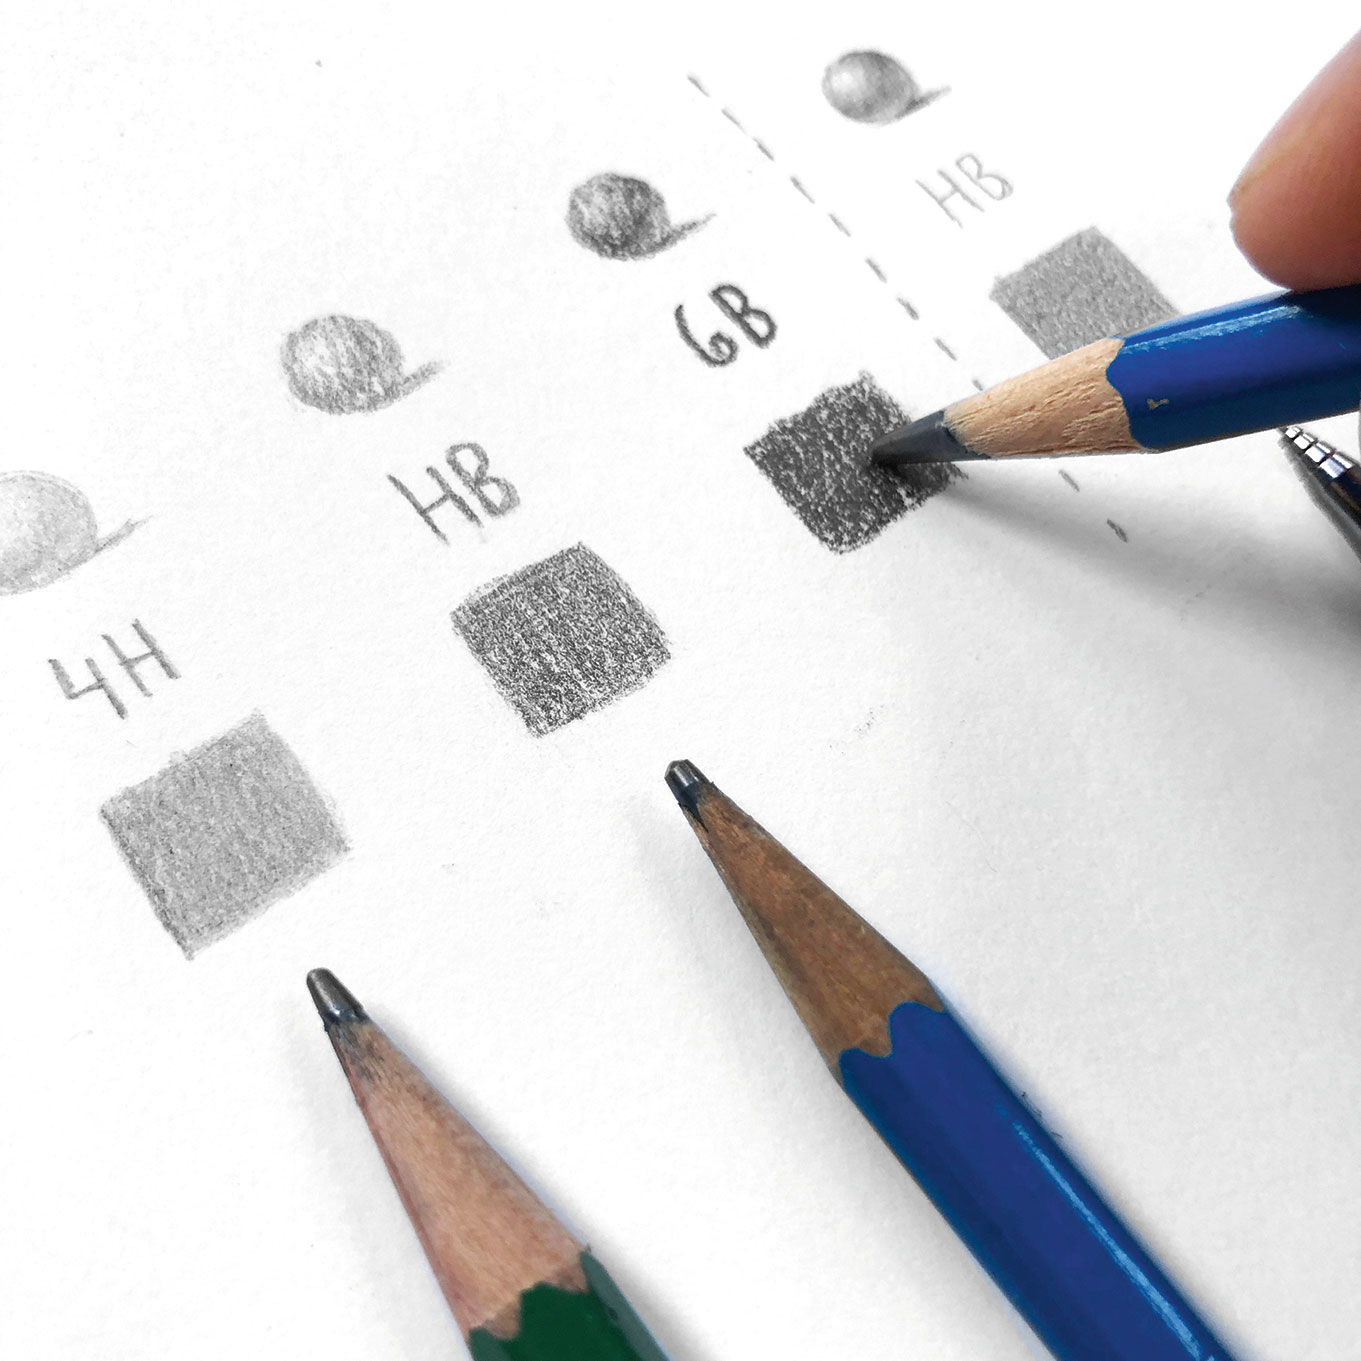
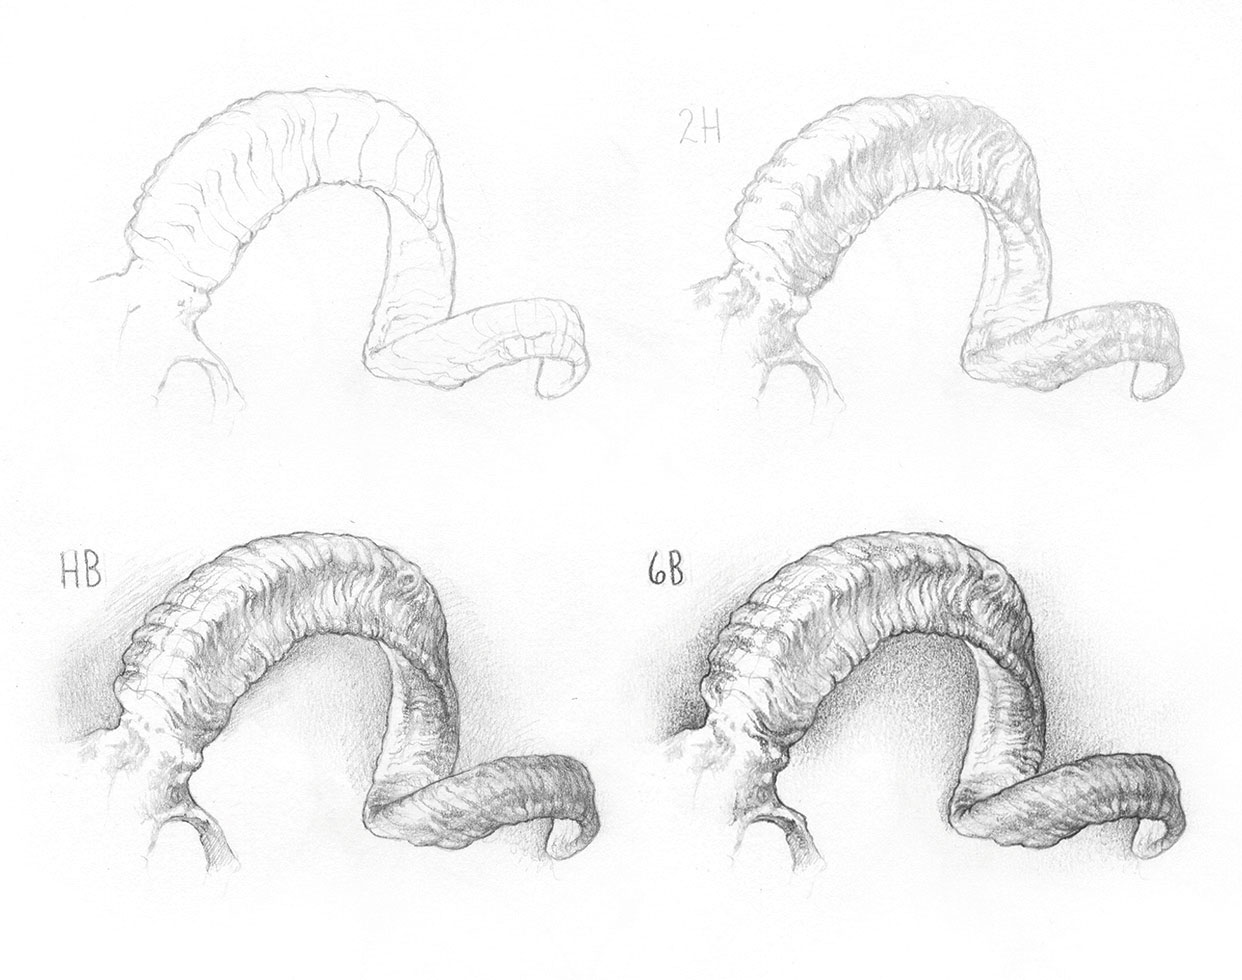
Having a duller-tipped pencil will produce larger areas while shading. They'll also create more of a textured look the higher you go up the B scale.
I recommend having a few solid pencils at hand that you can use in your work with full knowledge of the results they'll produce. There's a noticeable difference when working with different pencils on the HB scale and how sharp or dull the tip is, , such as shading with a 4B versus a 4H. A more rounded tip gives a larger, softer result and is more efficient to work with. Test and see how some will produce dark texture while others create consistent mid-tone smoothness.
Which type of pencil should you choose? I used HB mechanical pencils for a long time when I changed my focus from digital to traditional art. However, once I started working with regular pencils, there was a clear execution difference that I wasn't able to produce with mechanical pencils alone. Since then I've discovered techniques on how to produce different textures, tones and results that I combine to create my pieces.
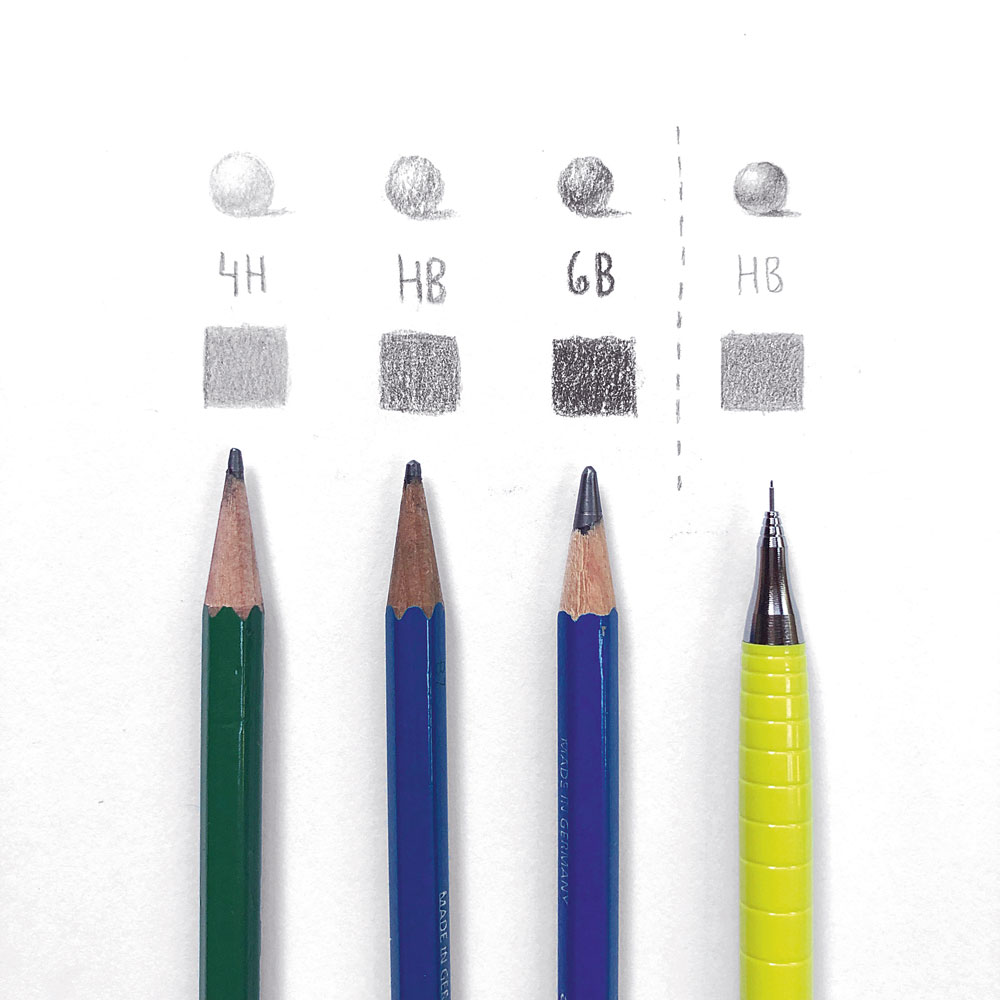
In the image above, you can see how going higher on the H scale will produce lighter yet smoother, buttery looking results. Using a small tip mechanical pencil will create precision, but often will smooth out the paper texture when shading to create a more matte look.
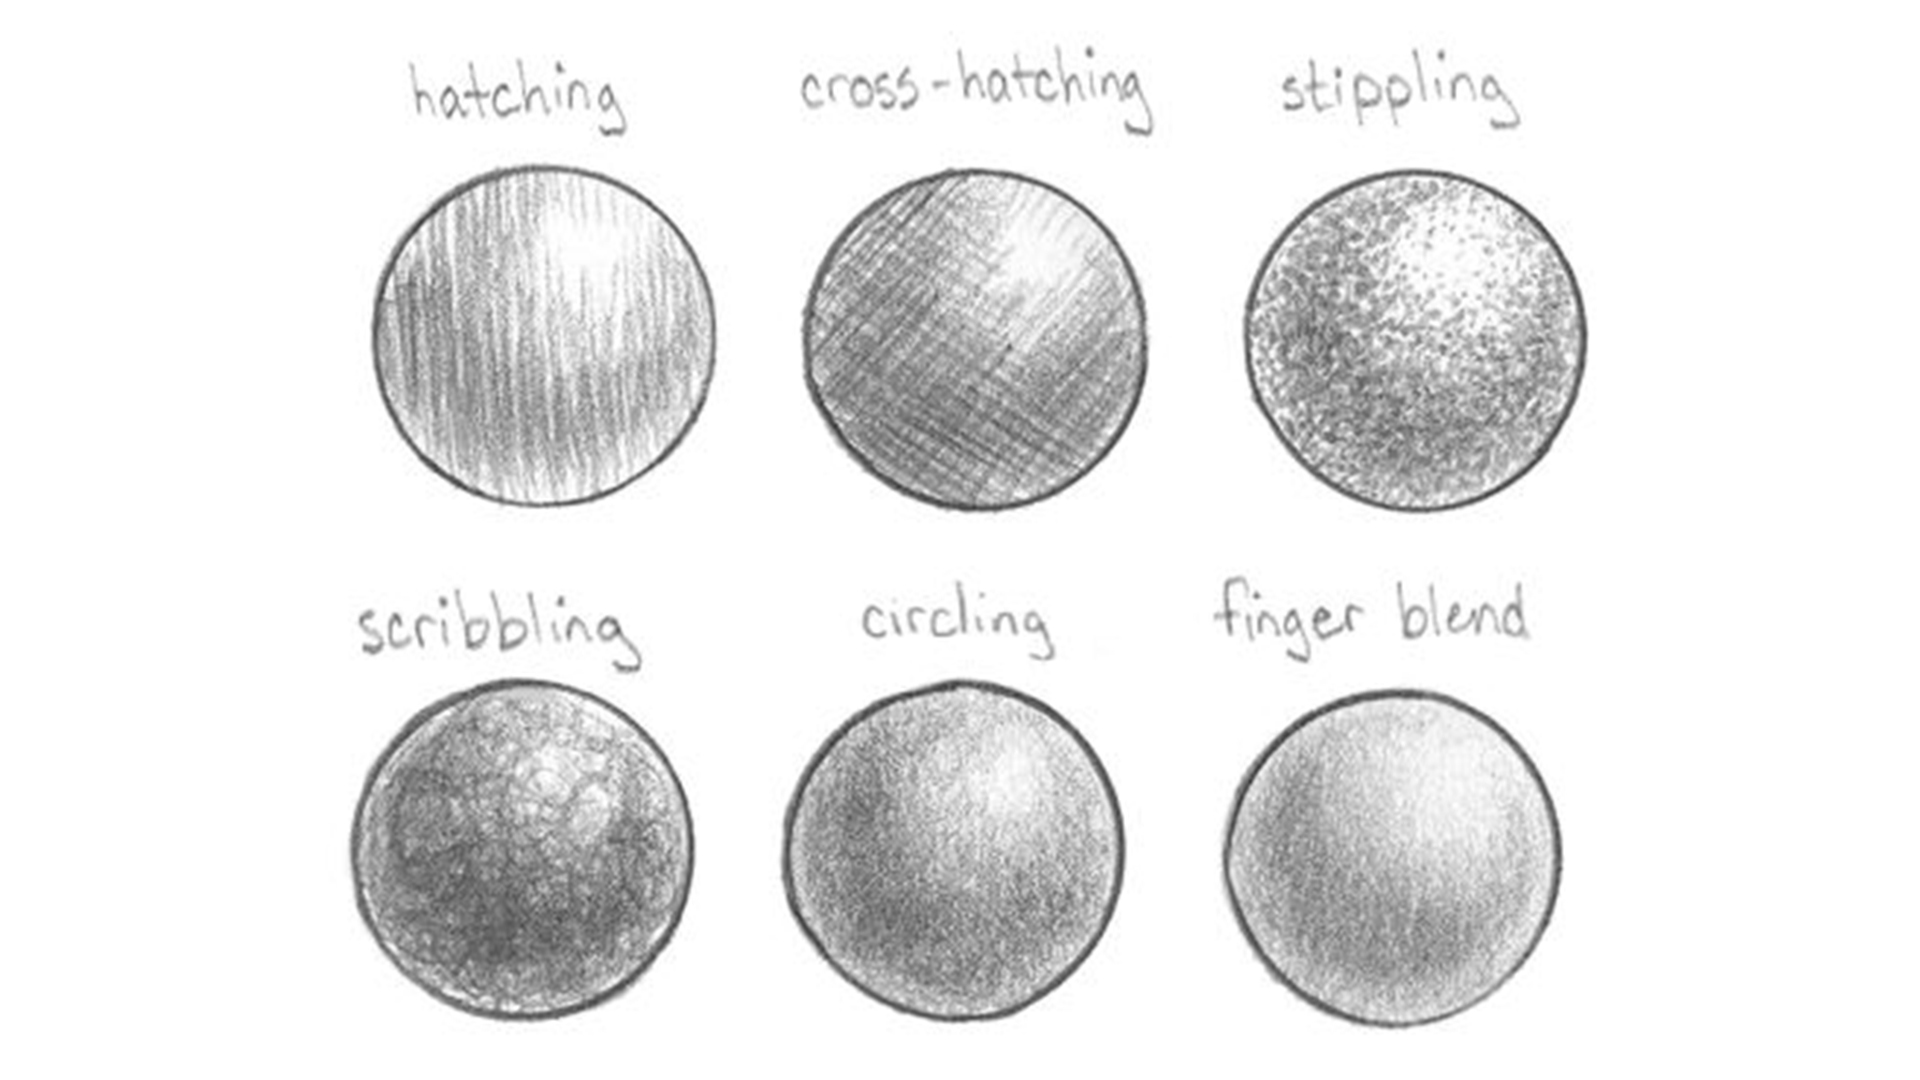
02. Create different types of shading
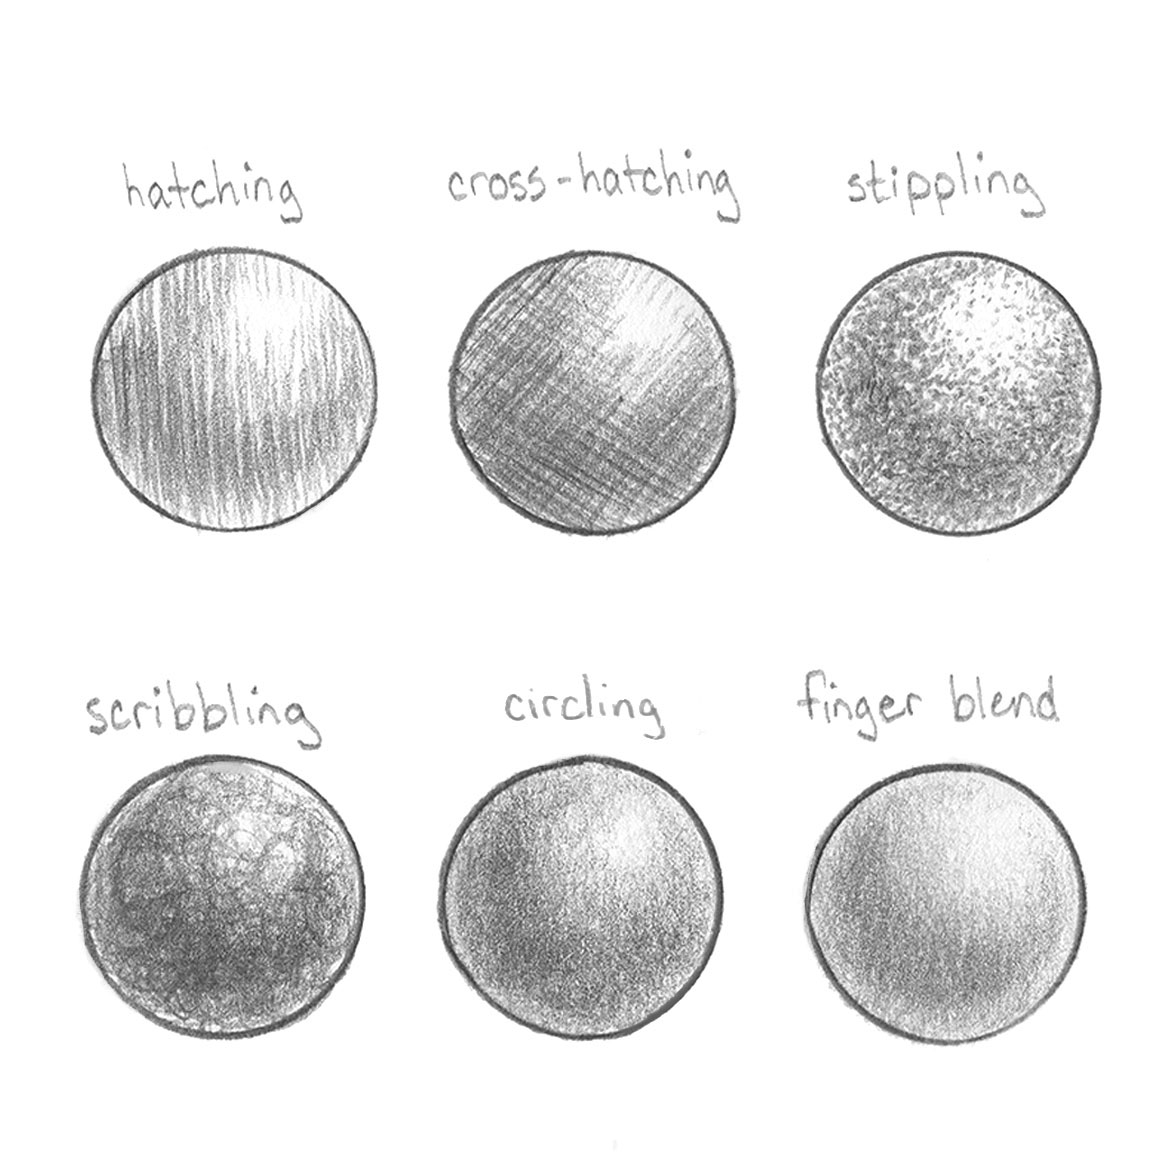
Every artist will find the shading method that works best for them and I tend to use a few while drawing. I primarily work with circling, but I've experimented with all of these methods and more to help me create my best results. Each method produces a distinct result and depending on what type of art you want to create, you'll want to find which is best for you! Hatching and stippling often create an underlying presence of texture and roughness. Circling and using a blending stump creates clean, gradual smoothness.
03. Get to know values
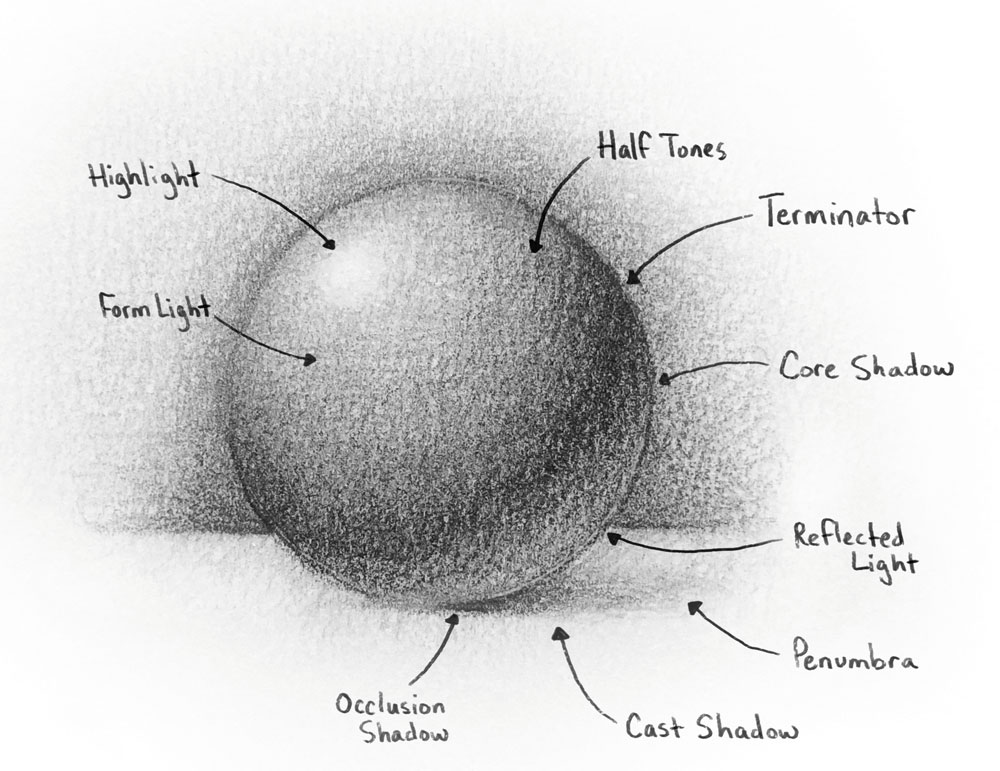
Take the time to understand how lighting works and the values it creates to shade properly. Do studies, find references and resources that provide this insight, and then apply that knowledge in your practice pieces. There's a range of value to work with, not just dark and light. For more on values, see our everything you need to know about tonal values piece.
04. Use different pencils for different effects
Now that I've been working with a handful of pencils with each drawing, I know when to switch over to another for a particular result. It's traditional and effective to start with a lighter H pencil and then gradually work darker into the B scale, to punch out the values and contrast.
05. Pick a shading technique
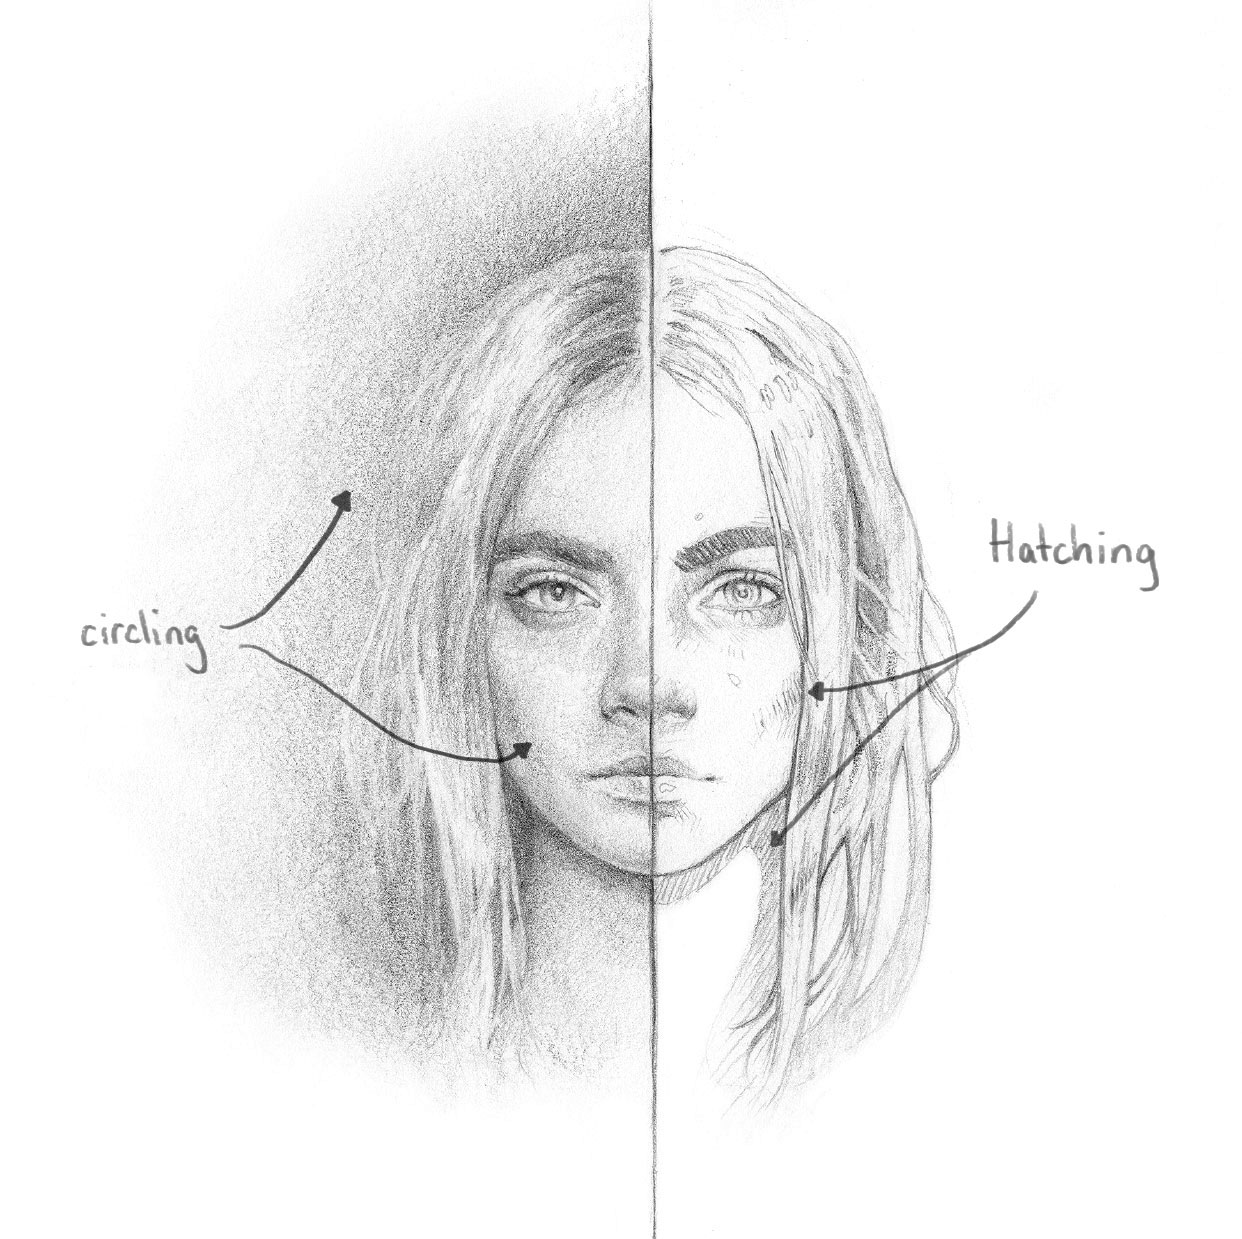
Here's an example of two different types of shading methods. The left half has a softer realism finish with gradations on the paper texture done with a circling method and a slow build-up of value. The right half was done primarily with hatching and creates a crisp bold finish.
This article was originally published in ImagineFX, the world's best-selling magazine for digital artists. Subscribe to ImagineFX.