Wildlife photography is one of the most popular genres of photography. After all, what could be more fulfilling than getting out in Mother Nature and documenting creatures great and small. Wildlife photography is also extremely accessible, with wildlife popping up in both rural and urban environments, and a plethora of potential subjects from showstoppers such as grizzly bears, red squirrels, and bald eagles to tiny creepy crawlies such as butterflies and spiders, and creatures that appear closer to home such as raccoons and foxes.
But capturing wildlife isn’t easy. In fact, it’s one of the more difficult genres of photography to master. Not only do you need to know the best camera for wildlife photography inside out, but access to a long lens is extremely helpful, and a little bush craft doesn’t go amiss either. So, I’ve compiled this list of 10 tips for wildlife photography so you can capture your best wildlife photos this year and beyond.
Tips for wildlife photography
1. Long and fast
Wildlife photography is often considered one of the more expensive genres, thanks to the long and fast lenses required to isolate skittish subjects in the wild. Thankfully, we live in the golden age of the super-telephoto lens with some very good enthusiast level glass such as the Nikon Z 180-600mm f/5.6-6.3 VR, Canon RF 200-800mm f/6.3-9 IS USM, and newly announced Sony FE 400-800mm f/6.3-8 G OSS. While these lenses aren’t particularly fast, you can get around this shortcoming by putting as much space between your subject and the background as possible.
However, if you want faster glass, but don’t want to pay a premium for lenses such as the 600mm f/4 lenses that tend to cost around $12,000 / £14,000, older glass on the used market can be picked up for a fraction of the price. Canon and Nikon users are particularly well catered for, due to a wealth of very competitively priced DSLR glass on the used market.
2. Focus (eyes)
AF-C / AI-servo mode is crucial when photographing moving subjects. If you’re using a pro-grade mirrorless camera then you can likely make use of subject detection when photographing certain animals. But particularly erratic subjects such as red squirrels will likely be too quick for subject detection. As such, many professional wildlife photographers still swear by AF modes such as single-point AF and dynamic-area AF/Expand AF area.
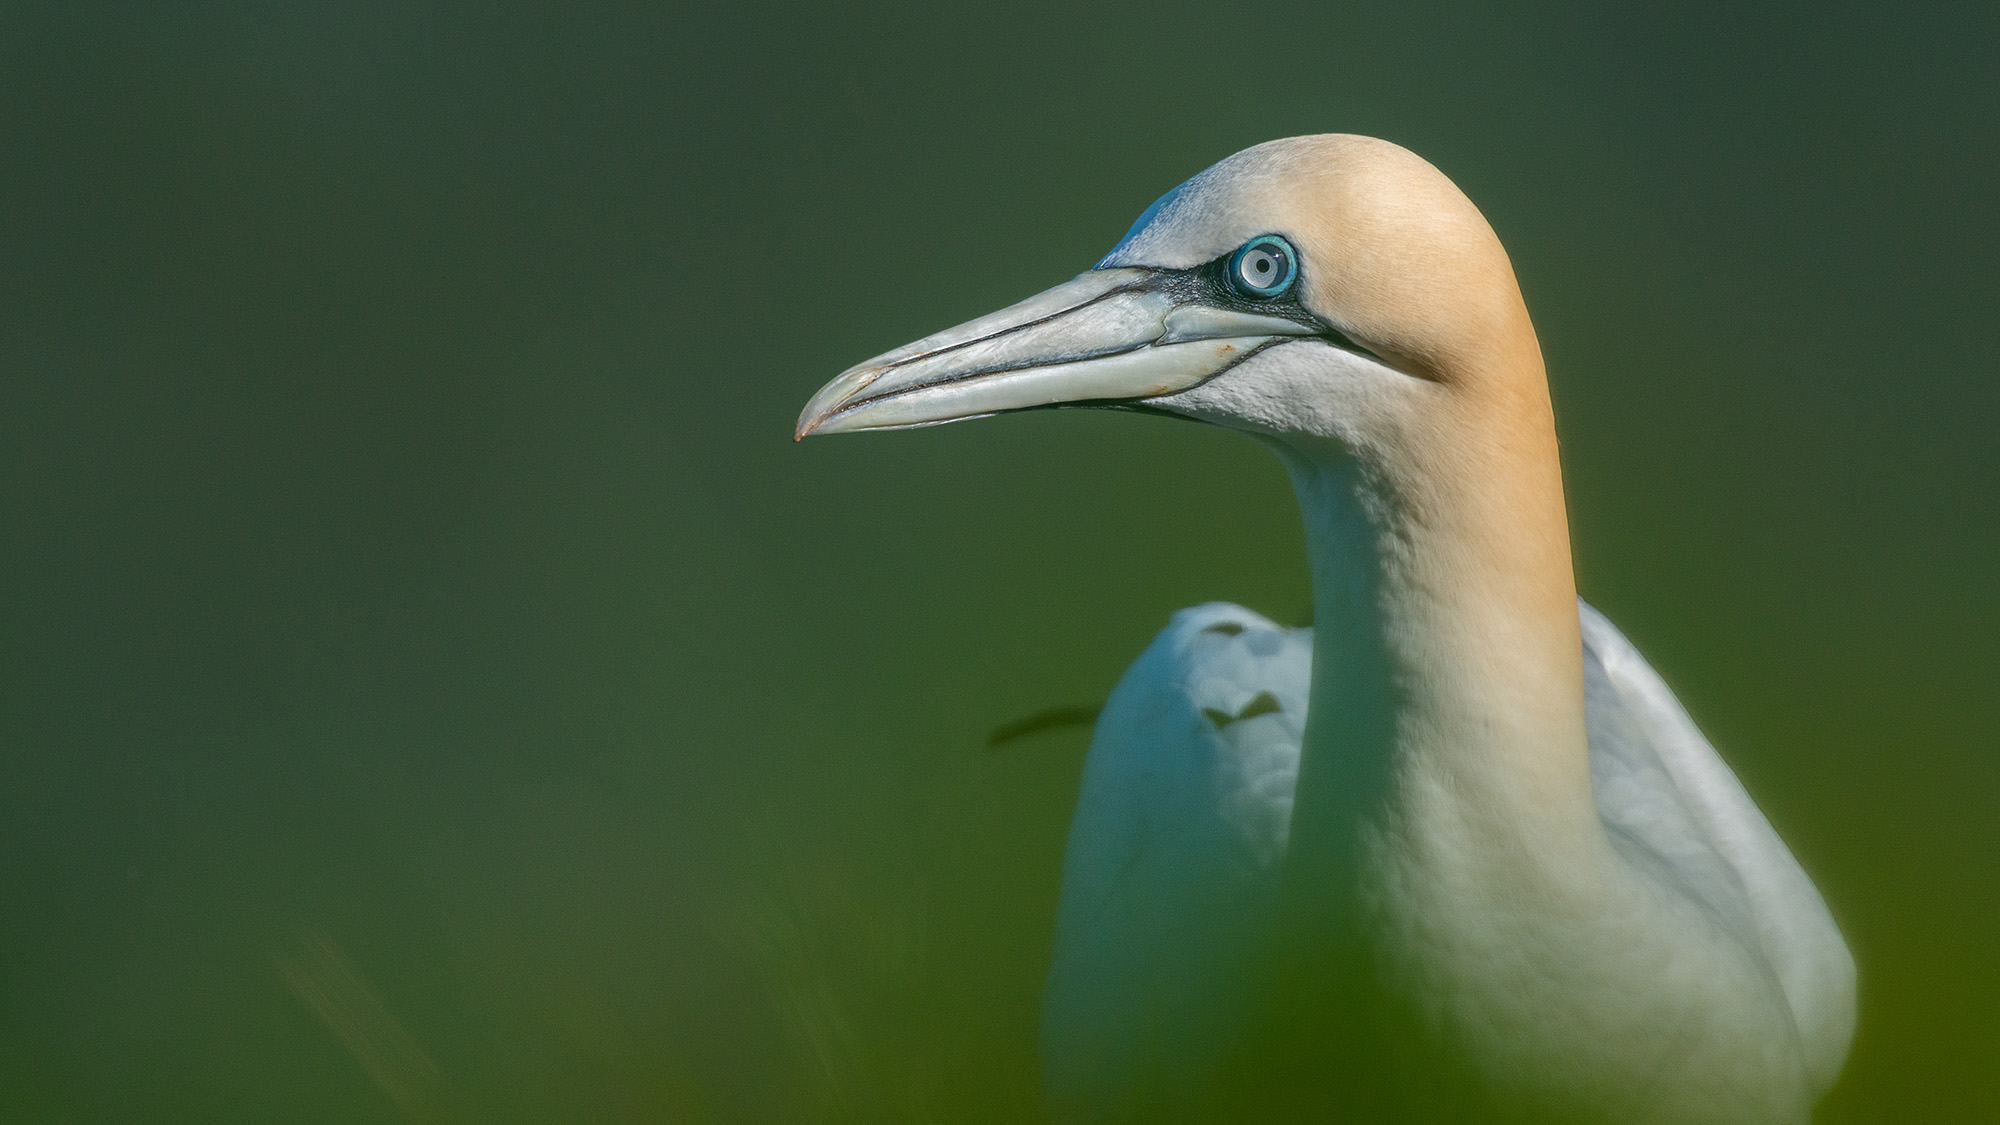
As with human portraits, close-ups of animals will usually require the eye that’s closest to the camera to be perfectly sharp. For animals that are further away, such as birds in flight, you’ll want to focus on the subject’s head.
3. Stabilization
In-body image stabilization and optical image stabilization are extremely handy when you have to resort to slower shutter speeds in low light. Many photographers opt to use a physical means of stabilization to support their setup, too. This isn’t just to remove camera shake, but also to make shooting more comfortable, given the weight of long lenses and the amount of time (sometimes hours) waiting for the opportunity to take the shot.
Common forms of stabilization include the best monopods and the best tripods with the best gimbal head. The latter provides stabilization, as well as the freedom to move the lens in a similar fashion to hand holding. If shooting prone or in a hide, some photographers like to use beanbags to rest their camera on and add some stabilization.
4. Camera settings
I recommend using manual mode (with or without auto ISO) when photographing most wildlife subjects since you'll want full control over both your aperture and shutter speed. Make sure you check out the exposure triangle if you're not comfortable using manual mode.
Wildlife photographers spend the majority of their time shooting with their aperture wide open to gather the necessary amount of light to freeze the action or simply meet the necessary shutter speeds required to mitigate camera shake when using a long lens.
If you don’t know how to work out what shutter speed is needed in relation to your focal length to banish camera shake, make sure you check out the reciprocal rule. If you’re photographing a stationary subject, you’ll want your shutter speed to at least meet the reciprocal rule. If you’re photographing birds in flight, you’ll ideally be aiming for 1/2000 sec and faster.
When it comes to ISO, you’ll want to keep it as low as possible, while compensating for your desired shutter speed. That said, don’t be afraid to boost it when you need to. A sharp image is always better than a blurry image. And besides, modern cameras boast better ISO-to-noise ratios than ever before and AI-powered noise-reduction in the best photo editing software is constantly redefining what’s possible in terms of noise reduction.
5. Composition
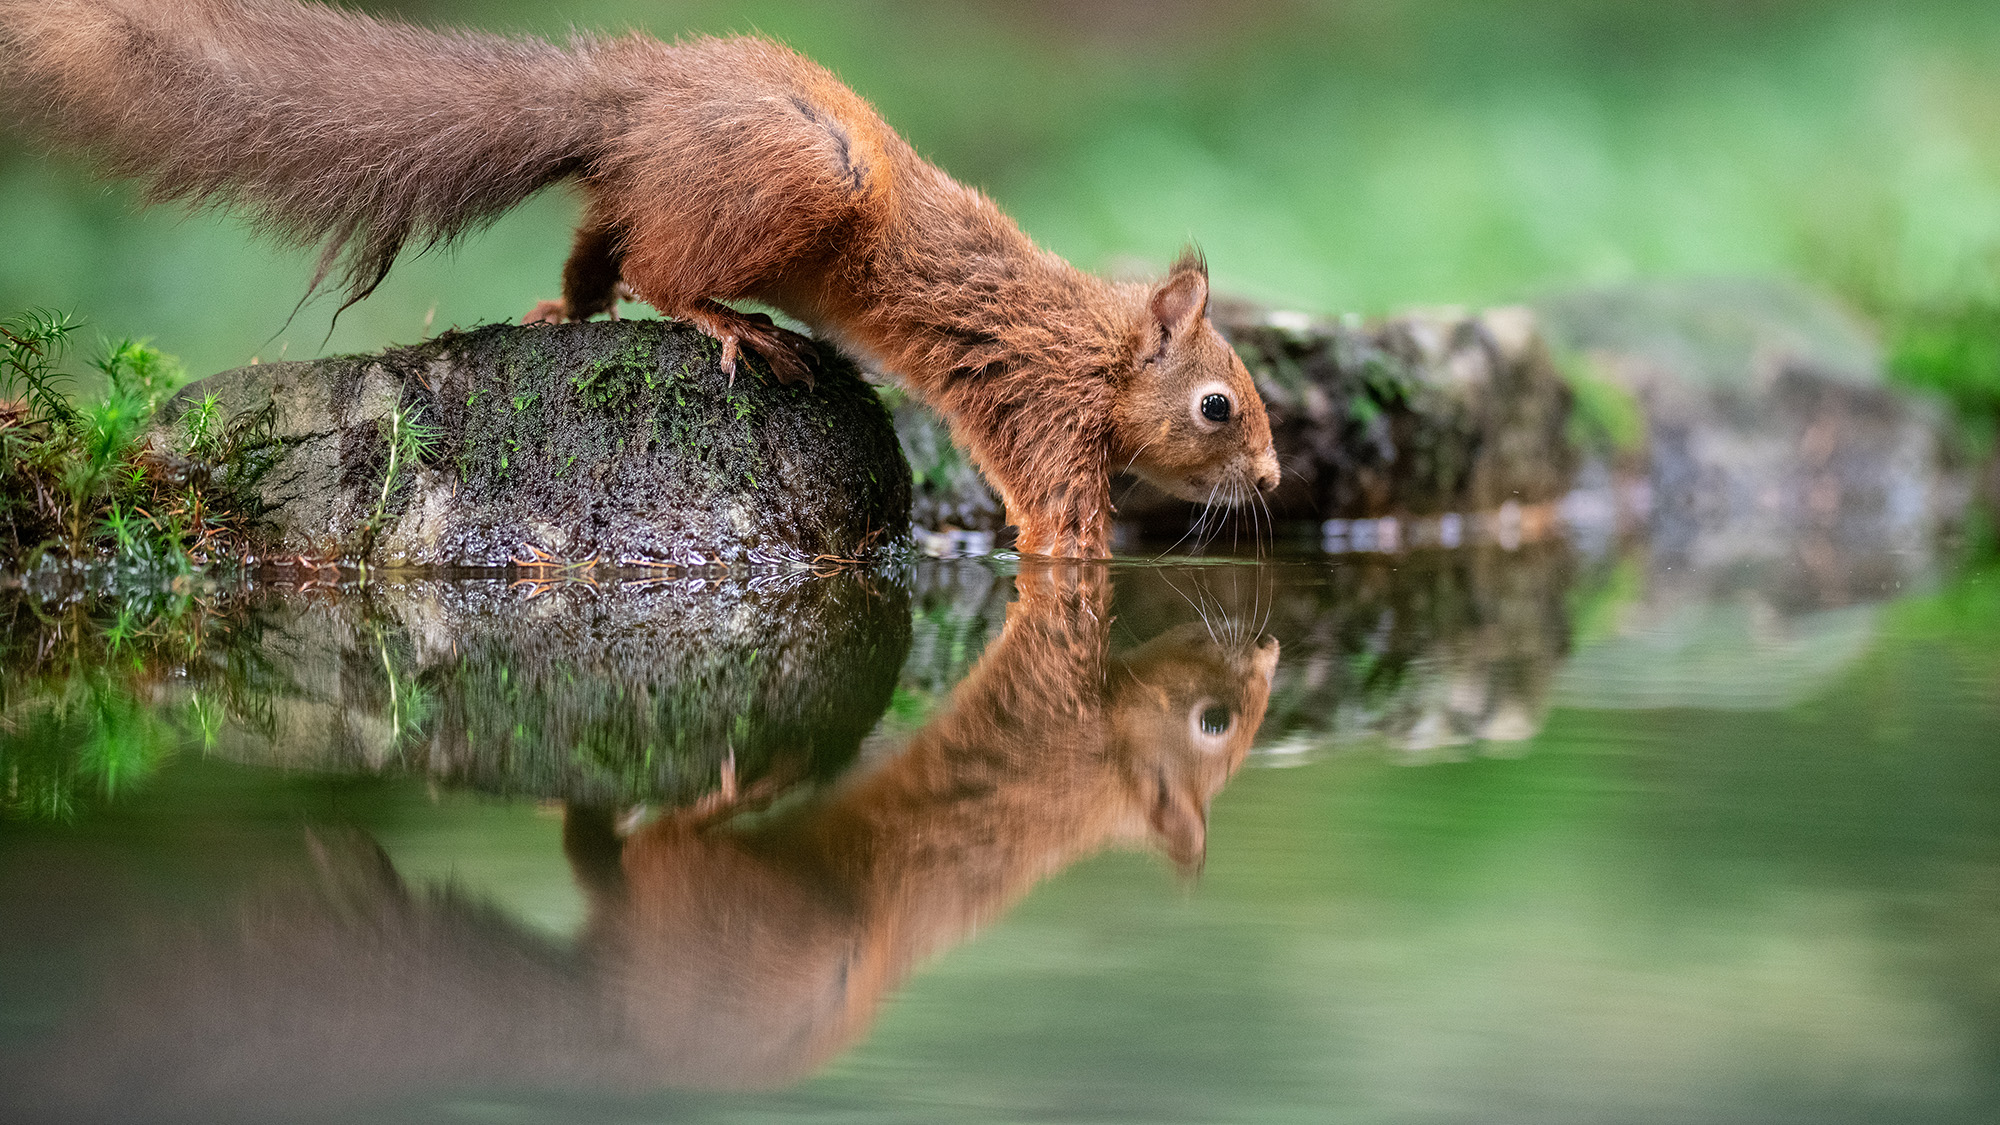
Frame-filling close-ups look great and are hugely popular, but don’t be afraid to widen your frame and include some of your subject’s environment into the photo. After all, just like any form of photography, good wildlife photography is about telling a story and building a narrative. If you spend a day photographing a subject, close-ups alone won’t tell an interesting story, so make sure you vary your images.
Active space is space within your image that your subject is either looking or moving towards. Space behind where the subject is looking or moving towards is called dead space. Generally, you’ll want to leave room for active space, but reduce dead space. For example, if you have a subject looking from right to left, leave a little active space on the left.
Space is vital when showing your subject’s environment. If you’re framing an animal within its environment, make sure the space you give to the environment is either clean (like a blurred background). You can use this negative space to create a minimalist aesthetic. Alternatively, use the space to frame something interesting within the animal's environment. For example, this might be an eagle sitting on a branch on one side of the frame and on the other side, its nest.
Eye contact is another great compositional tool. If you manage to capture your subject while it’s looking down the barrel of the camera, it will immediately engage your audience.
6. Wildlife ethics
We all photograph wildlife because we love it. It stands to reason, then, that every wildlife photographer would want to practice exemplary ethics. Sadly, that’s not always the case. While it's possible to get caught up in the moment in a bid to capture that stunning photograph, ultimately, the safety and security of the animal in question should be at the forefront of your mind. And your safety should be, too. No photography is worth sustaining an injury.
Do your research. Know when it’s breeding season or when animals have young and you’re required to keep your distance. Approach subjects respectfully, and if you get the feeling your presence is making them uncomfortable, back off. Refrain from making noises to grab their attention or trying to interact with them to draw them closer, too. Wildlife photography is about capturing authentic behaviour, after all.
7. Patience is a virtue
Some wildlife photographers spend hours waiting for a photo opportunity and some spend days, weeks, or even months observing patterns and behaviours before ever getting the chance to fire the shutter. How long you have to wait will vary from subject to subject and if waiting simply isn’t your thing, there are plenty of accessible wildlife subjects out there to photograph. But regardless of what you’re shooting, patience will always reap great results.
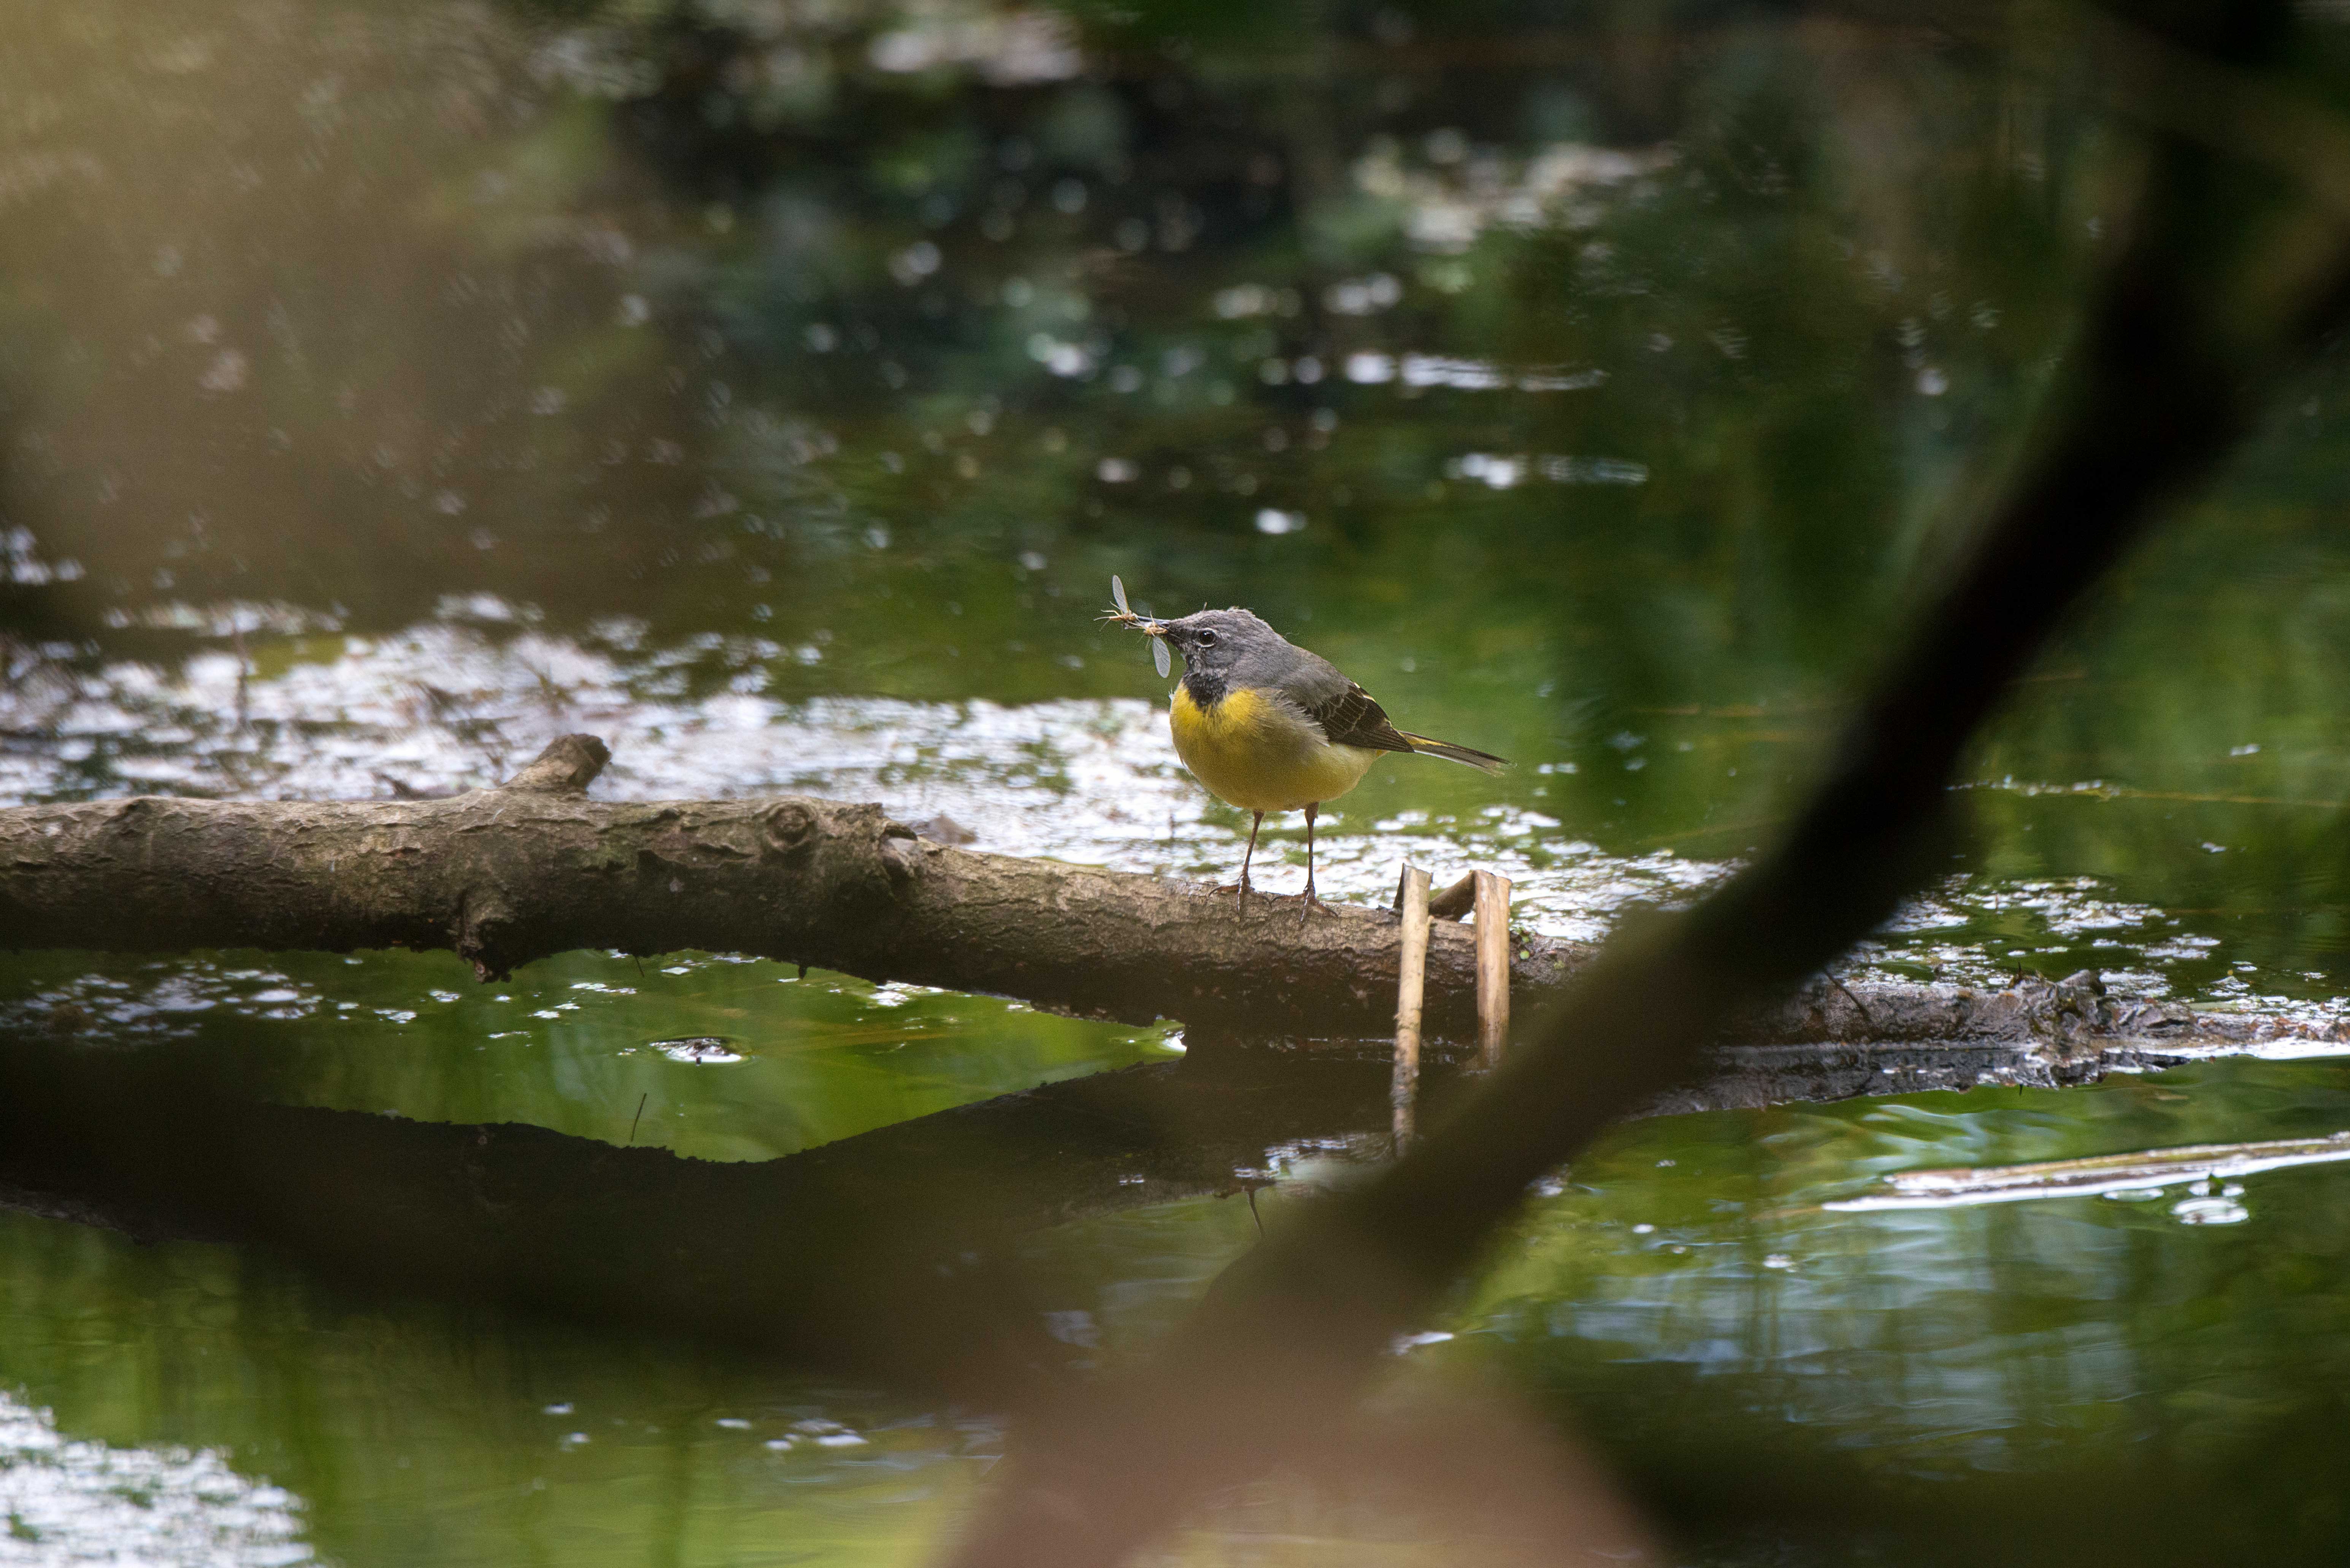
Don’t be tempted to sit with a subject for 20 minutes and then go home. Take the time to learn about them and think about how you can approach each shot. Think of wildlife photography as documenting a subject’s behaviours. Don’t just capture a close-up portrait of an eagle, aim to also capture the bird in flight, prey in its talon, etc.
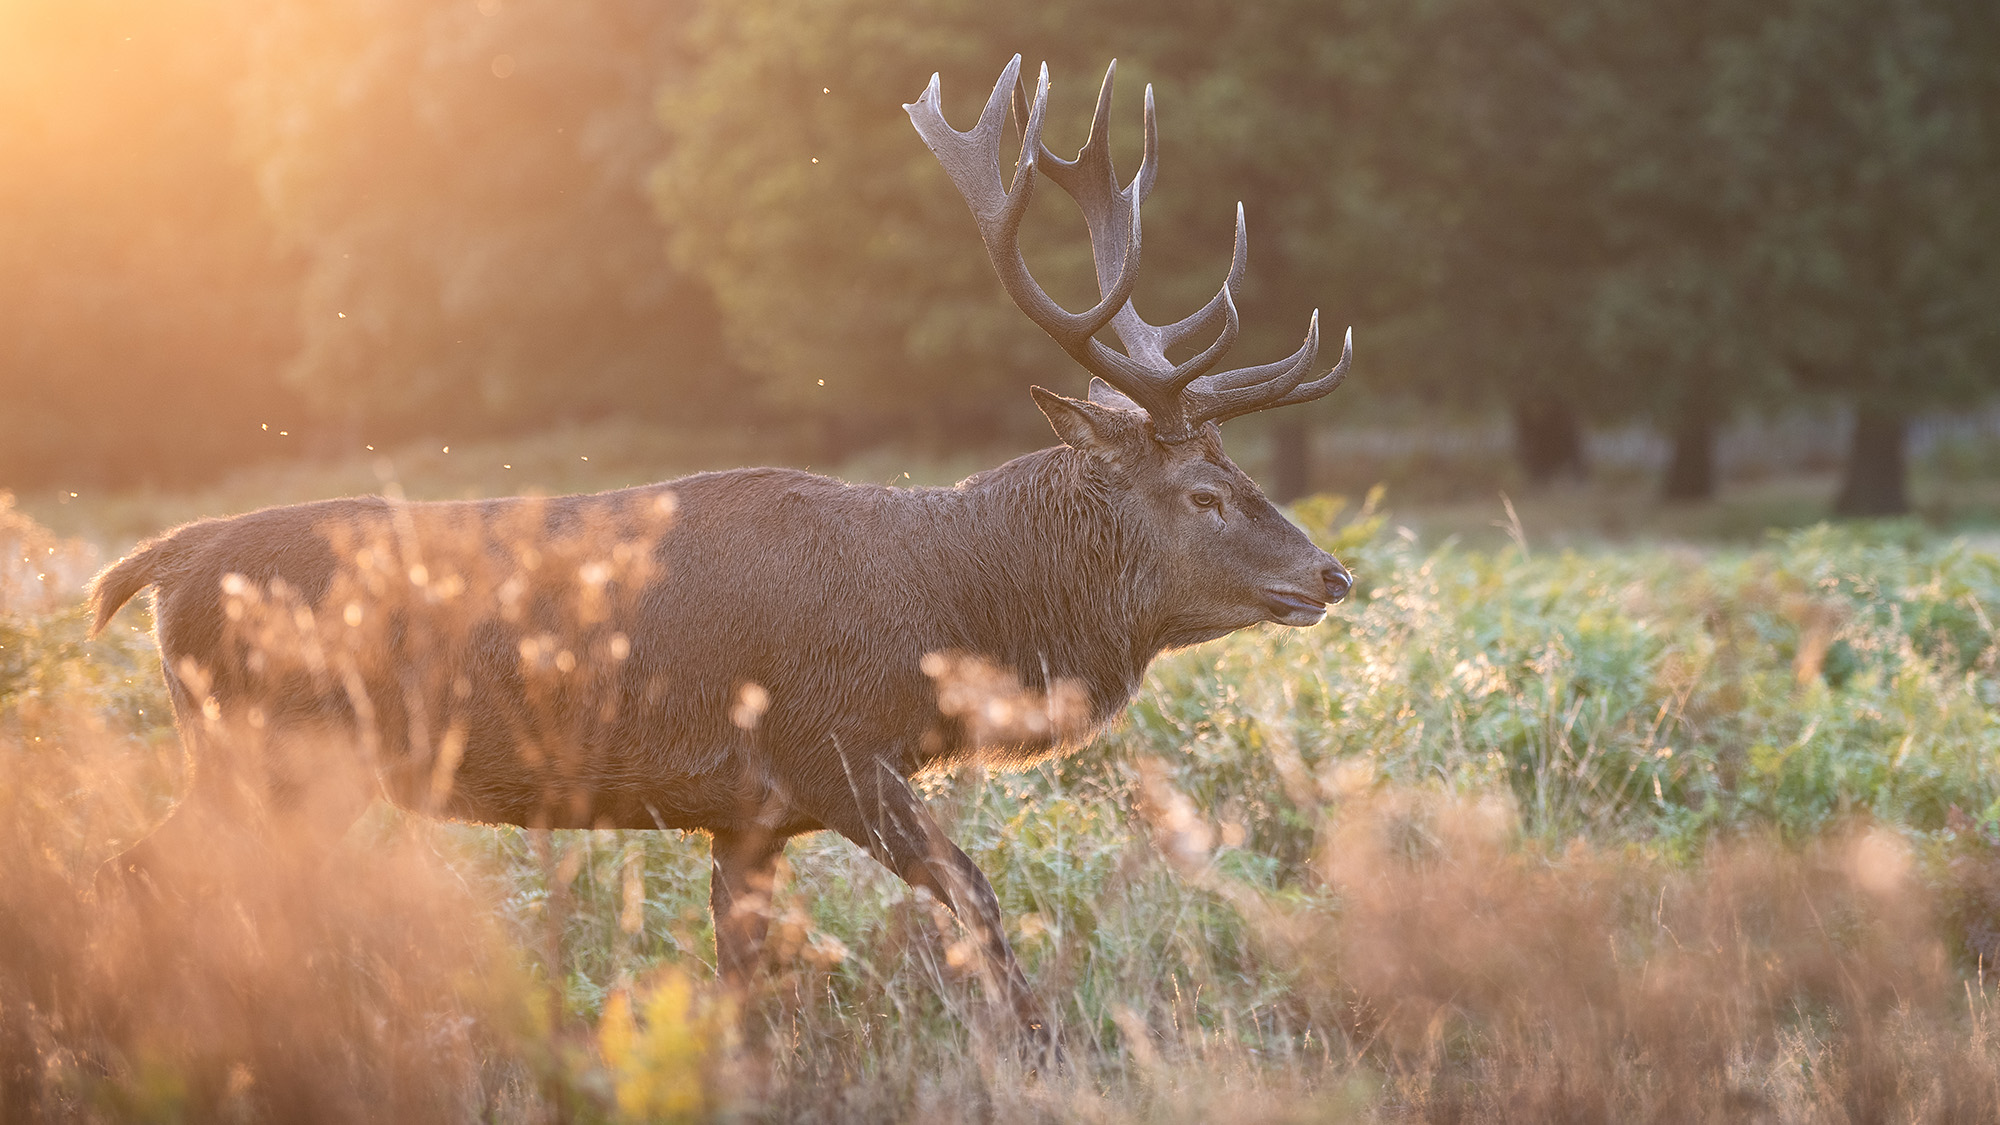
8. The right light
The difference between a good wildlife image and a great one will very often come down to lighting. You can position yourself so the sun is behind your subject to backlight it. Get up early or stay out late to photograph your subject at golden hour, when the lighting is soft, warm, and flattering. As with portrait photography, you’ll want to avoid having subjects bathed in the harsh, midday sun if you can help it.
Instead, use cloud cover or the canopy of a forest to diffuse the light or aim to photograph your subjects out of direct sunlight. For macro wildlife subjects, photographers will often set up one of the best ring lights or best LED light panels to add a little bespoke lighting and to bring out details in tiny subjects.
9. All winds and weathers
Wildlife photographers work in all winds and weathers so make sure you prepare for the elements accordingly with adequate outdoor clothing and sunscreen. You’ll also need to protect your camera, so make sure you bring one of the best rain covers for your camera bag and your camera itself. Weather-sealed kit really is a useful investment for wildlife photography as you’ll be working in wet and dusty environments. However, weather-sealed cameras should still be protected as much as possible, since no camera is impervious.
10. Burst shooting
Burst shooting isn’t essential, but if you have a camera with a fast drive mode, it’ll help you capture those blink-and-you’ll-miss it moments. Just be aware that shooting fast bursts will fill up your memory cards and drain your batteries quicker. As such, make sure you take plenty of spare memory cards and plenty of spare batteries. If you’re working in a cold environment, keep your batteries on an inside coat pocket where they’re warming, since cold weather can inadvertently drain them.
You may also like...
For a more detailed look at wildlife photography techniques, here's how to photograph birds in flight. If you're interested in other photography fundamentals, check out my 11 wedding photography tips. Finally, if you're looking to upgrade your wildlife kit, take a look at the best binoculars.