Whether you have an iPhone 14 Pro, an iPhone SE (2022) or any of the other best iPhones, you’ve got an extremely capable handset on your hands. But Apple doesn’t do the best job of advertising the iPhone’s features, so there are plenty of iPhone hacks and tricks that you might not know about.
Below, we’ve detailed a selection of these iPhone hacks, which can unlock new features on your phone, give you a new way of doing things, or just make life with your iPhone a little bit easier and better.
Note that all of these tricks were tested with iOS 16, but most of them are likely to work on older versions too – and on iOS 17 as well.
1. Fix calculator errors
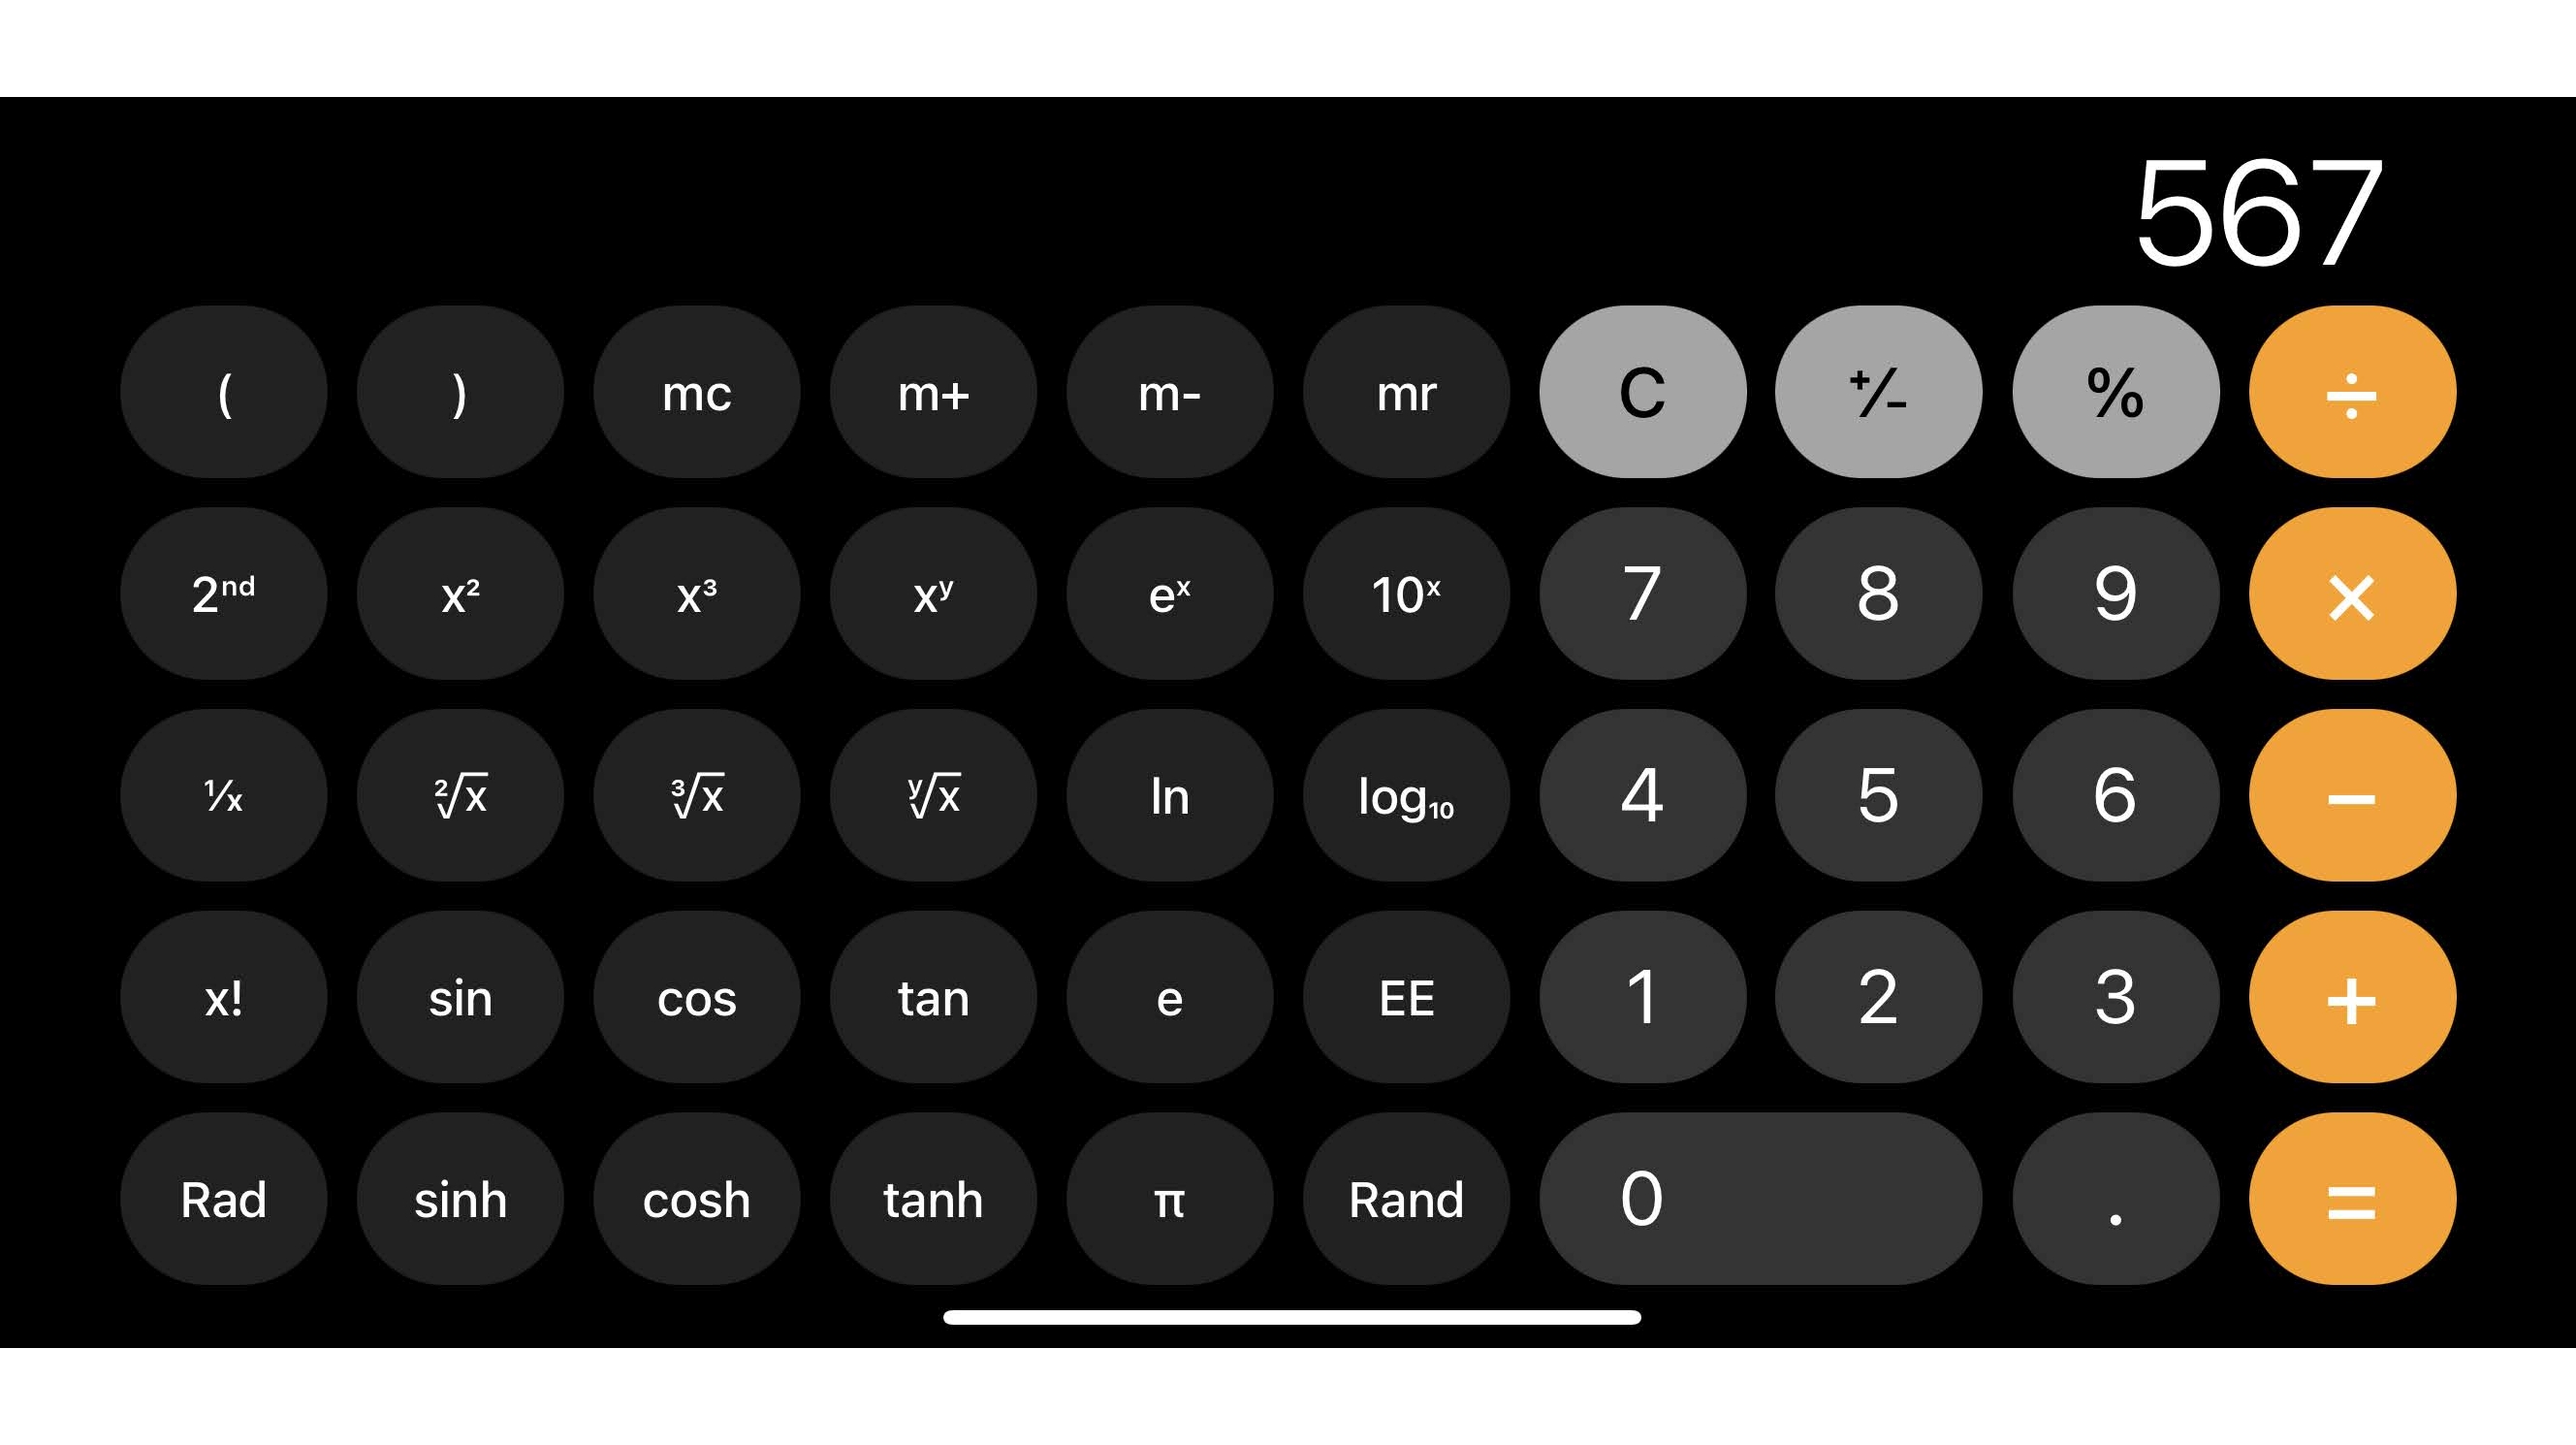
If you’ve ever entered the wrong number into the iPhone’s built-in calculator app, you’ve probably just pressed ‘C’ to clear the whole sum and start again. That’s not a big deal if you’re doing short, simple calculations. But if you’re partway through entering a long number or doing a multi-step calculation, then starting again can be a pain.
But you don’t have to. Instead, just swipe from right to left across the number, and the most recent digit will be deleted. You can also do this multiple times to delete multiple digits.
Sadly, you can’t use this trick to cancel an accidental addition, subtraction, or anything else beyond typed numbers, but it’s a lot better than nothing.
2. Identify every plant, animal, and more
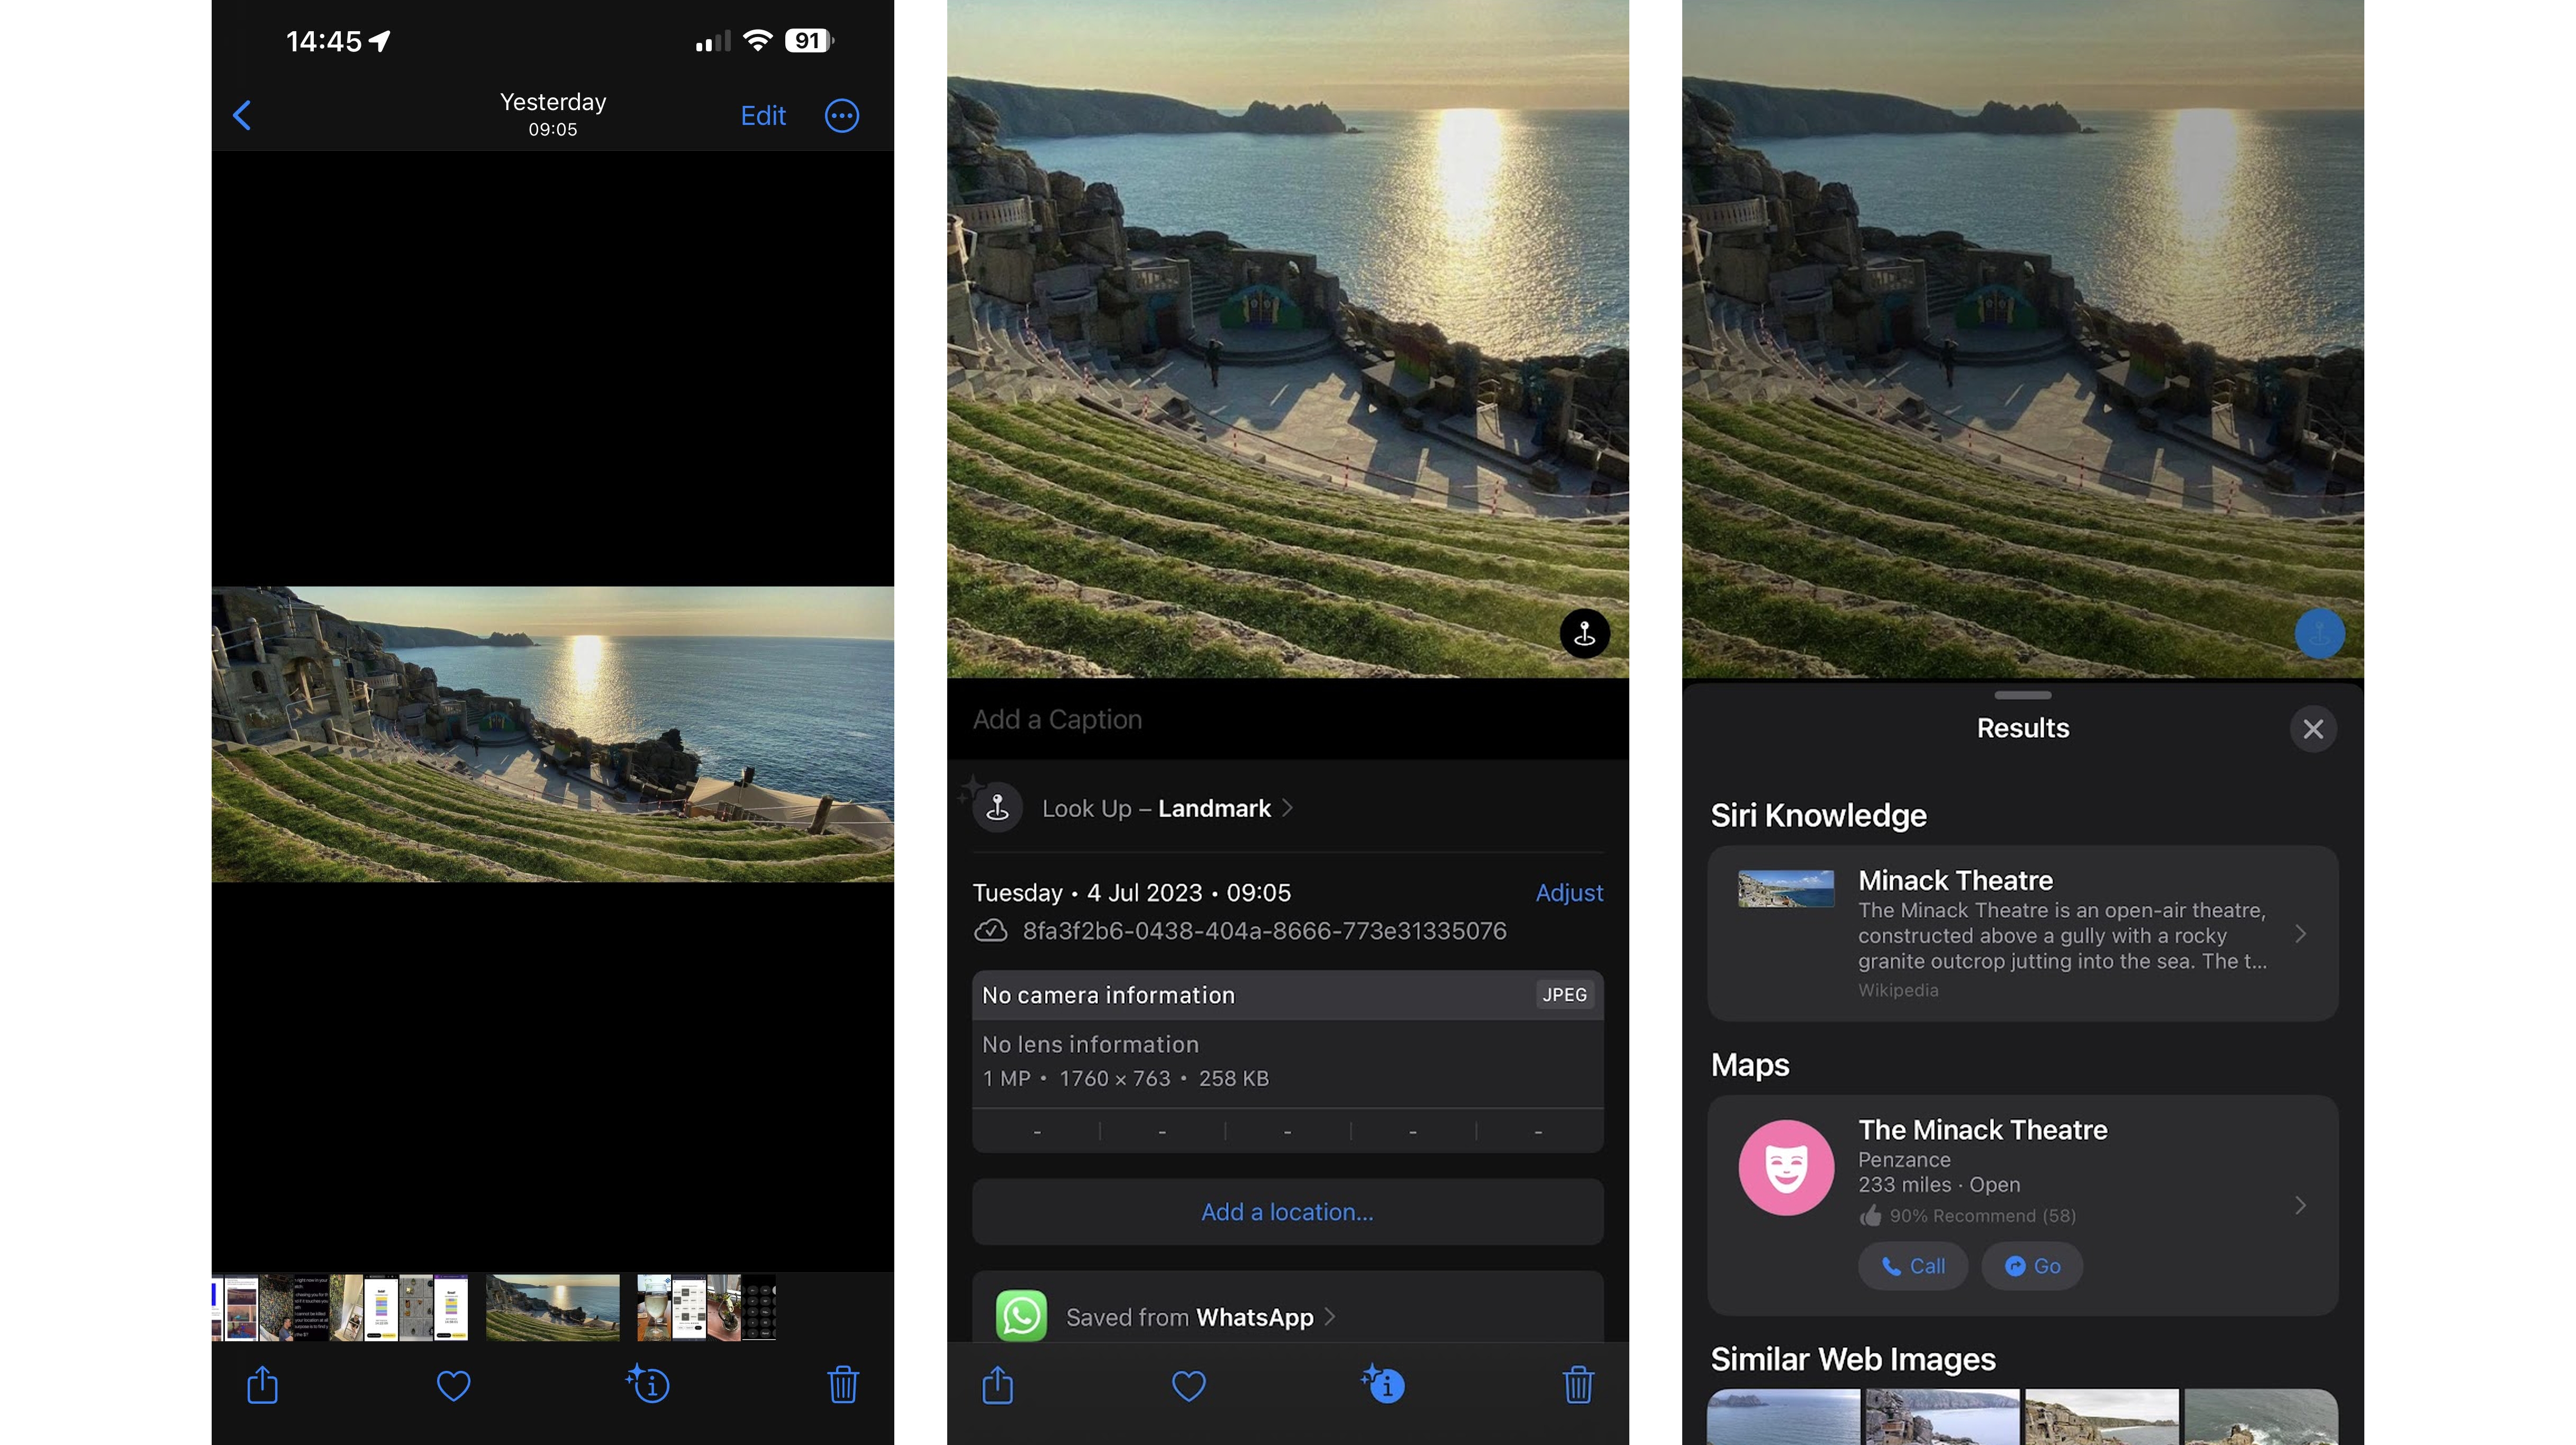
If you’ve ever wondered what type of plant you’re looking at or wanted to learn more about a particular landmark, there’s a handy tool for doing just that built into your iPhone.
Simply take a photo of the thing you want to learn about, then open it in the Photos app, and if Apple can tell you more about it, there will be an icon with the letter ‘i’ and stars around it beneath the photo. Tap that (or just swipe up on the photo), then tap the ‘look up’ option that appears, and your iPhone will search the web for the thing in the photo, providing information and links.
As well as plants and landmarks, this also works for identifying animals, artworks, and more. So give it a try if you’re ever curious about something.
3. Drag and drop photos between apps
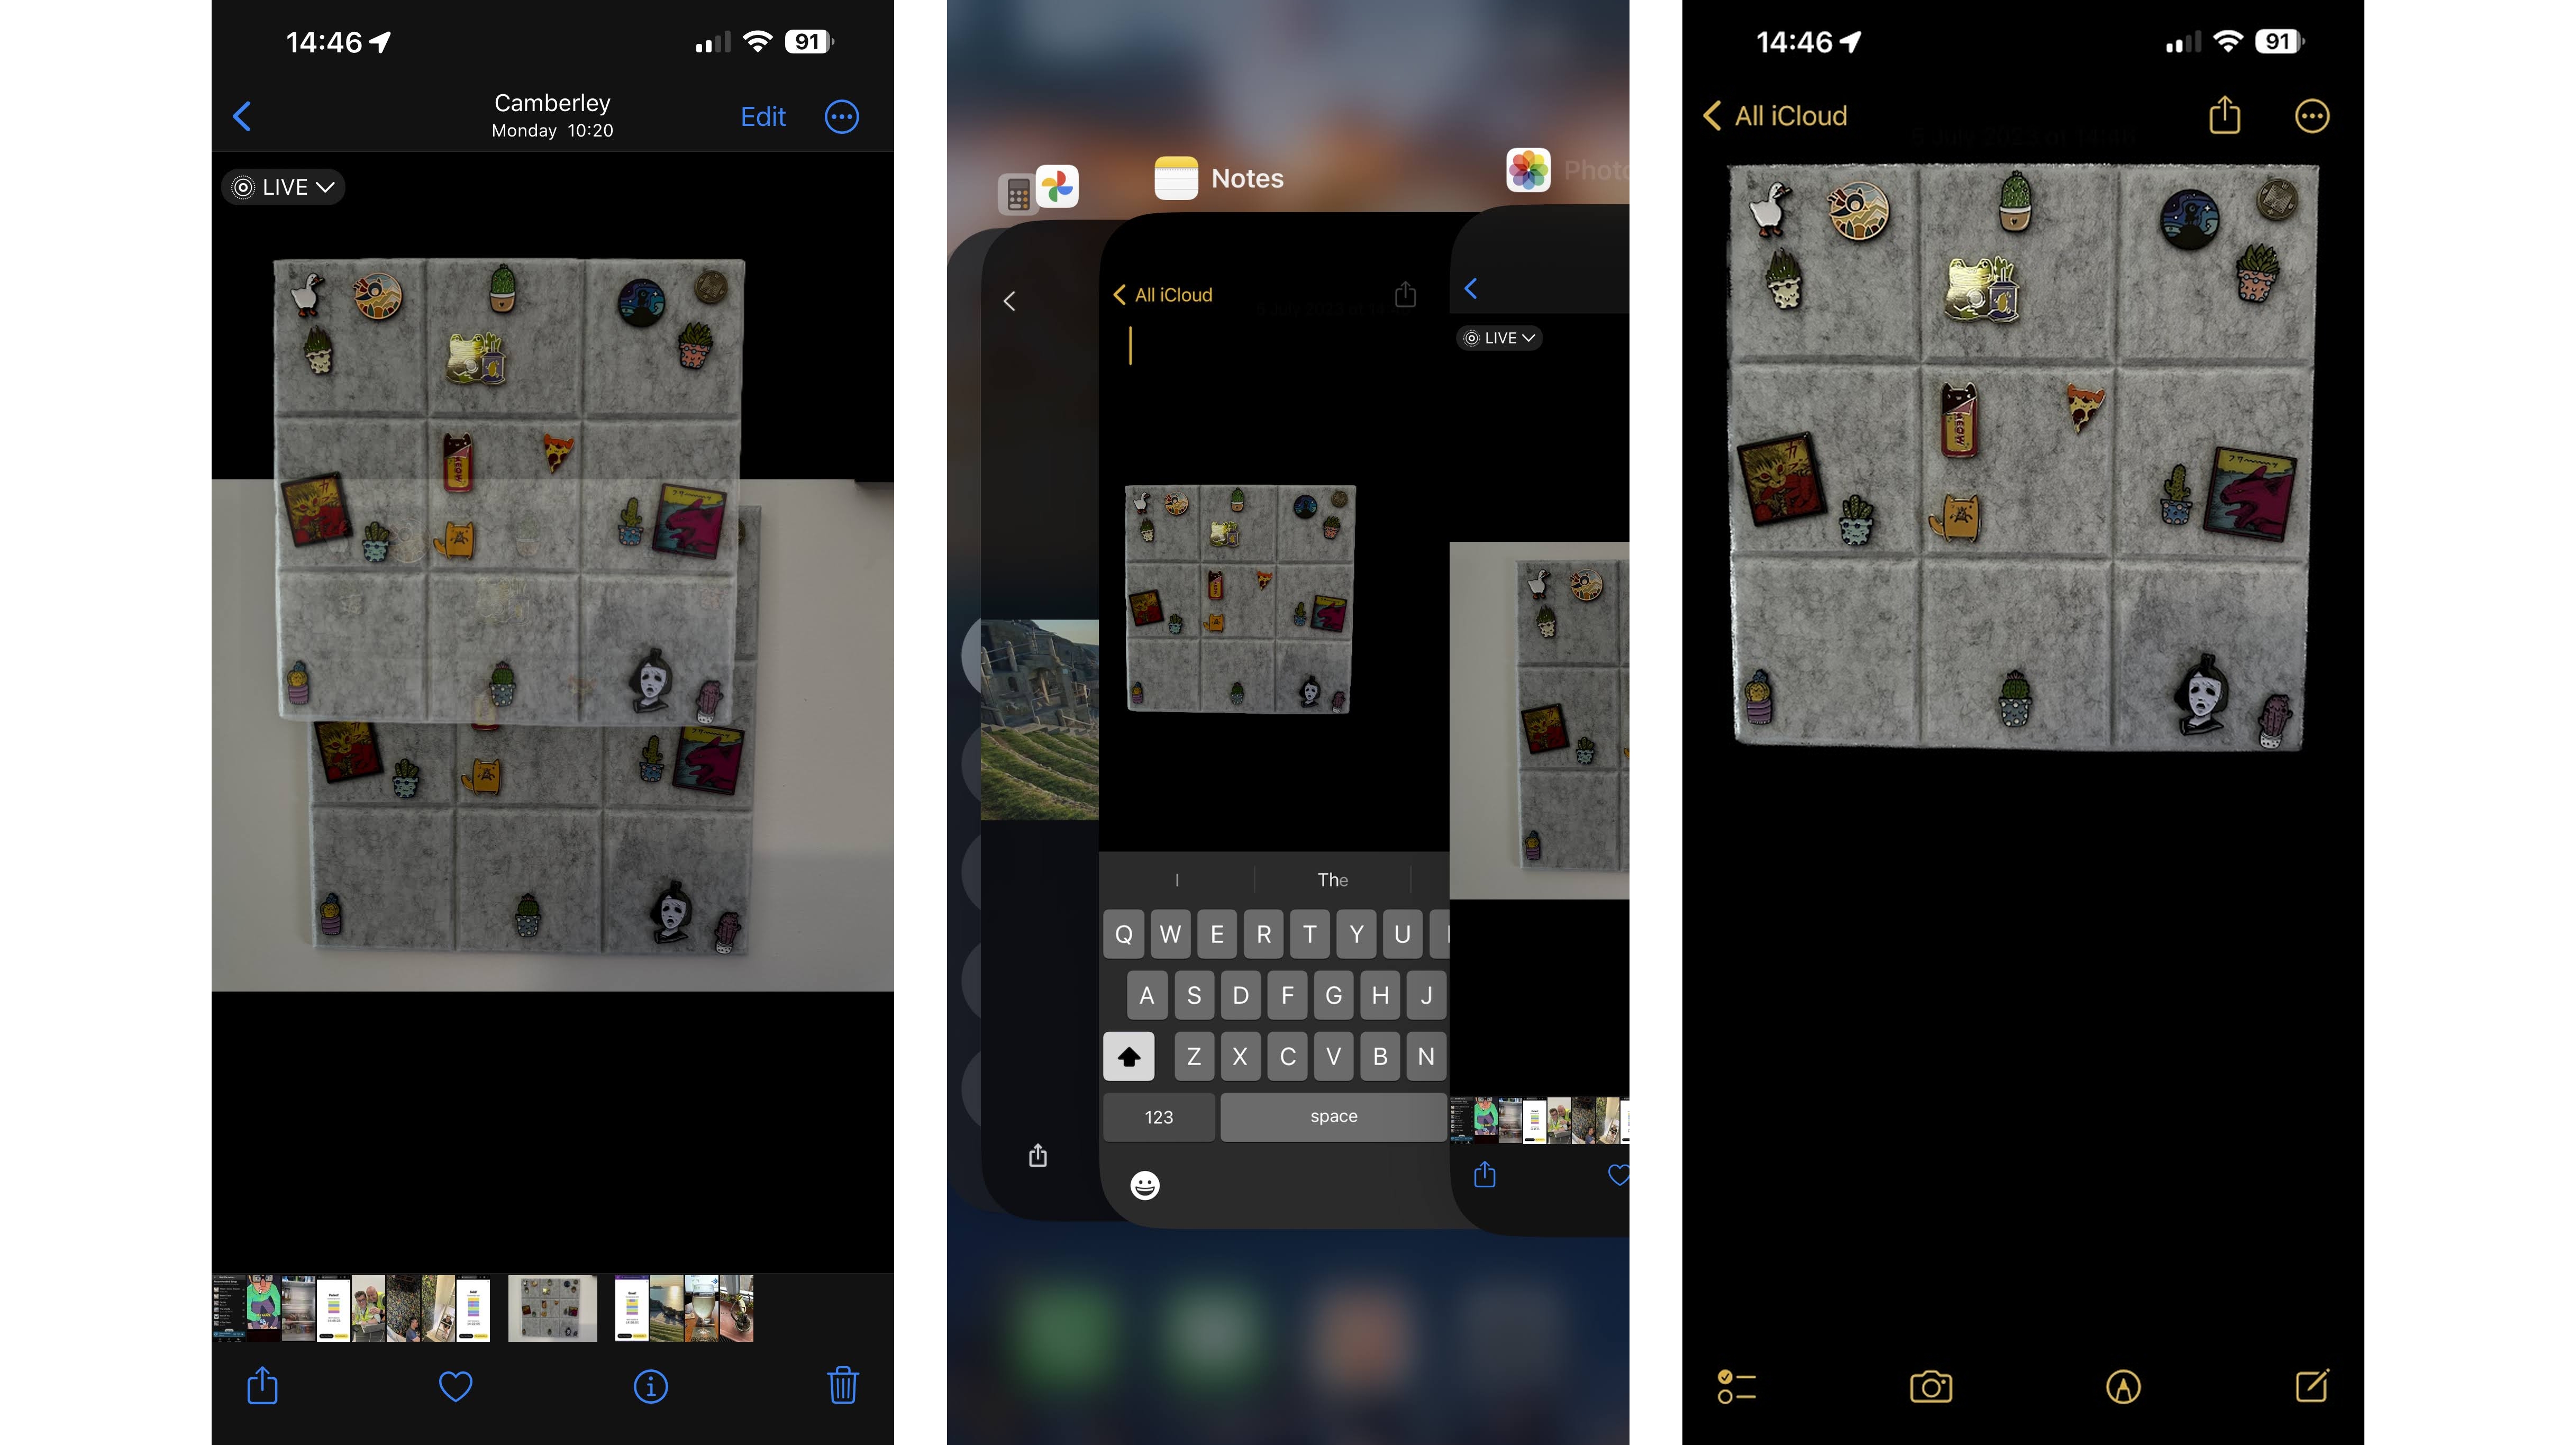
If you want to share a photo or bring it into another app, we’d guess you tend to either copy and paste, use the share option within the gallery, or a photo sharing option within the app you want to bring it to, but there’s yet another way to do this.
Instead, you can simply long press on the photo in the gallery, then use another finger to swipe the gallery away and open the app you want to bring the photo to. Then just drag the photo in, and release.
This works with a number of other files types too, such as videos, audio files, and documents.
4. Make sure your selfies match the mirror
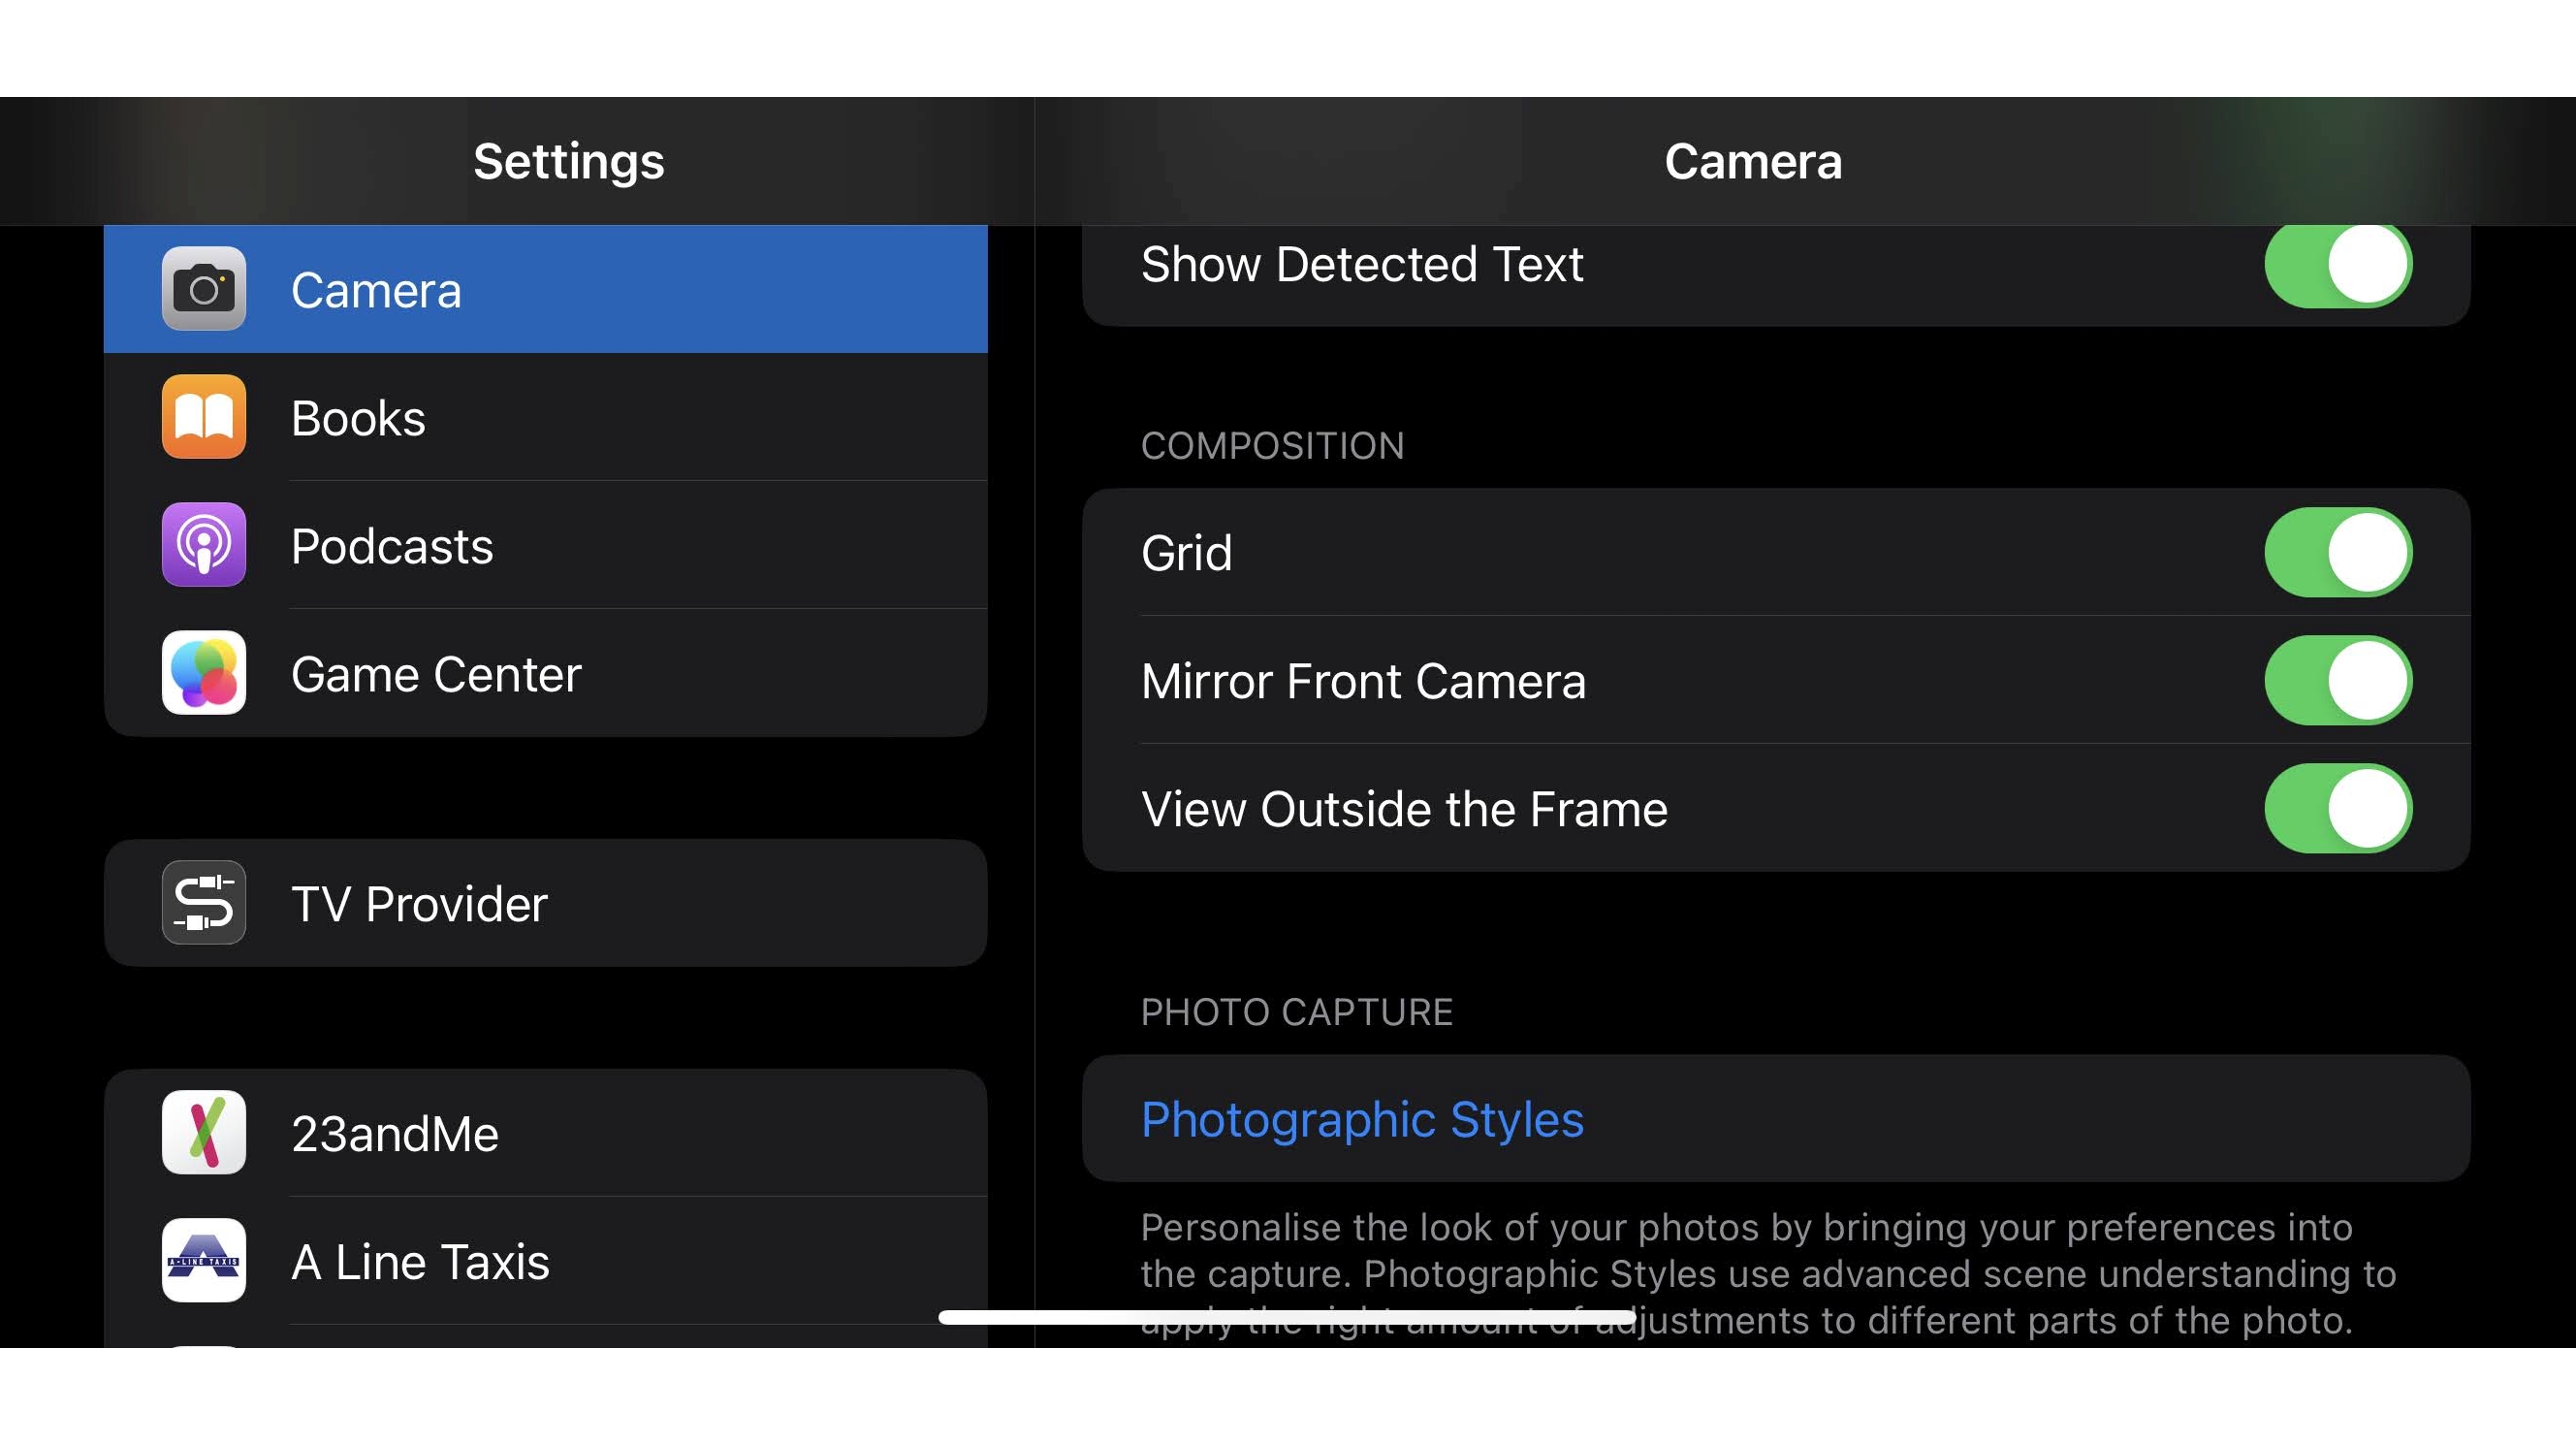
If you’ve ever felt there’s something off about the selfies you take with your iPhone, there’s a reason for that – it’s likely because you’re used to seeing yourself in a mirror, whereas by default your iPhone won’t mirror your image.
As a result, your selfies look more like how other people see you, but not necessarily how you see yourself. To remedy this, head to Settings > Camera, and enable the ‘Mirror Front Camera’ toggle. Now your selfies will be flipped, just like your image is in a mirror.
5. Find your photos with ease
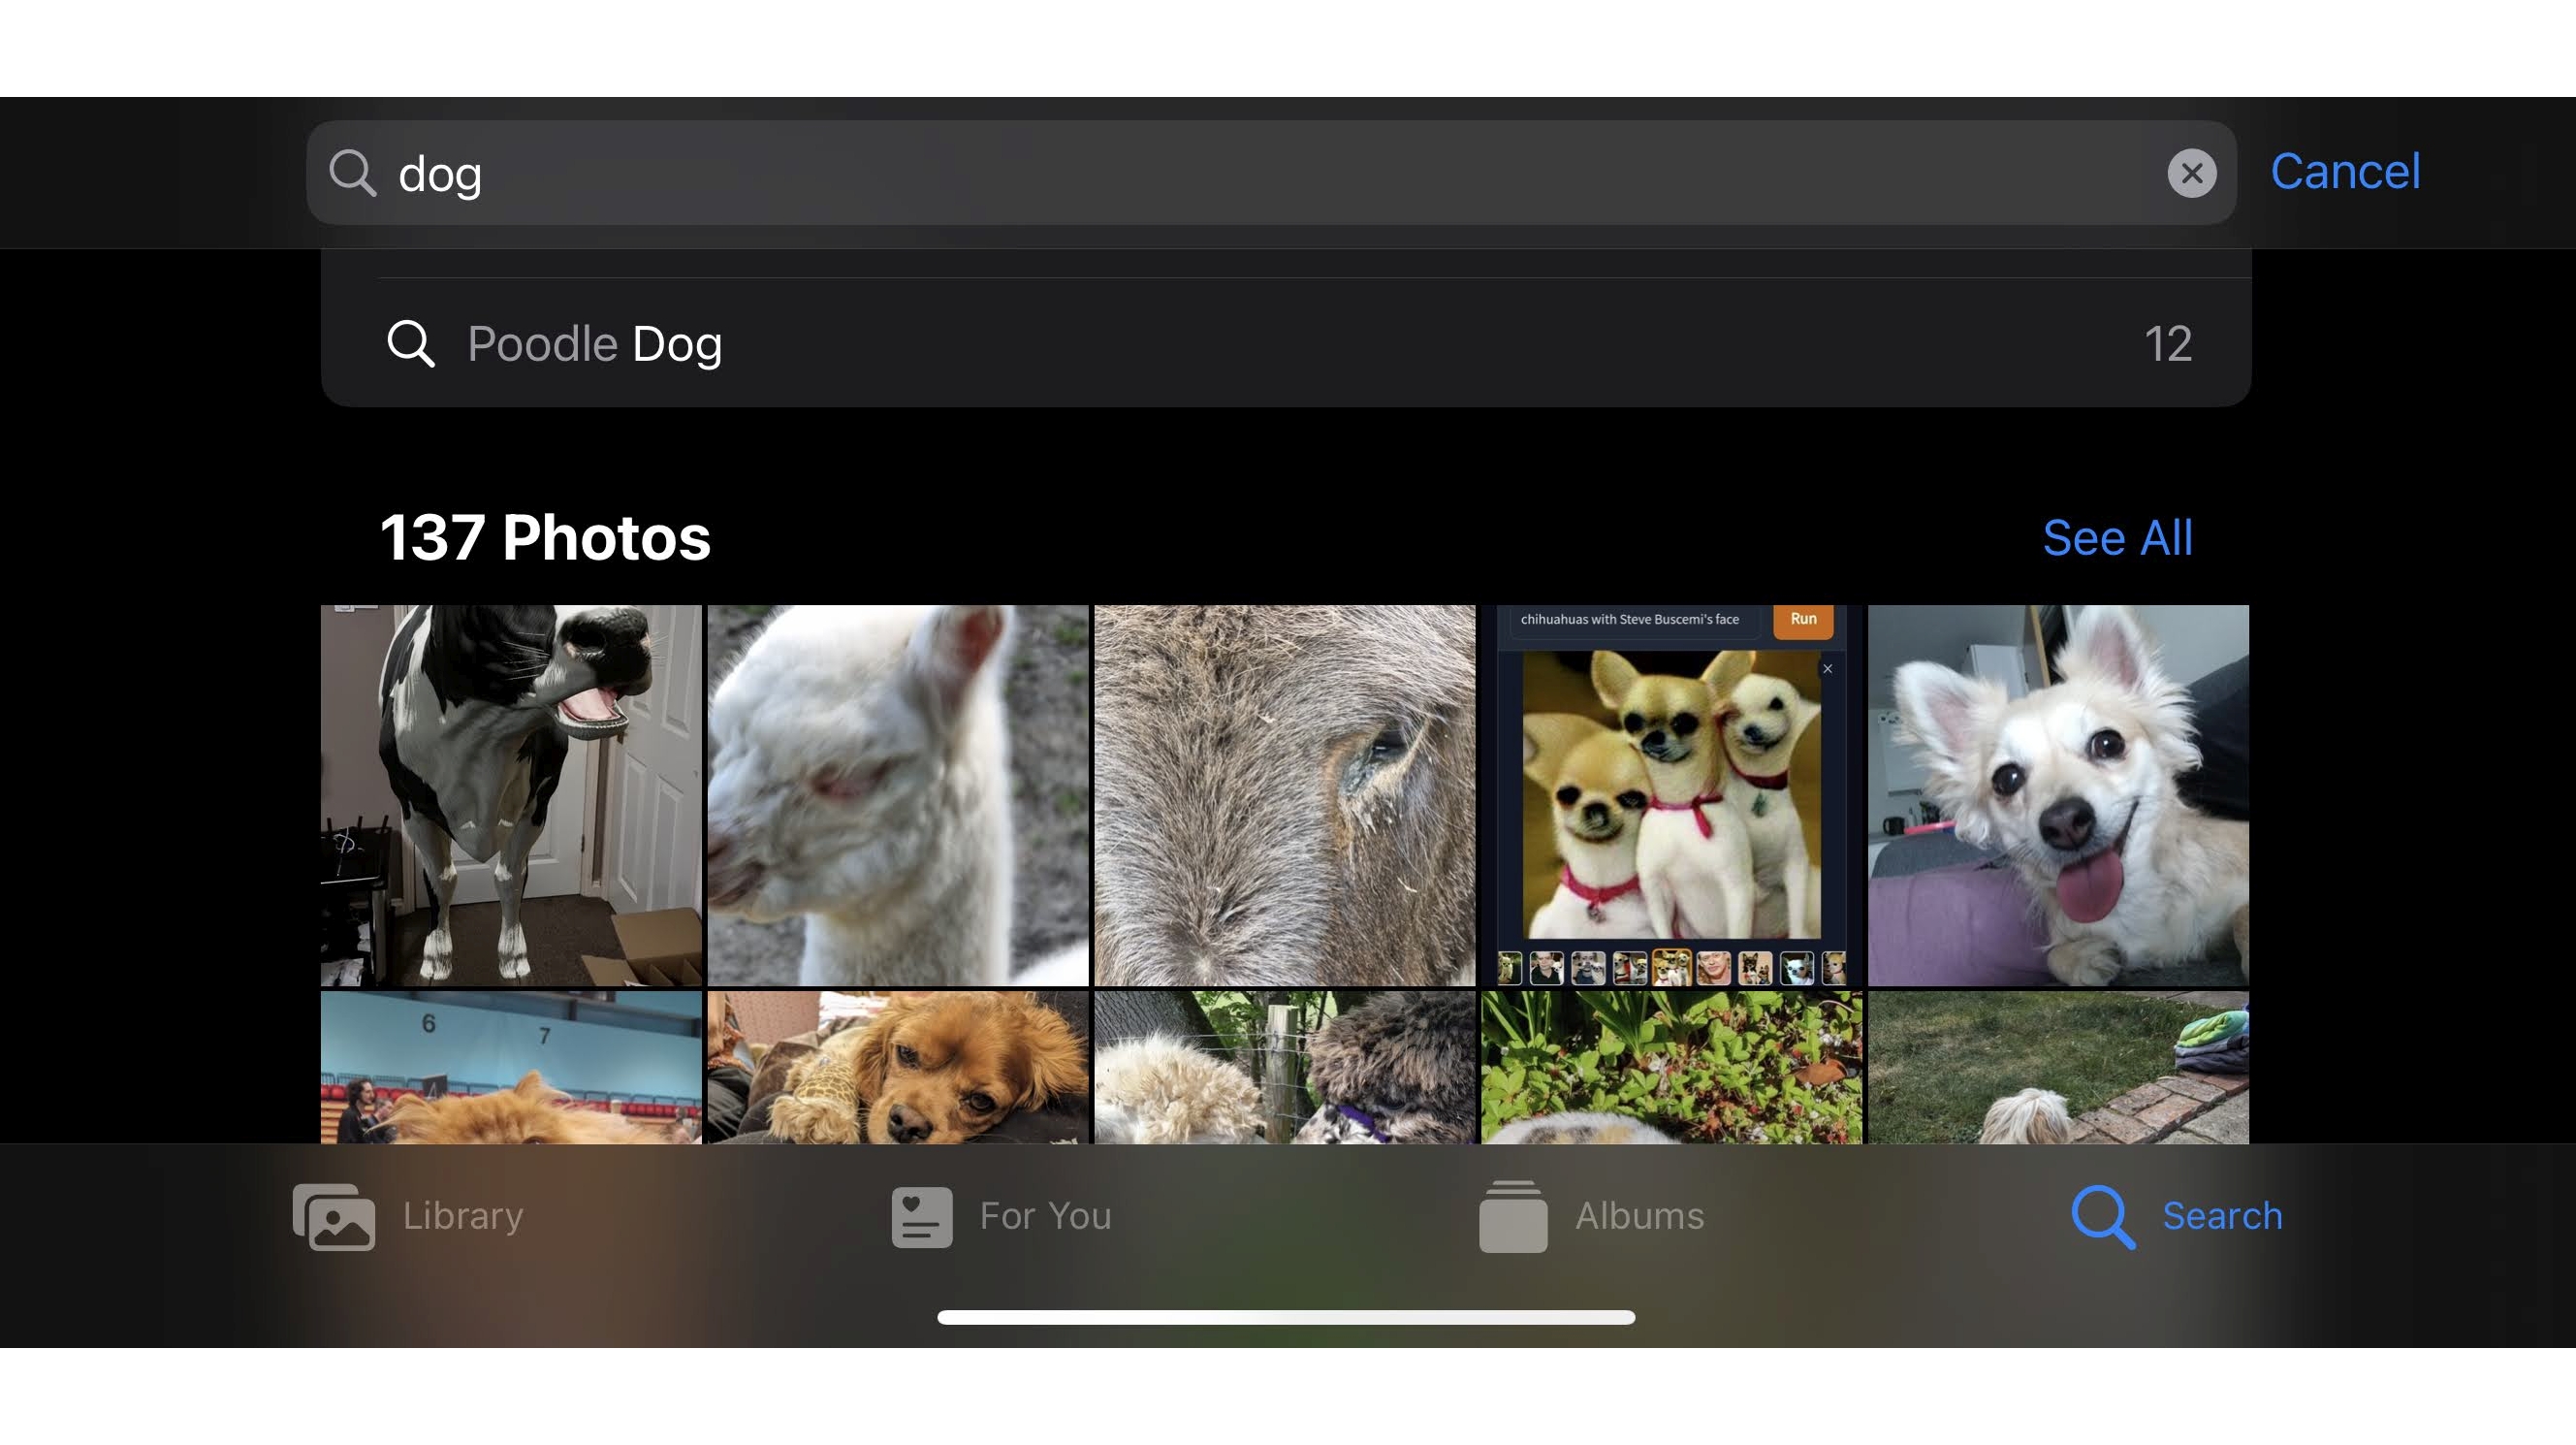
If you’re trying to dig up a photo you took a while ago, you don’t have to scroll back through your gallery or remember when you took it – all you need to do is remember what’s in it.
Then, use the search option in the Photos app, and type out a key word from the image – perhaps ‘dog’ or ‘beach’ for example. The app will then pull up every photo it can find that it thinks fits those criteria.
It’s not perfect – we’ve found it won’t always display every photo that it logically should, and it might bring up some that don’t seem particularly relevant. But a lot of the time it will deliver exactly the photo you’re looking for, and so massively speed up the process of finding it.
6. Get a more precise indication of remaining battery life
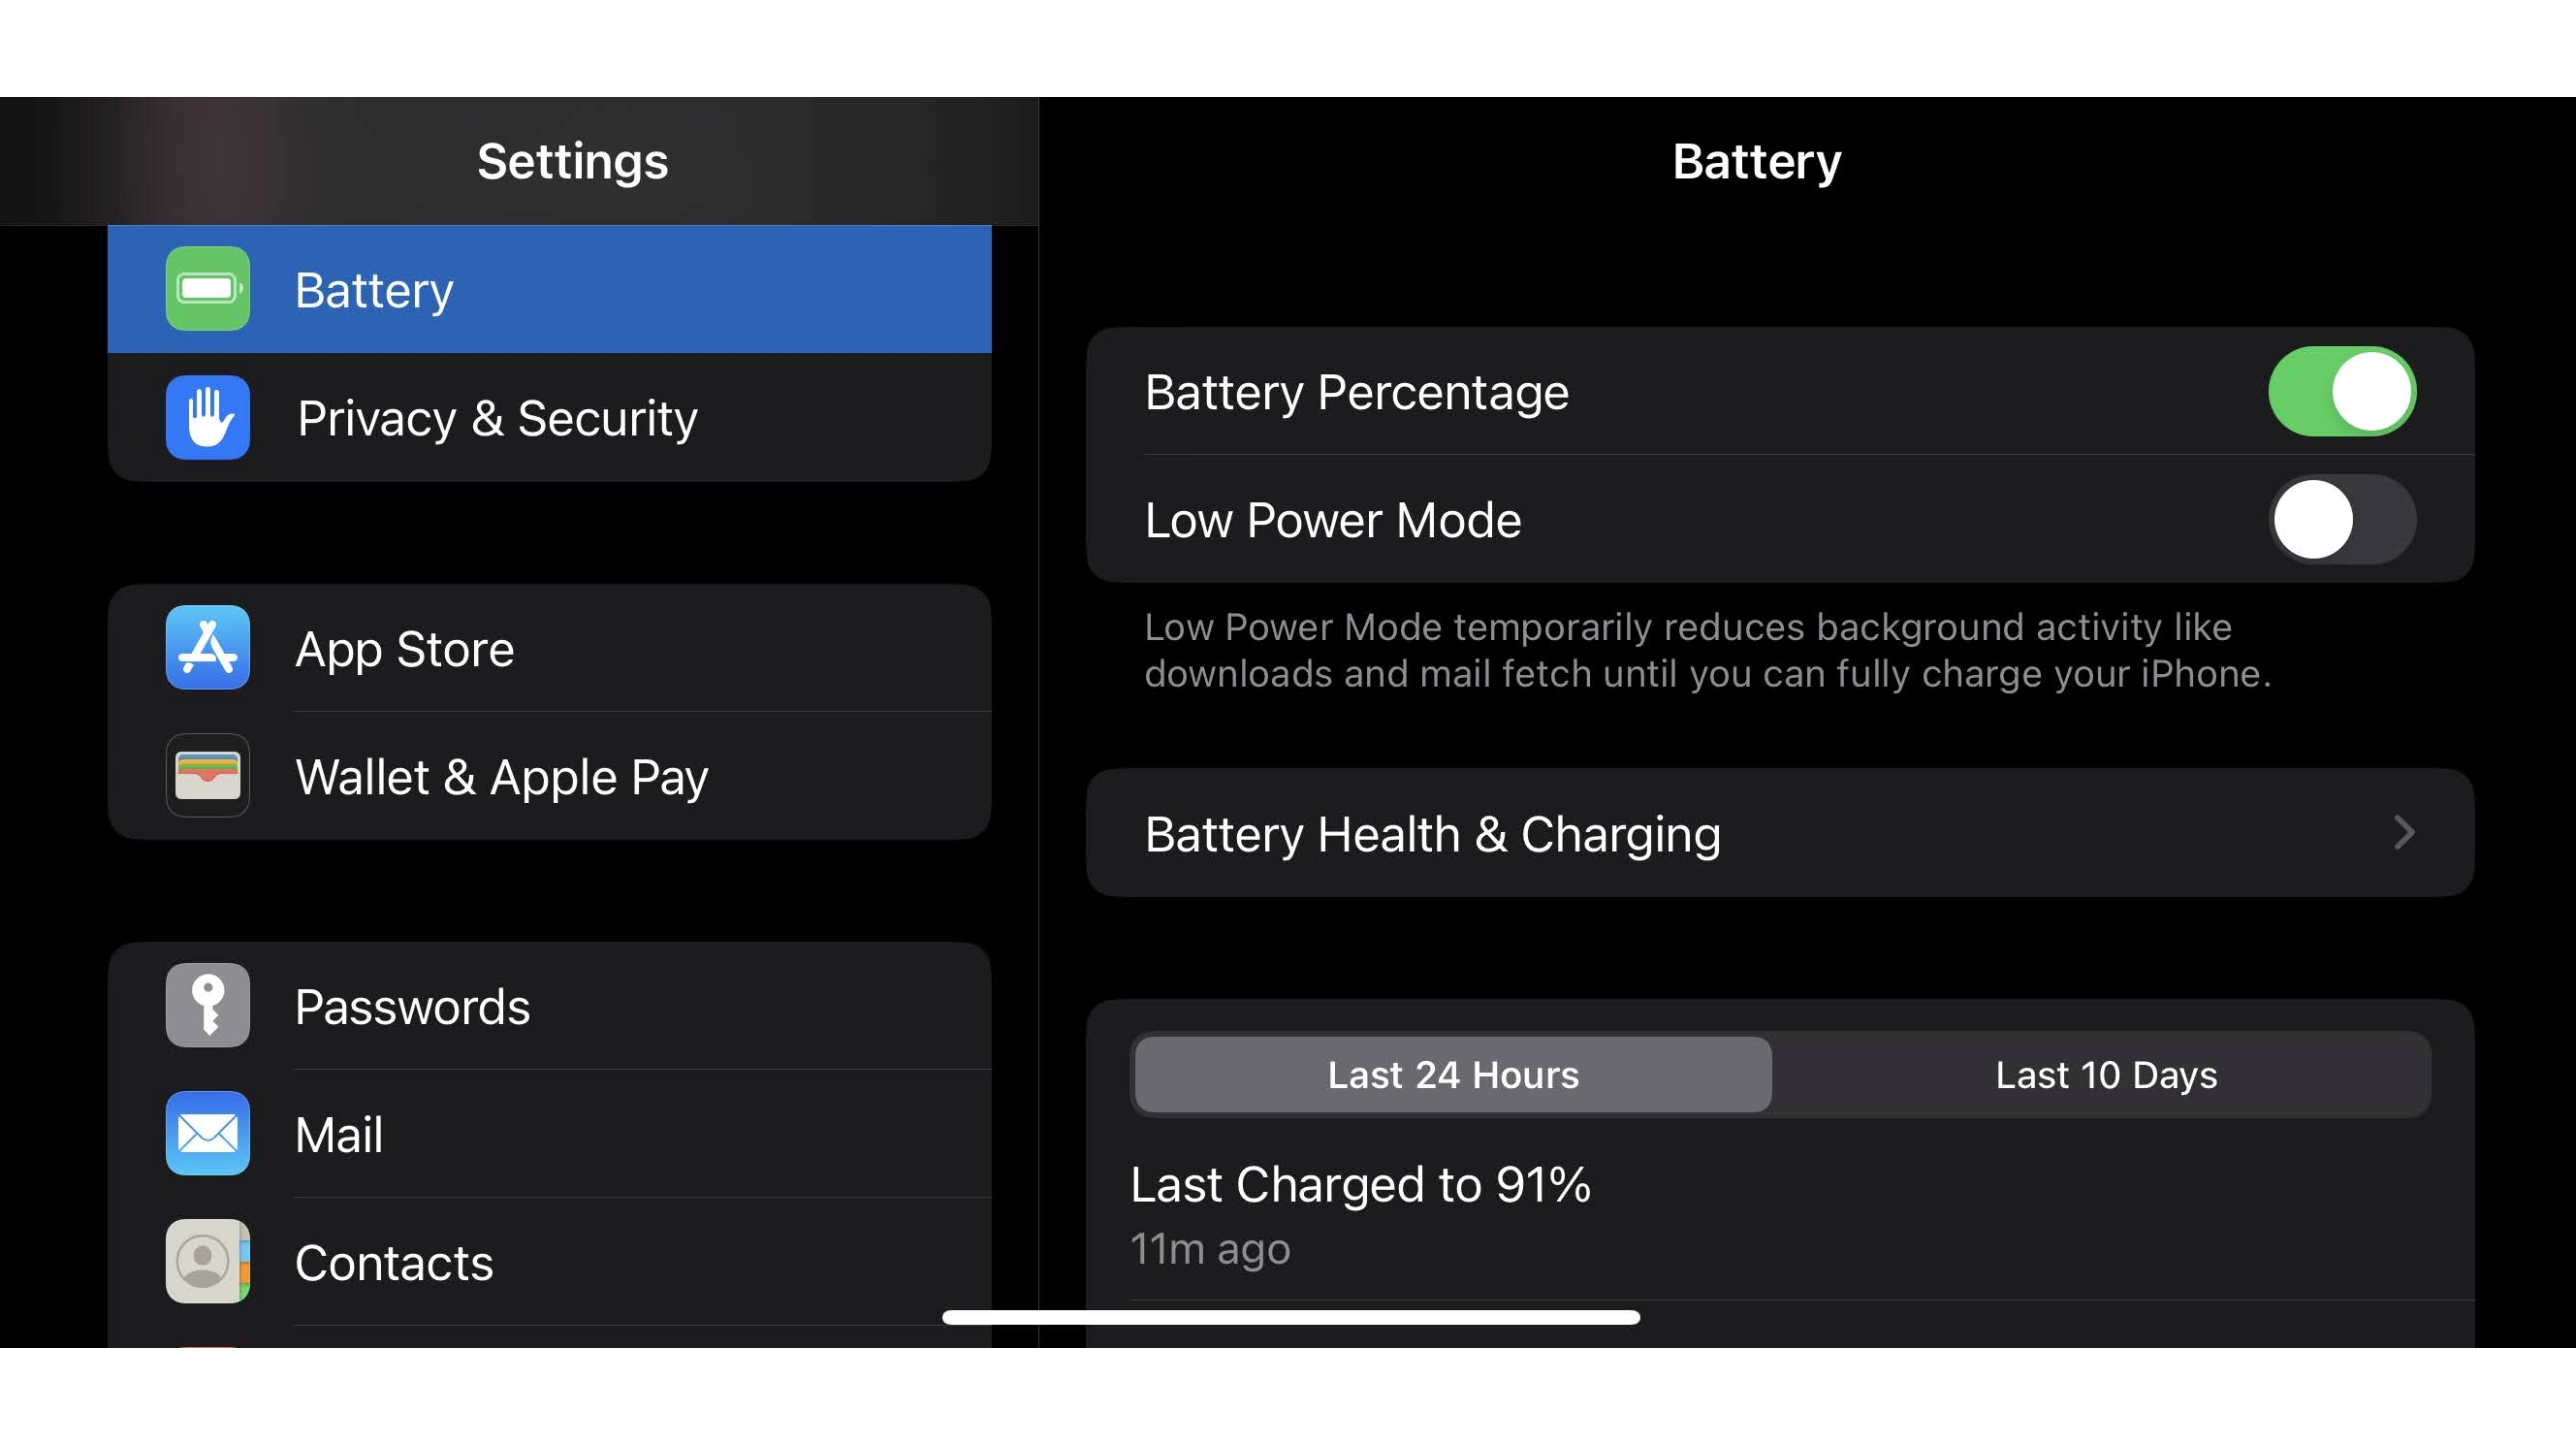
For a long time one of the more annoying aspects of owning an iPhone was being unable to get more than a vague indication of the remaining battery life in the status bar (at least, if you have an iPhone with Face ID). As of iOS 16 though, Apple has finally let you display a battery percentage instead of just a bar.
To do this, head to Settings > Battery, and turn on the ‘Battery Percentage’ toggle.
7. Measure anything
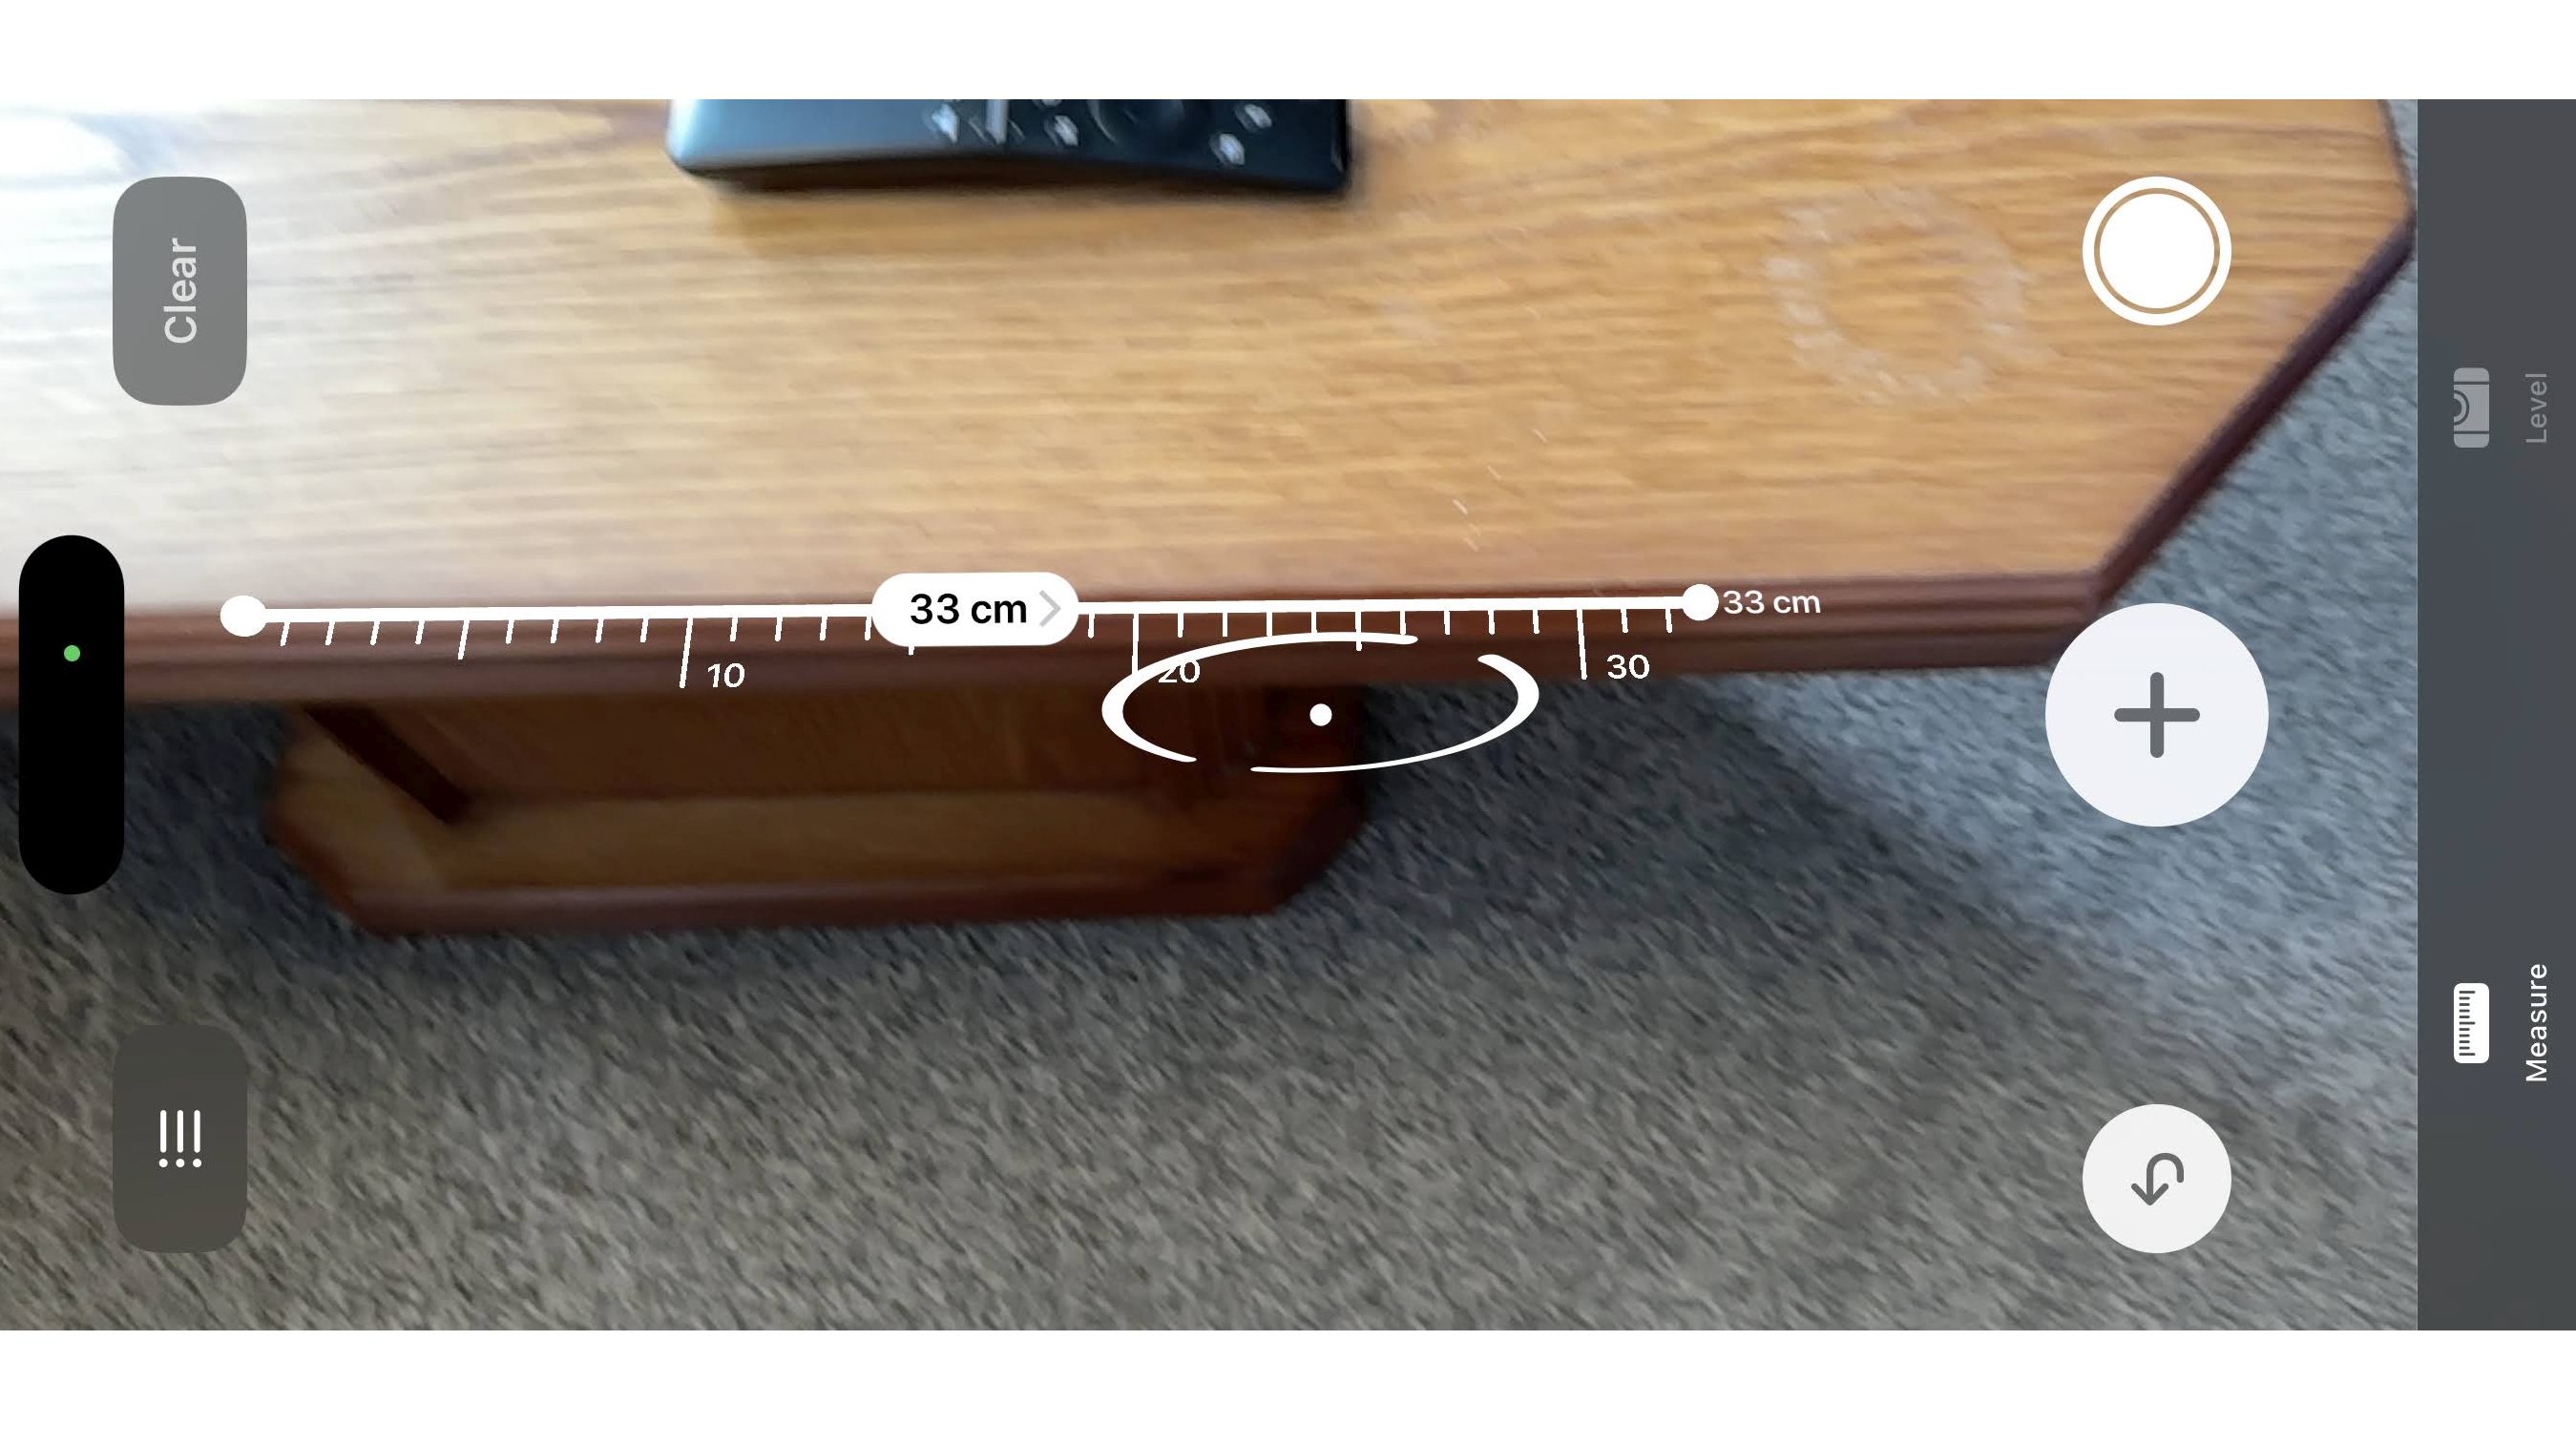
This feature isn’t overly hidden because there’s a built-in app dedicated to it, but the Measure app is one that we’d wager a lot of people have never even opened, and have probably forgotten exists.
If you ever need to measure something, then it’s very useful; letting you use your iPhone’s camera to measure things with a startling degree of accuracy.
It’s not always quite as precise as a tape measure or ruler, but if you only need an approximate measurement it can reliably deliver one.
Oh – and there’s also a level in there, so you can use your iPhone to help hang pictures straight too.
8. Use a Pro Max with one hand
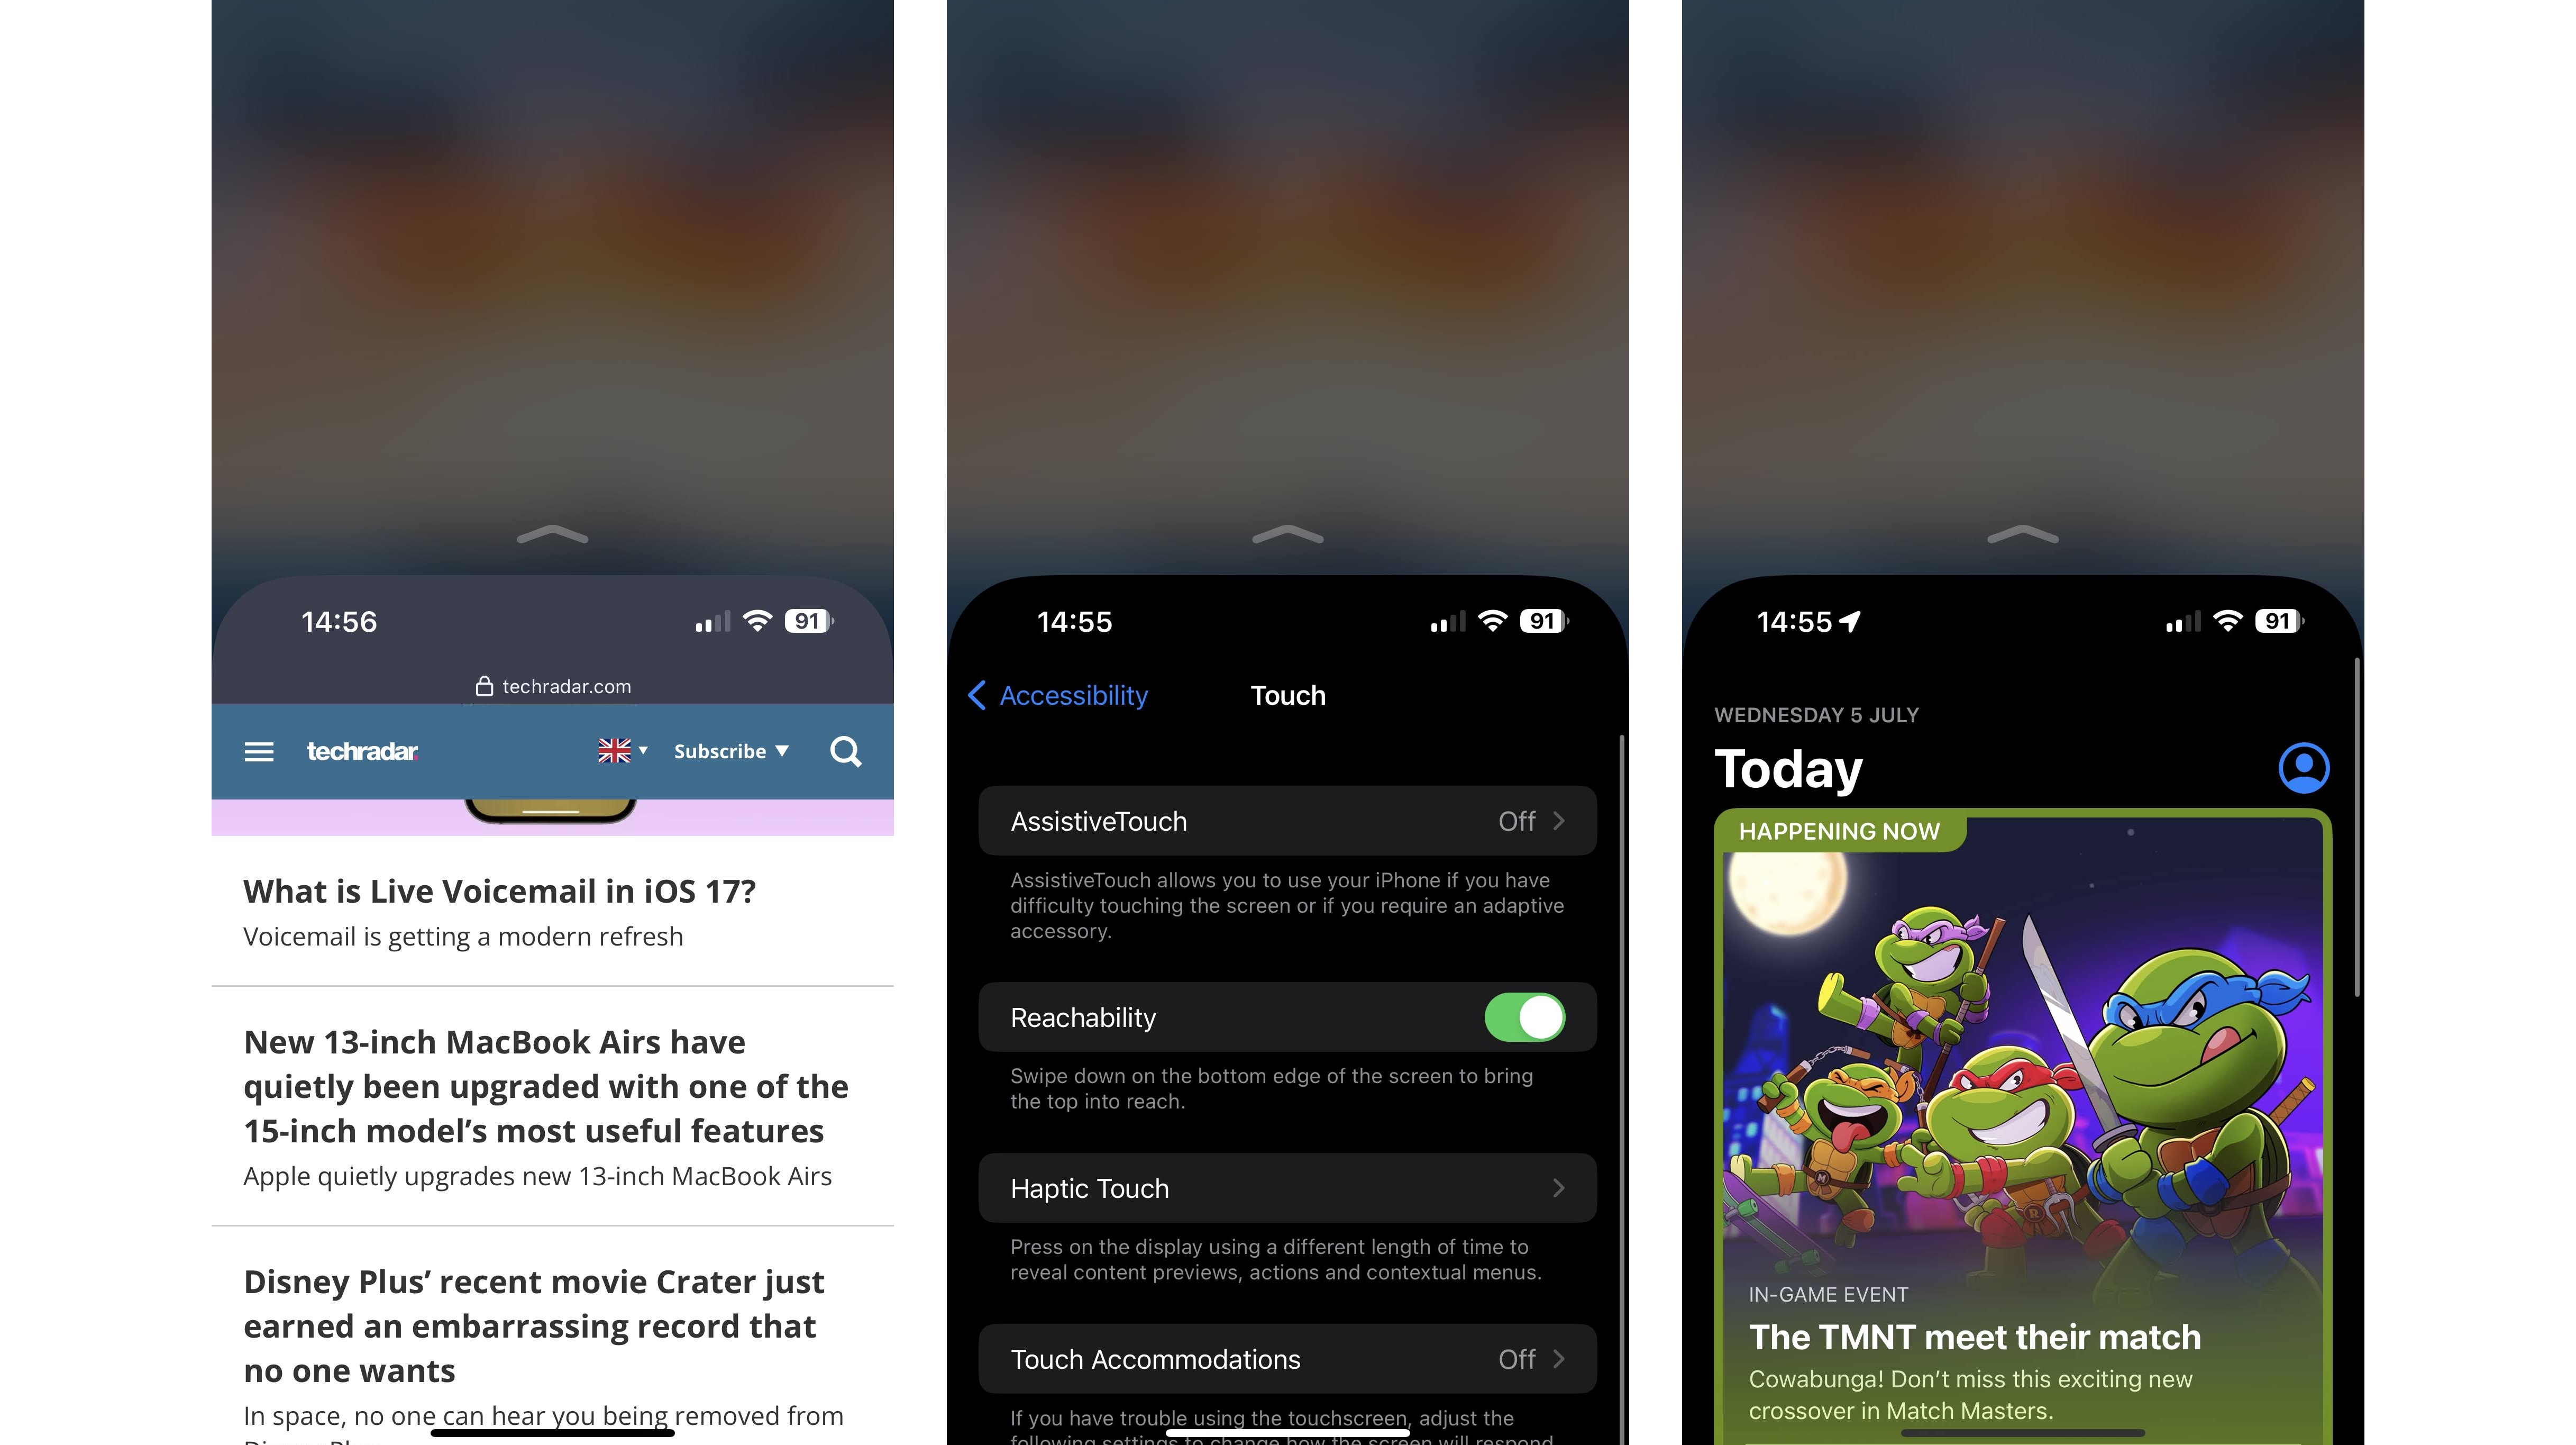
If you have a big iPhone like the iPhone 14 Pro Max or you have small hands, you might struggle to reach the top of the screen without employing a second hand, but there’s a software feature that can help with that.
Simply place your finger near the bottom of the screen and swipe down from there (or lightly tap the home button twice without clicking it in if you’re rocking a phone with one of those).
Once done, the app you’re viewing will slide down the screen, so that what used to be at the top is now around halfway down. This also works outside apps, such as on the home screen. If you want to make the app full screen again, just swipe up from the bottom or tap the void created on the upper half of the display.
As a side note, if you find yourself accidentally using this feature and don’t want it, you can disable it by going to Settings > Accessibility > Touch, and turning off the ‘Reachability’ toggle.
9. Never forget to turn Do Not Disturb off again
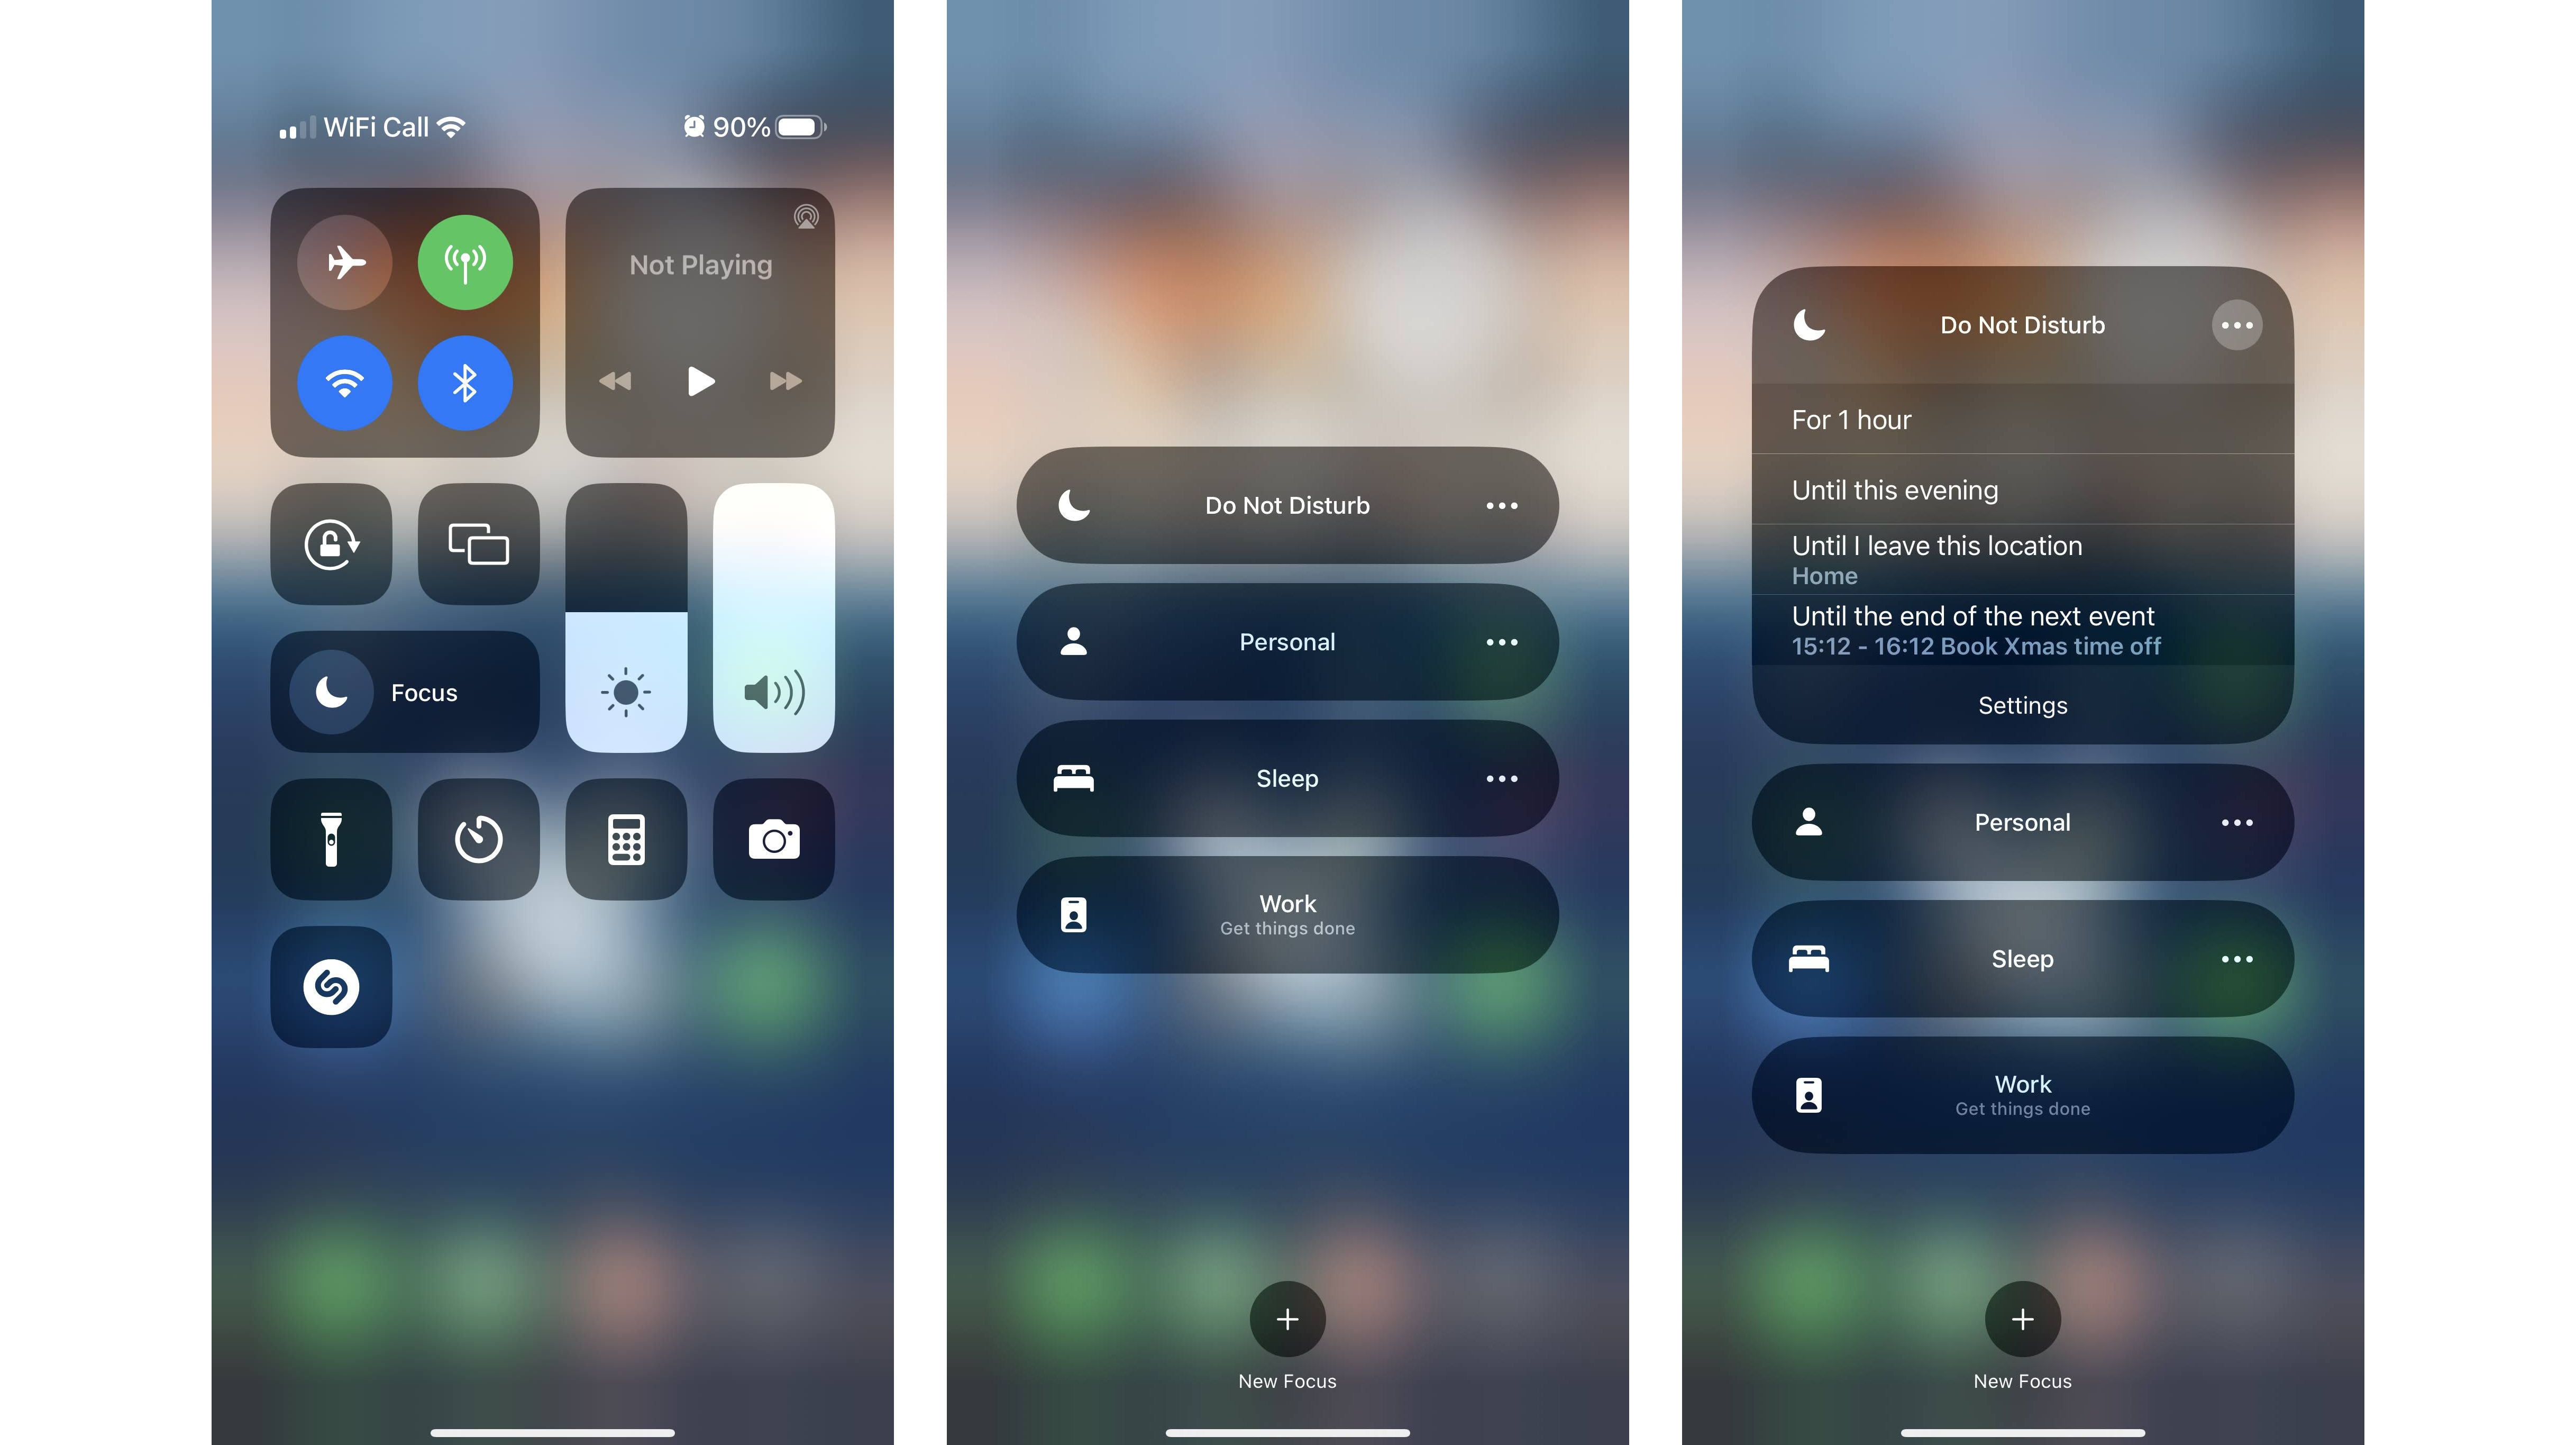
Do Not Disturb is a handy feature for those times when you don’t want your phone making noises, but if you’re anything like us you might forget to turn it off until hours later.
There’s a way to have it automatically turn off at the desired time though – just long press the crescent moon symbol in Control Center, tap the three dots next to Do Not Disturb, and set it to turn off again either at a specific time, at the end of an event in your calendar, or once you leave your current location.
So whether you’re at the movies, in a meeting, or anywhere else, one of these options should be able to effectively disable Do Not Disturb at the appropriate time. You can do the same thing with other focus modes too, by tapping the three dots next to one of those instead.
10. Hide sensitive photos
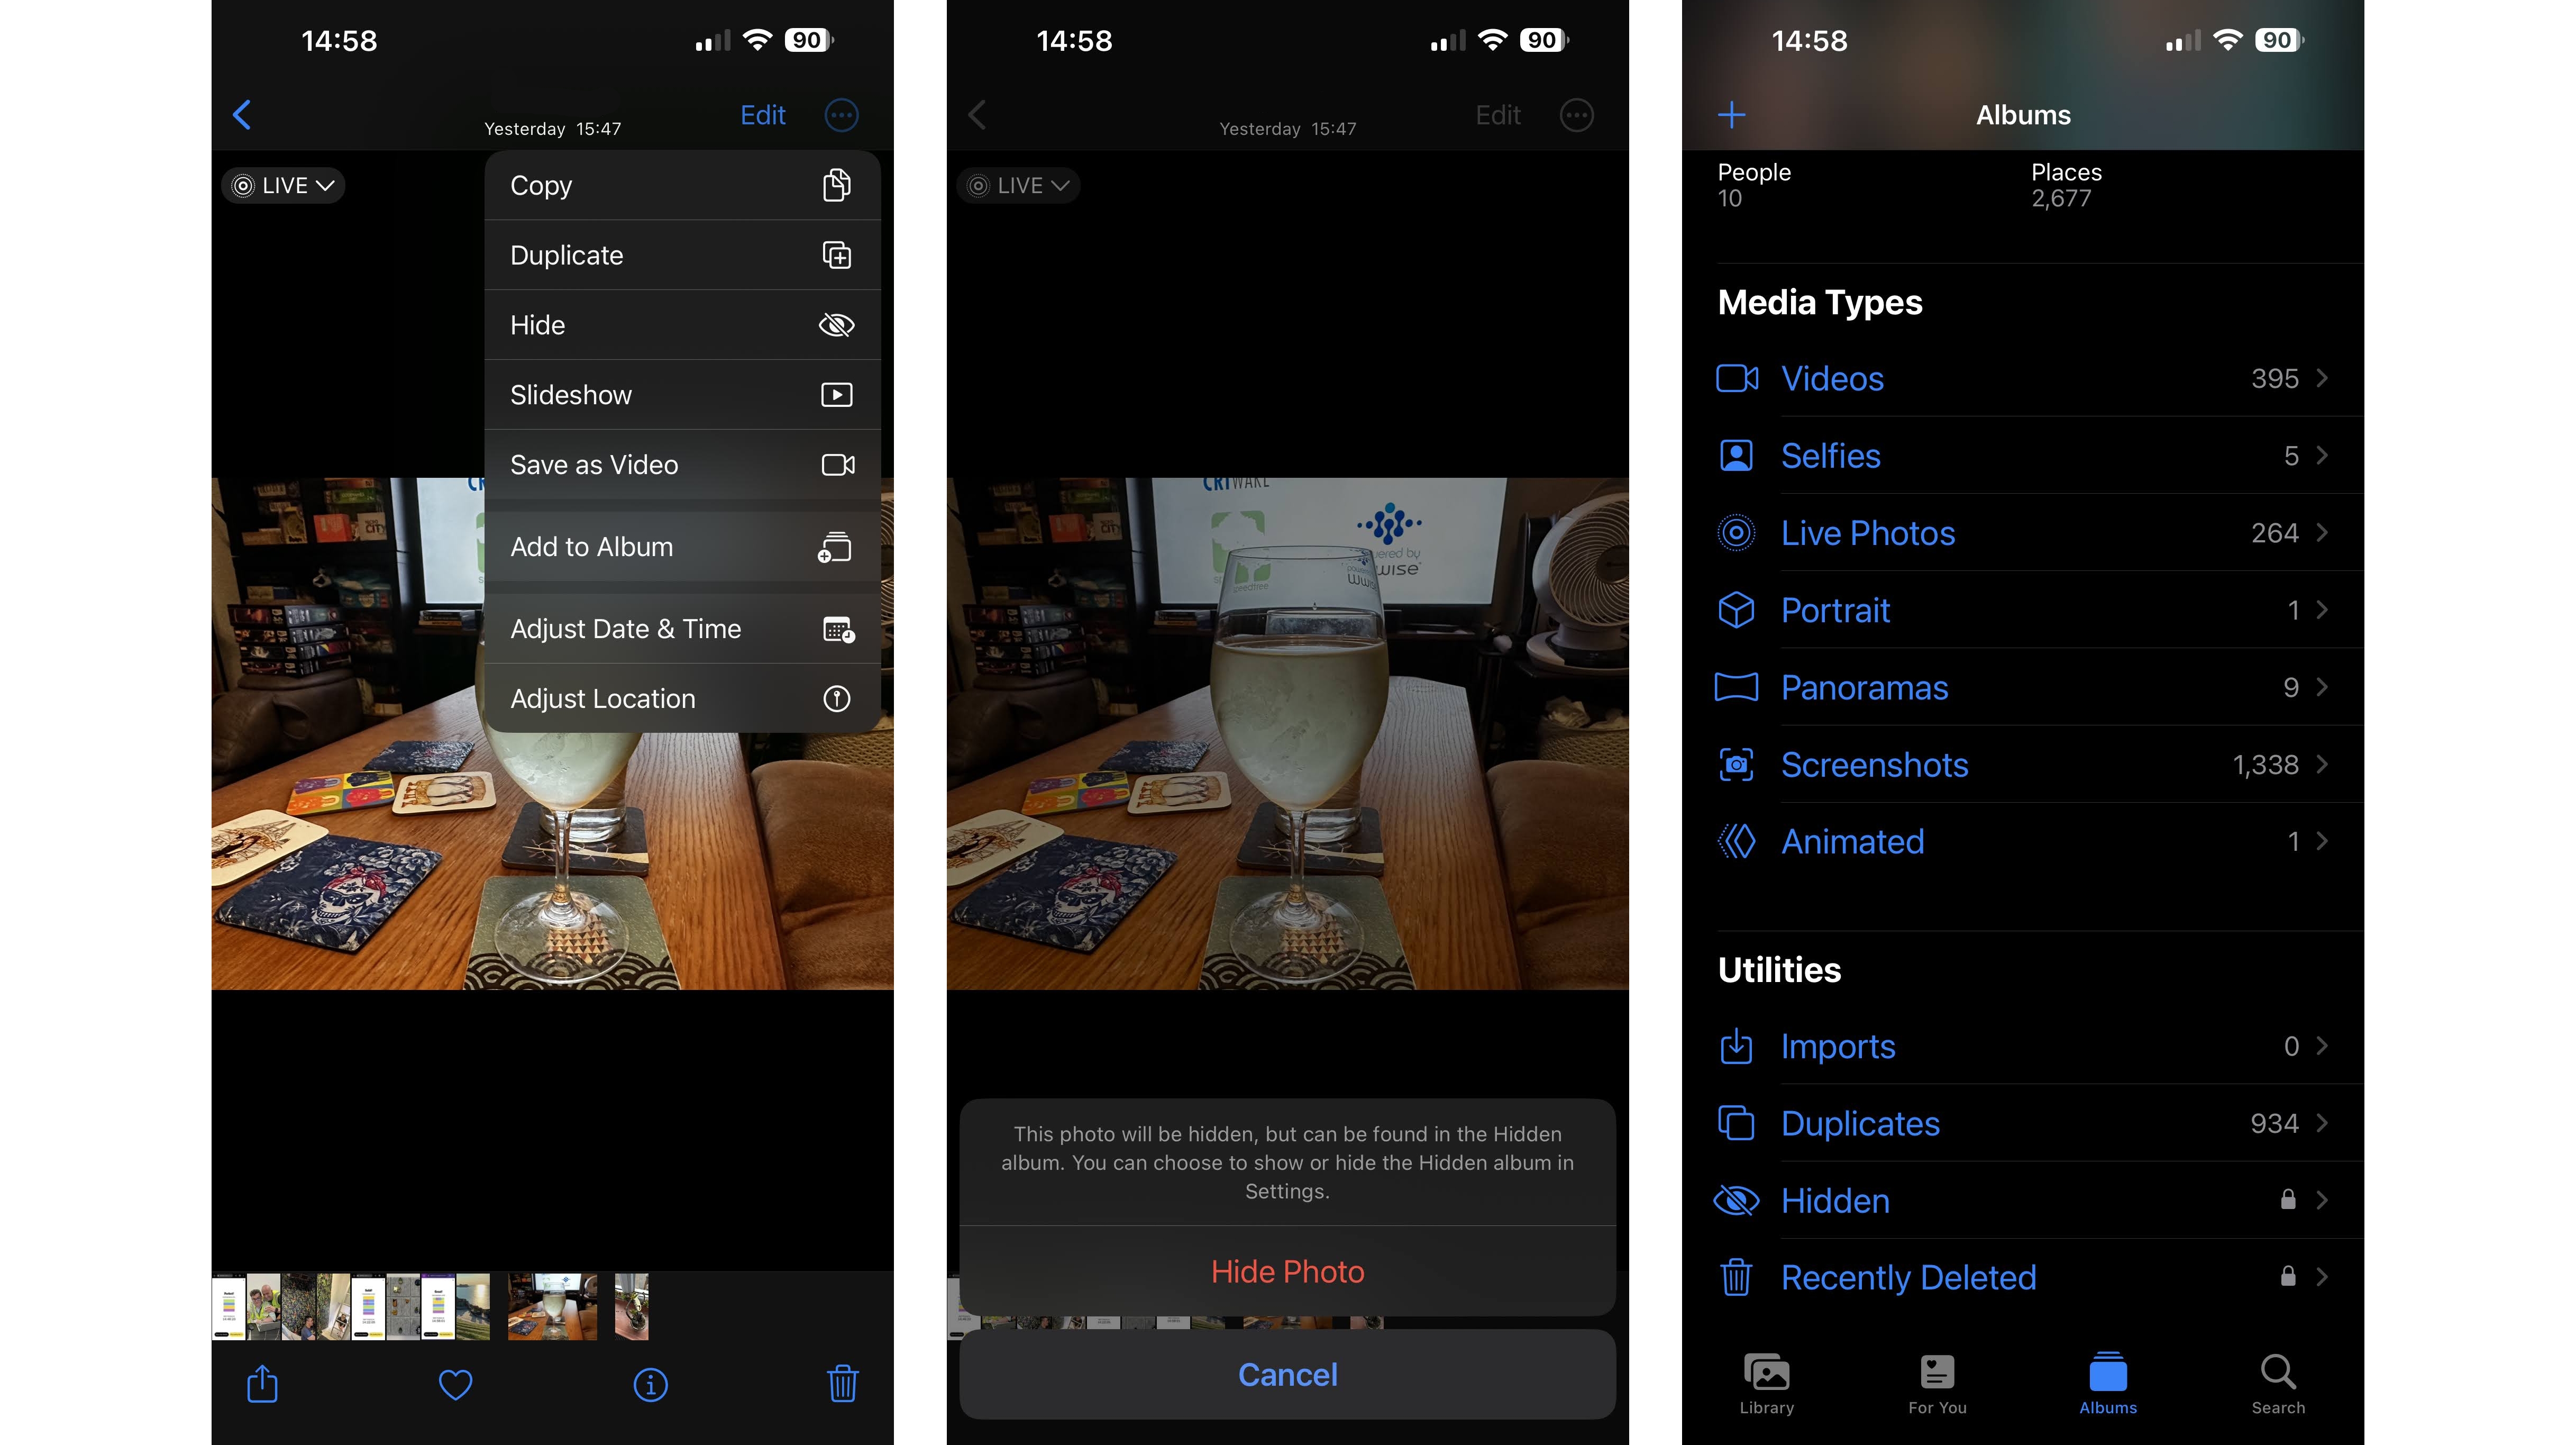
Over time your gallery will likely get full of photos and videos, and inevitably some of them might be things that you don’t want to have pop up when you open the gallery, or be easily findable by someone you hand your phone to. Thankfully, you can hide them.
To do this, open a photo or video in the Photos app that you’d like to hide, then tap the three dots in the top-right corner of the screen, and tap ‘Hide’.
To view those hidden photos and videos, you can then just head to the ‘Albums’ tab, scroll down to ‘Utilities’, and tap on the ‘Hidden’ option. You’ll then have to use Face ID to open this hidden album, so it’s quite secure.
If you don’t want to risk people even knowing that you have hidden photos though, head to Settings > Photos, and turn off the ‘Show Hidden Album’ toggle. Then you’ll have to turn it on again before the album – and the photos in it – are visible.


