Whilst some riders seem happy, or oblivious, to their bikes making a cacophony of noise, most of us prefer a silent ride. However, we’ve all experienced an annoying creak or unexplained rattle from time to time. These noises may be irritating to us and our ride buddies, but they can also indicate that maintenance is needed, parts are due replacement, or even that something more serious is afoot. They are always worth investigating.
Diagnosing mystery noises is far from straightforward, rarely can they be reproduced on the workstand. Bikes, particularly carbon ones, transmit noise throughout the frame, making it extremely difficult to find the source of the trouble. I once spent a few miles on a warm ride trying to discover where some terminal-sounding frame clunks were coming from, only to realize it was the ice cubes knocking about in my water bottle.
Here we'll guide you through some possible causes, checks and fixes to the most likely culprits. Please always refer to the manufacturer’s instructions for your components and use the right tools for the job. A good torque wrench is invaluable to ensure that bolts are tight enough, but not over-tightened, especially where carbon is involved.
Diagnosis
Does the noise only occur when pedalling, or is it present when rolling along as well?
If when pedalling only, then it is likely to be related to the drivetrain or your movement on the bike, ie. saddle/seatpost
Is the noise present when standing and sitting, or just one or the other?
If only when seated, then look for saddle/seatpost issues first of all. If only when standing then the headset, bars or stem might be to blame
Does extra pressure on the pedals increase the noise?
If so, then the drivetrain, bottom bracket or pedals are likely culprits
Does the frequency of the noise increase with speed or is it related to pedalling cadence?
An increase in noise frequency with rolling speed suggests hub or wheel issues whereas an increase in noise frequency with cadence suggests that you should look at the saddle/seatpost or pedals/cleats.
Does applying the brakes increase or decrease the noise?
Disc brake noises could fill an article by themselves, but they aren’t too much to worry about unless accompanied by a loss of power. If the application of the brakes reduces or stops the noise, the brake pads need adjusting to stop them catching. If the noise increases, then there might be some contamination or pad/piston vibrations causing the problem.
Getting a friend to ride behind you and beside you to see if they agree with your diagnosis of the origin of the noise can narrow down the likely issue.
Quick fixes
Before we dive deep into bike noise and its causes, here are a few easy fixes to try first:
- A tinkling or ticking noise from the rear wheel, when you are in the largest sprocket, may mean your inner limit screw needs adjusting. Your derailleur may be contacting the spokes.
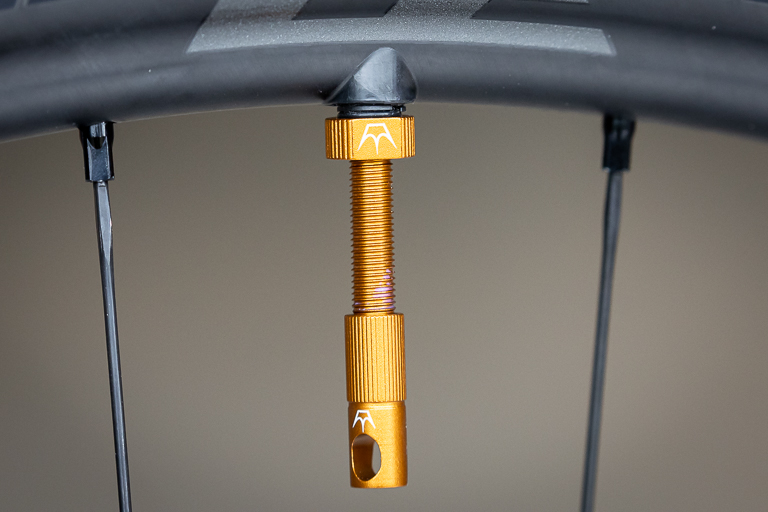
- A light rattle when the bike is picked up and moved is often caused by a loose lock nut on the valve or the valve itself rattling against the valve hole. Tighten the nut or wrap some electrical tape around the valve stem to cure this.
- Gear and brake cables can rattle against each other or the frame, but a strategically placed zip tie or two usually fixes this.
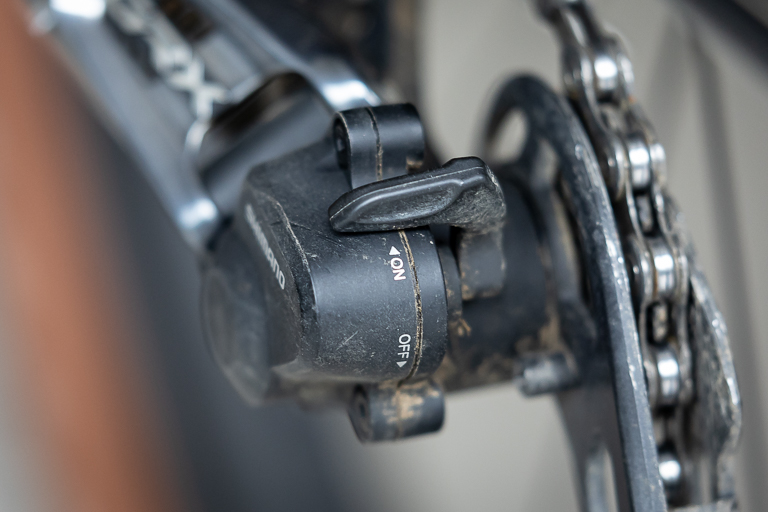
- Excessive chain slap on gravel or mountain bikes could be a reminder to re-engage the derailleur’s clutch mechanism. Or it could mean your chain length is too long.
- If your cleats or pedal plates get very dry or dusty they can creak with each revolution, which can sound alarmingly like a pedal axle issue or bottom bracket problem. Easily cured with a squirt of water while riding, or a quick application of beeswax furniture polish at home.
- And finally, perhaps the most common bicycle noise of all, a dry chain will creak and squeak as it negotiates the cassette and pulley wheels. An application of chain lube, preferably after a good chain clean, will sort this instantly.
Drivetrain
Front and rear derailleur
A poorly adjusted rear derailleur will make a constant noise as the chain tries to climb up or drop down the cassette. A small turn of the barrel adjuster (or play with the appropriate buttons for electric gears) should bring everything back into line. If this doesn’t work, and/or the gears are very hard to index properly then a bent derailleur hanger is probably to blame. Either very carefully bend it back straight, or, better still, replace it.
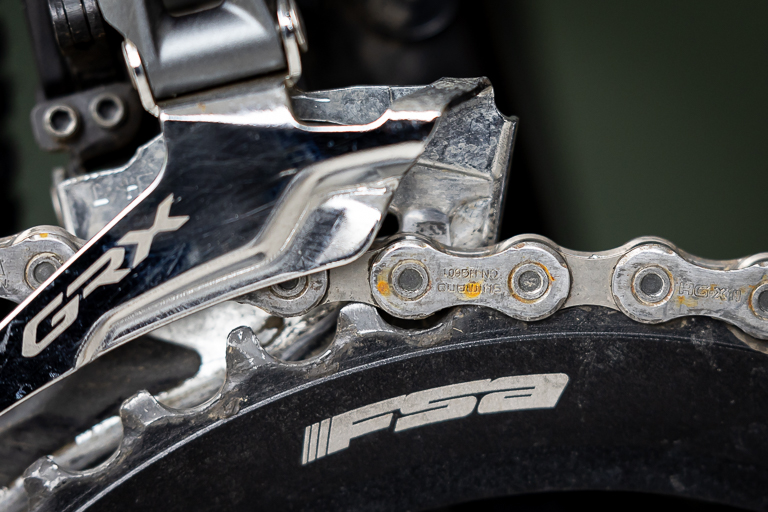
Noise from the front derailleur is likely to be intermittent as it will only rub in extreme gears and often only when under force from the pedals, which slightly twist the frame bringing the chain into contact with the derailleur plates. Check that alignment is to spec, adjust the cable tension or avoid extreme gear combinations.
For more details, see our guide to gear indexing.
Cassette
An excessively worn cassette, chain or chainrings can cause noise, so buy a chain checker and keep on top of chain replacement. Replacing a chain before it reaches 0.75% worn reduces wear on the cassette and chainrings, saving you money.
The cassette can also make a wide range of noises if not tightened properly onto the freehub. This is often accompanied by very poor shifting as the sprockets move rather than the chain. One set of wheels I had would groan constantly and the fix in the end was periodic greasing of the freehub splines.
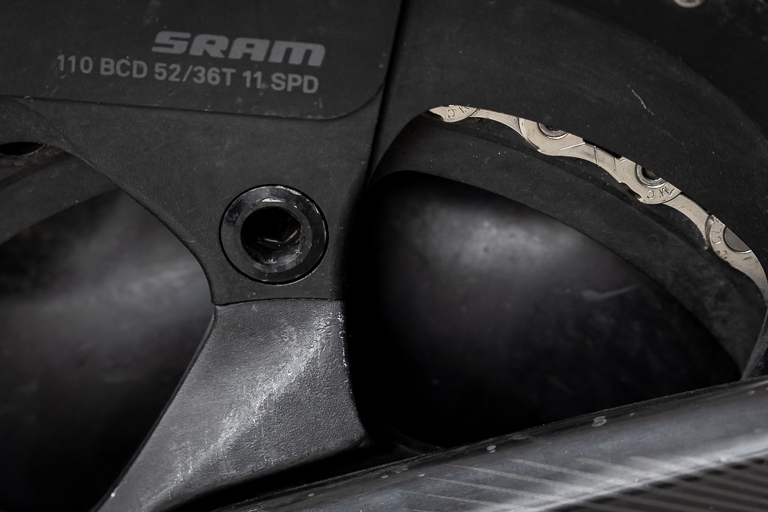
Chainset
Chainring bolts can cause a surprising amount of noise, ranging from occasional clicks to alarming creaks, so ensure that these are kept tight. When fitting new chainrings I also tend to put some very light grease on the clean spider and chainring surfaces where they contact each other to prevent creaking.
Bottom bracket
Noises from this area can sound very alarming as they reverberate through the frame’s tubes. The bearings, if accessible, can be regreased but more usually it’s either an indication that the bottom bracket needs replacing or that it needs re-seating in the frame.
Wiggling or rocking the crank arms to look for any play should give you an indication if a new one is due. Pressfit bottom brackets have a bad reputation for being noisy even when not worn out, as they are simply pushed into place and glued rather than threaded in securely. Often, a bit more retaining compound is needed.
If you need a new bottom bracket, then our guide can point you in the right direction for a worthwhile upgrade.
Pedals
As mentioned previously, cleats can make a lot of noise where they contact the pedal, but this is annoying rather than damaging and easily cured. All pedals run on internal bearings so these can wear out or become dry - some higher-end pedals are fully serviceable either by disassembly and regreasing or replacing the bearings. Alternatively there might be an external grease port into which you can pump fresh grease. Cheaper pedals may not be serviceable at all.
If your pedals can't be salvaged, then have a look at our guides to the best flat pedals and the best clipless pedals.
Chain
As well as squeaking when dry, chains can also make a noise if a link becomes damaged. When the damaged link passes through the derailleur or around the cassette there may be a ticking or clicking noise. However, it might not feel regular enough for easy diagnosis as frequency is related to gear ratio and cadence - very roughly, the link will pass through the derailleur every two and a half pedal revolutions. It's definitely worth persevering with though as a snapped chain is something best avoided!
Choose one of the best chain lubes for optimum results.
Headset, stem and handlebar
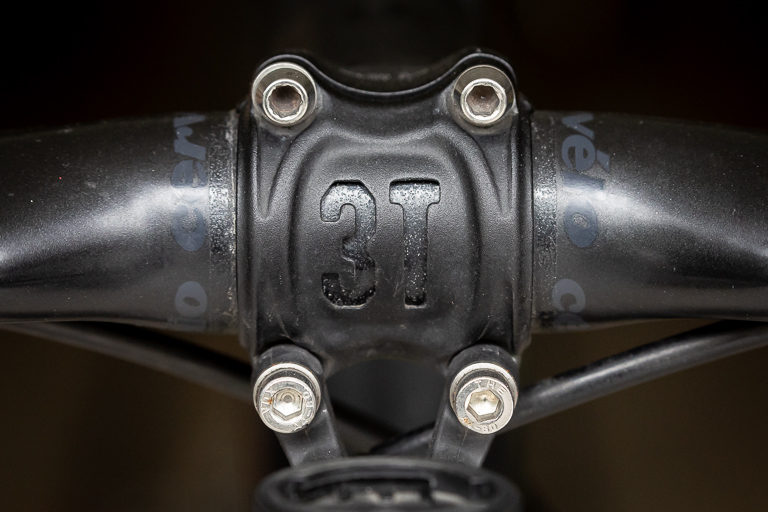
Most noise from this area is caused by something not being tight enough, or being too tight. Stem bolts should always be tightened to the manufacturer’s specifications using a torque wrench. Equally, take plenty of care when tensioning the top cap bolt that compresses the headset. Using carbon paste in areas that involve carbon components will increase friction, prevent creaking and ensure that the components are secure without needing to be overtightened.
A loose headset manifests itself as a knock or a creak and should be looked at as soon as possible because the frame or fork can get damaged if left for too long. Diagnosis is simple - apply the front brake and rock the bike forwards and backwards, feeling for movement or knocking noise.
The bearings, particularly the lower ones that are in the line of fire from wheel spray, will also need regreasing periodically, but this usually results in a gritty feel rather than a noise.
Brakes
Noises from rim brakes are typically pretty simple to diagnose; a rubbing noise while riding indicates that pads are contacting the rim, either because the caliper needs to be centered, the wheel has a buckle that needs fixing or the pads are running too close to the rim and need adjusting outwards.
Fixing disc brakes is a little more complicated, although the same principles apply. As the tolerances are much tighter, more care is needed when setting them up and fixing them. The occasional ‘ting’, especially after a long brake application is nothing to worry about as it's just the hot rotor expanding and will usually fix itself within a few seconds. More continuous noise will need looking at though, as no one wants to ride along with their brakes rubbing.
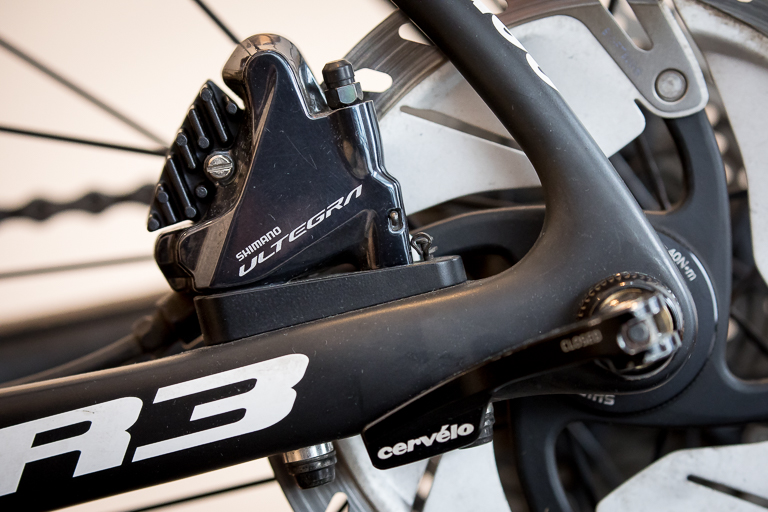
Check that the caliper is straight and evenly spaced in relation to the rotor. To do this, loosen off the two bolts that secure it, make sure that the caliper is ‘free-floating’ and then pull the relevant brake lever to apply the pads to the rotor. This should self-align the caliper and pads to the rotor, so all you need to do now is tighten up the bolts while still holding the brake lever. It can sometimes be useful to put a piece of thin card on either side of the rotor where the pads contact it to add a bit of extra clearance. Spin the wheel very slowly and carefully to check that the spacing is even all the way around. If it isn’t, then the rotor is slightly warped.
There are specific tools for straightening bent rotors, but for occasional use, a large adjustable spanner does a pretty good job - just make sure it doesn’t have any grease residue on it before applying it to the rotor surface.
If the caliper is evenly spaced but the pads aren’t, then the pistons behind the pads aren’t retracting or pushing out evenly. Use a pad spacer tool or a plastic tire lever to push the pistons back fully into the caliper and (with the pads in place) pump the brake lever a few times. If the pads still aren’t sitting evenly in the caliper, then the pistons will benefit from some lubrication - use a few drops of whatever hydraulic oil your system uses to lube the pistons so that they move smoothly into and out of the caliper.
The bane of any disc brake is when they squeal while in use. Often this is just a bit of moisture or grit on the pads that sorts itself out, but more regular or prolonged howling might indicate that the pads and rotor are contaminated and need a clean. Perhaps a bit of chain oil has splashed onto them, some GT85 or even some brake fluid. If you think that this is the case then use some isopropyl alcohol or a brake cleaner on a cloth to thoroughly clean all the surfaces. In the worst cases, it might be necessary to change the brake pads completely.
We have a whole article dedicated to disc brakes for further information.
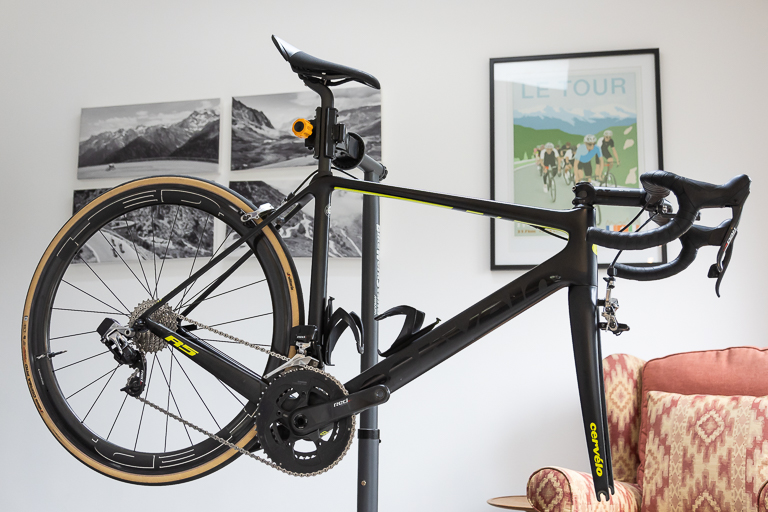
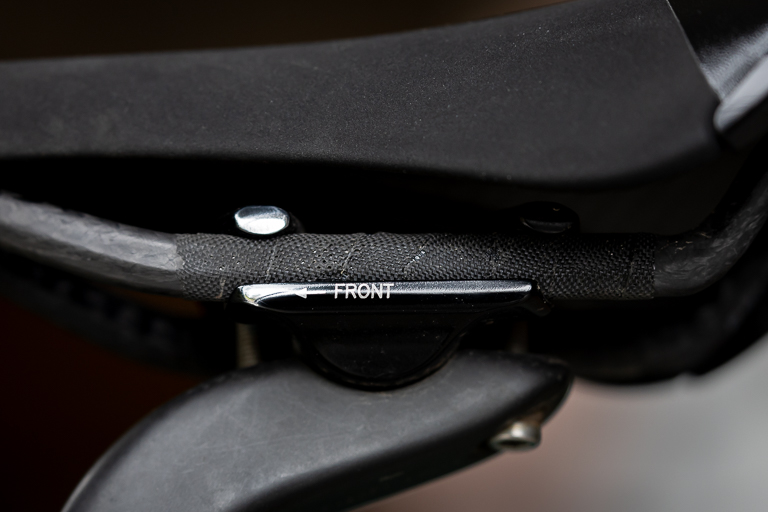
Saddle and seatpost
Perhaps surprisingly, the saddle and seatpost can make quite a racket at times. The biggest giveaway is that the creaking only occurs when seated and usually in time with your pedaling cadence. The cause is either where the seatpost and saddle rails contact each other or where the seatpost sits in the frame. In both cases, give the areas a good clean and put back together using a small amount of grease or carbon paste if any surface is made of carbon. Tighten the bolts to the correct torque.
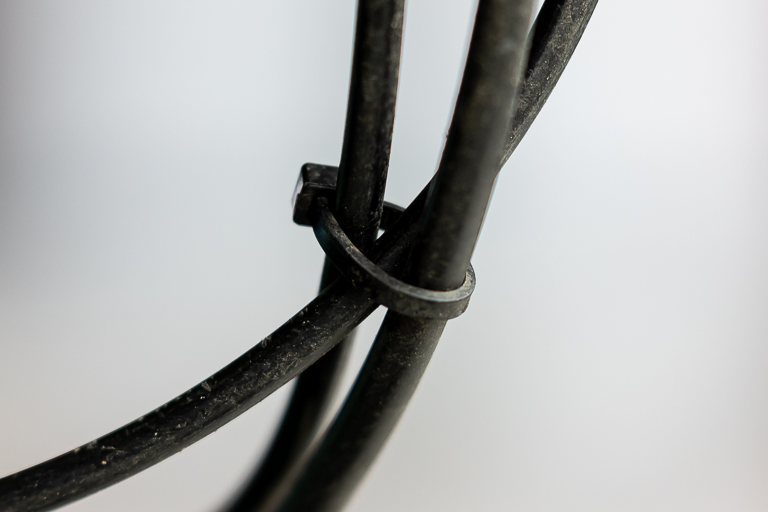
Cables
External cables can rattle or knock on each other but can be easily fixed with a judicious zip tie or two; just make sure that the steering range, gear shifting and braking aren't impeded. Much harder to diagnose and fix are internal cables rattling against the inside of the frame. Most bike manufacturers mitigate against this by holding the cables captive and separate from each other and the frame, but if not then your options are limited. Shortening the cables or hoses so that they are under a little more tension might work, otherwise, you may have to consider a squirt or two of expanding foam to hold things in place.
Wheels
Spokes
A light tinkling noise when your rear derailleur is not in the lowest gear, especially at low speed uphill, is caused by the spokes moving slightly against each other as the wheel flexes under pressure. Black, bladed spokes seem to do this more than others, and as there is no real harm being done you could choose to leave it - you won’t be aware of it most of the time anyway. A tiny drop of chain wax or grease at every point that the spokes contact each other silences the noise very effectively if it does trouble you.

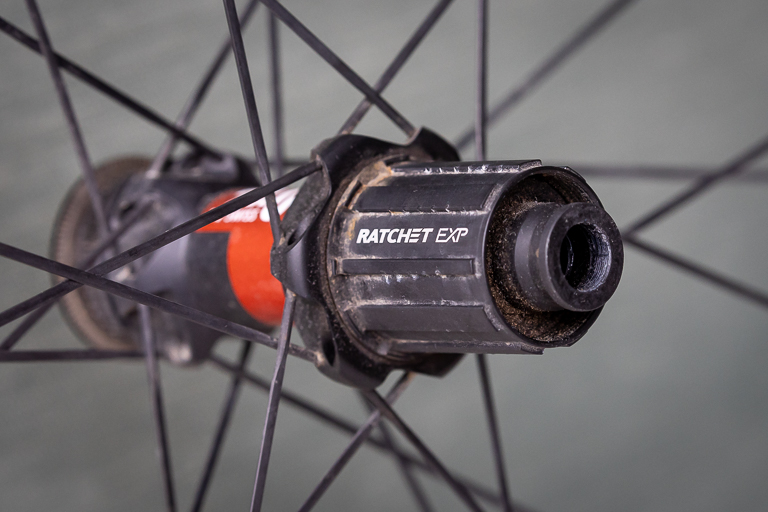
Hubs
Like all bearings, hub bearings can wear out, get too dry or loosen off - all of which can cause them to create a bit of a racket. A lot of hubs can be snugged up with a couple of Allen keys if there is play in them, and most use sealed cartridge bearings that can be pushed out and replaced if required. Shimano hubs use a more traditional cup and cone system, which should be serviced and regreased regularly using cone spanners.
Fenders/Mudguards
Everyone who has ridden a bike knows the annoyance of the fender or mudguard rattle. A necessary evil throughout the winter months, poorly fitted fenders can rattle persistently, especially the lightweight type that can be fitted to bikes without proper mudguard eyelets. Optimise your choice of mudguards by having a look at our guide to the best bike fenders/mudguards.
There isn’t a lot of advice to offer here, other than to fit them as carefully as possible and make sure that all the little bolts are tight and that the blade of the mudguard doesn’t knock against the frame. The area between the seat stays is particularly prone to being caught by the edges of the mudguard and this can cause actual damage to the frame as the mudguard rattles. Otherwise, most mudguard noises are annoying rather than problematic.
Frame
And finally, noises caused by the frame itself are fortunately quite rare, but also quite serious, so don’t ignore them! Nobody wants a frame failure while riding.
Cracks in the frame can click or groan when the bike is under pressure but will be almost impossible to replicate in the workshop. Regularly washing and cleaning your bike gives you the perfect opportunity to inspect the frame for any cracks or wear points, so get your hosepipe out!