When it comes to how to tile a small bathroom floor, it is important to realize that in a more compact space, there will be certain challenges to tackle that homeowners working with larger rooms won’t face – but don’t worry, our guide has you covered.
From the colors and patterns of tiles you select, to how you arrange them, there are lots of ways to ensure that your bathroom flooring will help make the most of the space you are working with, no matter how tiny it might be.
Small bathroom design might well take a little extra planning and consideration than when working with more generously proportioned spaces, but very often, the need to think creatively in terms of design solutions results in some of the most beautiful outcomes.
How to tile a small bathroom floor without calling in the pros
Tiling a bathroom floor is a job undertaken by lots of keen DIYers – and if you want to keep costs down on your bathroom remodel the DIY route is definitely one you should consider.
“You can definitely do your own tiling if you have the right tools and the motivation to get it done on your own, but it can be a tricky process,” says Drew Mansur, co-founder and head of growth at TileCloud.
With our step-by-step guide, even the most novice DIY tiler should have no problems tackling this task to turn their bathroom tile ideas into reality.
What you’ll need to tile a small bathroom floor
Before you begin, make sure you are properly equipped with everything you need to complete the job from start to finish.
Materials:
- Bathroom tile
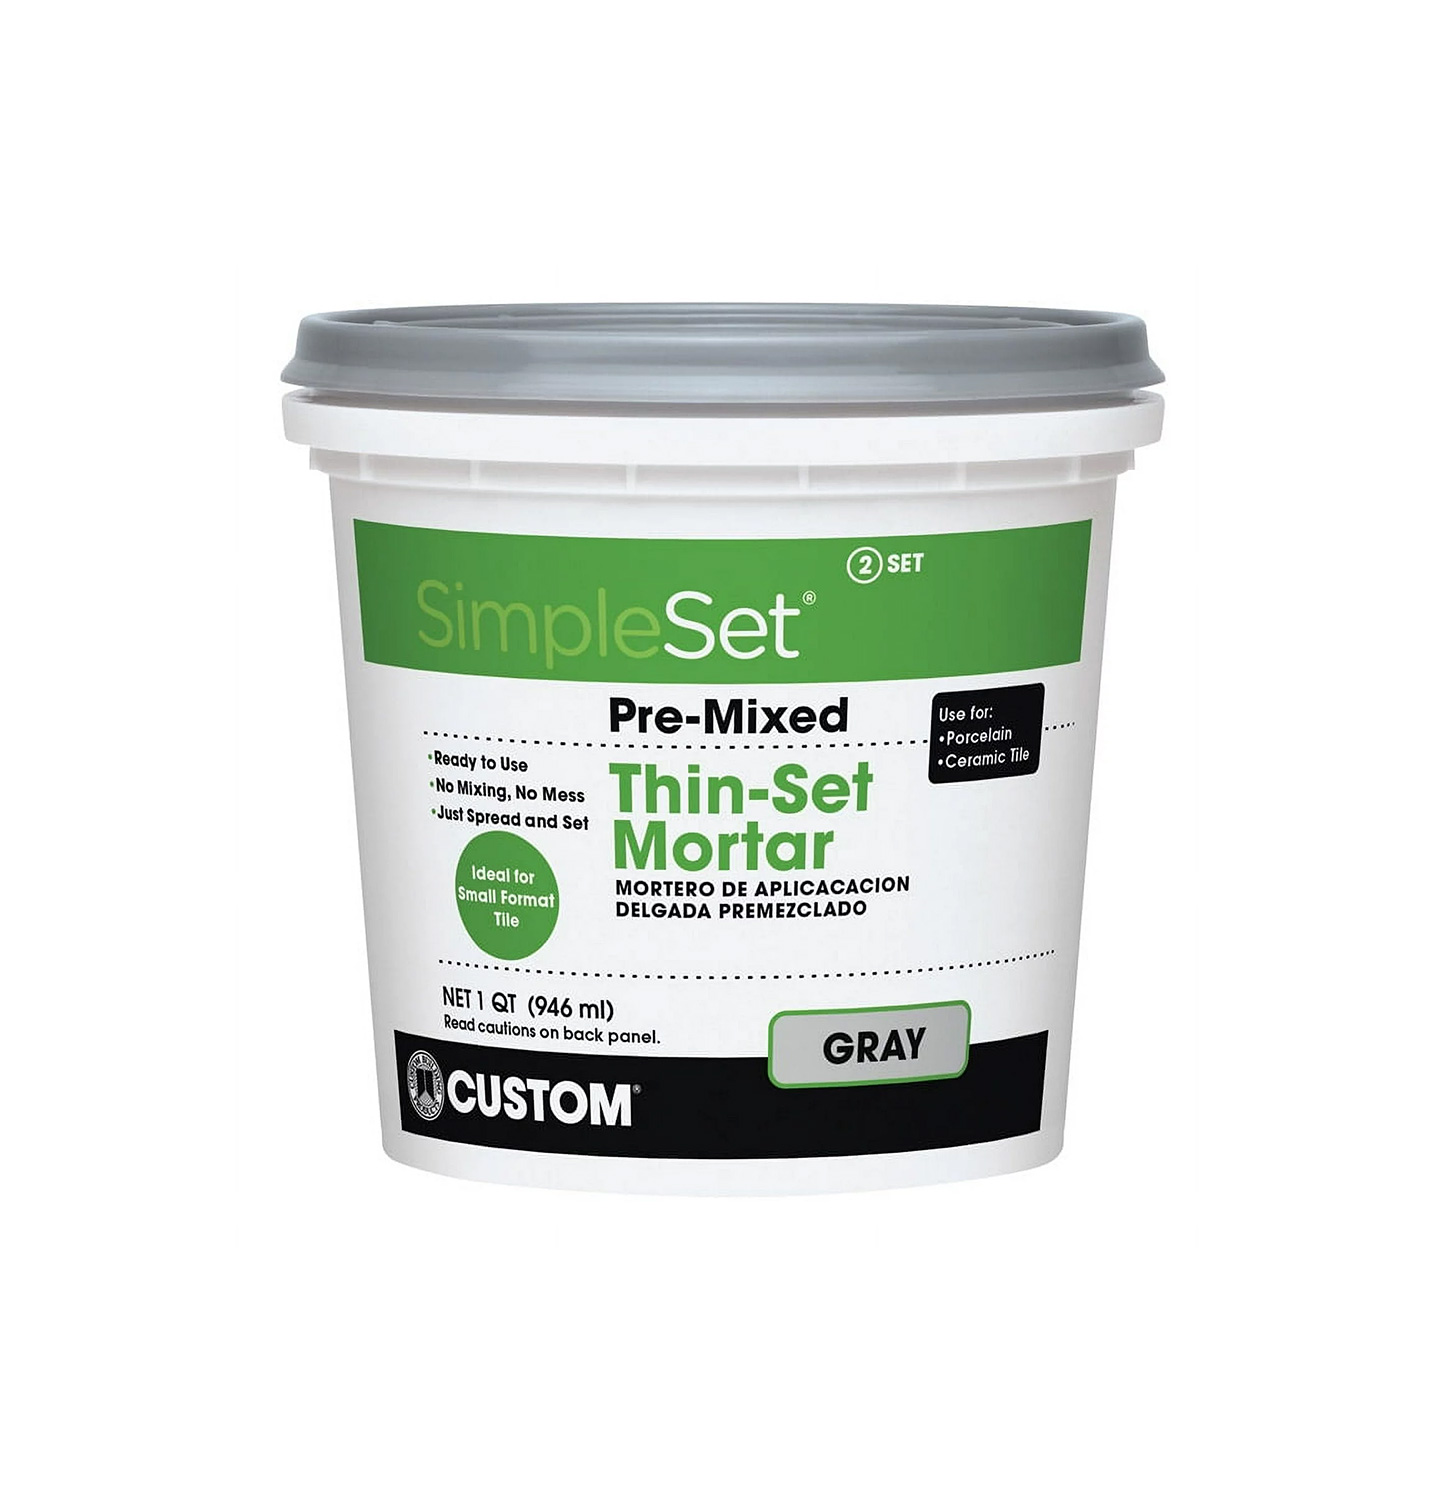
- Tile adhesive, such as thinset
- Tile and grout sealant (Seal It Green Xtreme-Heavy Duty Pro Strength Grout Sealer from Amazon is a great non-toxic option)
- Tile grout
- Tile spacers
- Decoupling membrane (also known as uncoupling membrane)
Tools:
- Measuring tape
- Pencil
- Bucket for mixing adhesive and grout
- Notched trowel (such as Edward Tools Squared Notch Tile and Flooring Trowel from Amazon)
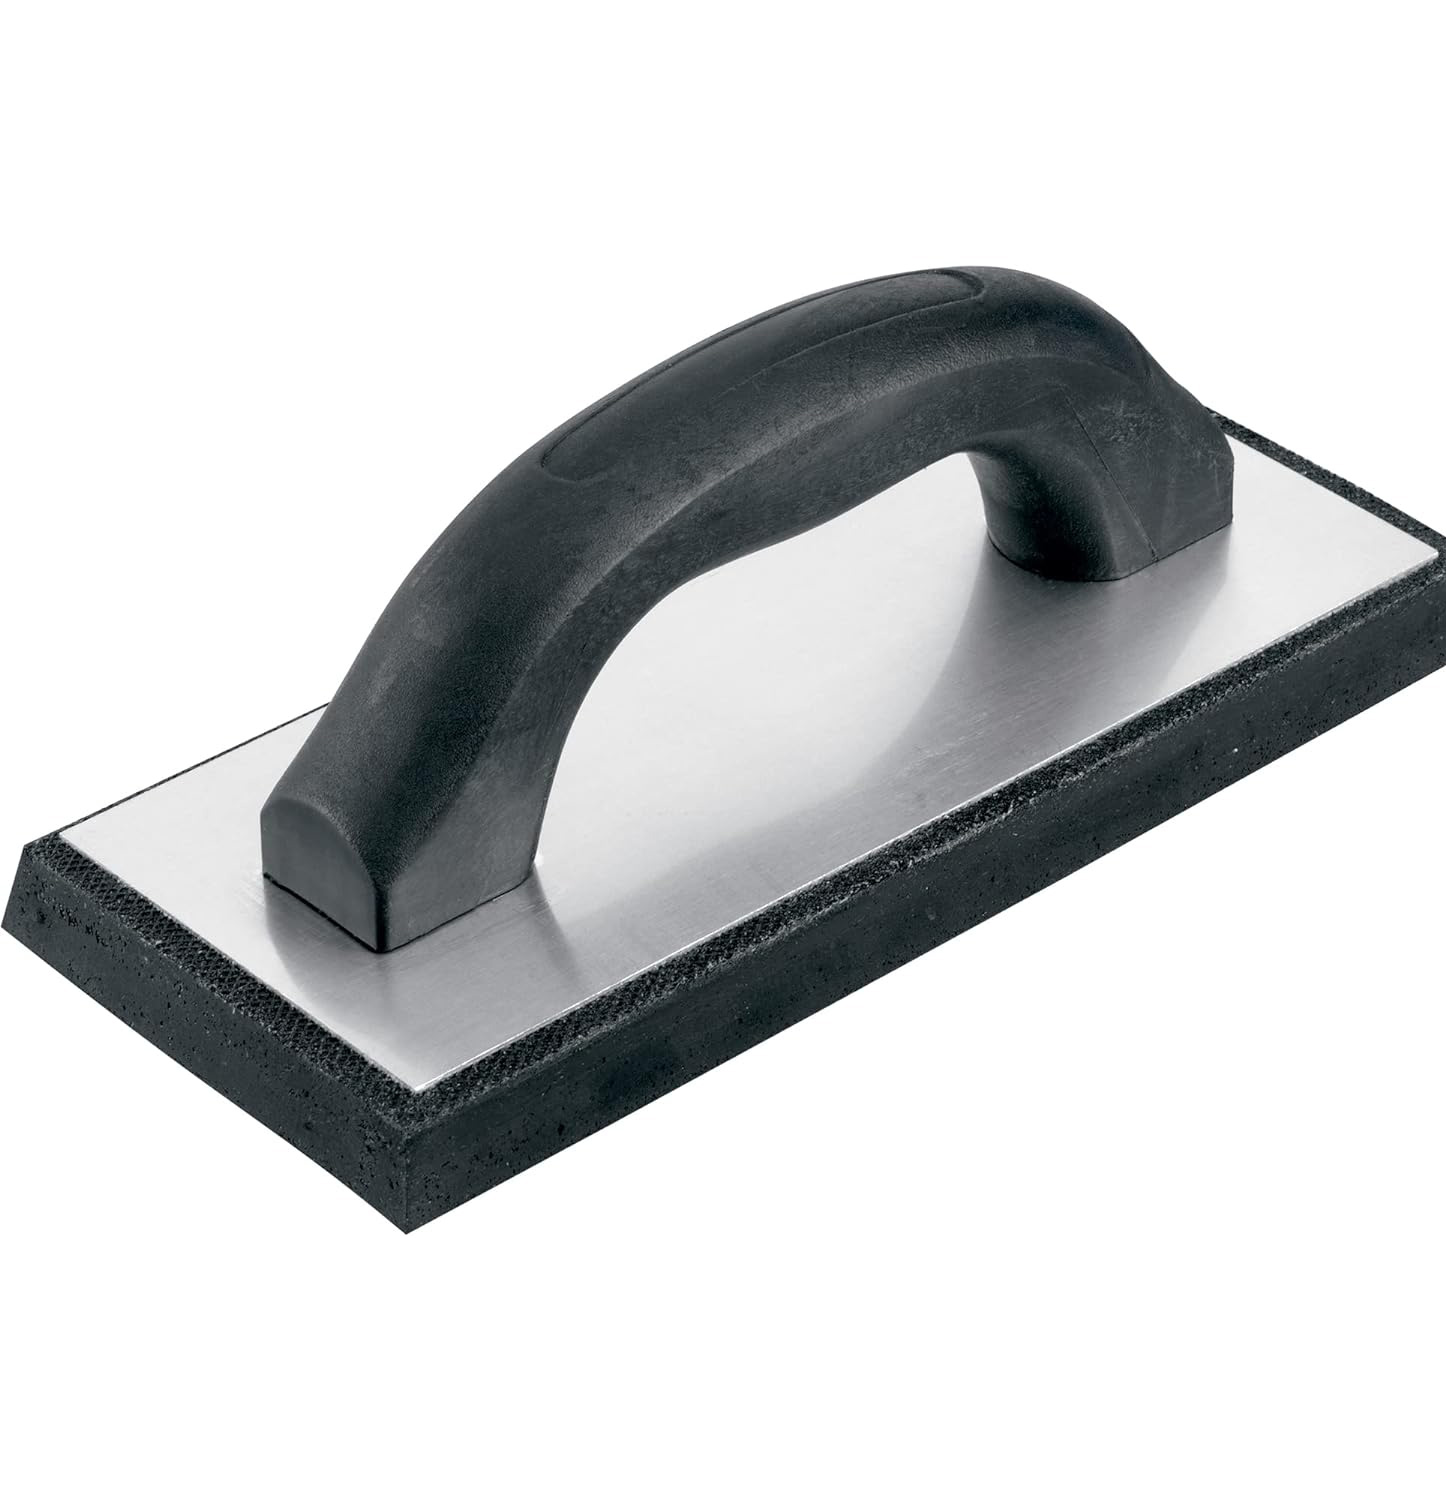
- Rubber tile float
- Laser level (or spirit level or chalk snap line)
- Tile nippers
- Tile cutter (manual, wet saw, or angle grinder, depending on the type of tile)
- Goggles, gloves, and dust mask
- Rubber mallet
1. Prepare the bathroom floor
Before you can begin laying your bathroom tile you need to get your floor in good condition. Much of the prep work needed will depend on the type of subfloor you have and its current state. If you skip this step you risk tiles lifting and cracking later on down the line. If you have existing tiles, don’t attempt to lay new tiles on top – instead, find out how to remove floor tiles first.
“Make sure that the surface is clean and level, and that it doesn’t have any debris before starting,” says Drew Mansur. “If you don’t do this, there might be issues with how the tiles lay or how long they last.”
Floors are usually either timber or concrete. In the case of concrete floors, you should first sweep the floor free of dust and debris before cleaning it with warm water. When dry, fill any cracks with a cement patching compound and trowel. For larger cracks use a suitable leveling compound. A floor leveling compound will sort out any small uneven areas but be sure to let it dry before tiling and don’t forget to apply a concrete sealer.
If you have timber floors, begin by checking for areas of water damage and replace these sections with new marine-grade plywood. In a small bathroom, water damage might have spread out to all areas of the floor.
If you are tiling onto existing timber floorboards, you will need to fit boards made of exterior-grade plywood on top. When screwing or nailing this down, be aware that you are working over pipes and wires so use a detector such as the FNIRSI Premium Wall Scanner available from Amazon to avoid damaging them.
2. Fix a decoupling membrane over your subfloor
Although some people do skip this stage, most people see it as an extra step not to be missed and you should definitely use a decoupling membrane if you are tiling over underfloor heating.
Decoupling membranes are thin sheets that can easily be cut to fit and sit between the subfloor and the tiles to prevent movement affecting the tiles, causing them to crack or lift. Some also protect the subfloor from moisture, such as Waterproof Membrane Uncoupling Membrane for Under Tile from Amazon.
Although it is often thought that decoupling membrane is only necessary for large bathroom floors, it is also well worth installing in small bathrooms. Simply measure your bathroom floor then cut the membrane to fit. It can then be fixed to the subfloor using adhesive mortar – such as thin-set – that has been troweled on, pressing it down into the mortar and scraping off excess to leave a smooth surface before allowing it to set. Lie separate sheets parallel to one another without any overlapping.
Plan and design your tile layout
Before starting the job of tiling the floor, you need to work out the layout for the tiles – something that is more important than ever when it comes to small bathroom flooring ideas if you want to avoid too many cuts and a design that does the space justice.
“Make sure that you lay out the tiles and plan the layout well before you start the job, otherwise you might end up with gaps near the walls that are permanent,” warns Drew Mansur.
“Geometric and diagonal layouts can make a floor look wider, so these are good patterns to consider in a small space. The format is important too, so try to look for tiles that are large-format to have fewer grout lines, which will also make the floor space look larger.”
Using a measuring tape, chalk snap line, or the vertical line of a laser level, find the center point of your room. The IRWIN Tools STRAIT-LINE Chalk Line from Amazon offers good value for money.
4. Dry-fit your tile
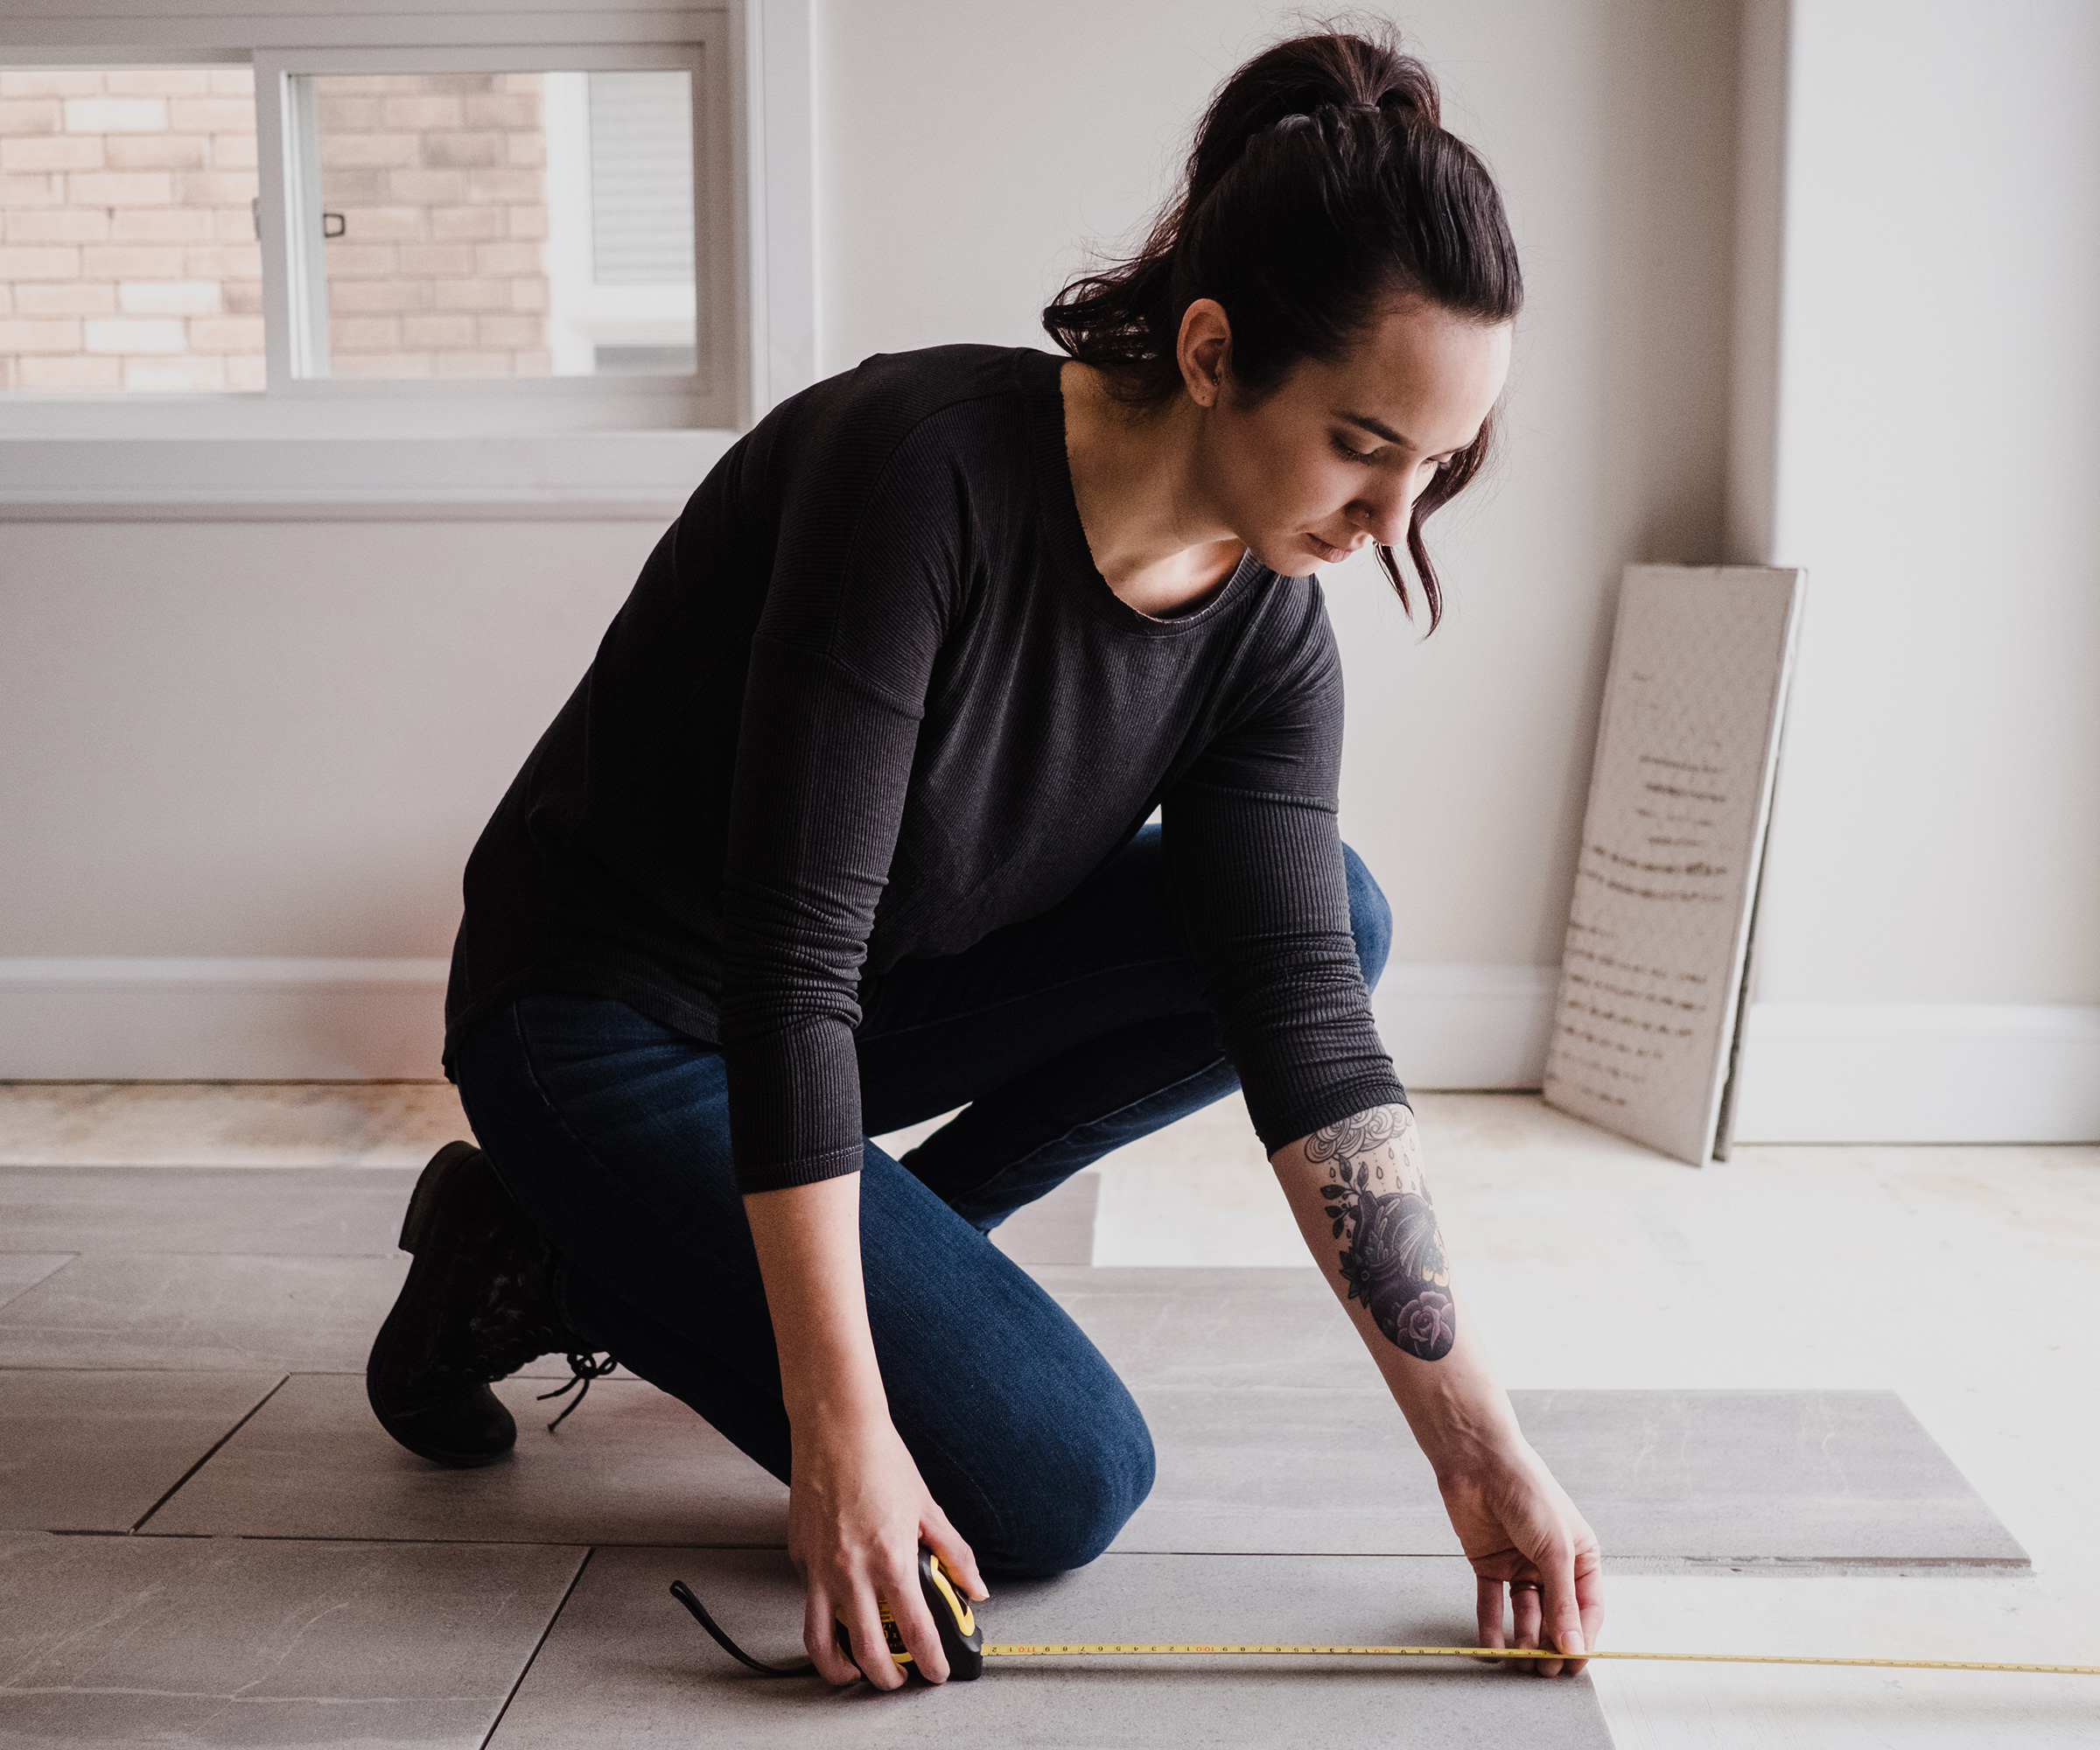
Before committing to any tile patterns you should dry-fit your tile to find the best final layout. Start from the center and work outwards toward the corners of the room to avoid any uneven cuts – and don’t forget to place spacers between each tile for accuracy. Play around until you get a layout you are happy with and aim to avoid any cut tiles being placed in the more visible areas of the room. Ideally, you want to make sure that your edge tile is at least half the width of a whole tile.
Use a pencil and ruler to mark out your cut lines and don't forget to take into account spacers and grout lines.
5. Measure around obstacles and cut your tiles
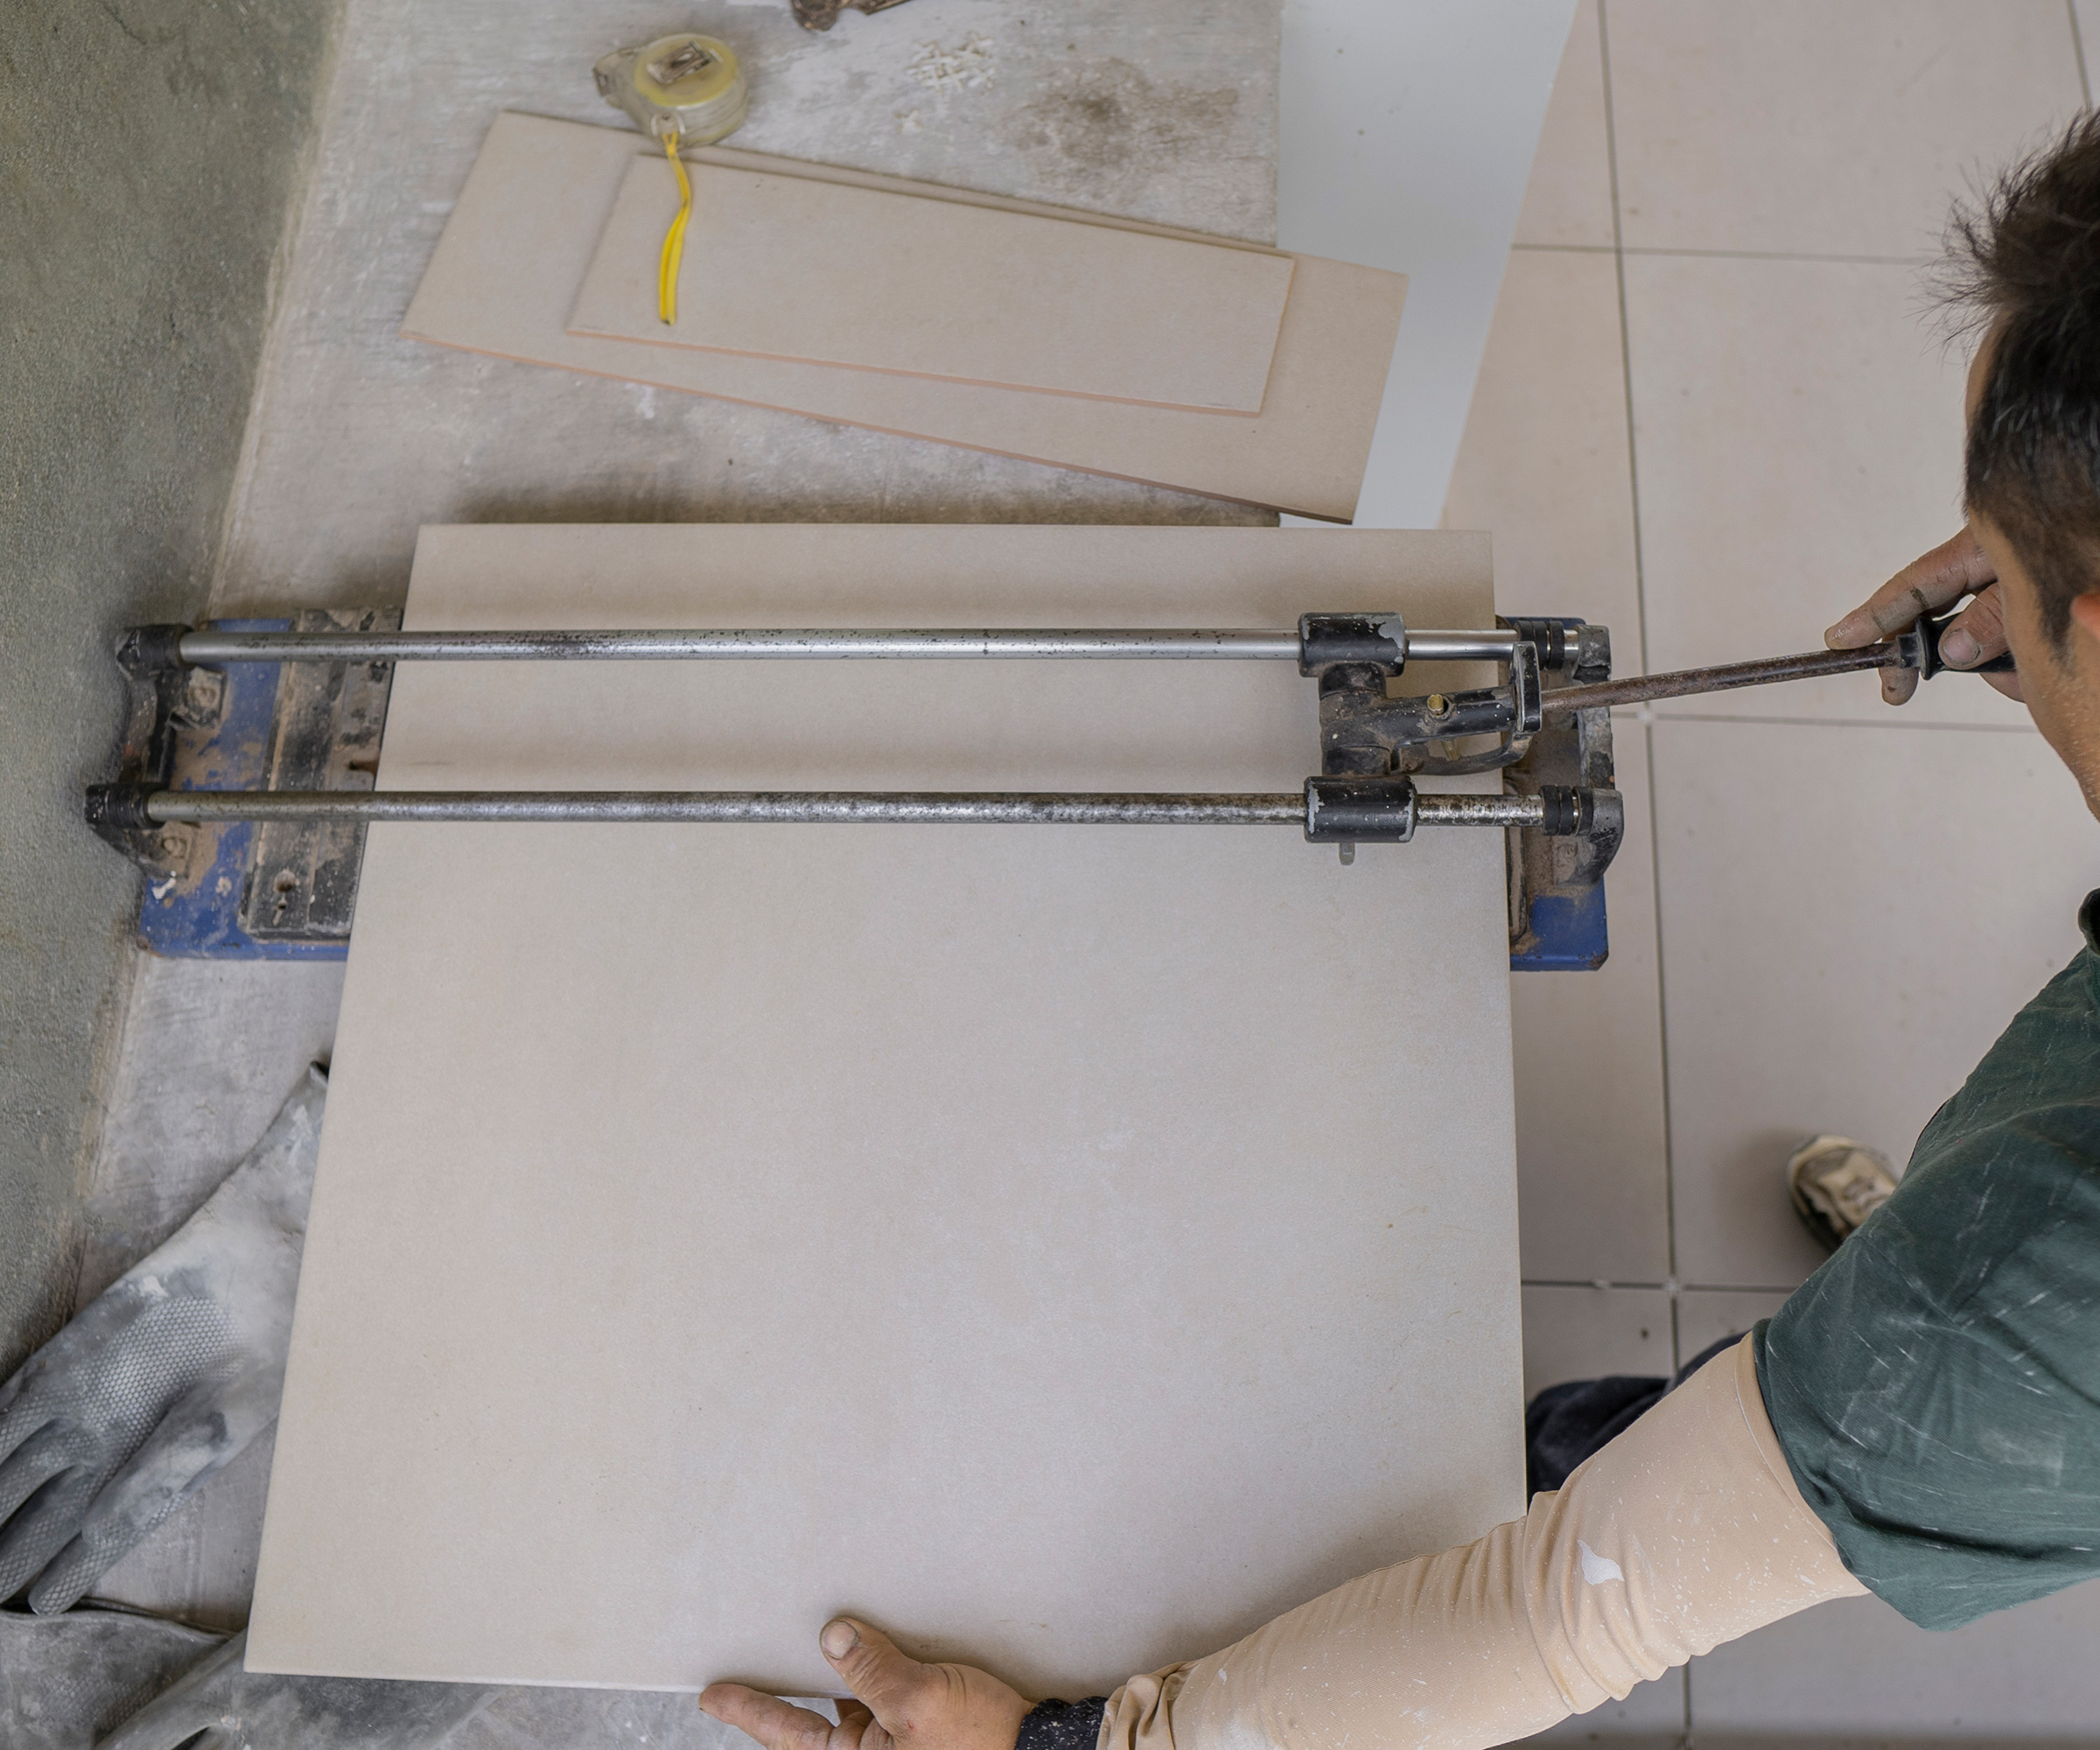
Now comes the time to cut your tiles. In small bathrooms, if you are using ceramic or porcelain tile, you will usually only need a manual tile cutter, or snap cutter. A glass cutter – a small hand tool with sharp wheels that can cut ceramic or glass tile – can also work well.
If you are remodeling you might find you have existing features such as door jambs to navigate. This means you are going to need to make cuts in your tile for them to fit neatly around them. A tile scribe and tile nipper can be used for cutting tile to fit around obstacles. The QEP 9 in. Compound Tile Nipper from Amazon is made with tungsten carbide tips and is suitable for all tile types.
Ideally, you should be tiling underneath the sink, toilet, and so on rather than around them for a neater finish.
6. Fix your tile into place
If you dry-fitted your tile like you should have, you will already have your central starting point.
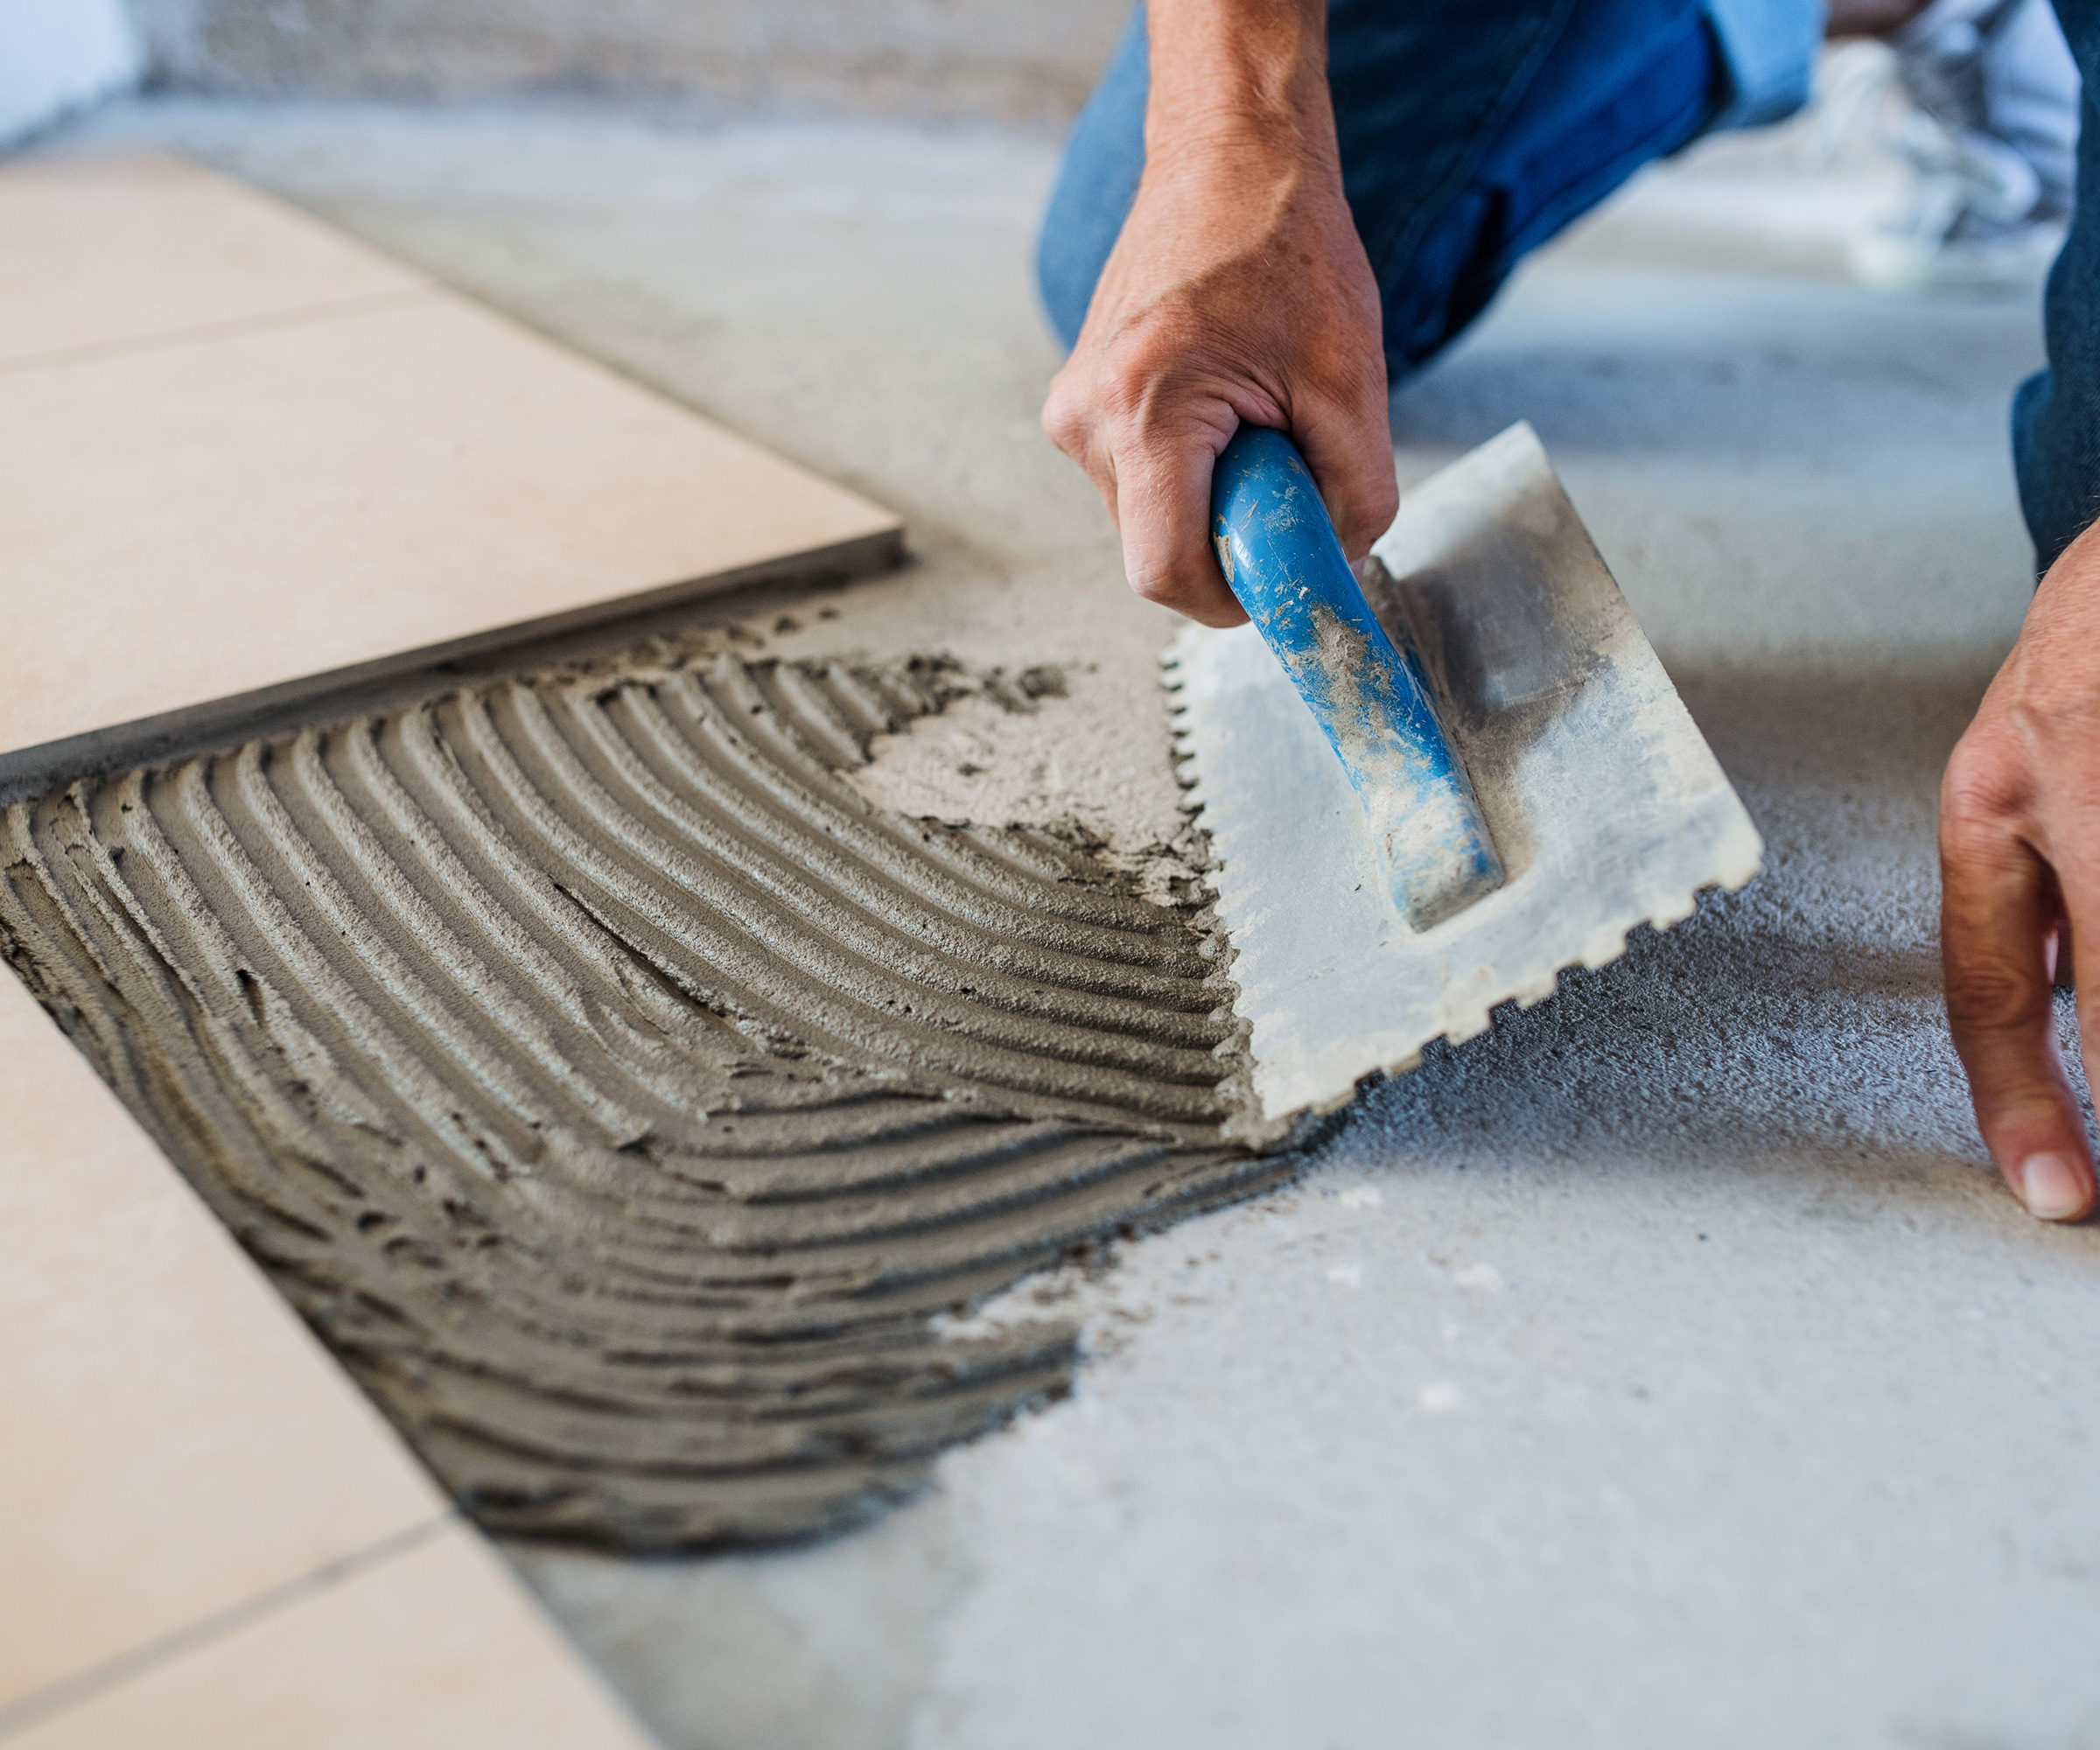
Using your notched trowel, evenly spread enough thin-set or the best tile adhesive for your tiles the first time, then butter the back of the tile itself before laying the tile and tapping it down gently with your hand or rubber mallet. Using your spirit level, check that the tile is level in all directions and carefully wipe away any excess adhesive with a damp cloth.
Repeat this process for the whole floor, placing tile spacers as you go. You want to place your cut tiles last and if you can’t reach over your newly laid tiles to get to the spots these are being fitted then wait until they are dry to avoid putting any weight on them. Check the drying times recommended for the tile adhesive you have used.
7. Apply sealant if required
If you have chosen natural stone tiles, these will usually need to be sealed before you can grout as they stain easily. Check that the sealant you use is suitable for your tile material first. StoneTech Bulletproof Sealer from Amazon is suitable for natural stone, tile, and grout.
Clean the tile, allow it to dry and then apply your chosen sealer using a clean paintbrush.
8. Apply your grout to the tiles
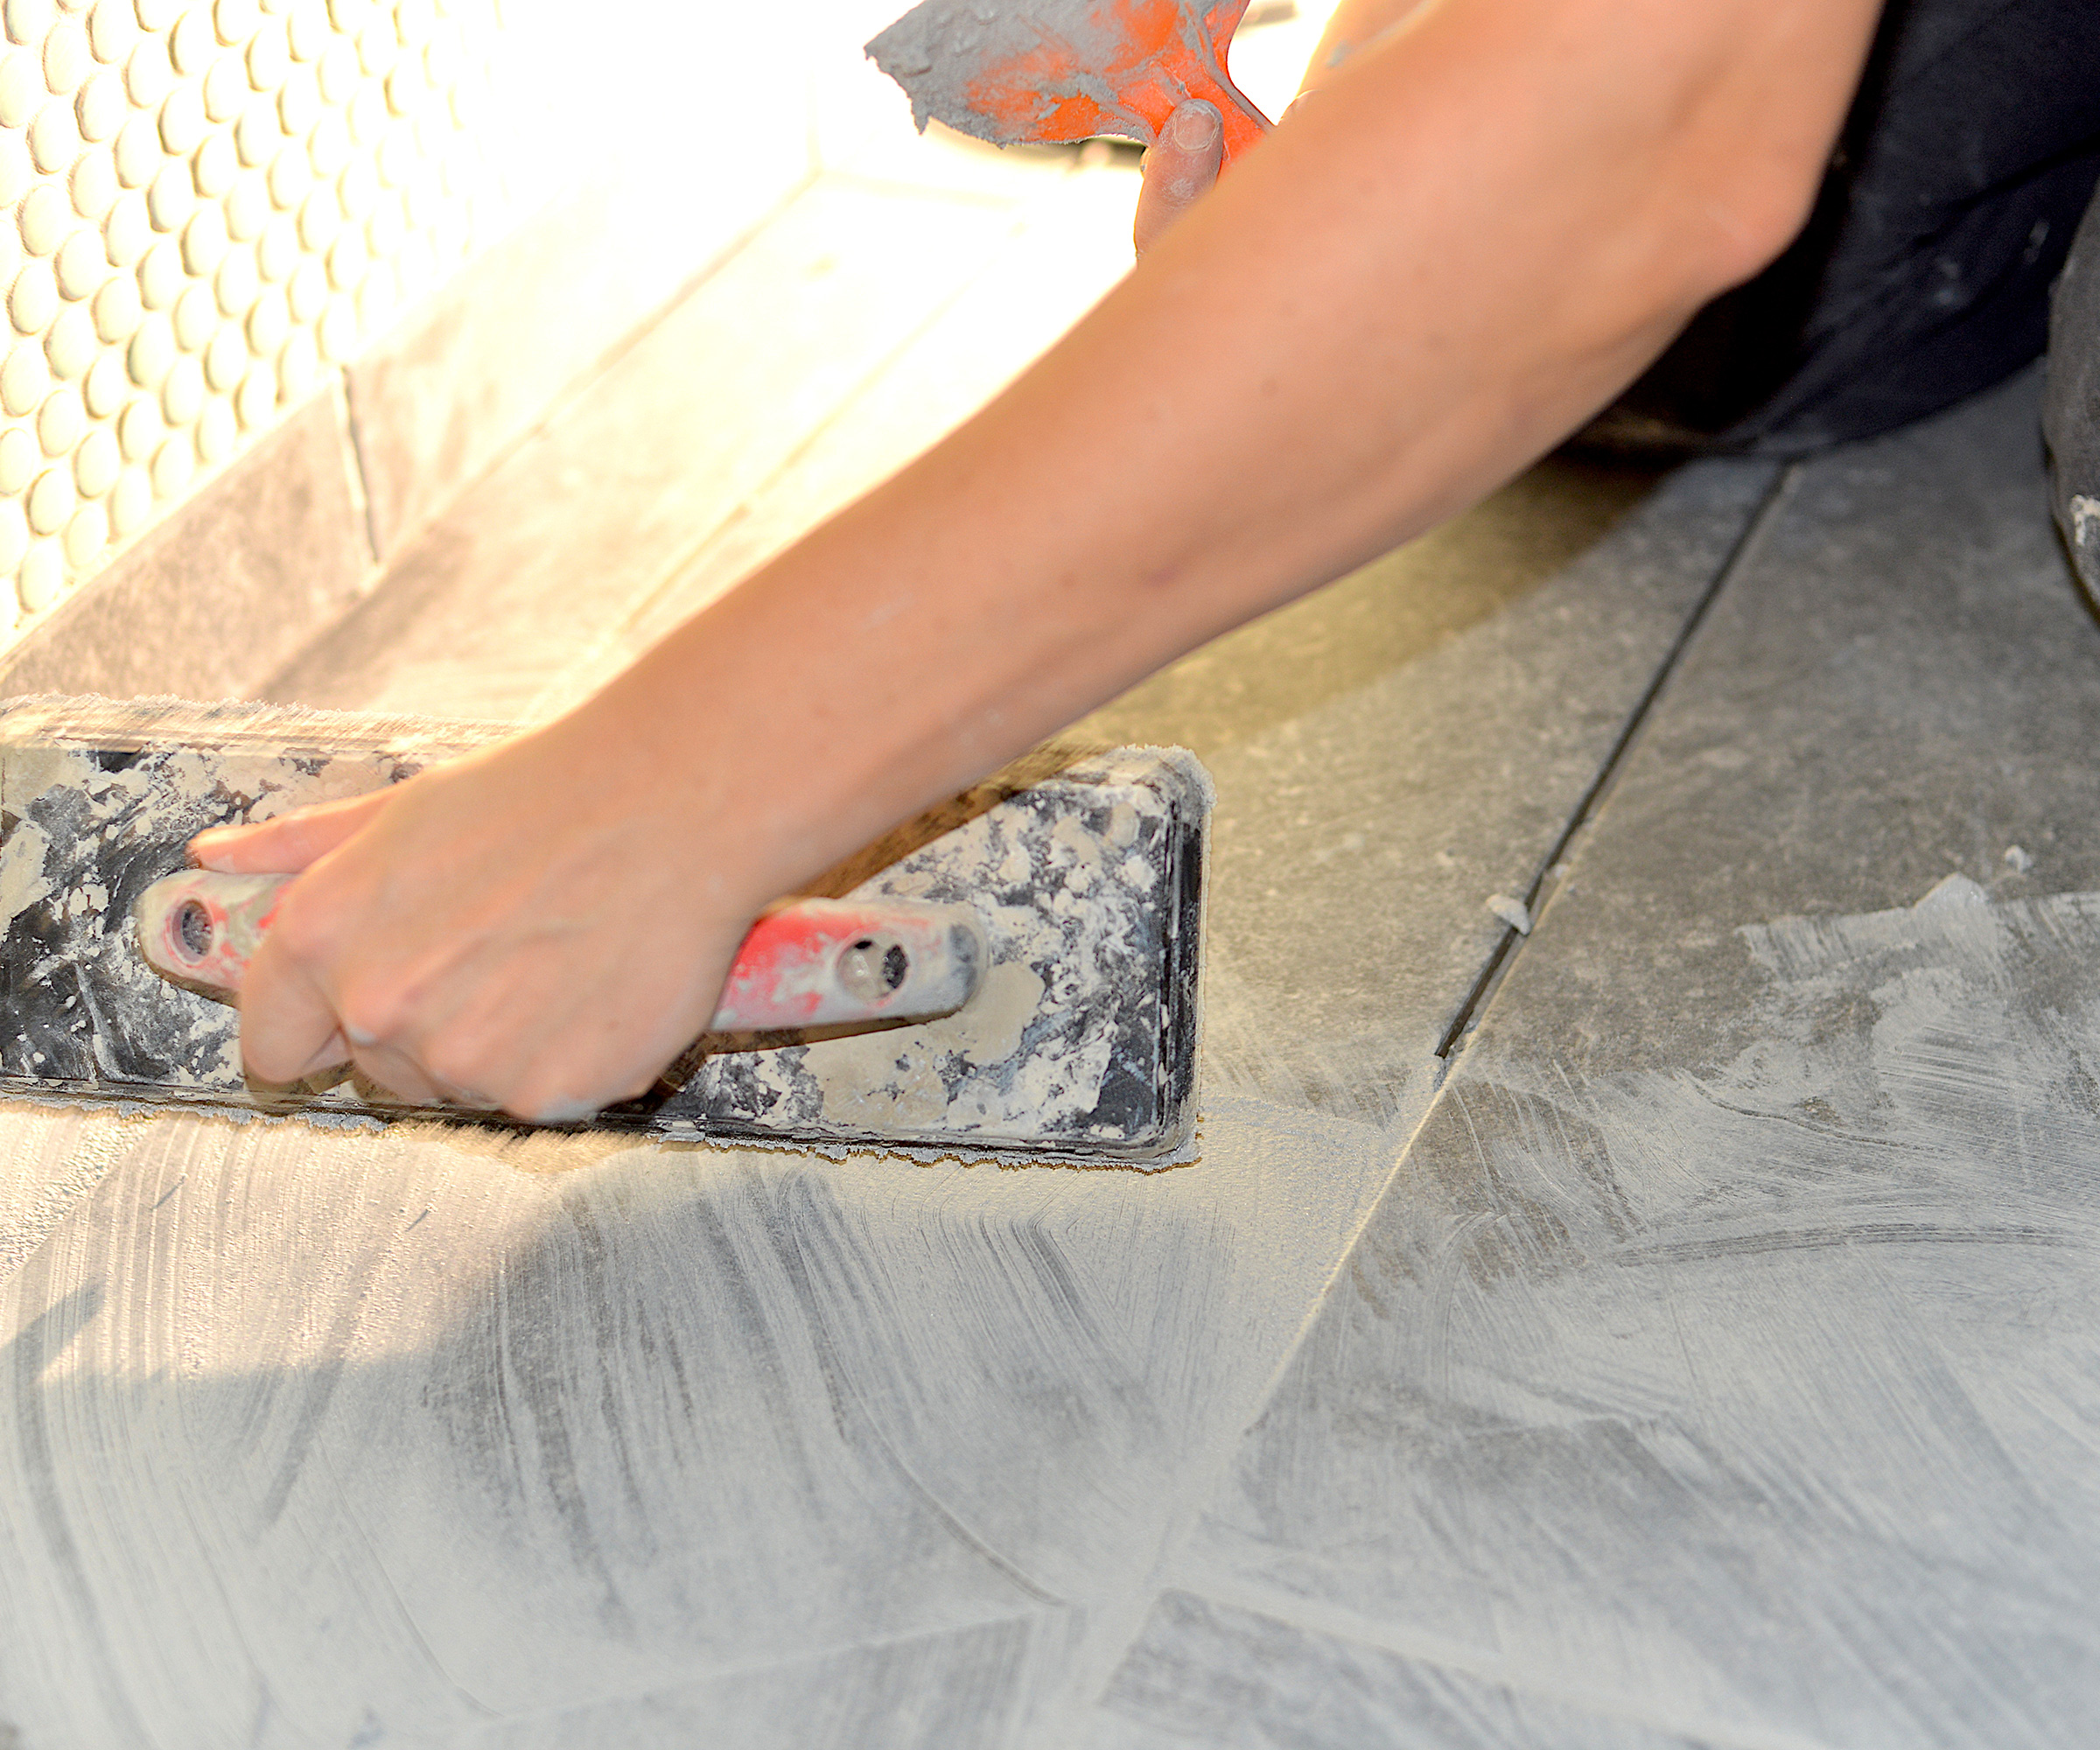
Having removed your spacers, it is time to finish off your tiles neatly by applying your grout.
“Make sure to let the adhesive cure fully before you start grouting (usually this will be 24 hours), otherwise the tiles might shift and become uneven,” warns Drew Mansur. “Use a rubber tile float to work and push the grout into the gaps between the tiles, pulling the float towards you across the face of the tile. If you are using a grout that requires you to add water to a power mix, only make up as much as you can use in around 15-20 minutes as it may get too hard and be difficult to apply. For DIYers, ready-mixed grouts can be an easier option."
Opinion is divided on how to grout tiles, and in particular this next step. Some people prefer to use a wet cloth or sponge to clean off excess grout before the grout between the gaps has fully dried as it can be hard to remove once fully set. Others prefer to wait until the grout lines have fully cured before wiping the entire surface over with a grout haze remover.
Either way, once everything is set, clean off the tile and allow it to dry.
9. Apply sealer to the grout
Applying a grout sealer will prevent water seeping through and getting beneath.
FAQs
What is the best tile for a small bathroom?
The tile you choose for your bathroom needs to make the most of the space you have available, but you also need to think about the overall look you are going for – for example, if you are aiming for modern small bathroom ideas, the tiles you choose will be different from those after classic schemes.
“Your tiles will have a pretty big impact on how big the room will feel, and for smaller spaces, your best bet is to go for lighter colors,” advises Drew Mansur. “Lighter options like whites, light grays, or pastels will help spread light and make the room look bigger. If you prefer darker colors though, consider using them as accent tiles rather than the main tile color.
“Small bathrooms, such as powder rooms, are an opportunity to unleash your creativity with a tile floor design. If you choose a classic color mix of tile, like black and white. you’ll have infinite possibilities for tile size and installation patterns but a timeless color combination that can adapt to different bathroom wall colors and accessories,” suggests Julie Taylor Interior Designer at FLOOR360. “If you’re going for a creative personalized floor tile pattern it’s wise to find a flooring showroom that can create an AutoCAD drawing and provide installation expertise so you can approve the exact floor tile pattern to scale and order the accurate quantity."
What size tile is best in a small bathroom?
Choosing the right size tiles for a small bathroom needs to be a priority if you want the room to feel as spacious and bright as it can.
It is something of a myth that large tile makes a room feel smaller – in fact, very often, with fewer grout lines to busy the look of the floor, they can actually help create a sense of space. That said, everything from the shape of the room to the amount of natural light coming in will have an effect.
Small tiles might seem like a good idea, but those that feature a busy pattern or that are super tiny – meaning lots of grout lines – can feel a bit overwhelming. If you have your eye on some mosaic or highly patterned tiles and are worried about how they will look, just use them as an accent detail, such as a border, backsplash, or in a shower enclosure instead.
“Choosing the type of tile for a small bathroom can be a challenge, especially since the goal is usually to make the space feel bigger,” says Brandon Walker, superintendent at ASAP Restoration LLC “One of the best ways to pick tile types is to decide if your space feels more open or enclosed with large or small format tiles. It can honestly go either way depending on the space involved.”
Do I need a decoupling membrane in a small bathroom?
There are many benefits to using a decoupling (also known as uncoupling) membrane. They protect tiles from cracking should the substrate move, some provide waterproofing and certain products also offer sound reduction and help with thermal insulation.
Some people think that it is unnecessary to use a decoupling membrane in a small space, but while it is definitely true that they should always be used in large bathrooms, the substrate you are working with is more important than the size of your bathroom.
Cracked concrete substrates, timber subfloors and even newly installed concrete slab all have the potential to move, shrink and swell which could well cause your tiles to crack. In short, to be safe, it is best to use one.
What kind of tile cutter will I need?
As you are only working with a small space, the kind of tile cutter you need will be different to if you were cutting a large number of tiles for a big room.
A glass cutter, manual tile cutter (or snap cutter) and tile nipper will usually do the job just fine.
Electric angle grinders are recommended if you are going to be making lots of curved cuts or will be working around items such as a toilet, sink or bathtub.
A wet saw is unlikely to be needed for a small bathroom but if you need to know how to tile a floor in a larger space then this is one tool you are likely to see recommended.
Price: $20.47
This is a mess-free, ready-mixed tile mortar, perfect for anyone keen to avoid traditional thin-set. It is quick and easy to spread and is suitable for porcelain, stone, marble, granite, and ceramic tile. Even better, if you have any left over, it can also be used for tiling a wall.
Price: $7.97
This is an easy-to-use rubber grout float that is non-stick and has a handy beveled edge to give a super smooth finish. Offering fantastic value for money, it also has a comfortable contoured handle and is easy to clean after use using just water.

Price: $40
This would make the perfect investment for anyone planning on carrying out a few tiling jobs. Its rubber-padded aluminum alloy breaker bar won't damage the tile, while the extra long, high-leverage handle makes cutting easier. It is capable of cutting tile up to 20" long.
Meet the experts
In many ways, tiling a small bathroom floor is not all that different from tiling the floors of larger rooms – the key to success lies in choosing colors, patterns, and layouts that will make the space feel restful.
One word of caution here, make sure you have enough tile to complete the job, and don’t forget to account for accidents – this is just as important for those after kitchen tile ideas as it is when dealing with a bathroom.
“I always advise homeowners to purchase more tile than the job requires for those ‘just-in-case moments,” says Julie Taylor. “Unexpected or unforeseen damage to the tile during or after installation can be a pain, but having extra tile makes it easy to replace the tiles without searching for a match.
“You can expect to pay a minimum of $10 - $20 per square foot for a quality porcelain tile and upwards of $35-$55 square foot for the installation labor if not doing it yourself. A skilled tile installer will charge more for intricate patterns or small mosaics.”