This week, we're exploring how to produce piano in your DAW, whether that's recording acoustic piano or working with the many superb piano plugins available to the modern producer. Today, we're walking you through how to create an atmospheric and ethereal piano sound using a free plugin from Spitfire Audio.
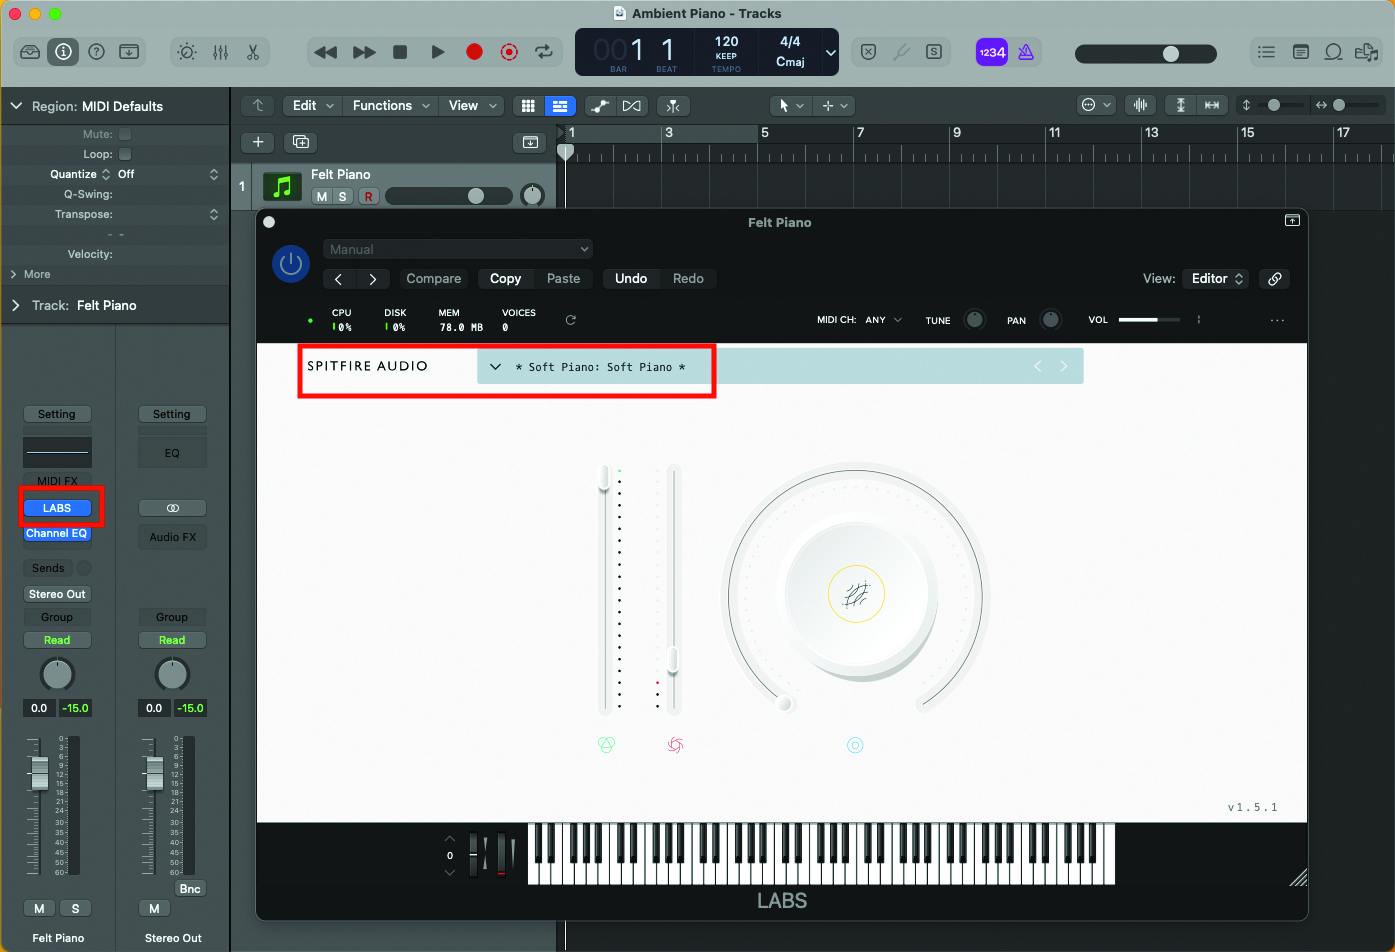
For our ambient tutorial example, we’ll use the freely downloadable Soft Piano, which is available as part of the LABS series, from Spitfire Audio. Despite the description, this is actually one of the most used examples of felt piano, so you’ll be in exceptionally good company. Load into your DAW, ready for use.
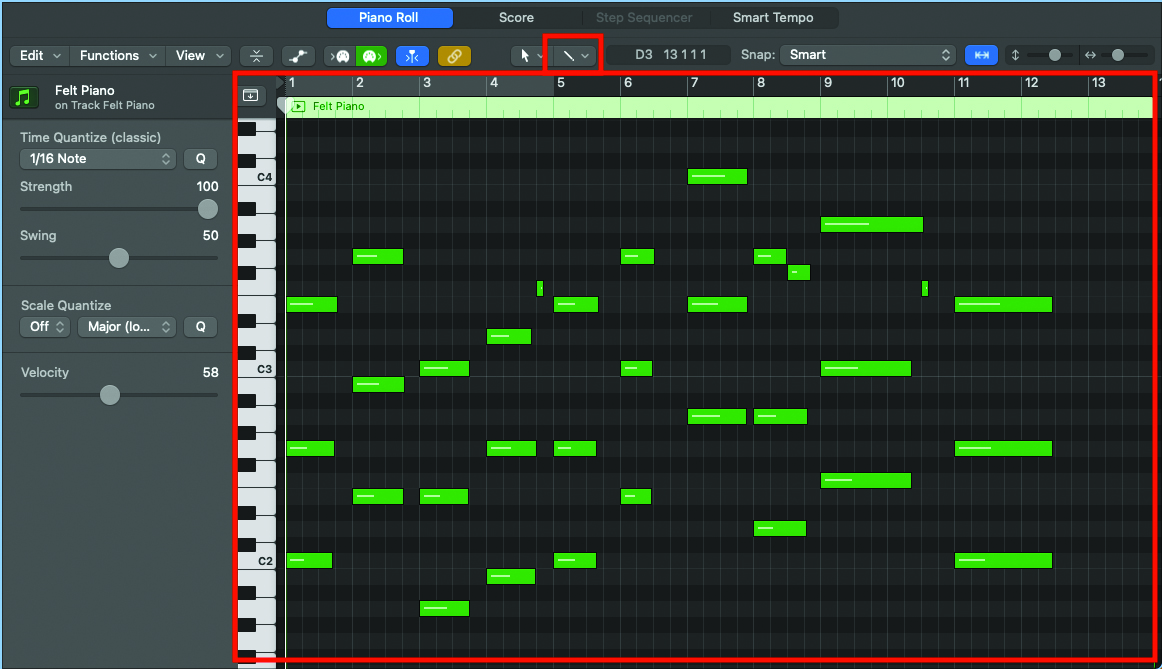
Have a play around with the instrument; it’s quite dark in tonal makeup, but responds very well to triadic or spaced chords, particularly in the lower middle register. Record your piano part, or draw in via an editor of choice. Grid editors are often the most useful example for this form of work.
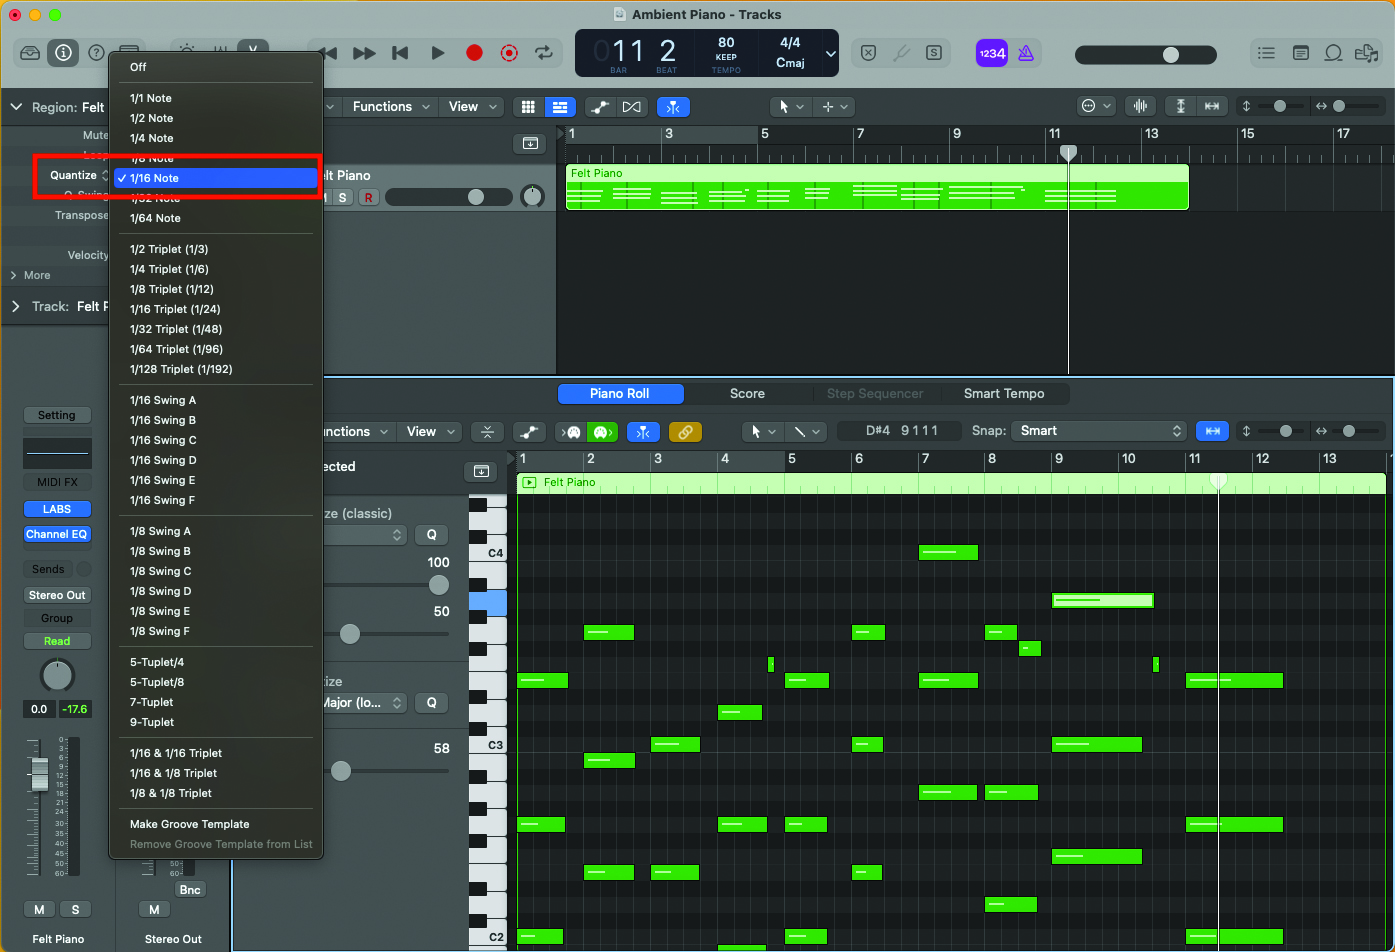
If you’ve played in your piano part by hand, feel free to quantise at this stage. If your playing is good enough, you might not need to, but our next step will allow us to introduce a degree of humanistic feel. There’s no shame in quantising. It’s an extremely useful tool at many levels.
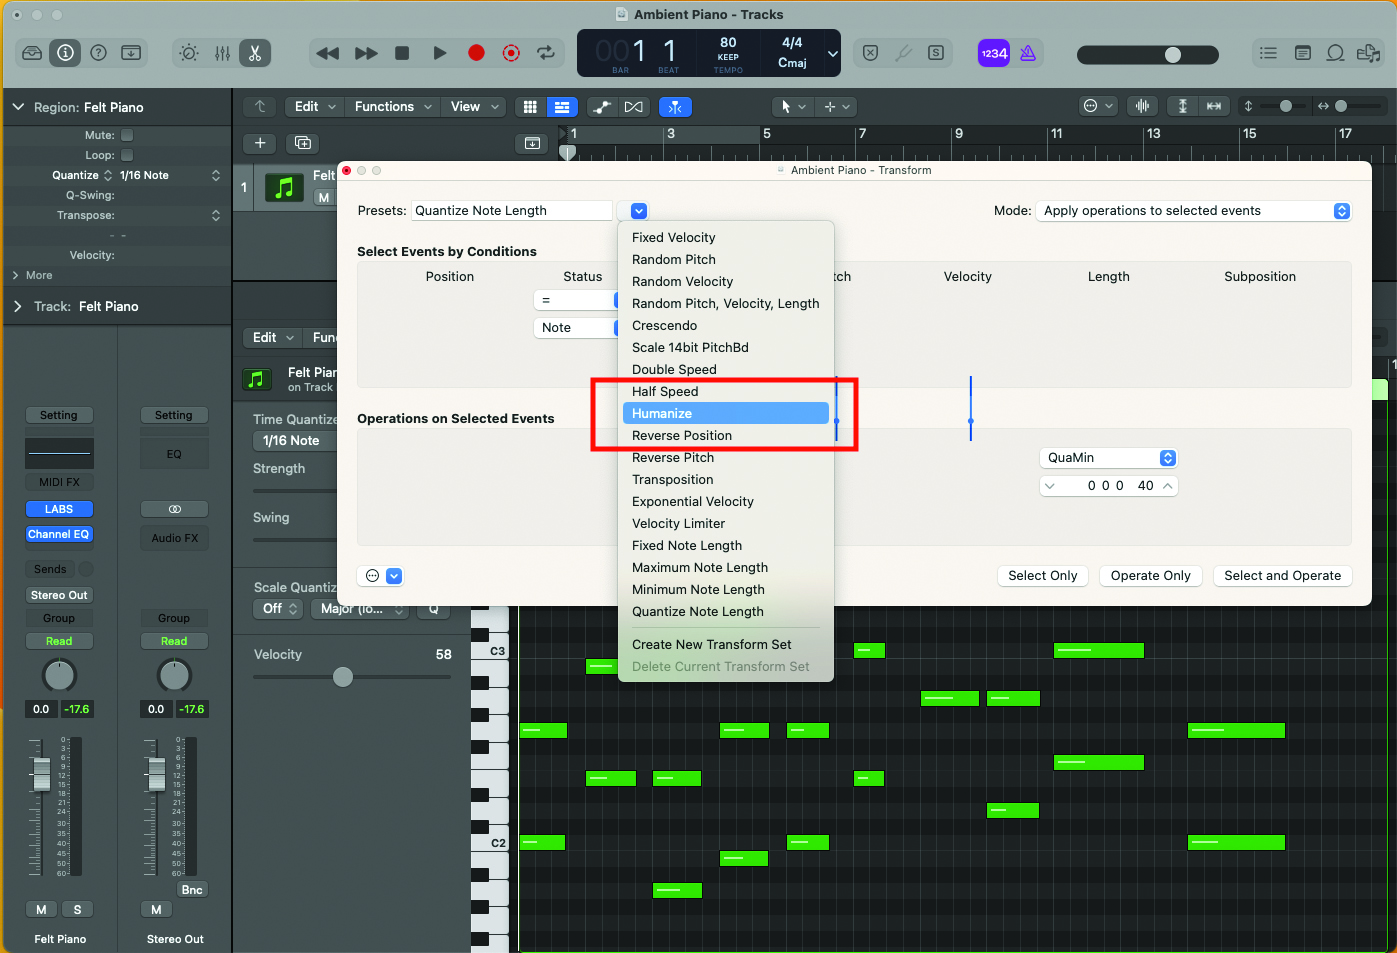
Using your DAW’s Humanize function, you can create subtle separation between each note, which will have the effect of softening the attack of each chord being played. You might need to alter the amount of humanising, depending on the tempo of you track. Slower speeds require smaller values.
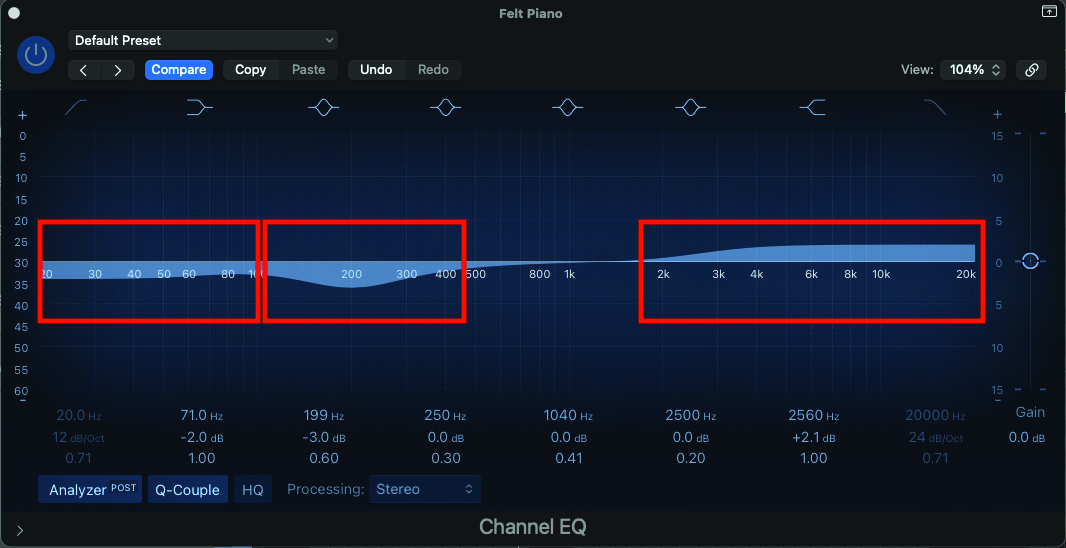
Insert an EQ on your channel strip, and begin to experiment with the tone of the instrument. In our example, we want to reduce the lower-mid frequency content, at around 200Hz. We have also subtly lessened the lower end, while sweetening the upper frequency band, above 2kHz.
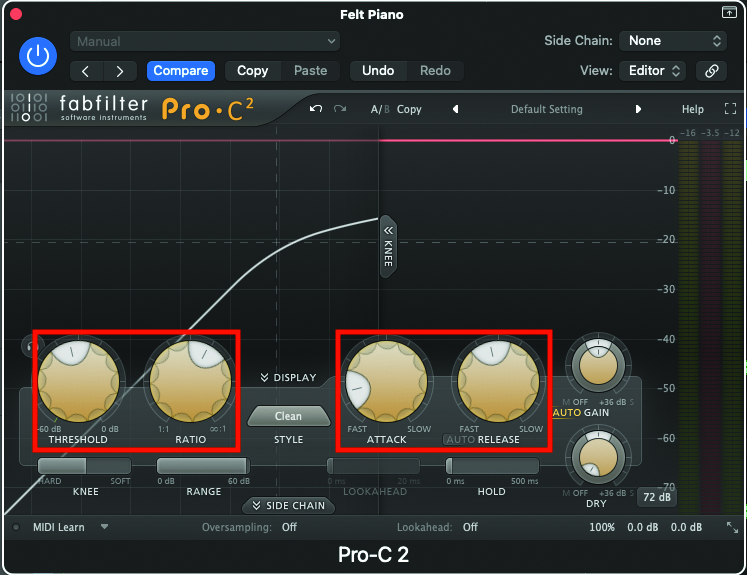
Next, we’ll add compression, but don’t take this too far; we want something reasonably transparent. There are plenty of compressors to use included with your DAW package, but as an alternative, we love the transparency of the FabFilter C2. We’ve slightly reduced the threshold of the compressor, while lessening the attack rate and increasing the release to a slightly slower dissipation rate.
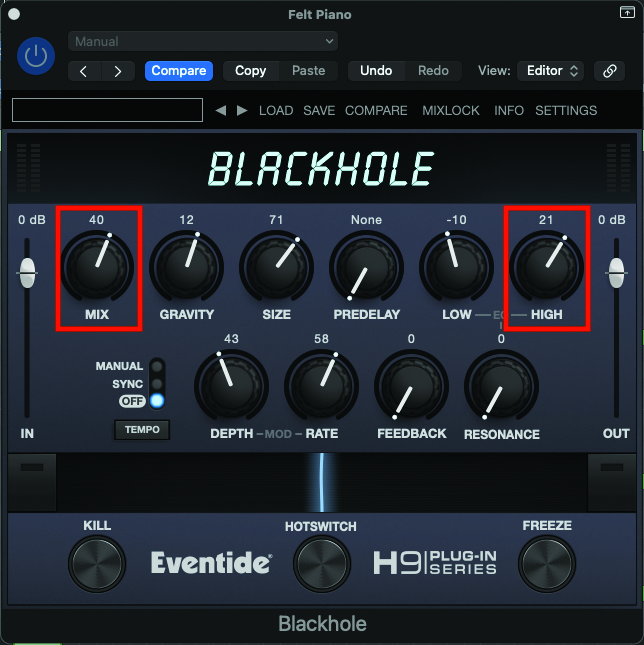
In keeping with our ambient and cinematic ideal, we’re going to employ a lavish, long reverb. Again, there’ll be many examples included in your DAW, but a particular cinematic favourite is the Blackhole from Eventide. We’re setting a generous reverberant mix, while also brightening the resulting reverb.
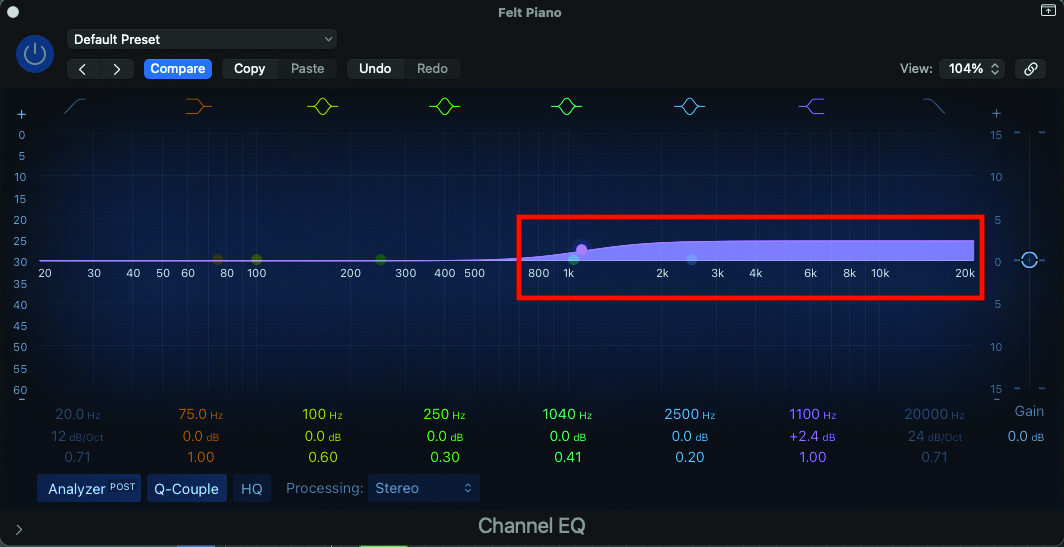
If the reverb that you choose to use does not include any tone control on board, you can easily apply a second EQ plugin at this stage, to perform the same task as brightening, in the previous step. As always, adjust to taste while listening to your track.
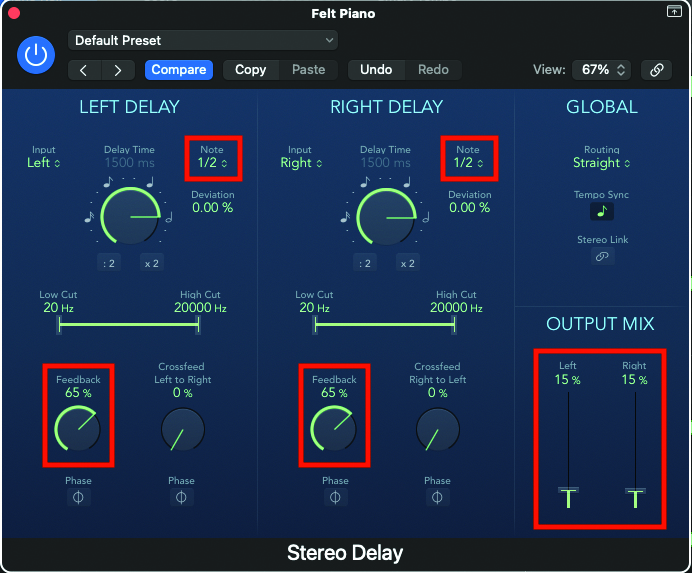
To extend the reverberated signal even further, add a delay at the end of the signal chain. Depending on the effect you wish to achieve, you can increase the feedback control considerably, to generate a large number of repeats. Note that we’ve used a slow delay of a half-note, to make the delay signal less obvious.