BazilleCM is a powerful beast. We’ve already established that the oscillator section hosts some amazing features, thanks to its association with phase distortion synthesis.
This means that we can create some pretty complicated waveforms at the very beginning of our signal path. In true subtractive synthesis style, we have the option to feed both of the oscillators through the filter section, which offers us a wealth of sonic colour.
For this tutorial, we're using BazilleCM, a synth plugin that comes free with every issue of our sister magazine Computer Music, along with a bundle of other plugins called the CM Plugin Suite. BazilleCM is our unique version of u-he's patchable modular synthesiser, sequencer and mapping generator Bazille.
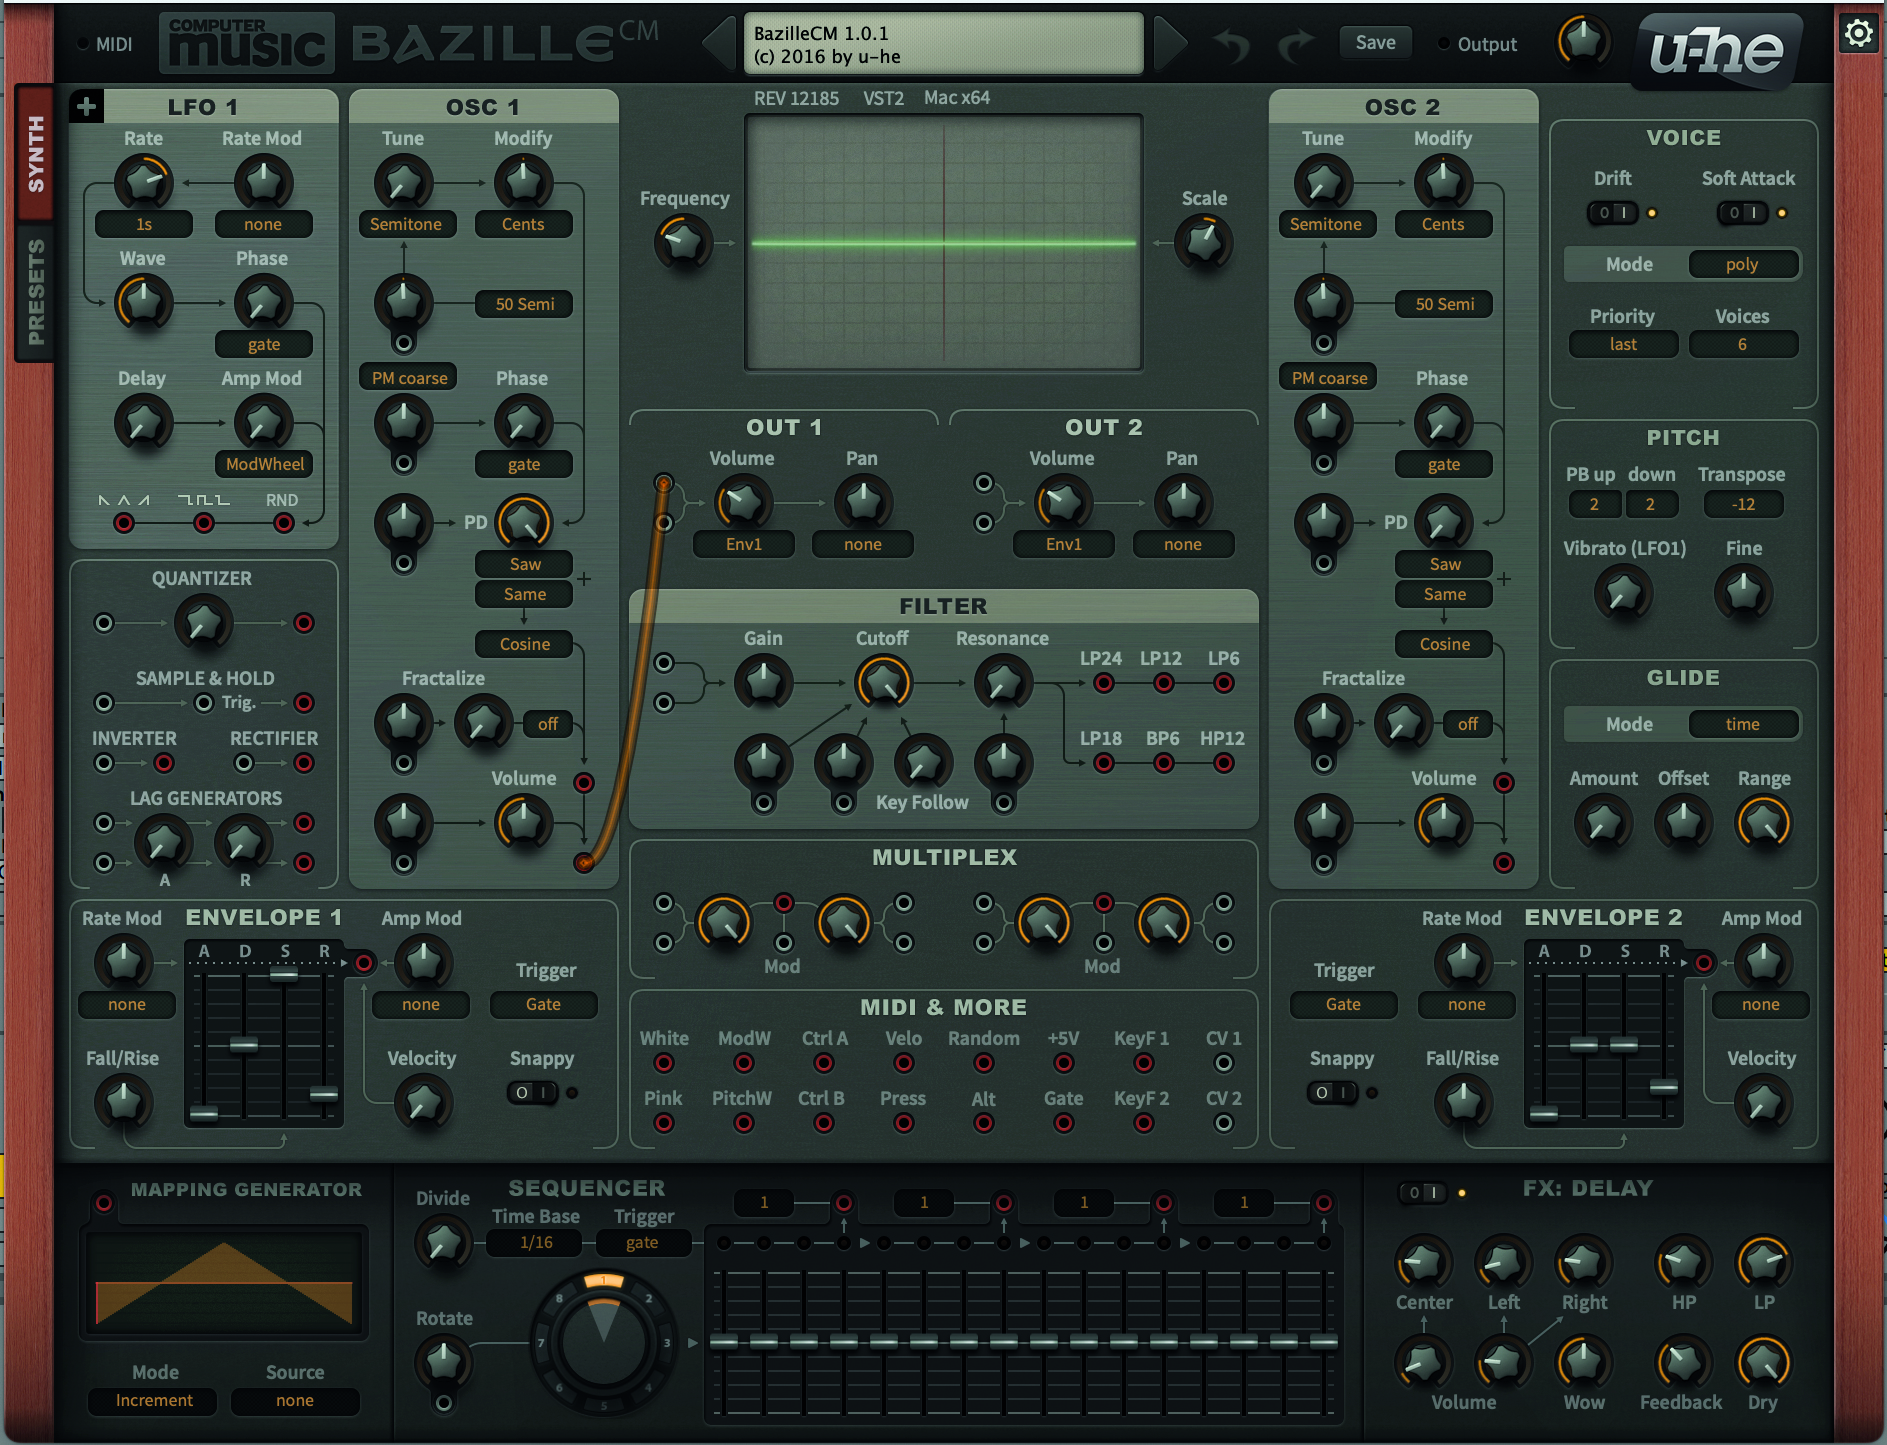
As many of us already know, the primary focus of the filter section is to filter out elements of the harmonic series that we don’t want to hear. For example, we may choose to remove some of the upper harmonic brightness, contained within an oscillator’s sound, leaving the lower frequencies to pass through, hence the description ‘low pass’ filter.
The extent to which we apply this is governed by the position of the Cutoff Frequency pot. Sweeping this pot will provide the classic filter-sweep effect, particularly if coupled with the resonance control, which accentuates the point of cutoff.
BazilleCM is blessed with six filter types, which include four low-pass filters, a band-pass filter (which sweeps a band of frequencies either side of the cutoff point) and finally a high-pass filter, which let the high frequencies through, as an opposite to the low-pass filter. So now it’s time to unleash the filter, and give our bass a good kick!
Make a filter kick bass with BazilleCM
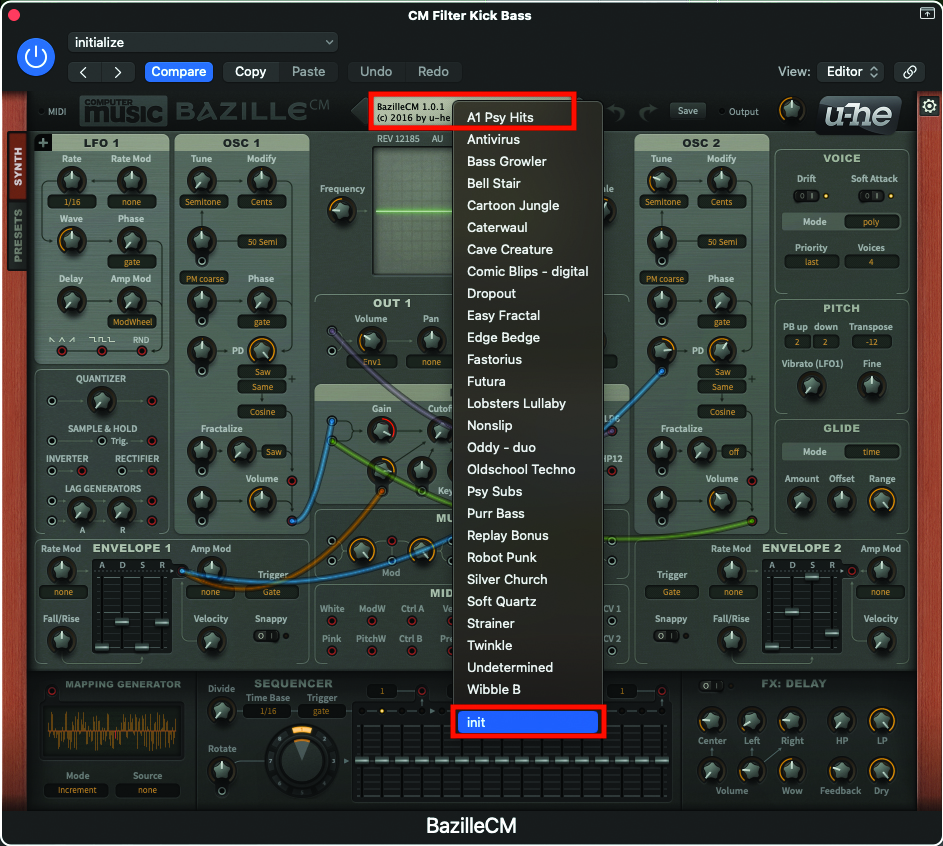
Let’s begin by initialising a patch on BazilleCM. Open up your DAW and load up the plugin. Once the plugin window is open, move to the central display at the top of the window, click to reveal the dropdown menu, and select ‘init’ from the bottom. This will initialise the patch.
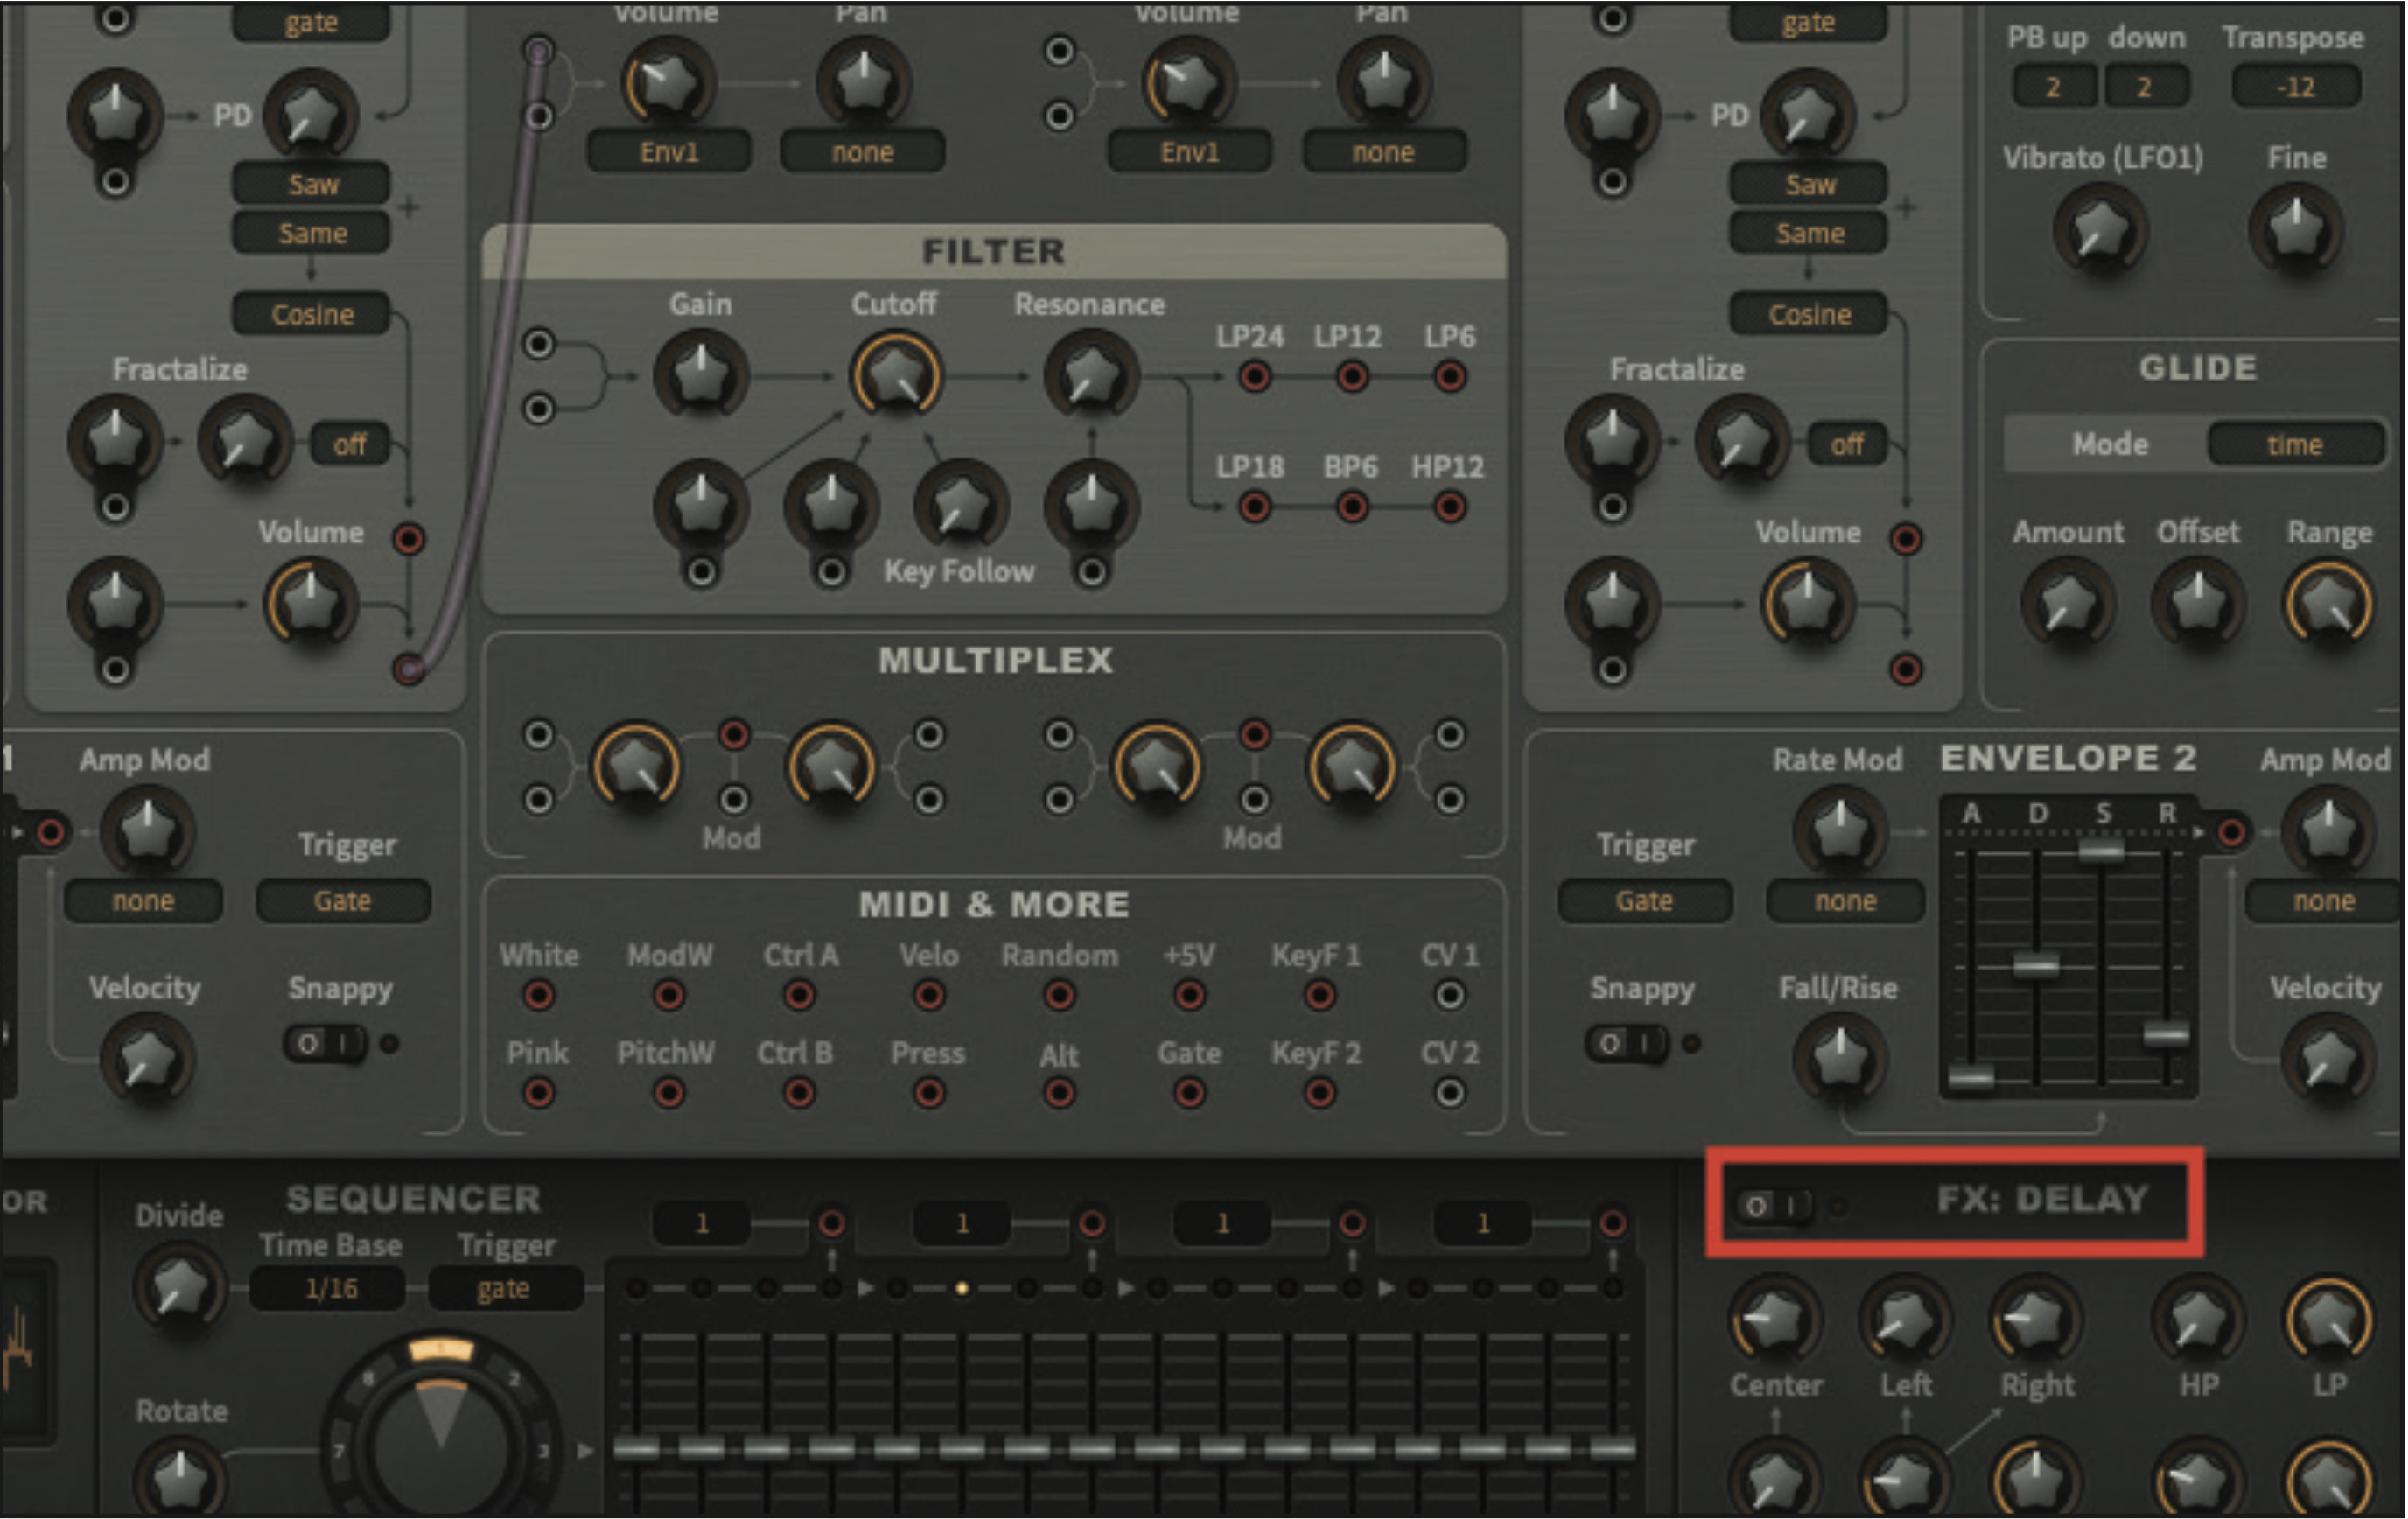
As part of the initialisation, you’ll also hear the FX Delay active in the signal. To make our adjustments clearer at this stage, go to the Delay section (bottom-right) and move the switch to the ‘off’ position. You can always switch it on again later, if so desired.
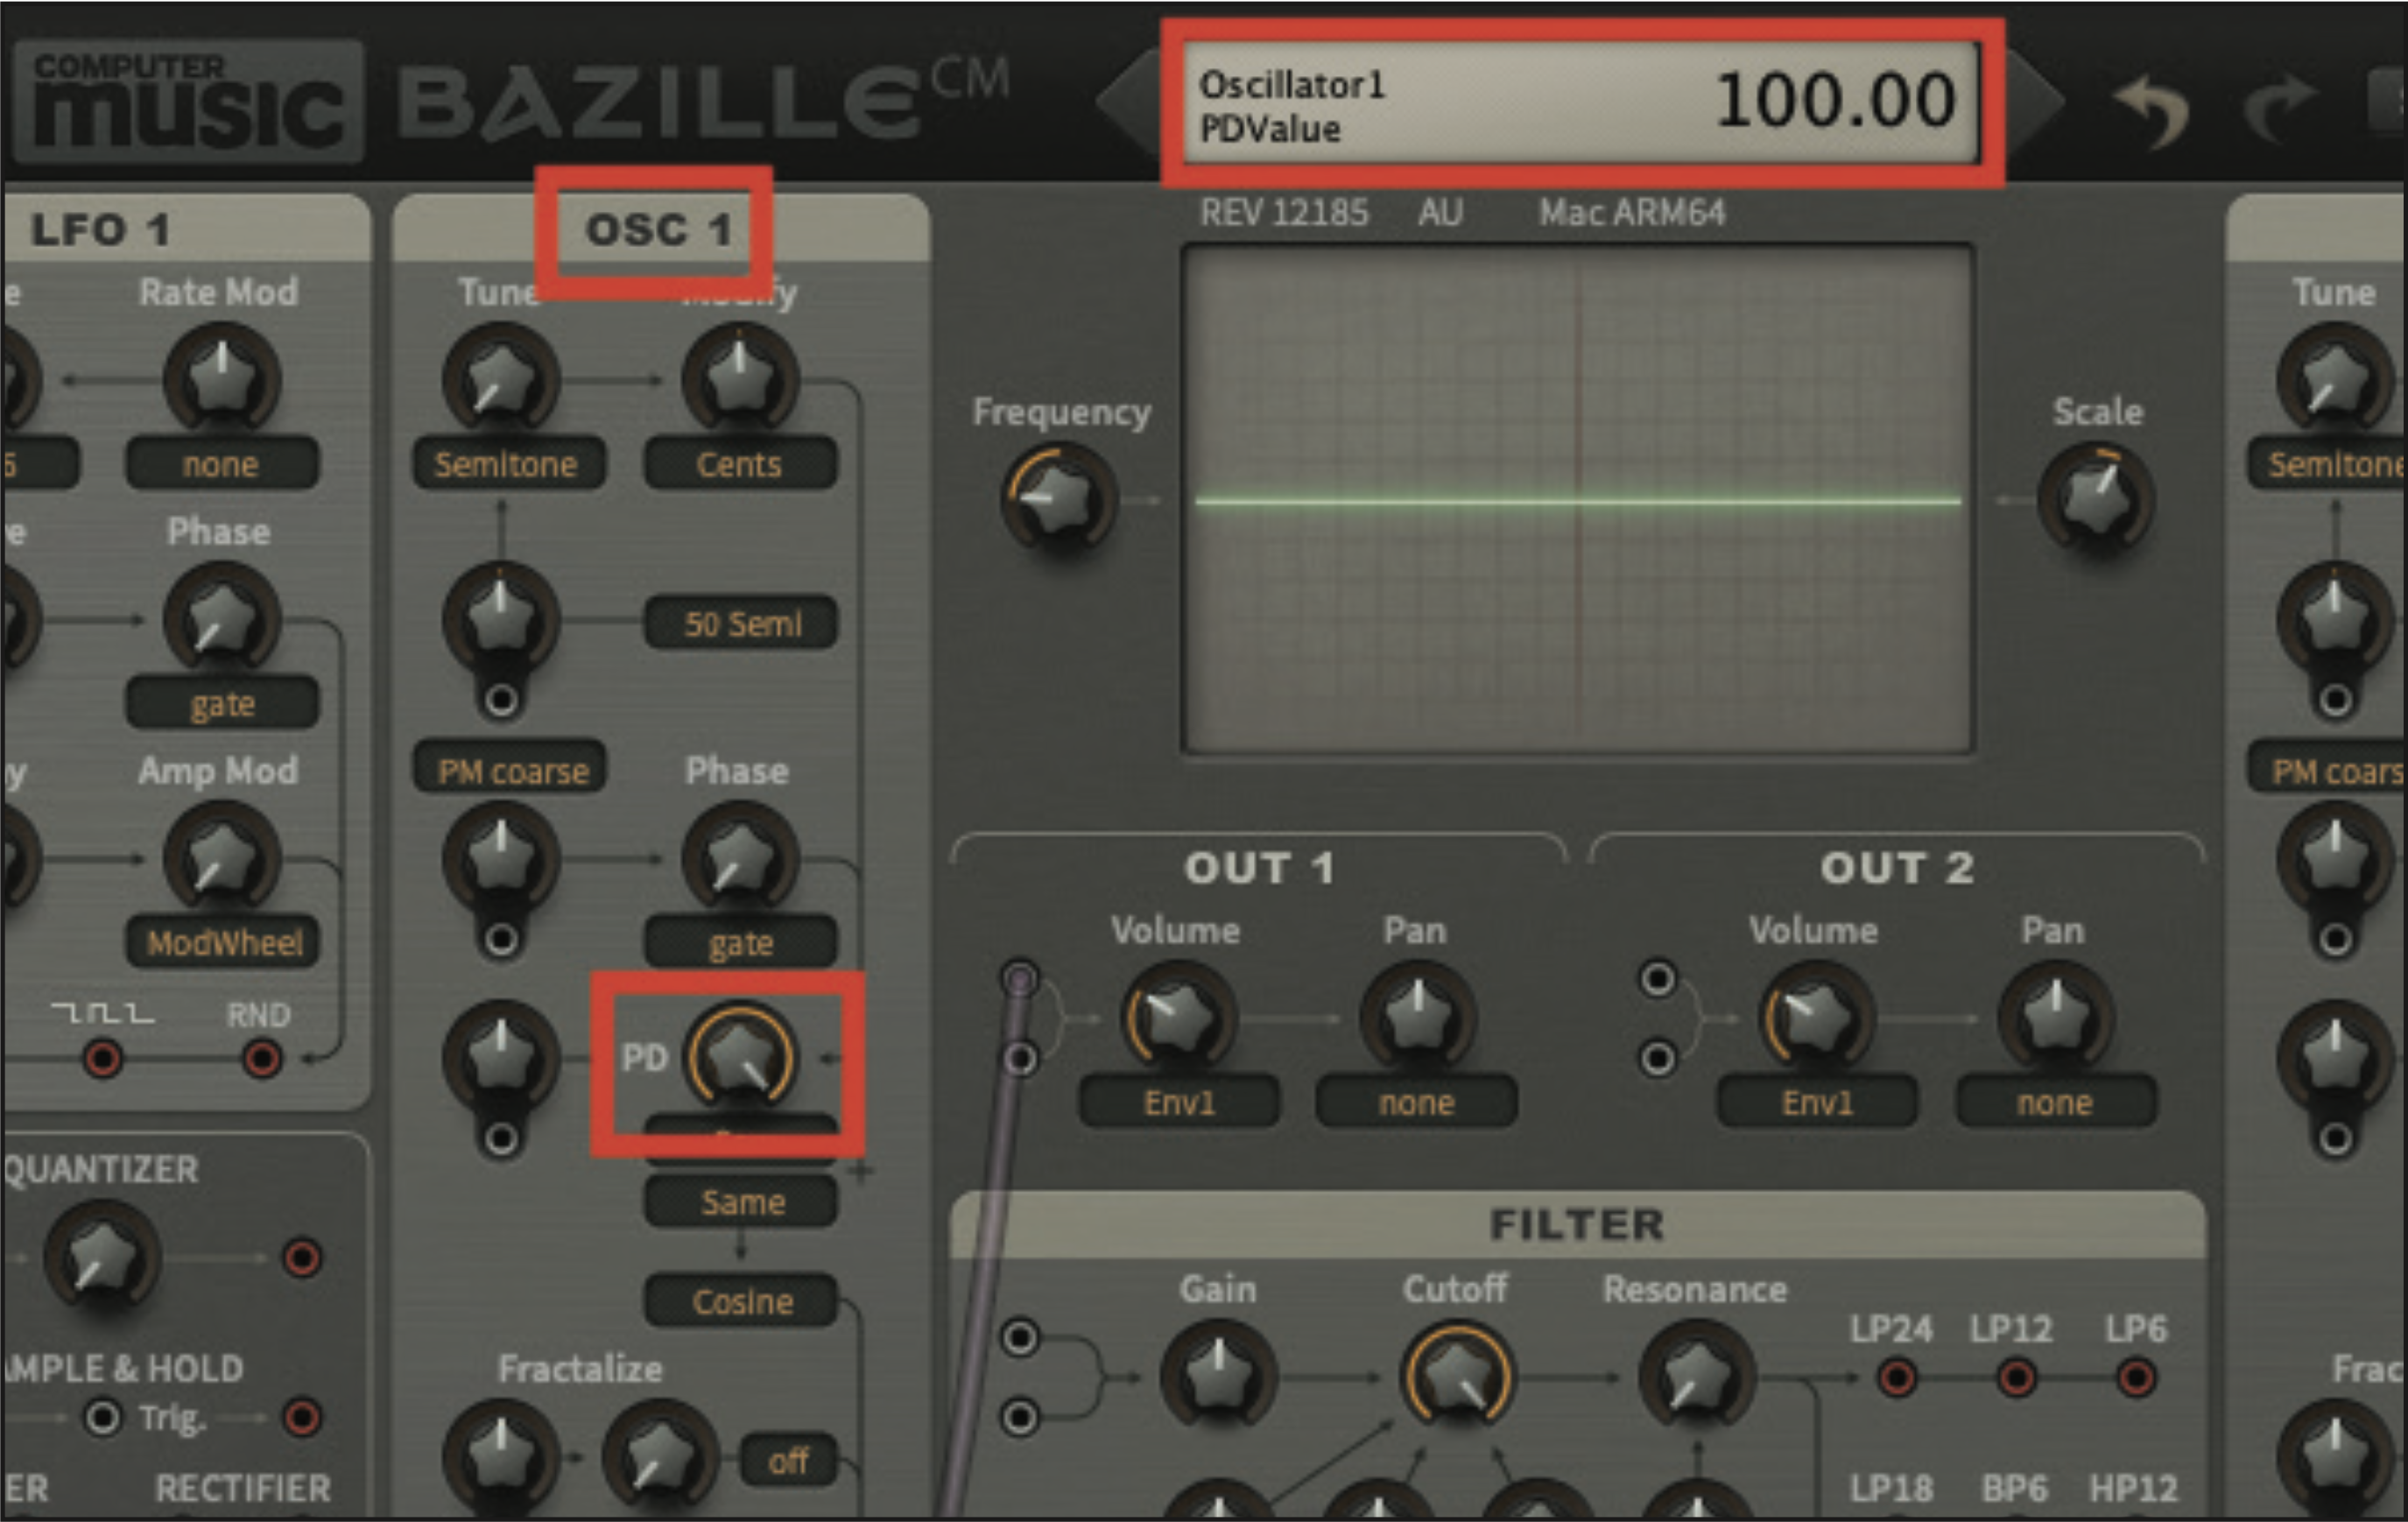
Begin by creating a sound by heading to the Osc 1 section; locate the phase distortion (PD) pot, halfway down the oscillator section. Increase the pot value to its maximum (100). Don’t forget, every time we make an adjustment, we can see an accurate value of adjustment by looking at the display at the top of the plugin window.
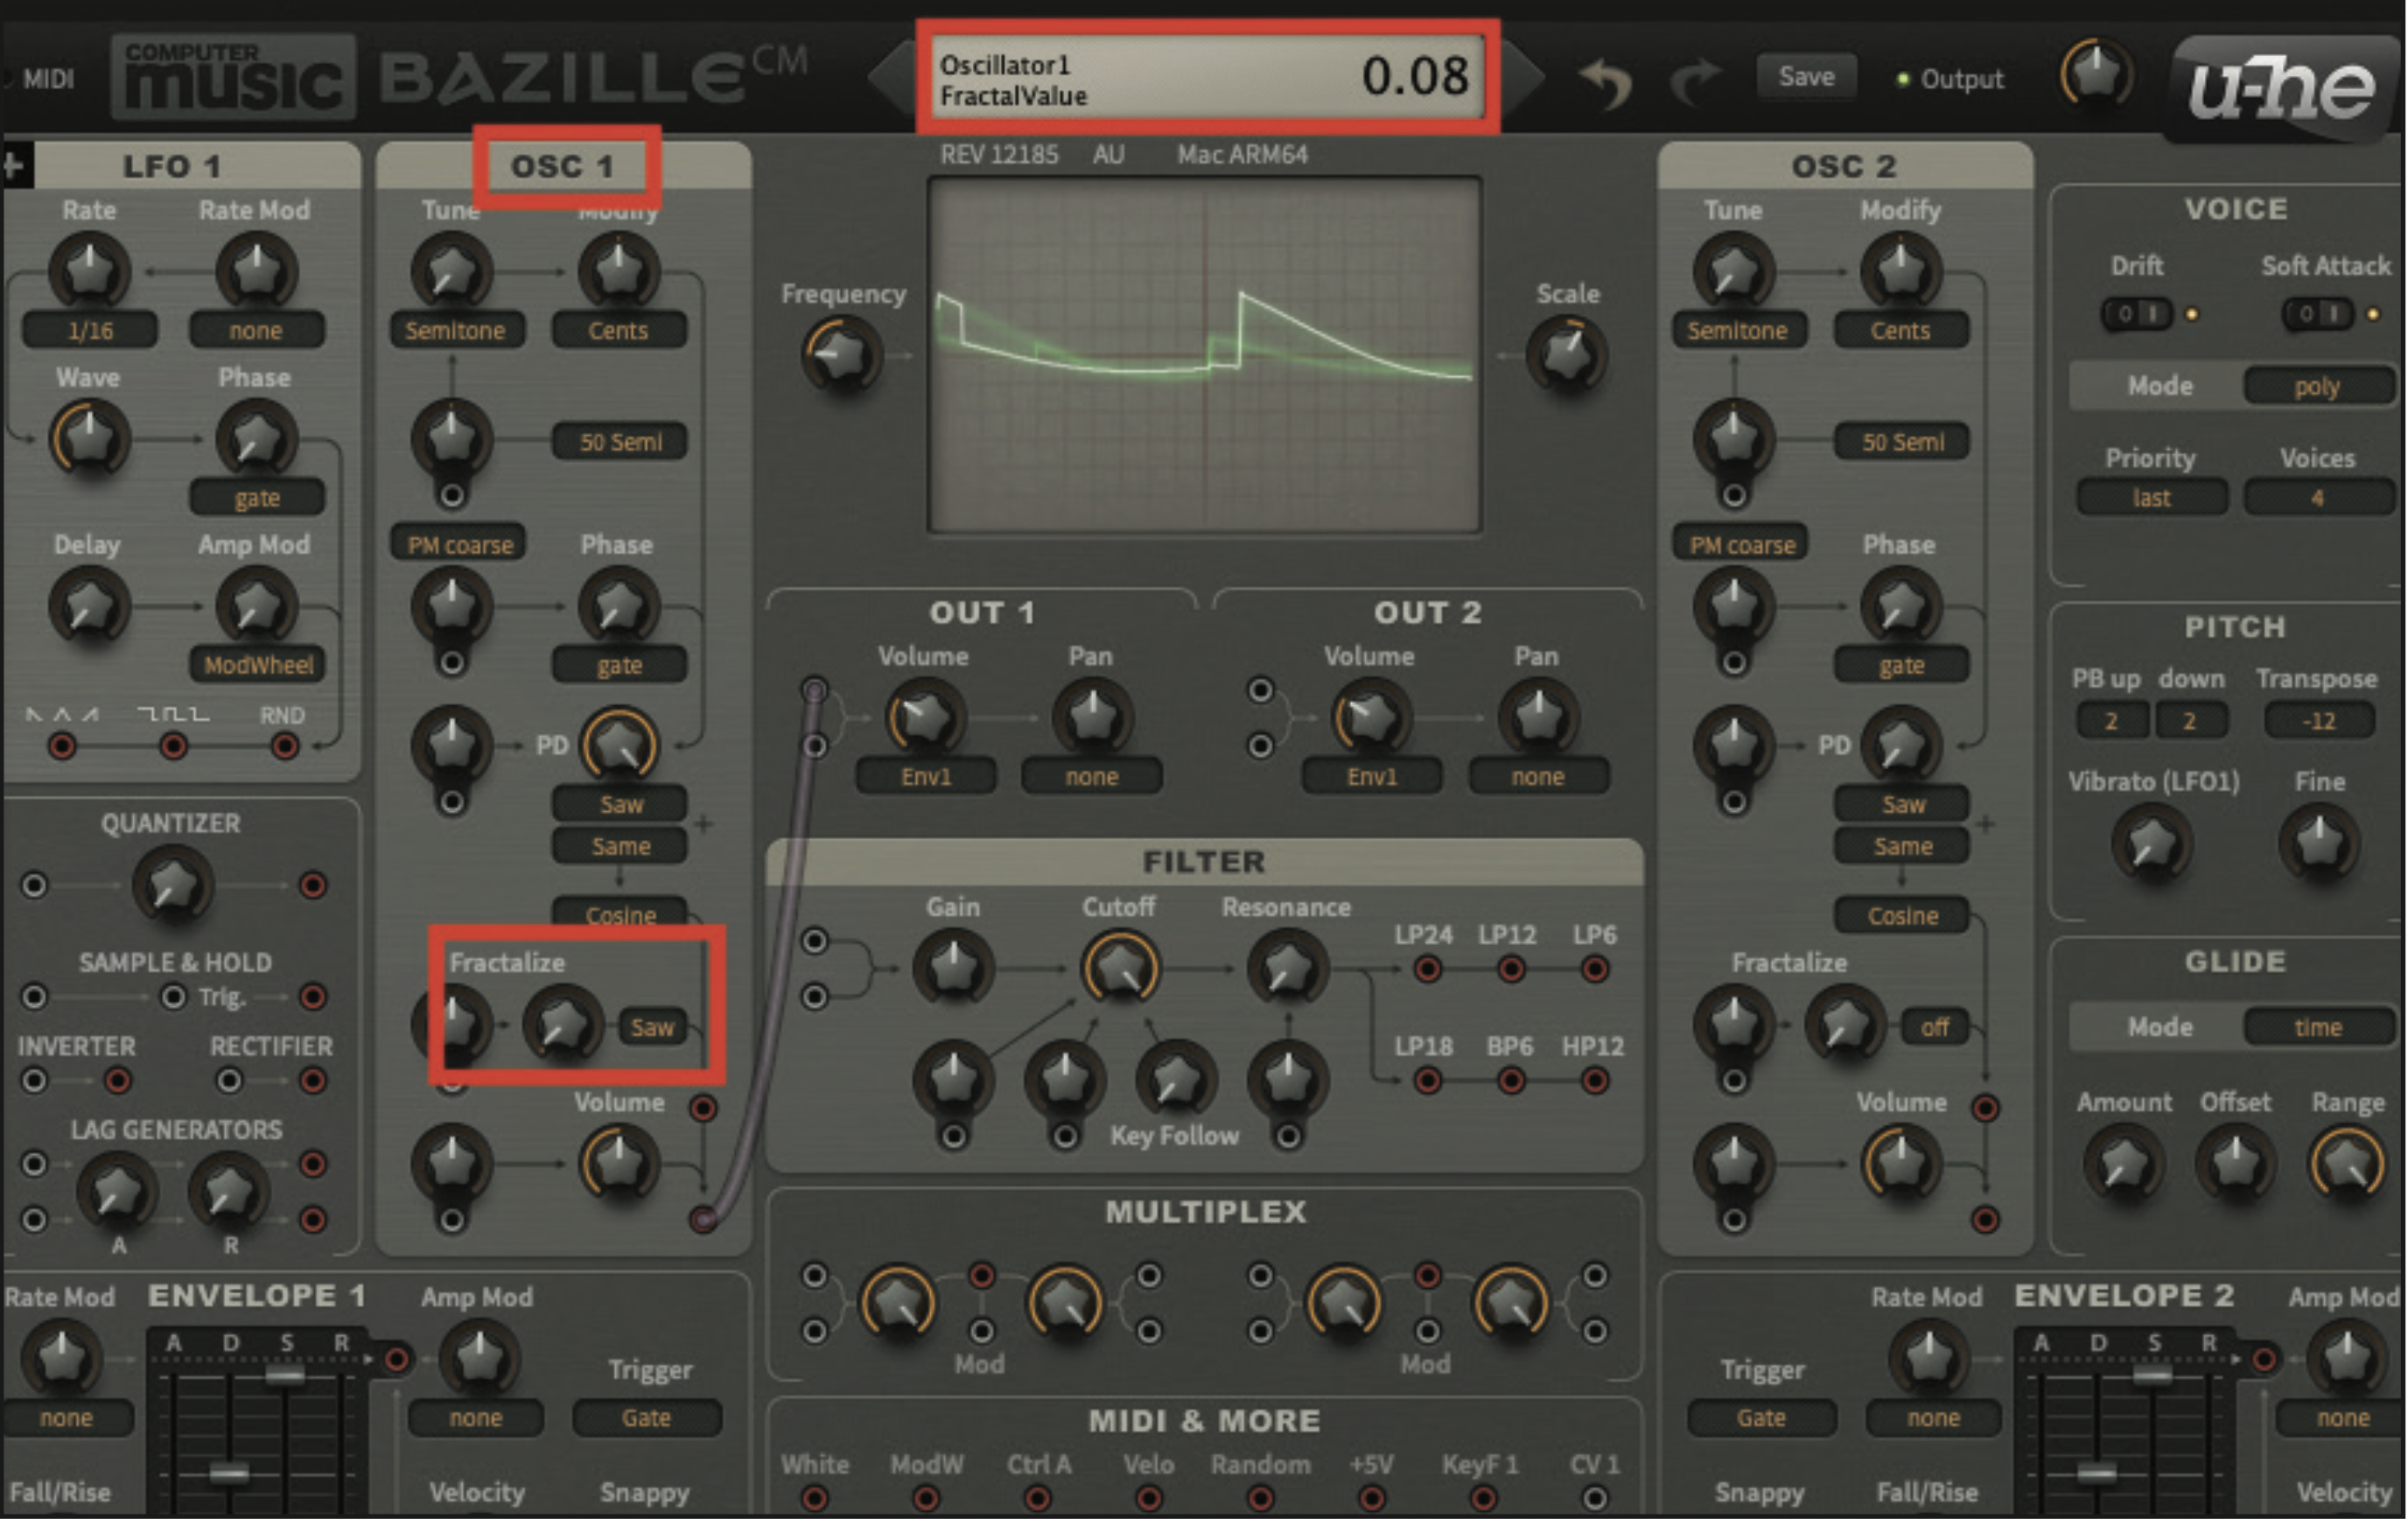
Keeping our focus within the Osc 1 section, let’s move down to the Fractalize controls; select Saw from the dropdown menu, and then adjust the Fractalize pot to a value of 0.08. This small but effective adjustment will act to substantially thicken up the texture of our chosen waveform.
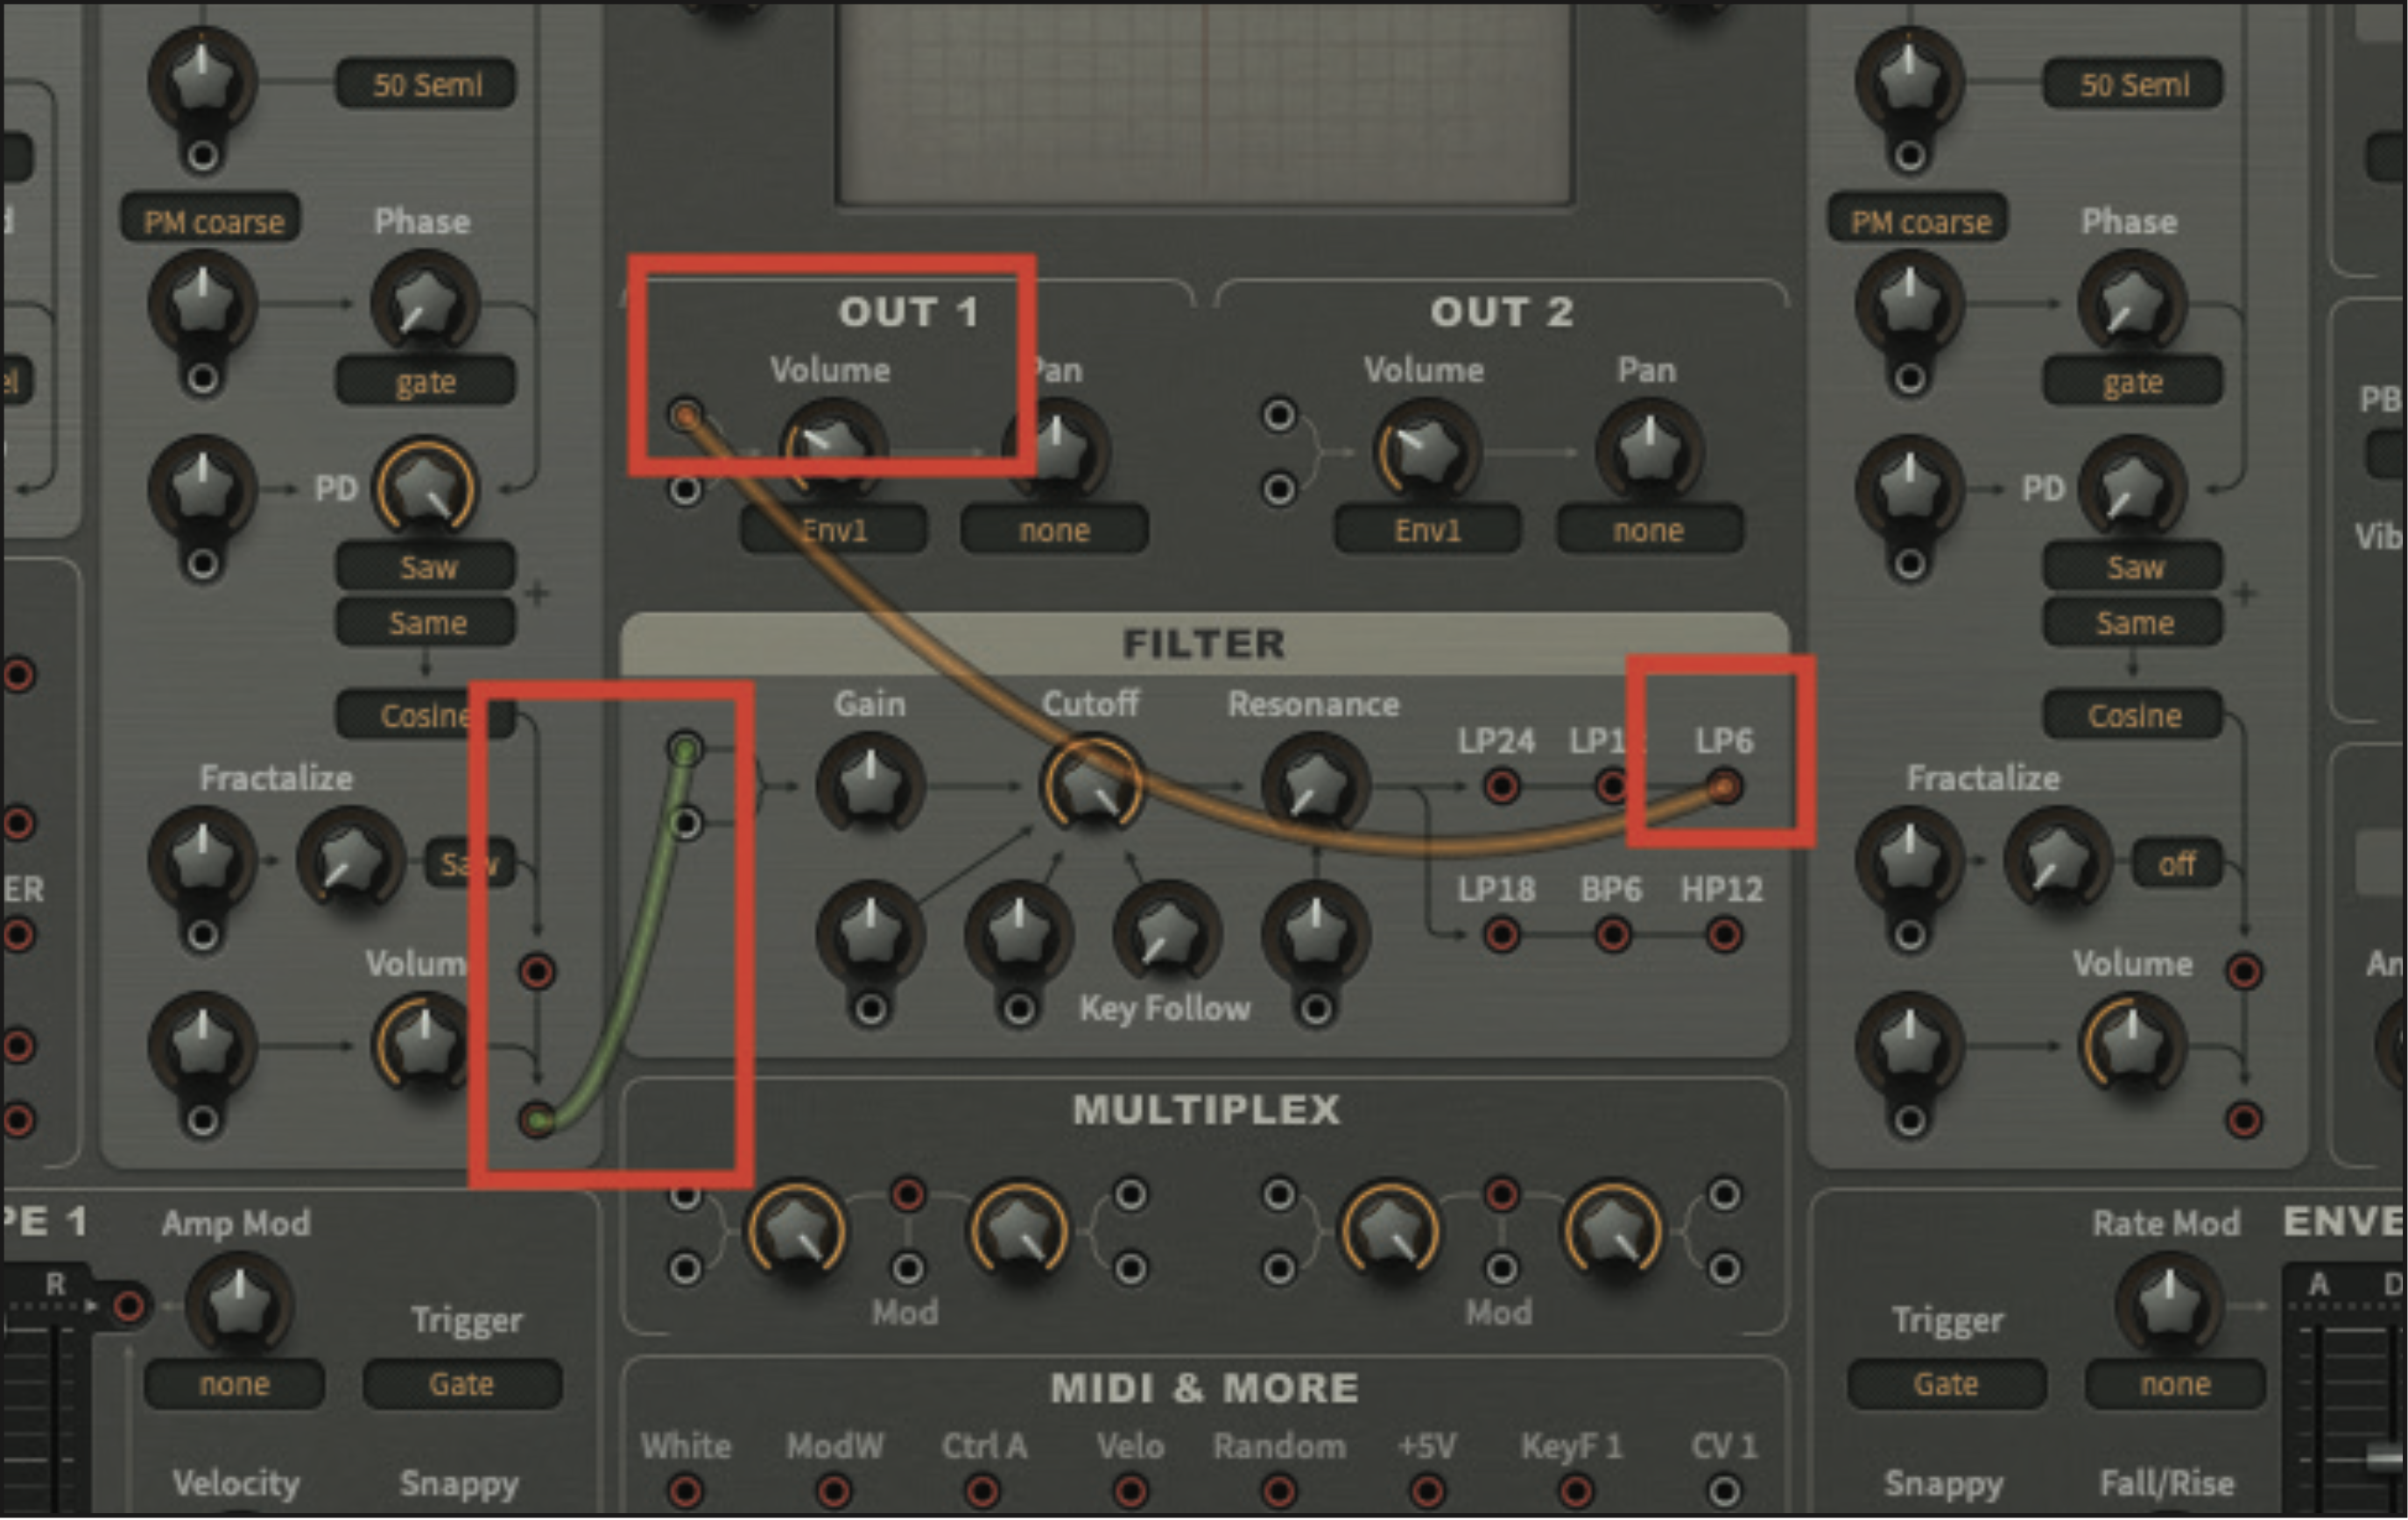
Next, we’ll patch in the filter, but first disconnect the Osc 1 output. Click and hold the patch cable connected to Out 1, before releasing it on the Osc 1 output point, to disable the connection. Then create a new cable from Osc 1’s output, inserting it into the filter input point. Connect the LP6 output point, and patch it back into Out 1.
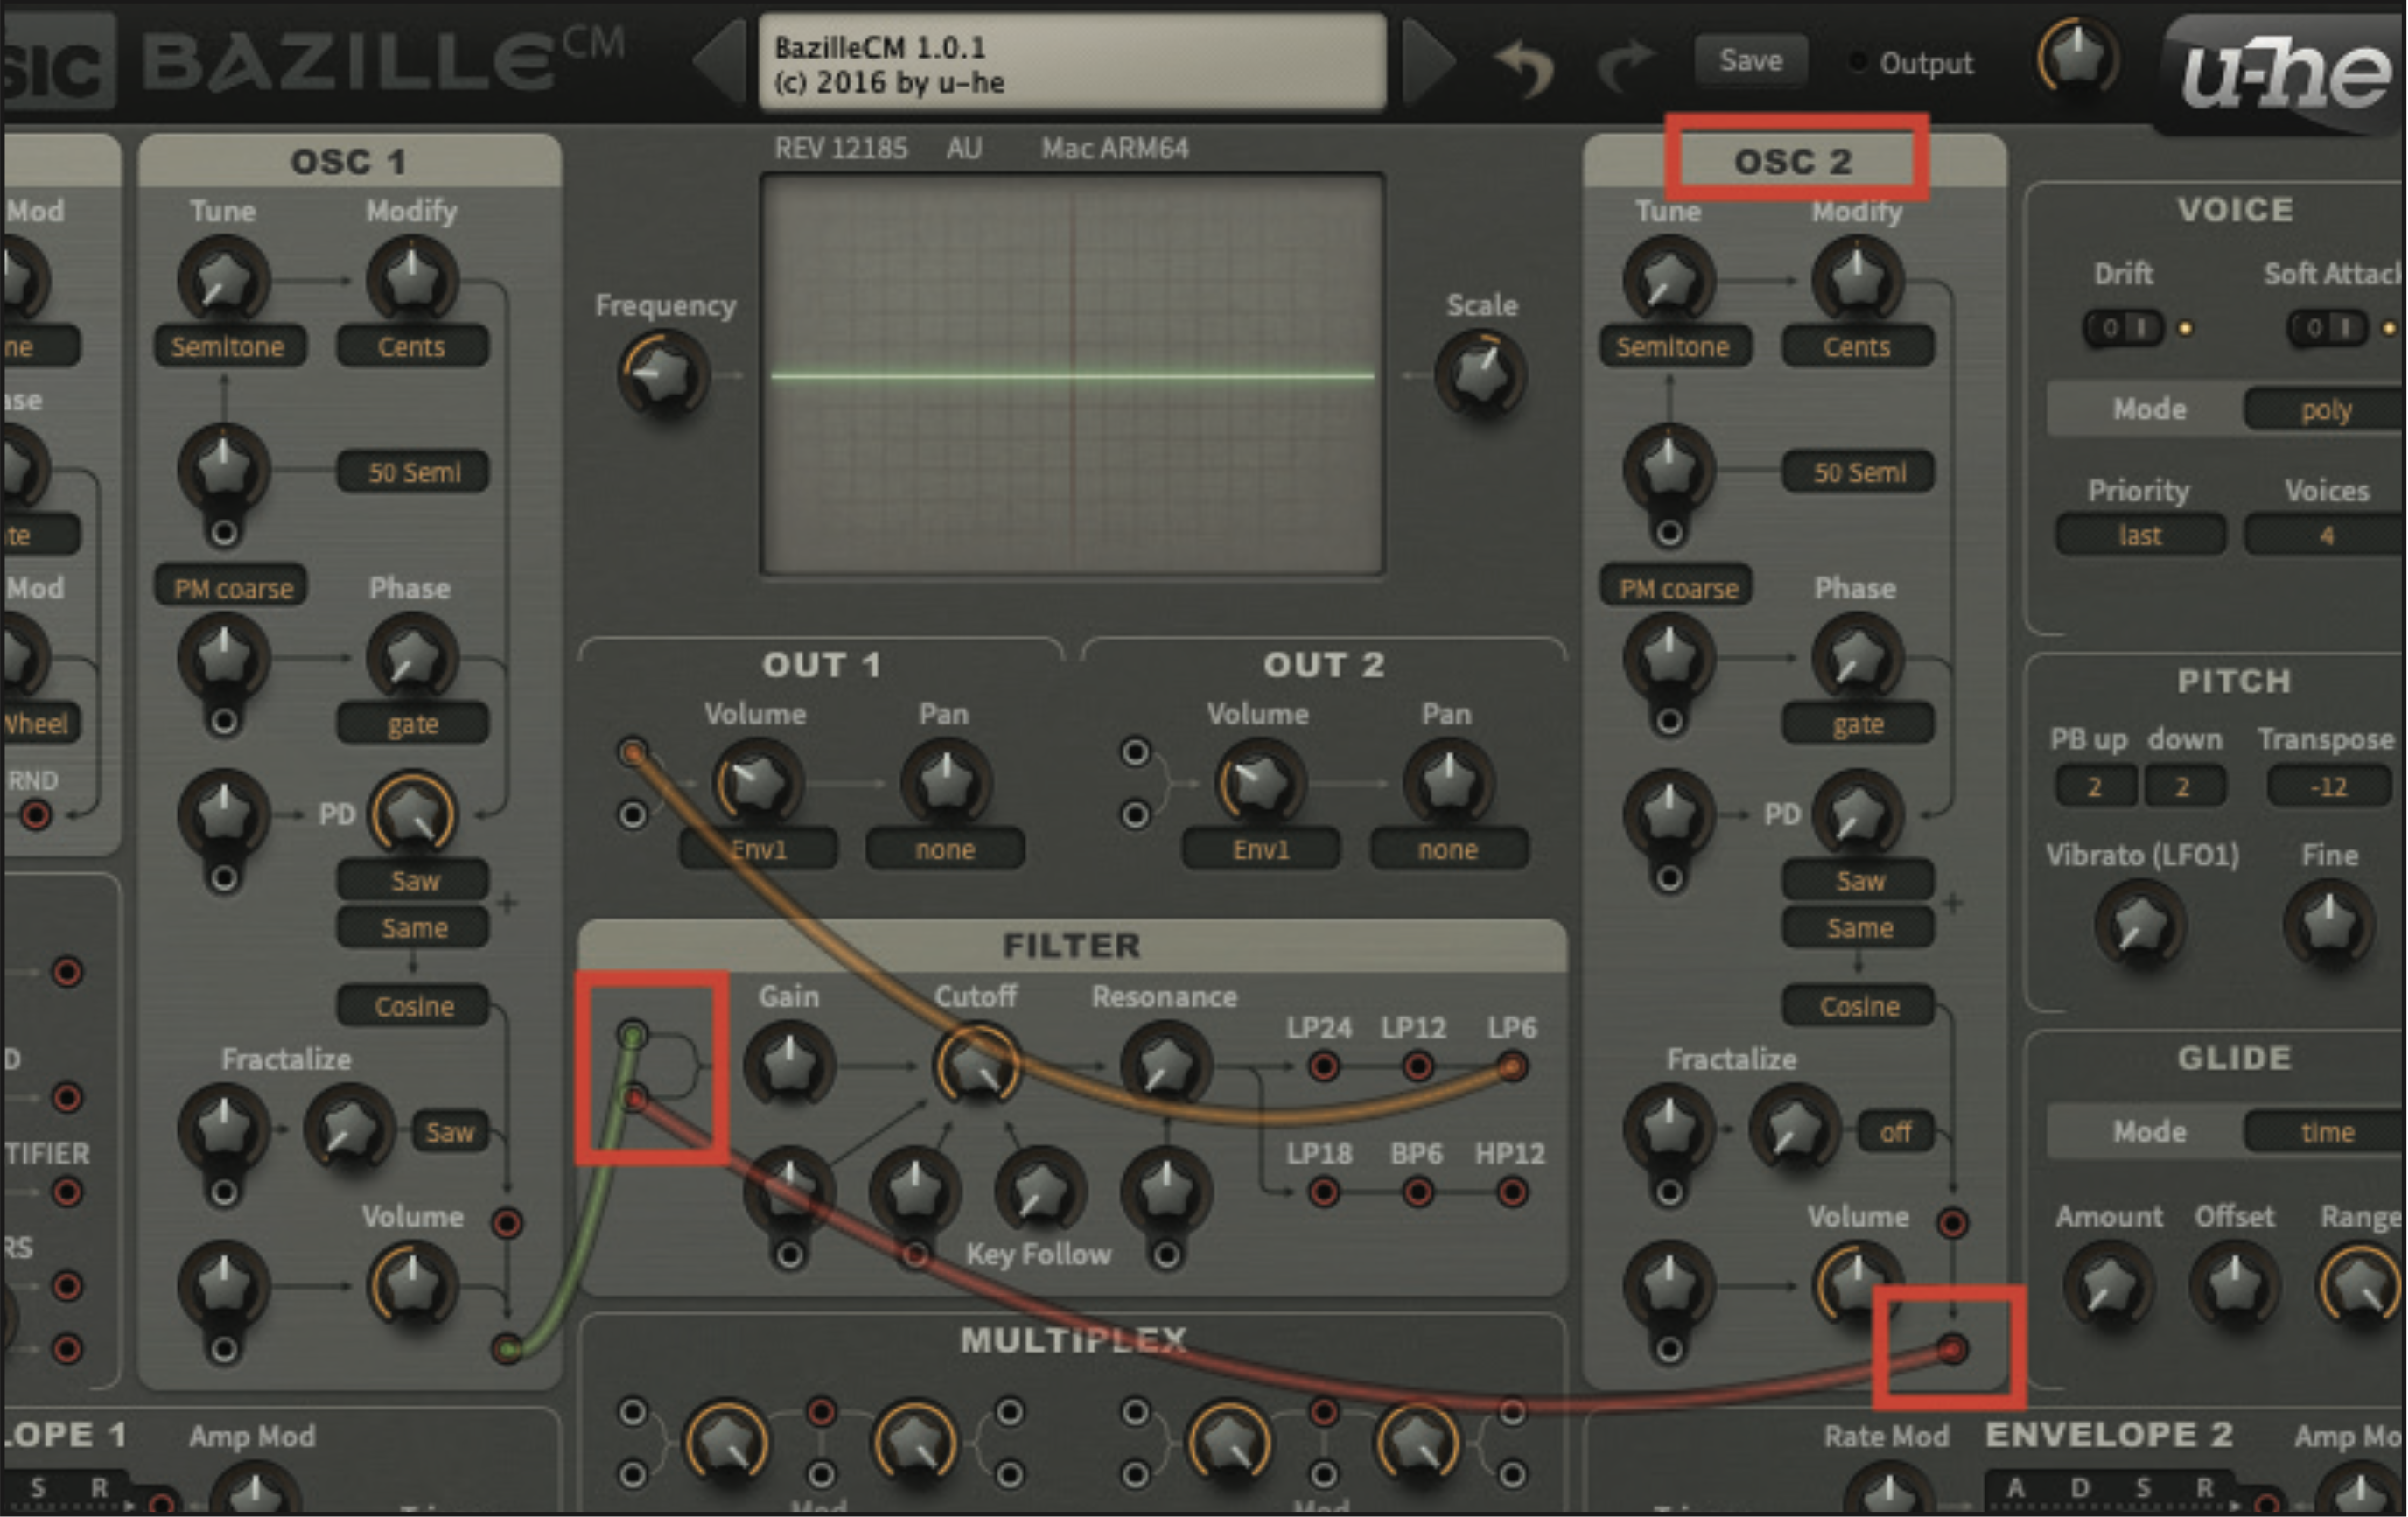
We’ll introduce Osc 2 into the patch, but we’ll also need to patch it to the filter. Create a patch cable from the Osc 2 output, and connect it to the second filter input. The inputs on the filter are not labelled, and effectively sum the signal, so you can use either the upper or lower input, as required.
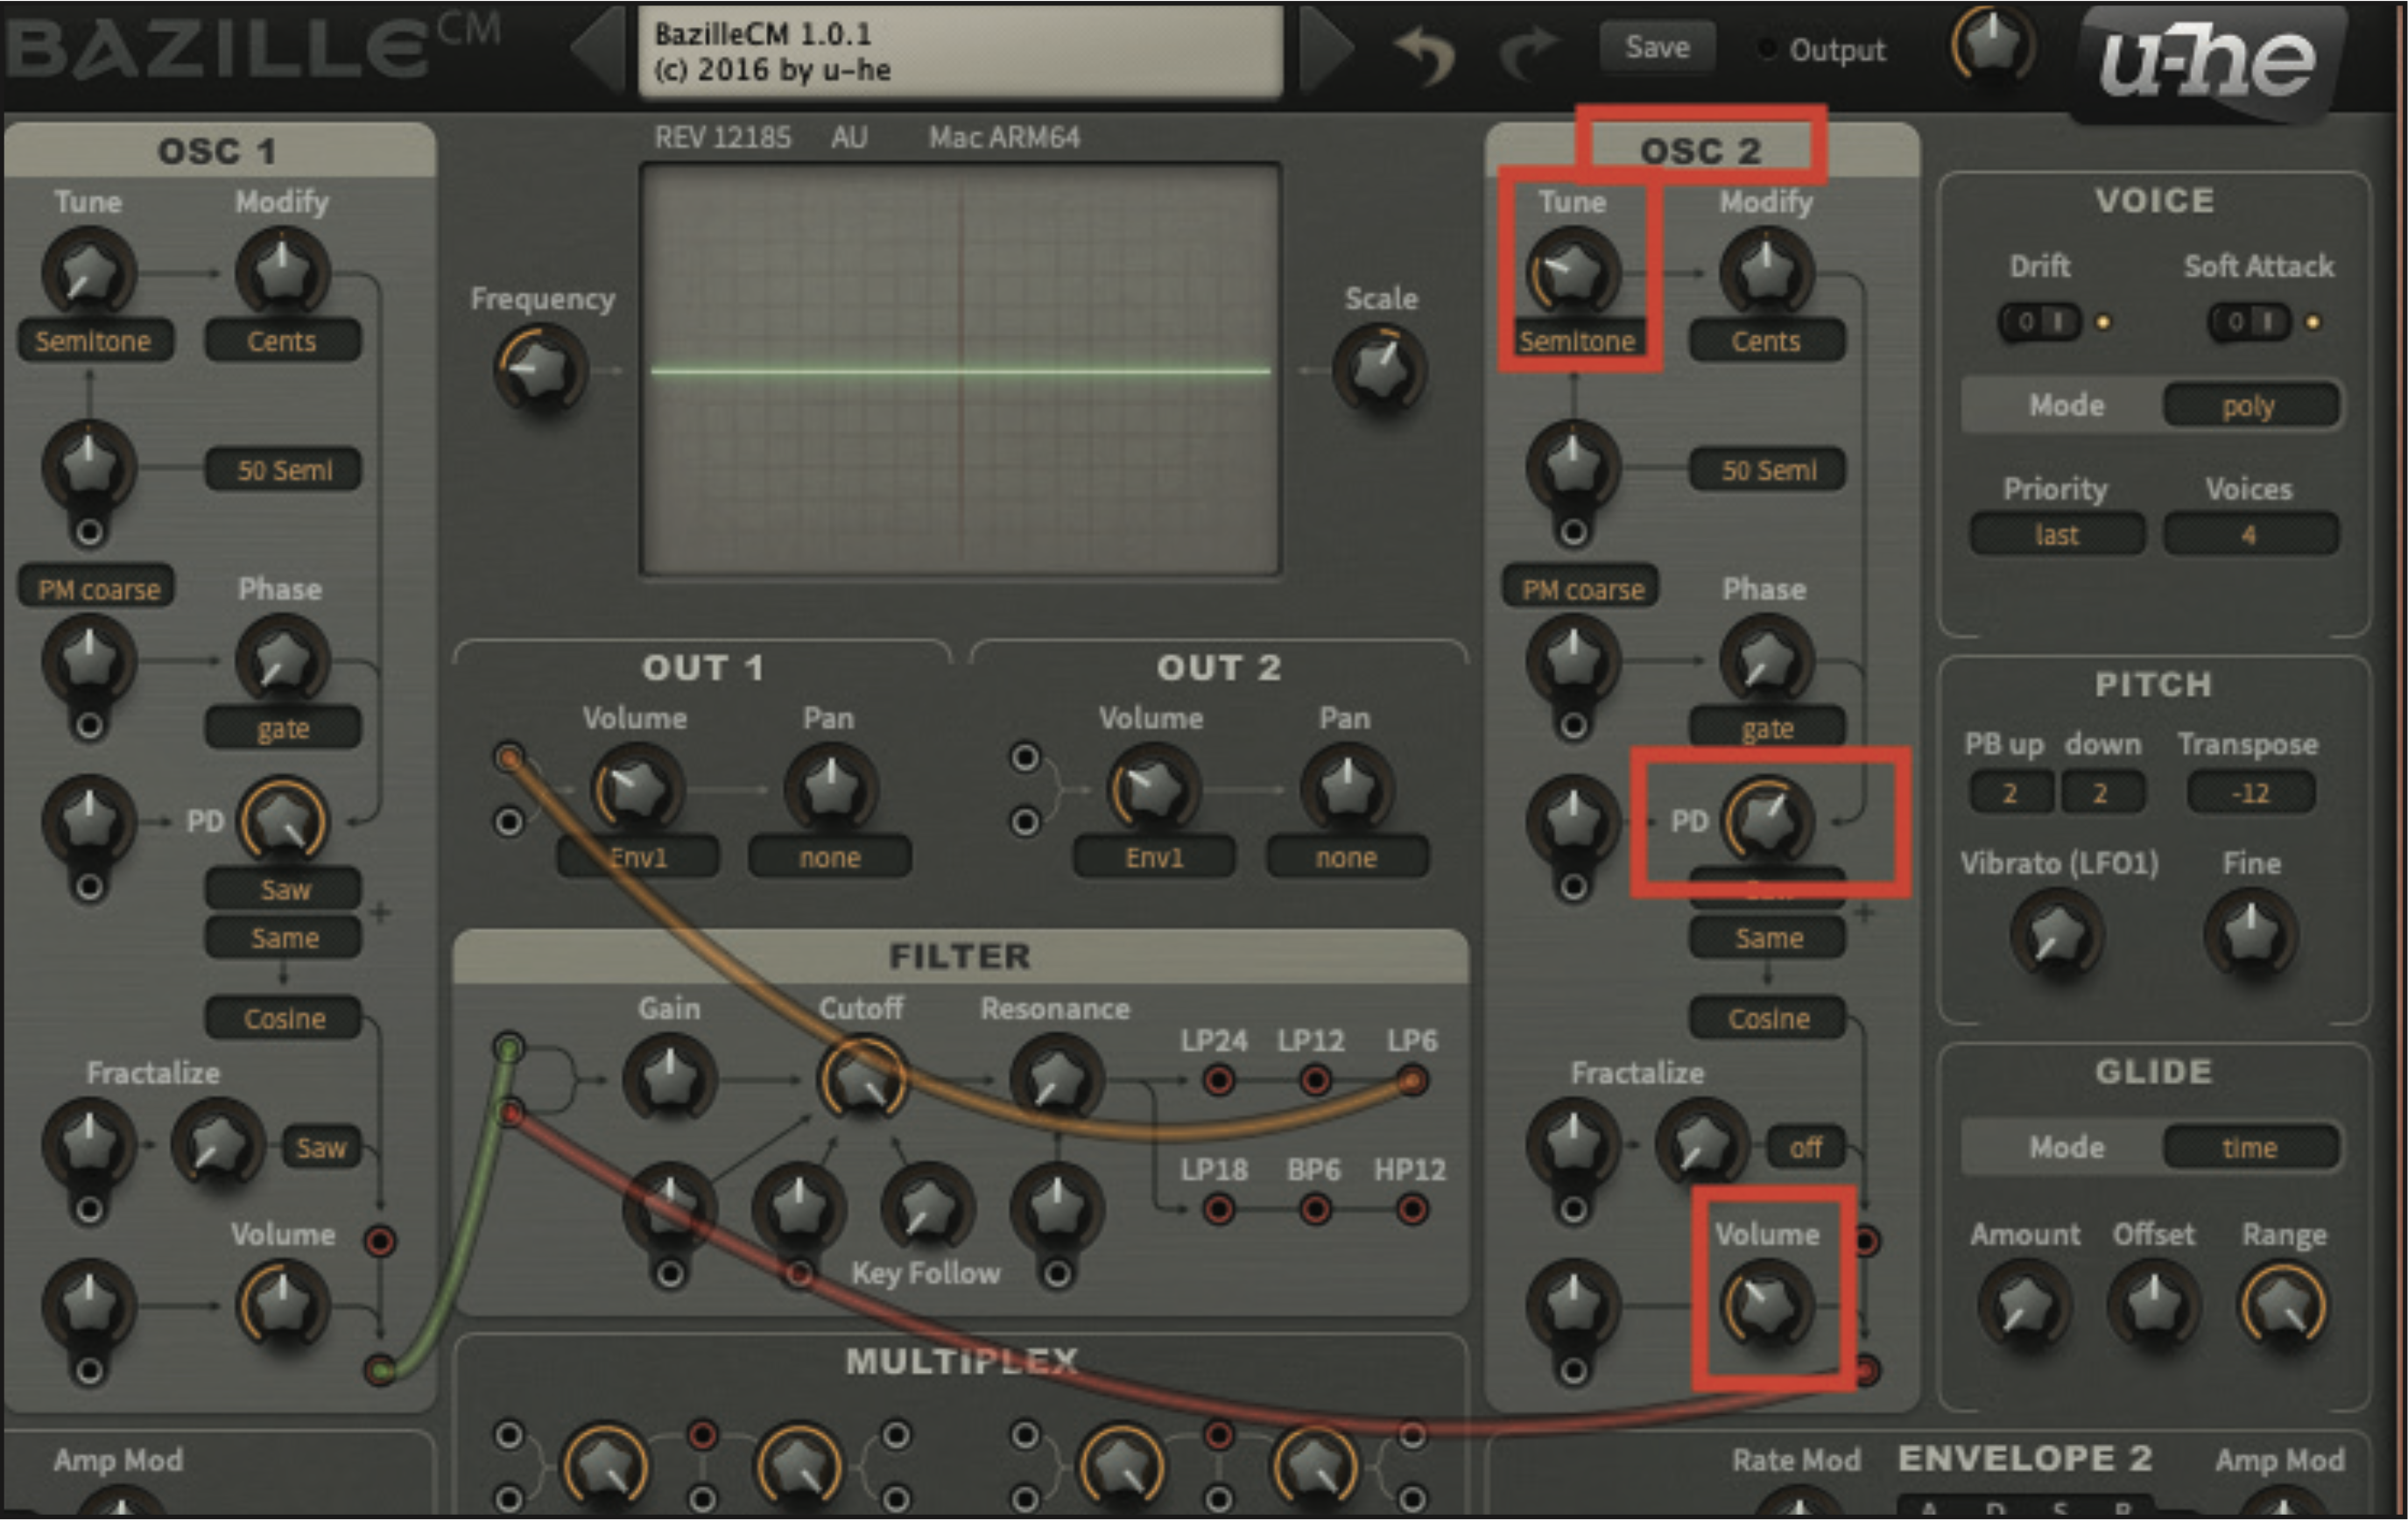
Switching to the Osc 2 section, increase the Tune pot to a value of 7. Then move down the oscillator section and locate the PD pot, which we need to set to a value of 61. Finally decrease the output volume of Osc 2, setting it to 35. We’ve tuned Osc 2 to a 5th above Osc 1, as well as thickening its texture and decreasing its volume slightly.
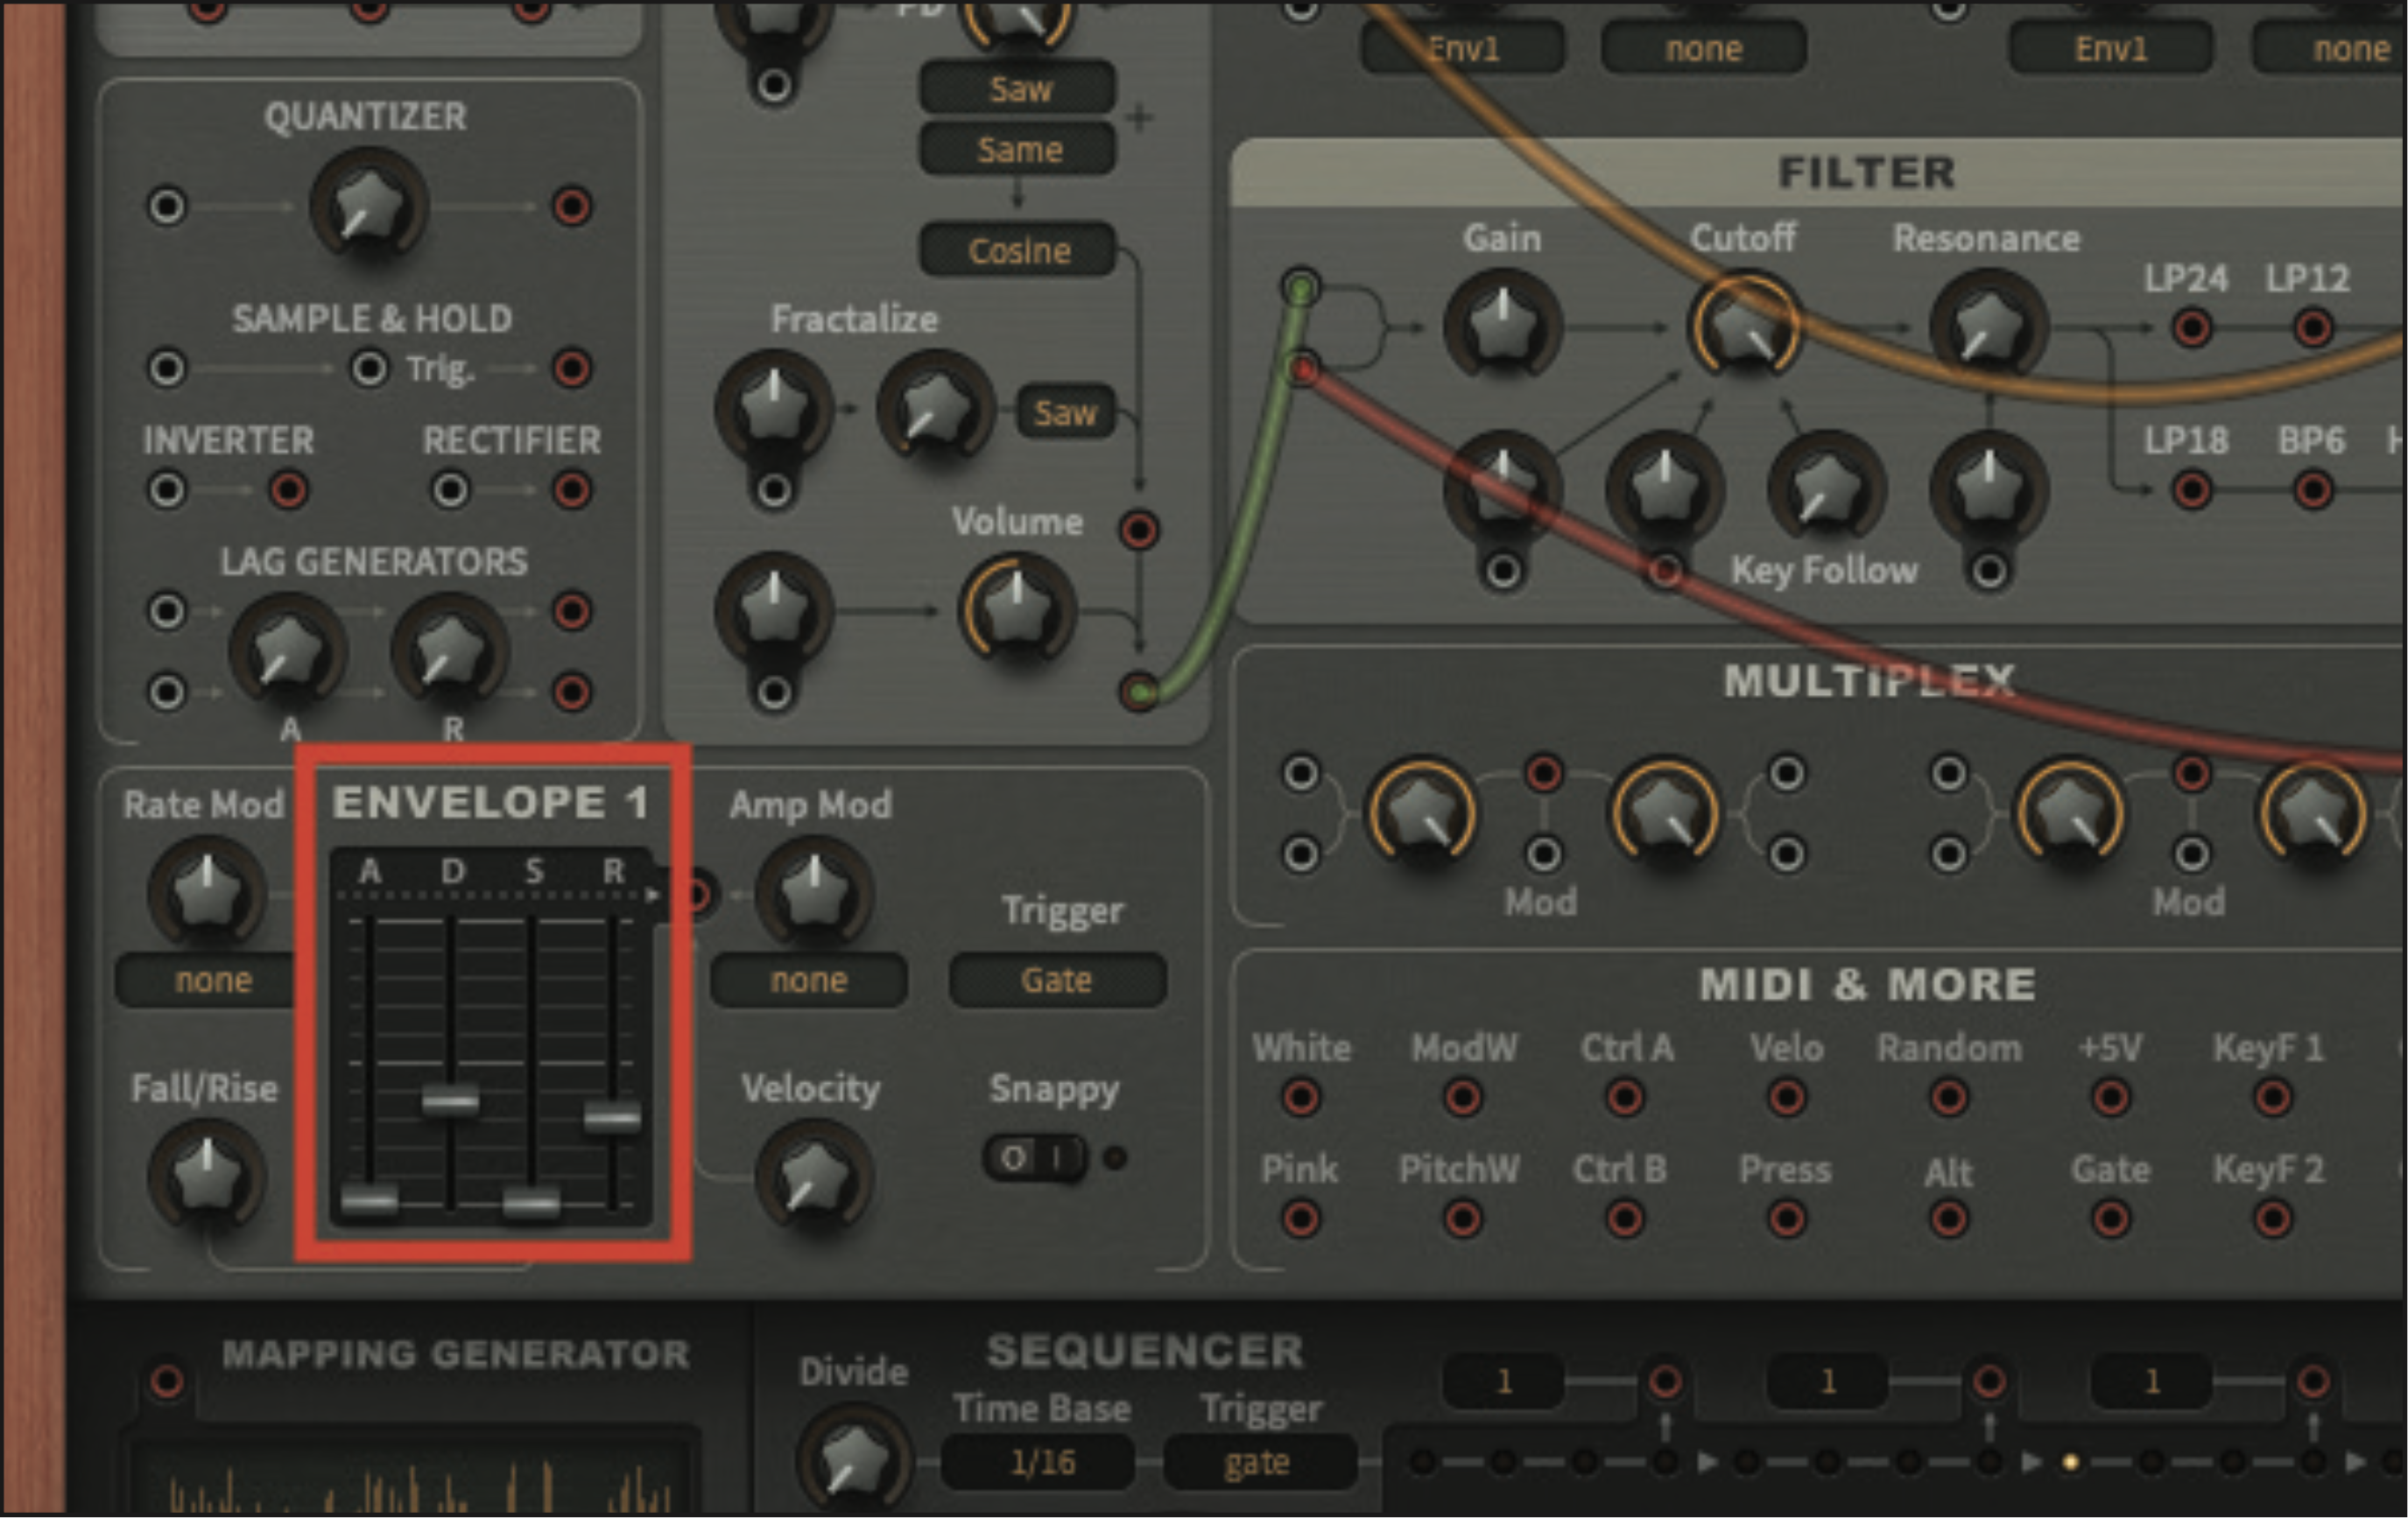
By default, Envelope 1 is controlling the amplitude or volume of our sound. This does not require a patch cable, as it’s already modulating Out 1. We do however need to change the settings of the envelope; set the Attack fader to 0, Decay to 36, Sustain to 0, and the Release to 30.
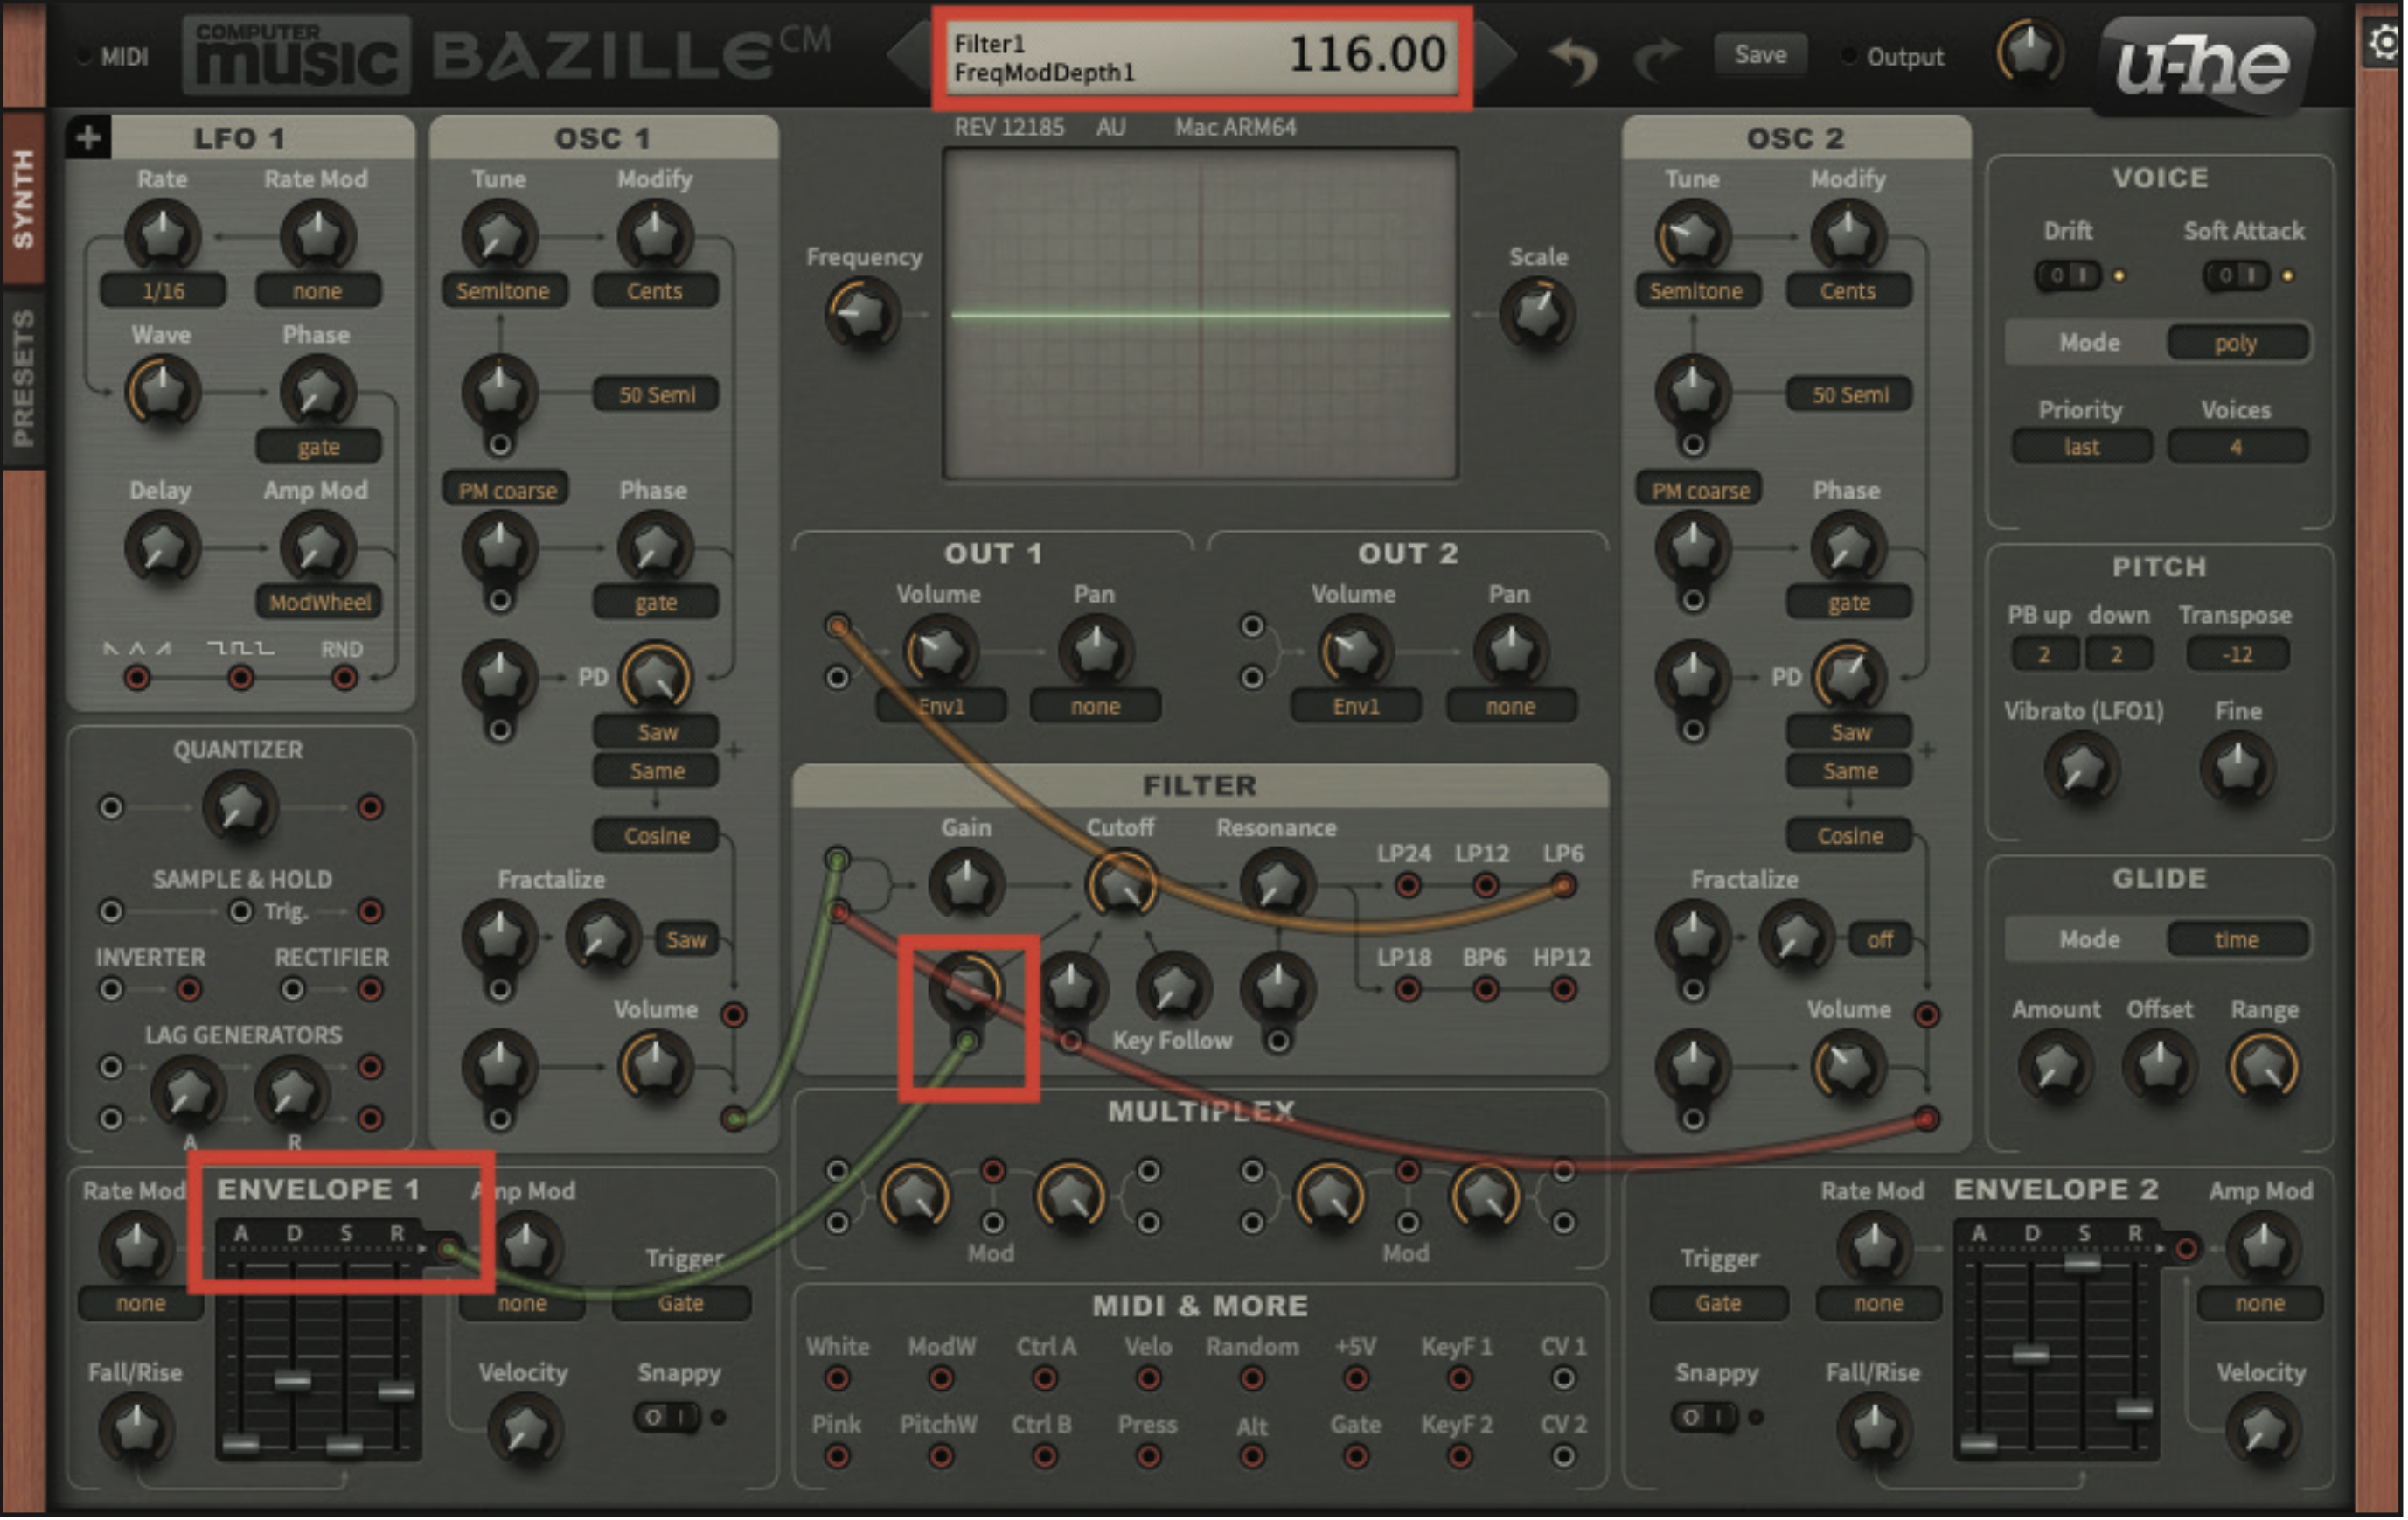
We can also use the output of Env 1, for the purposes of modulation. Create an output cable, which extends from Env 1 to the Filter cutoff modulation pot. These pots are not labelled, but can be found in the lower left-hand area of the filter section. Once connected, change the value of the pot to 116.
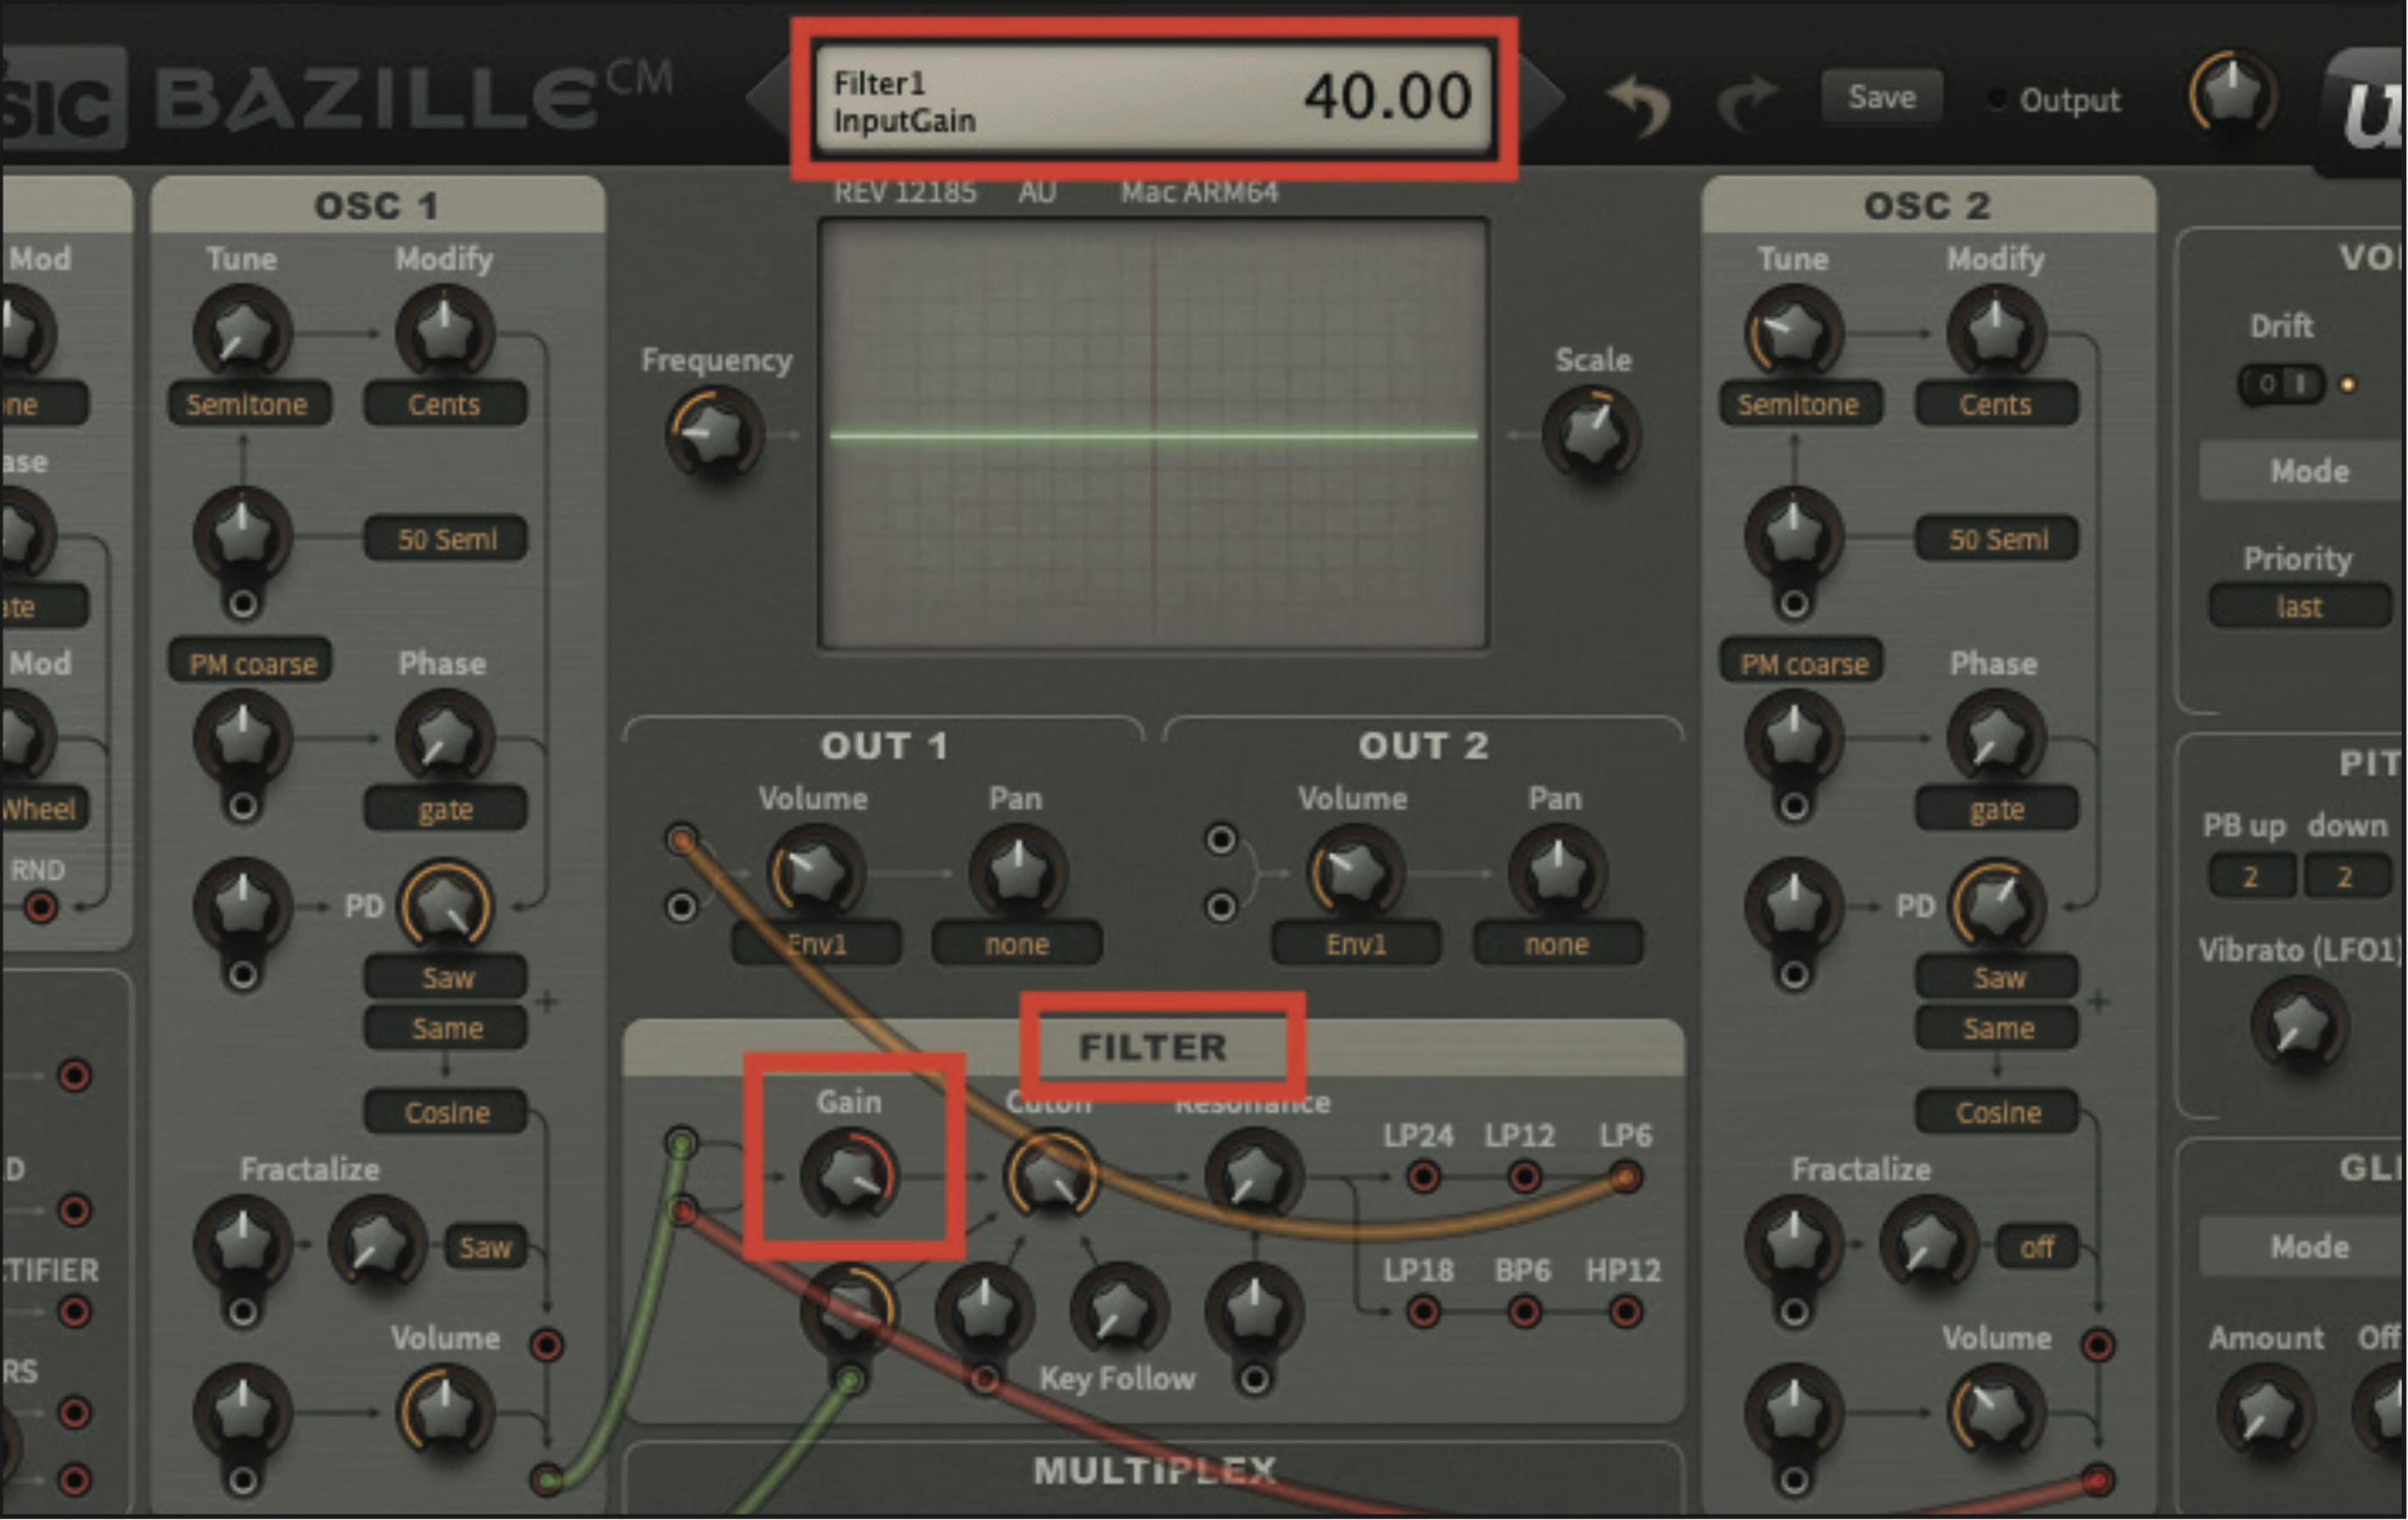
The filter section will need to have some adjustments made, to counteract the modulation elements. We will begin by increasing the Gain pot to a value of 40. This has the effect of increasing the signal going into the filter circuit, albeit virtually. You should hear a radical increase in volume.
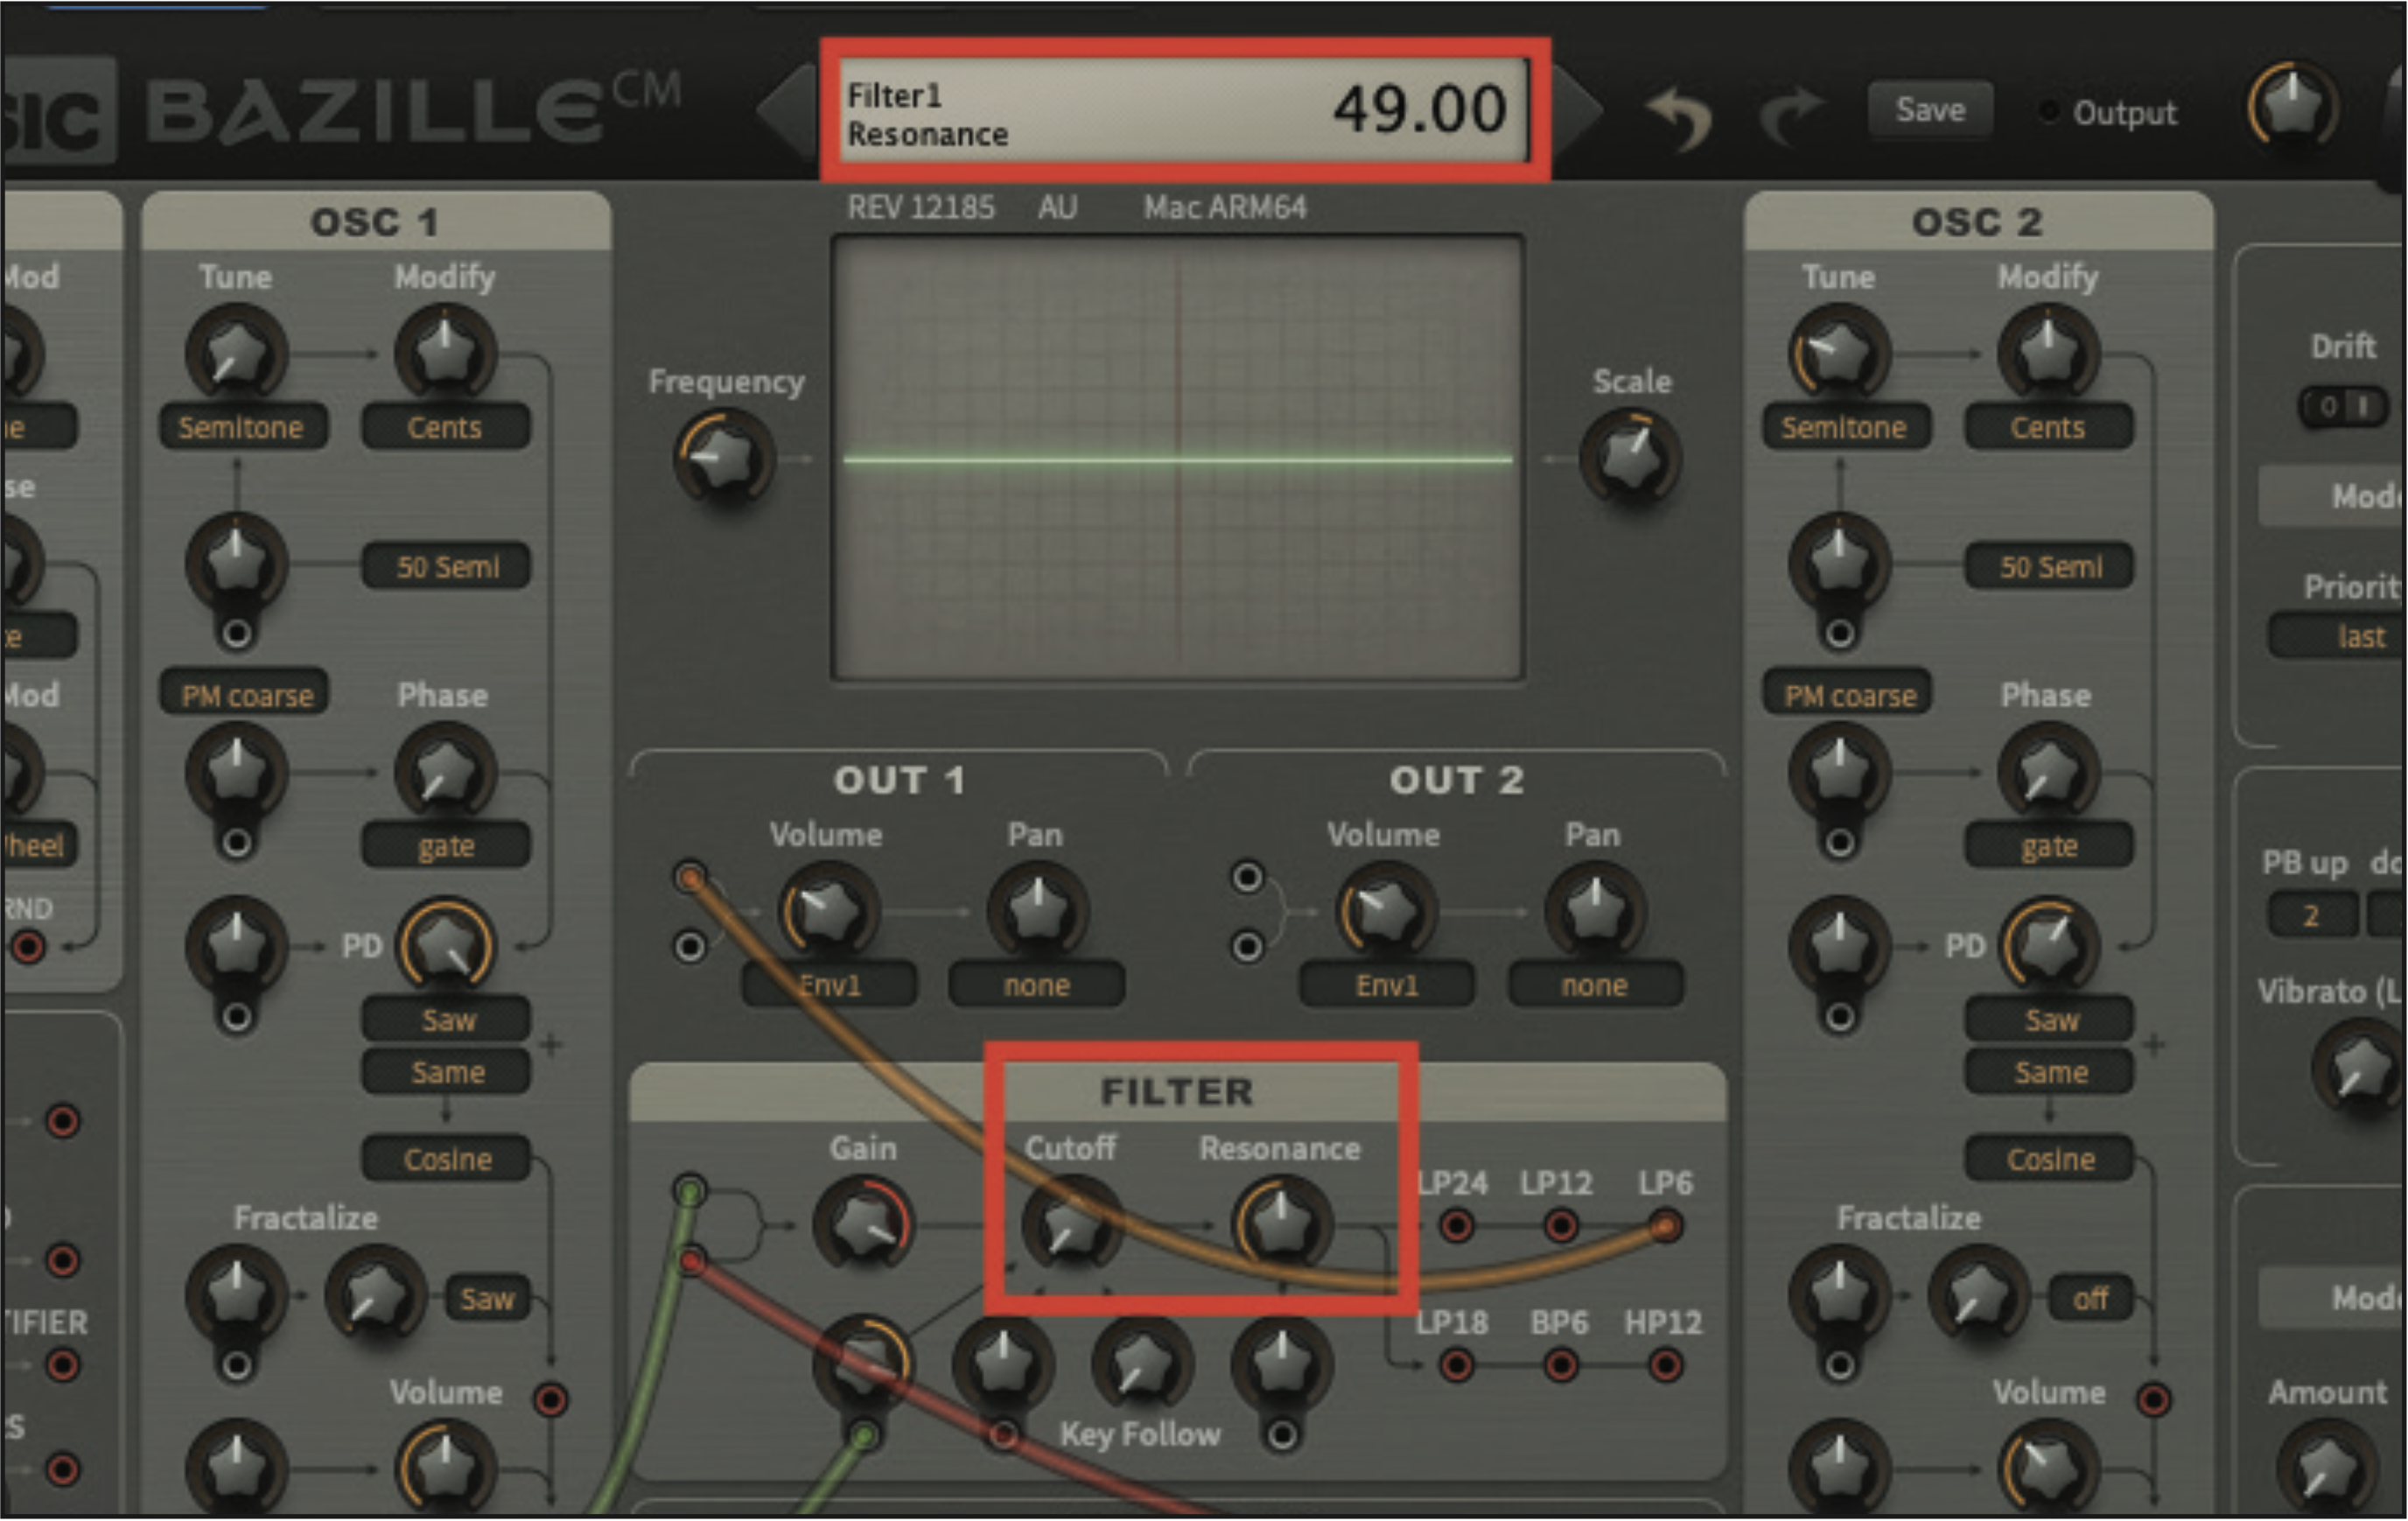
Keeping within the filter section, set the Cutoff pot to a value of 0, before setting the Resonance pot to a value of 49. Despite the huge decrease in the cutoff value, the modulation will now come into effect in a huge way, giving us the true kick bass sound.
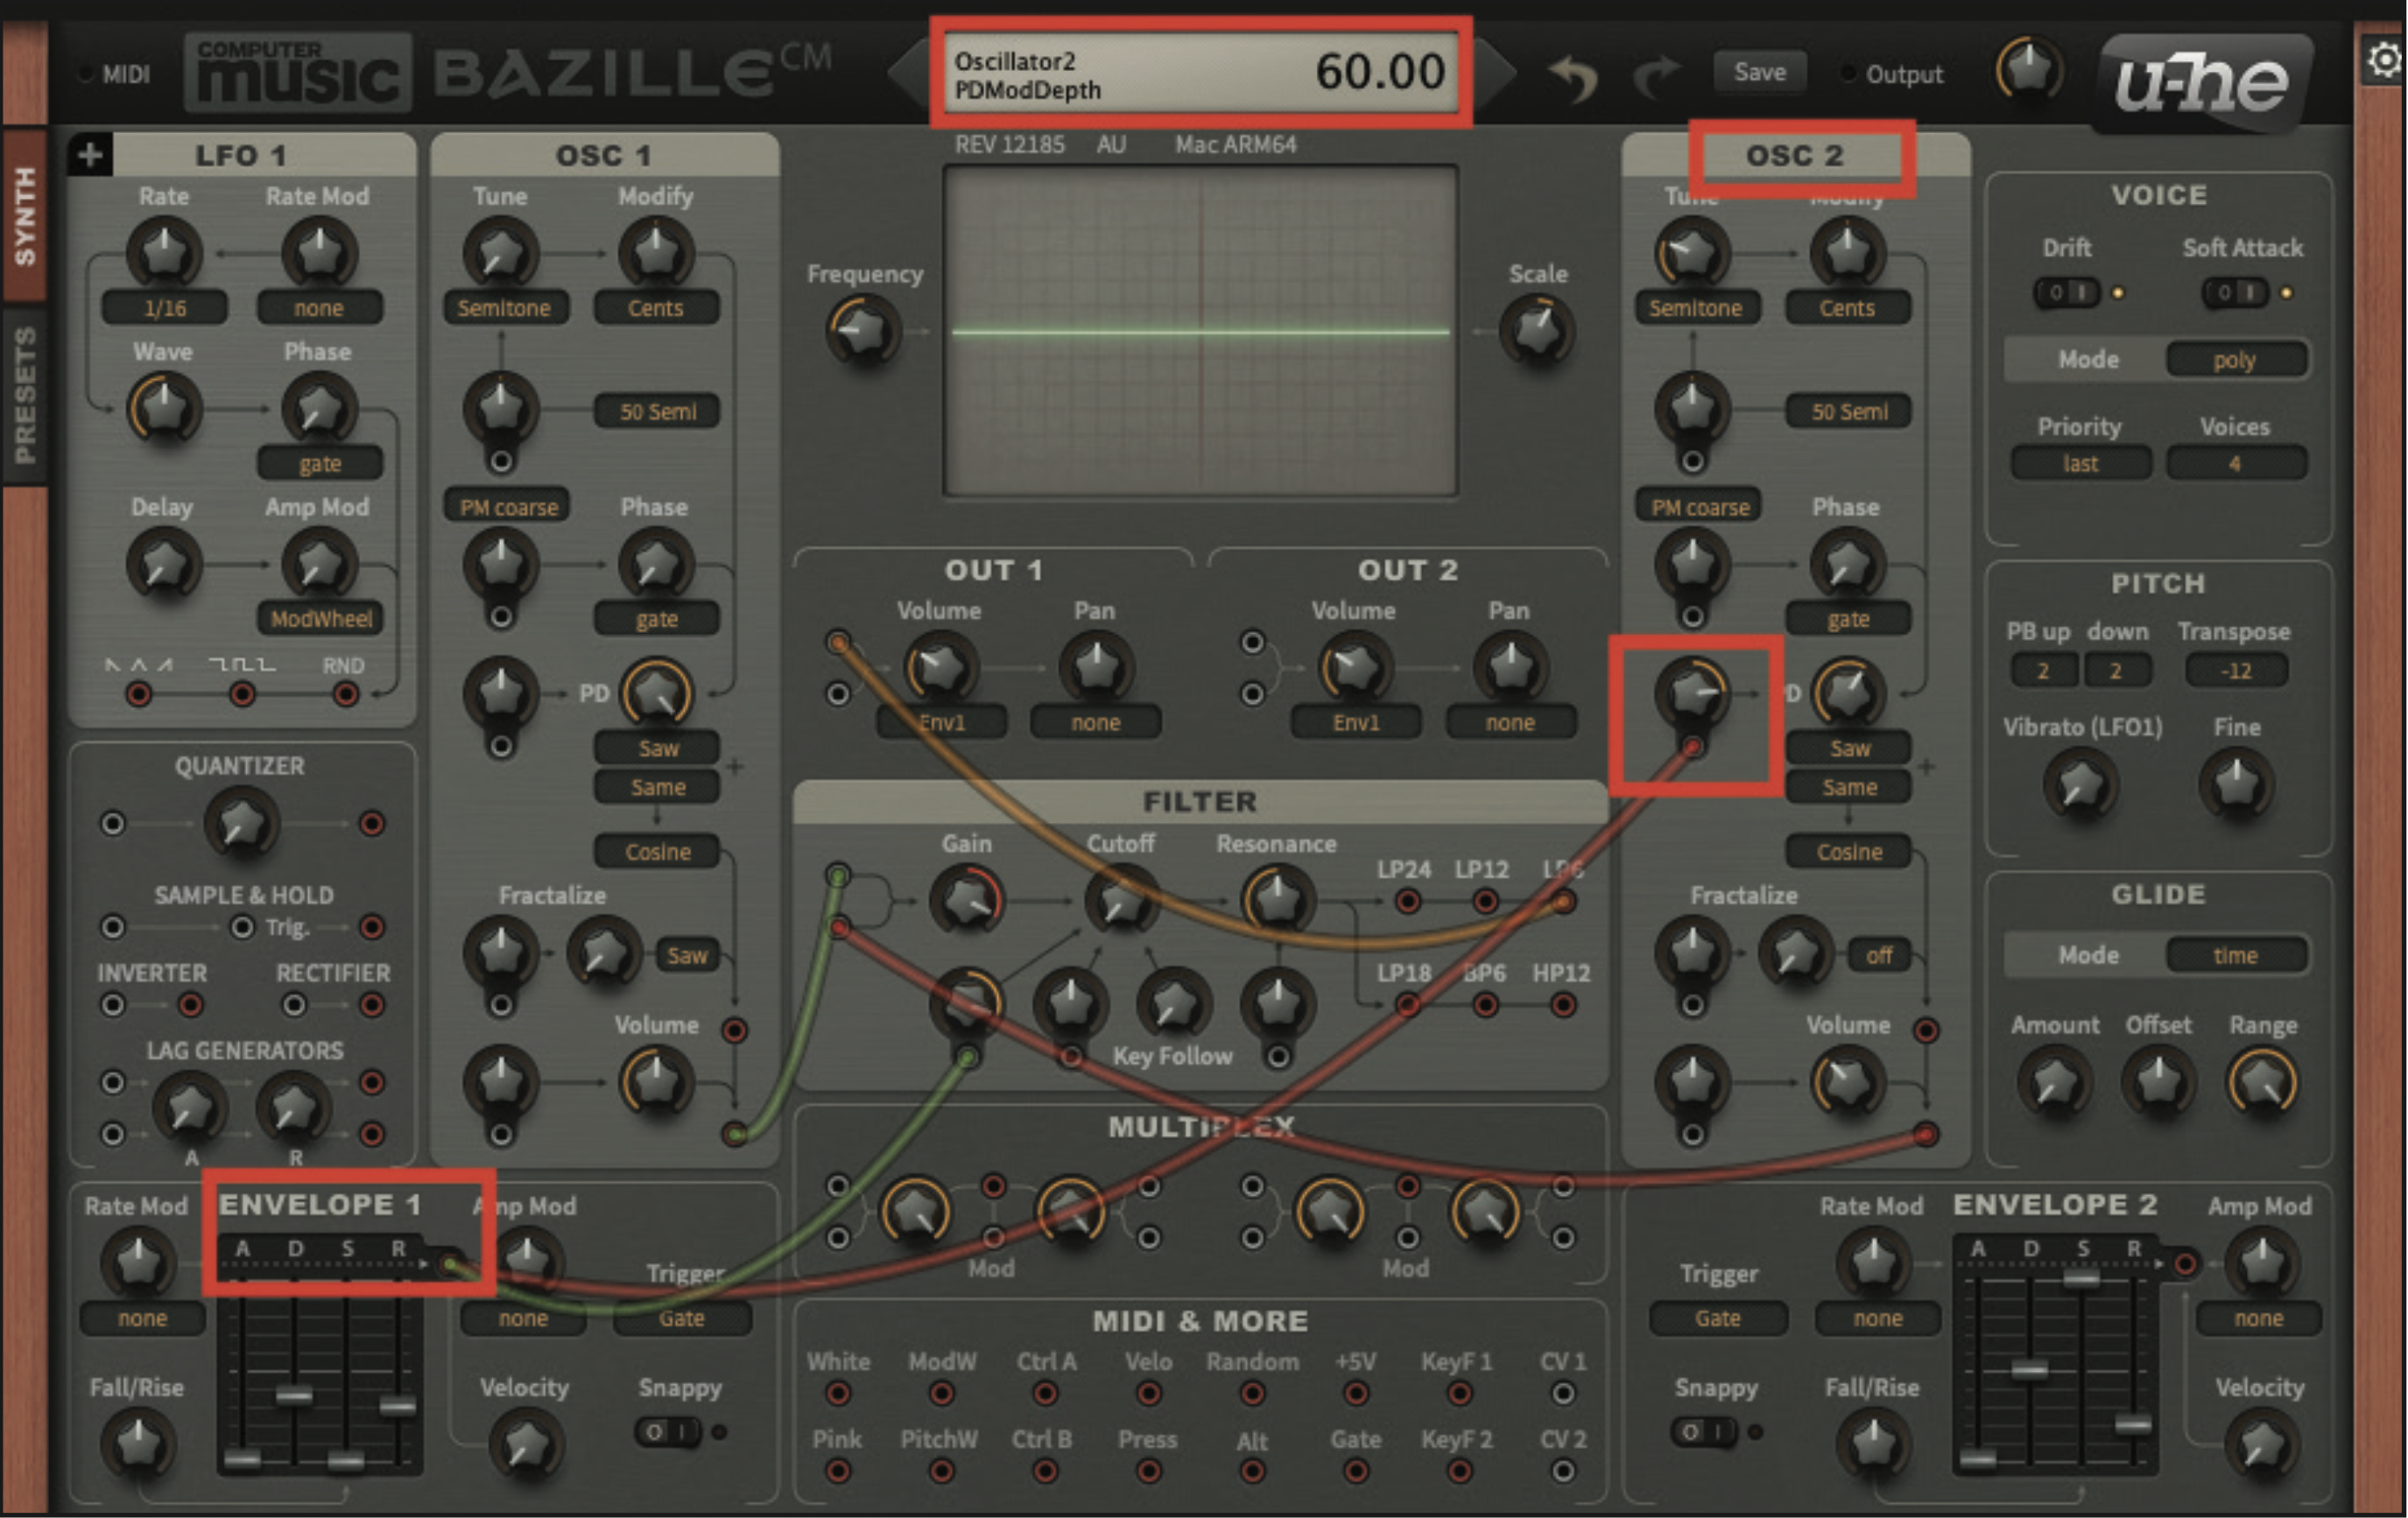
Finally, we’ll create another modulating output from Env 1. Create a second patch cable, from the output of Env 1, and assign it to the PD modulation pot, just left of the main PD pot in the Osc 2 section. Once connected, set the pot to 60. This now means that we’re modulating the phase distortion element of OSC 2, as well as the filter.
Pro tip: filter poles and dB curves
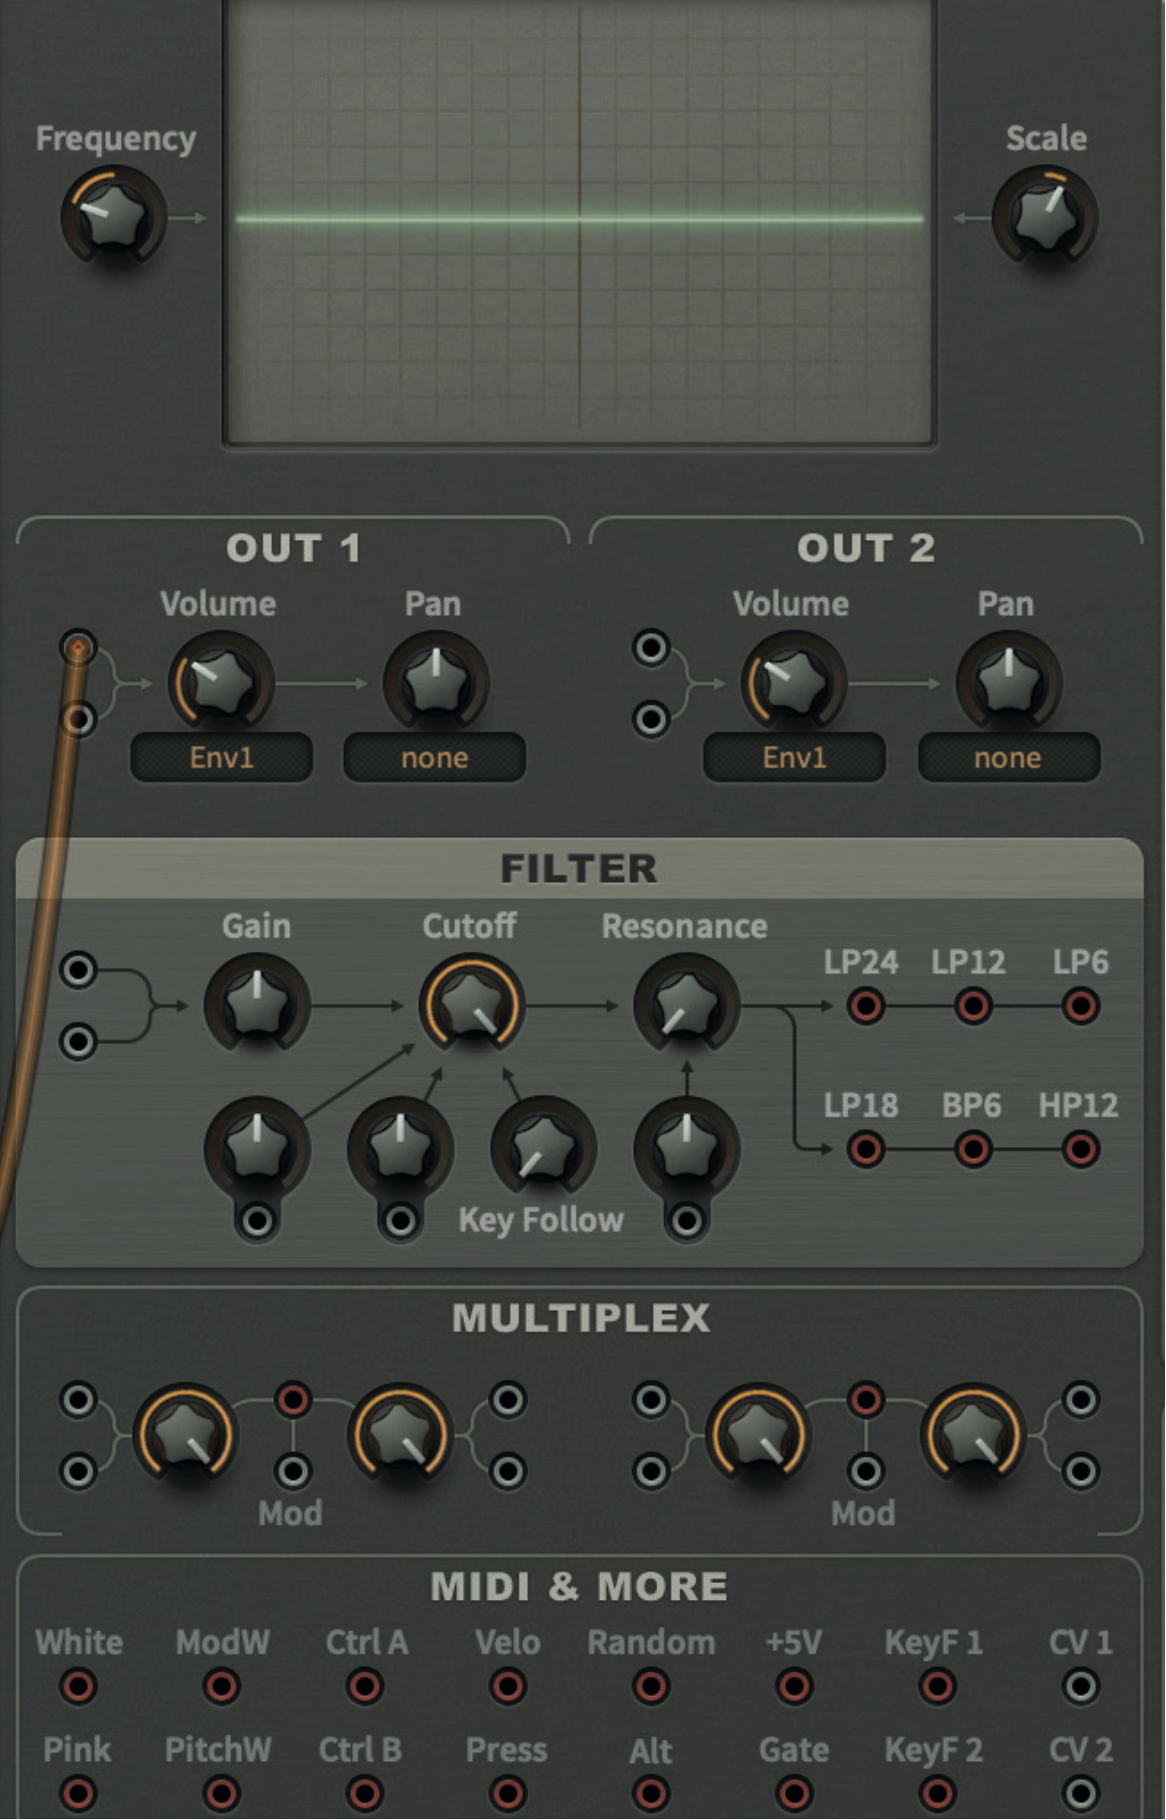
You may have noticed, that in the creation of this patch, we specifically used the filter described as LP6. This is because we wanted a particularly aggressive sound, but what does the filter name actually refer to? The LP part of the description refers to ‘low pass’, which lets the lower frequency content pass through unscathed.
And the number? Filters often have a number attached, such as 24, 18, 12, or 6. Each of these numbers is a value which reflects dB per octave, which describes the slope of the filter. Your choice of filter is dictated by the sort of sound you want to create. Within BazilleCM, there is plenty of capacity to explore the different filter types, as they all sound different.
To make matters even more confusing, there is another term which is similarly employed to describe these filter types, namely 4-pole, 3-pole, 2-pole and 1-pole, hence a 24dB filter is often described as a 4-pole filter. This element colours the sound considerably, and programmers have an idea of which filter to use for a required sound. We’re using the Low Pass 6dB filter in this patch, with its relatively harsh sound, ideal for a filter kick bass.
Recommended listening

1. Lindstrøm - Rà-àkõ-st
On this opening cut from the album Smalhans, you can hear the kick bass effect right from the very first note of the track.
2. Calvin Harris & Disciples - How Deep Is Your Love
This classic track from Calvin Harris also adopts a kick bass principle, but in this example, the bass is squarewave-shaped, with less filter involvement.