
Auto-harmonization relies on an inputted audio signal, which is analysed to detect a note’s pitch, before applying an instant harmony to the original note, by resampling the incoming audio.
This effect, which is a little bit like shining light into a prism to reveal the rainbow colours which make up white light (hence the name Prismizer), caught the ear of a number of artists, including Jacob Collier and Imogen Heap.
It was the use of this harmonizer technique alongside hard-tuning that found itself earning the label of ‘Prismizer’, in no small part thanks to its use by the artist Bon Iver on the superb 2016 album 22, A Million.
The following year, a live performance of Bon Iver's 715 – Creeks resulted in speculation about the production process. The reality is that the name may be new, but the concept and the technology behind it wasn't. We could really just regard this as a repackaging of a sound, under a new label - albeit an incredibly impressive one!
Here's how to achieve the effect in your DAW...
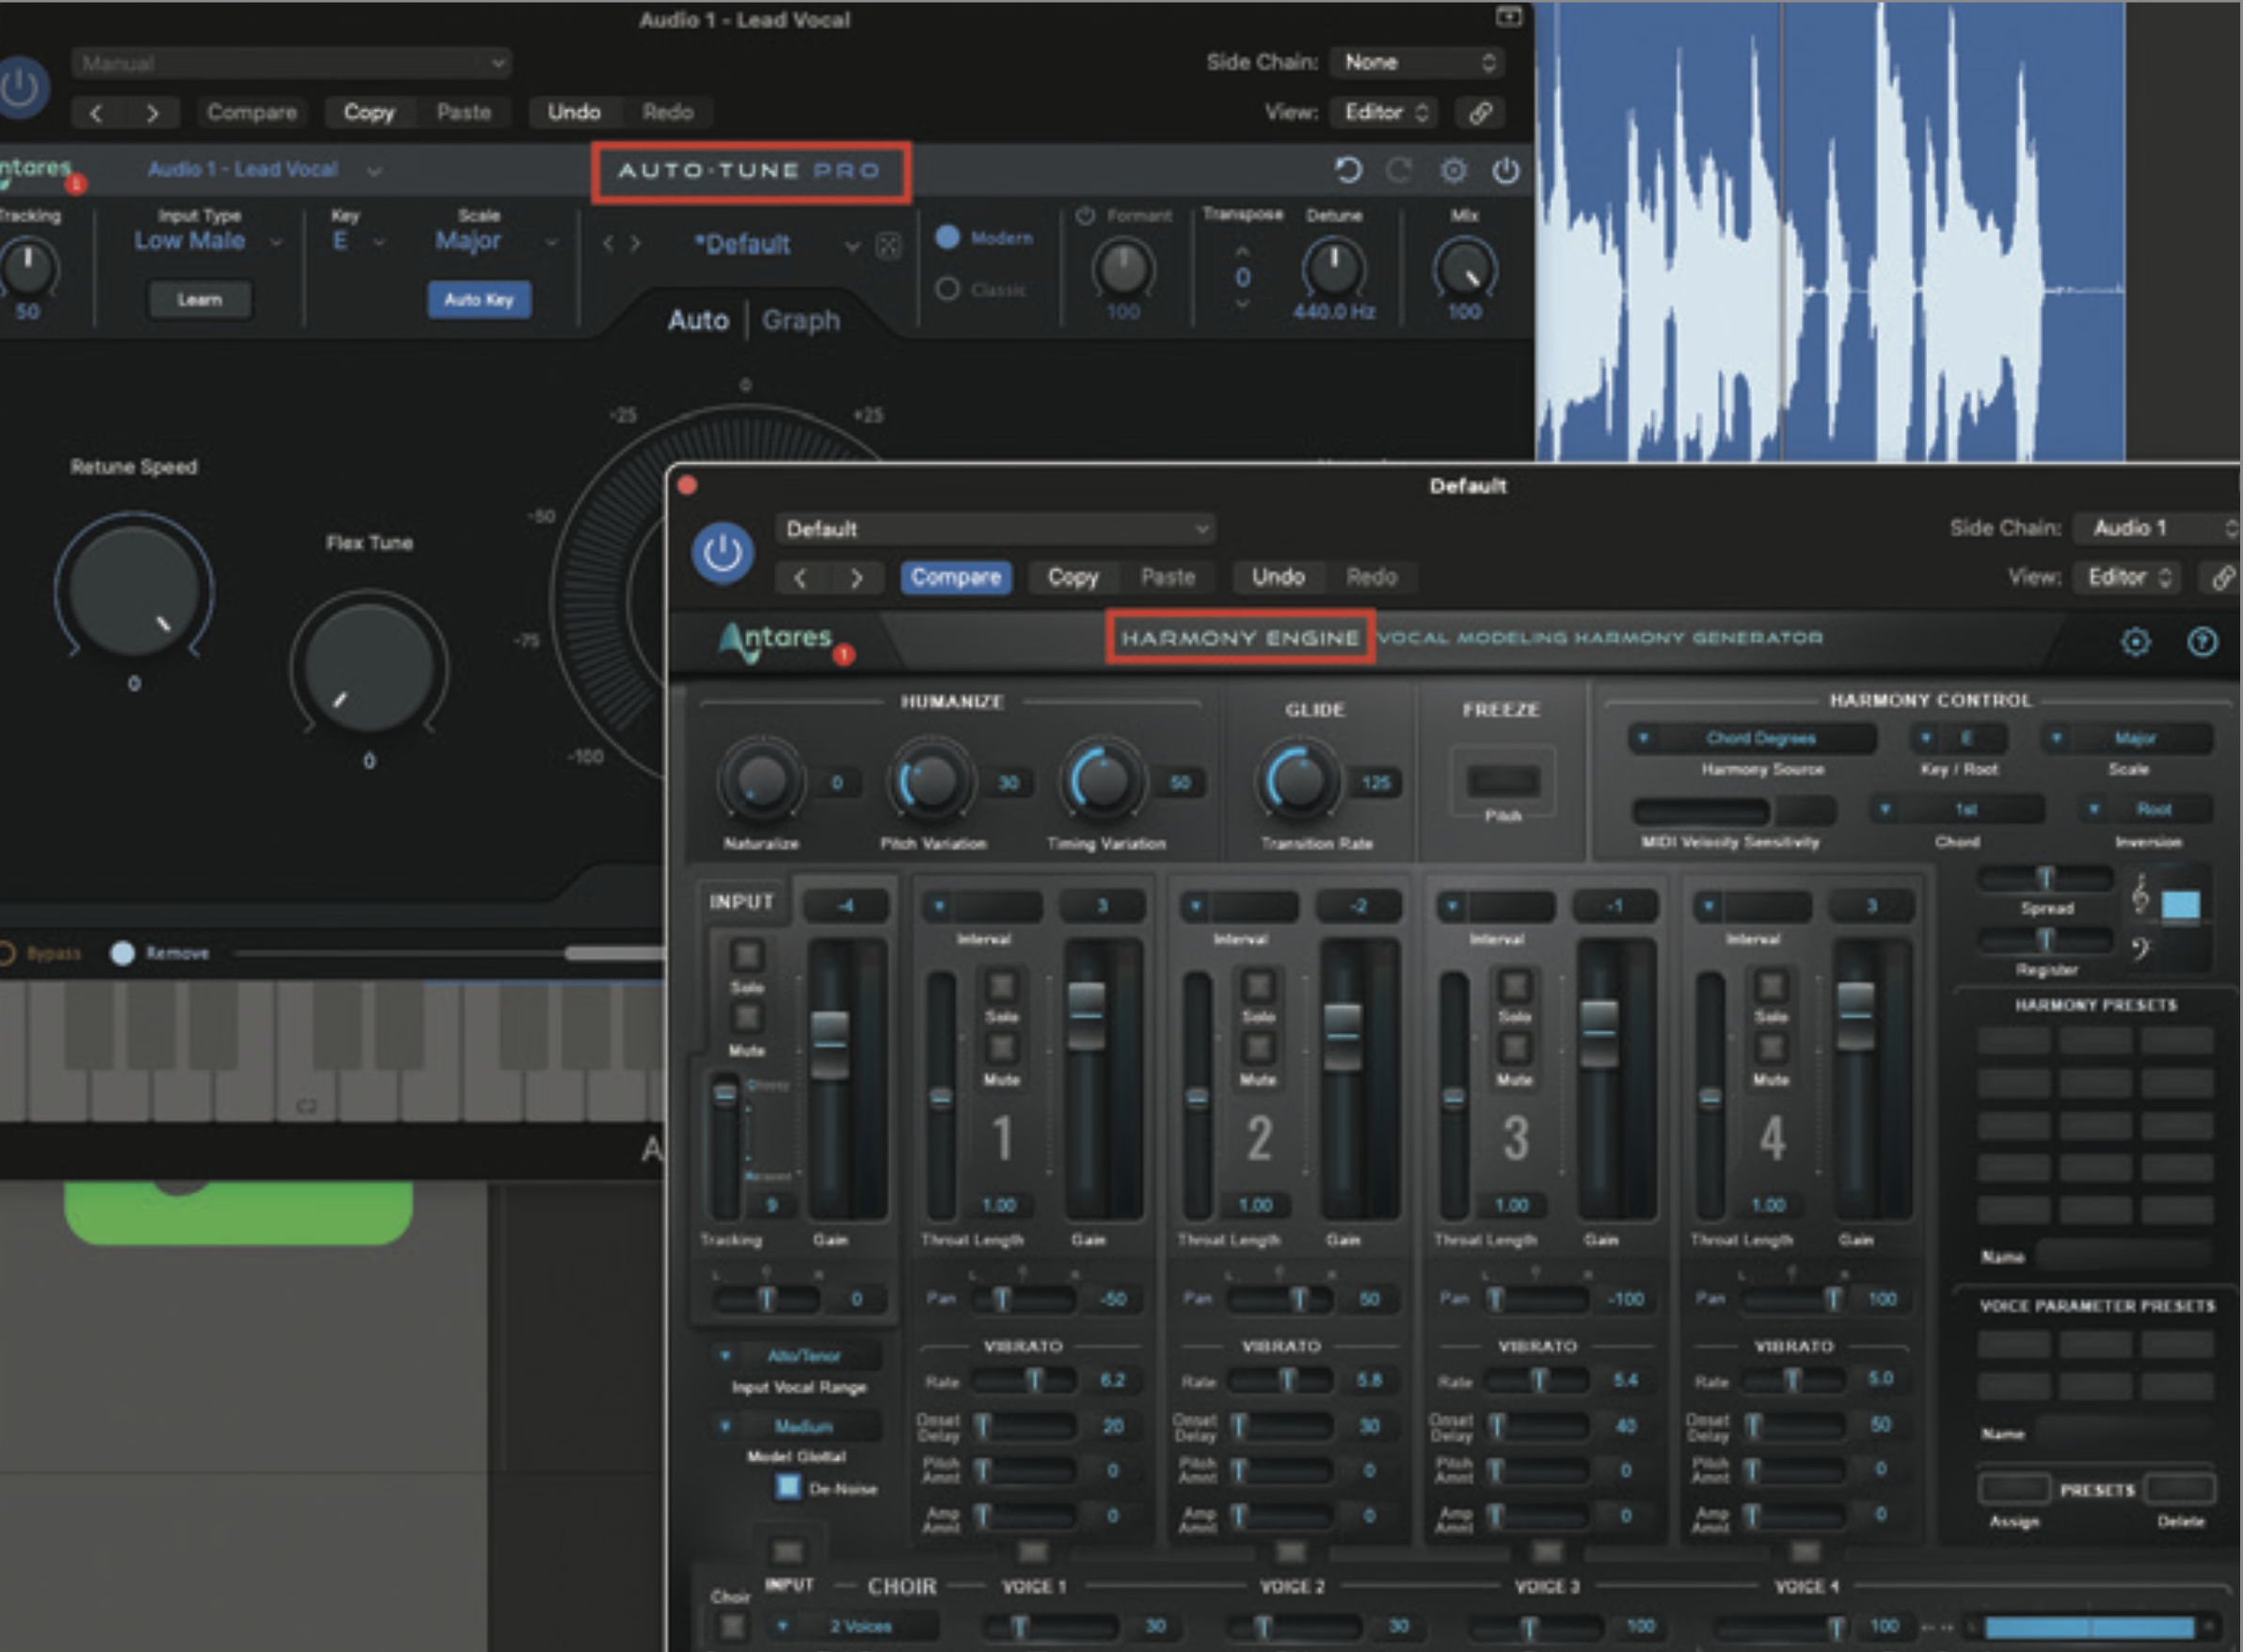
In order to replicate the classic Prismizer effect, you will need to have harmonising software, and the best option is undoubtedly from Antares, in the shape of Harmony Engine. Depending on the sound you want to create, you may also need pitch correction software, which may form part of your DAW, or for the ultimate solution, we recommend you get a copy of Antares Auto‑Tune.
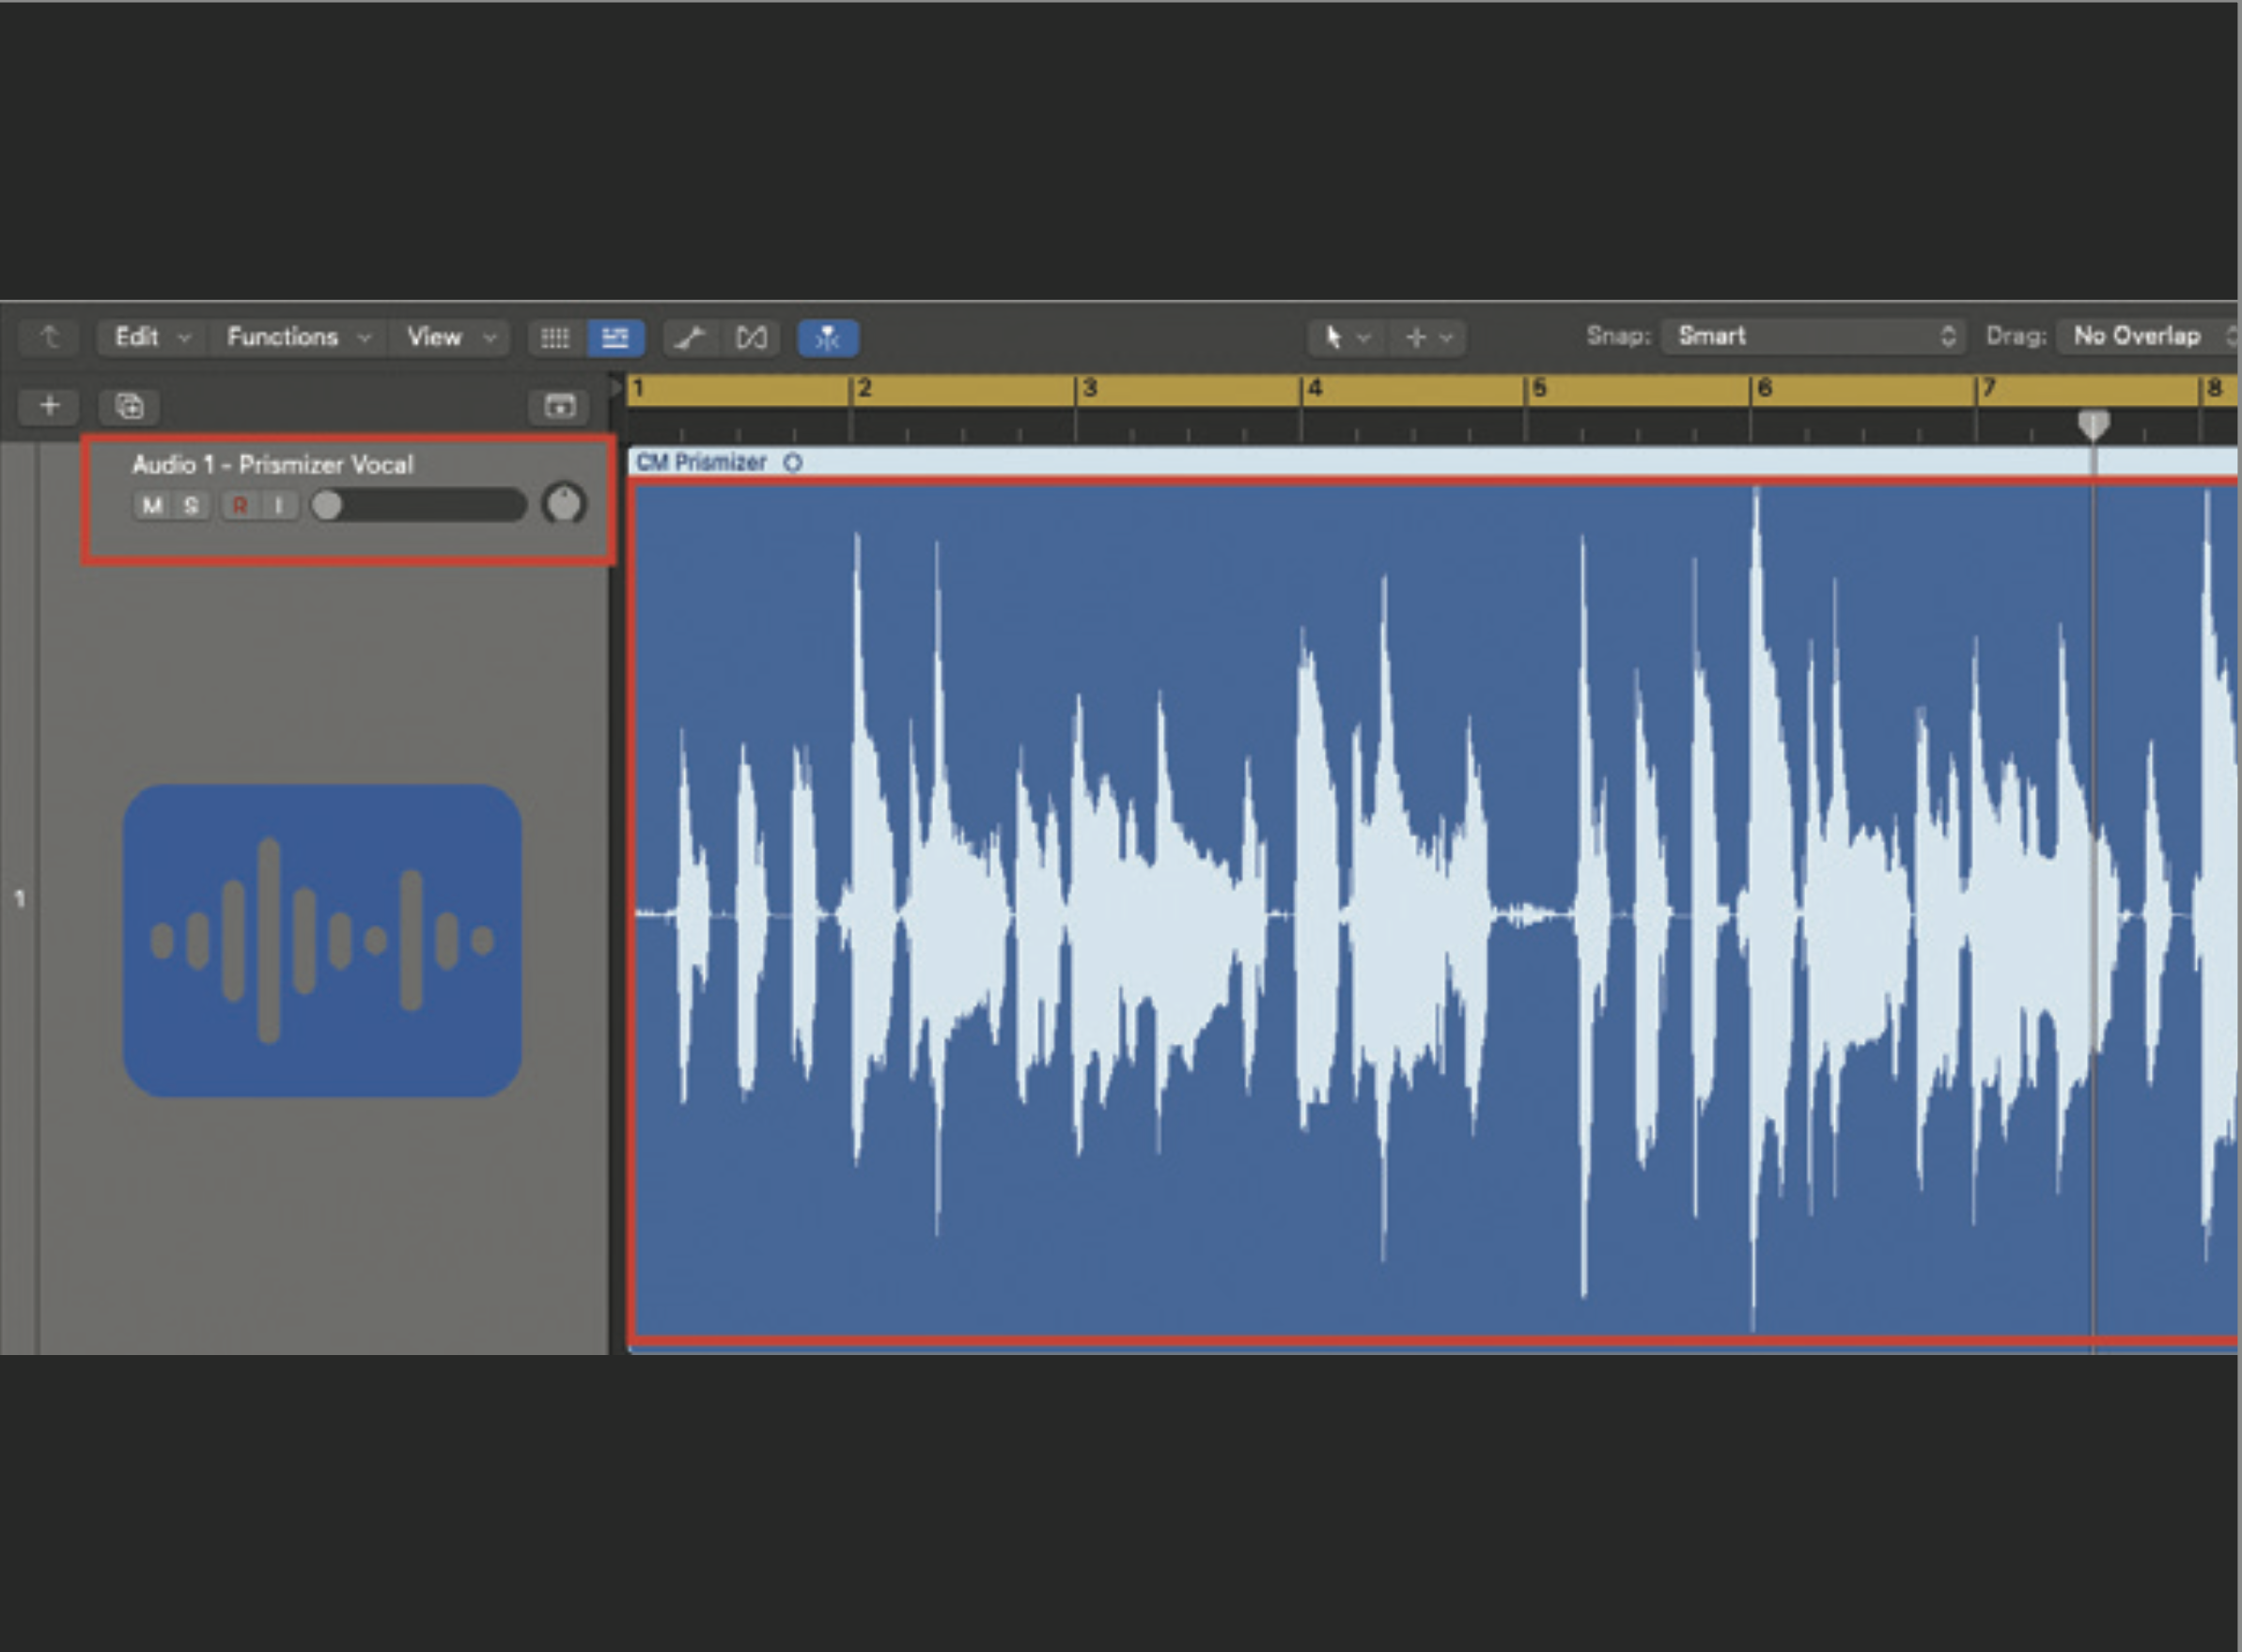
One of the first decisions to make is whether you wish to use a recorded vocal, or use this process live. Both scenarios are possible, but be aware that using software of this kind in the live environment will result in a small degree of latency, as the processing takes place in real time. For our example, we will use a recorded vocal line.
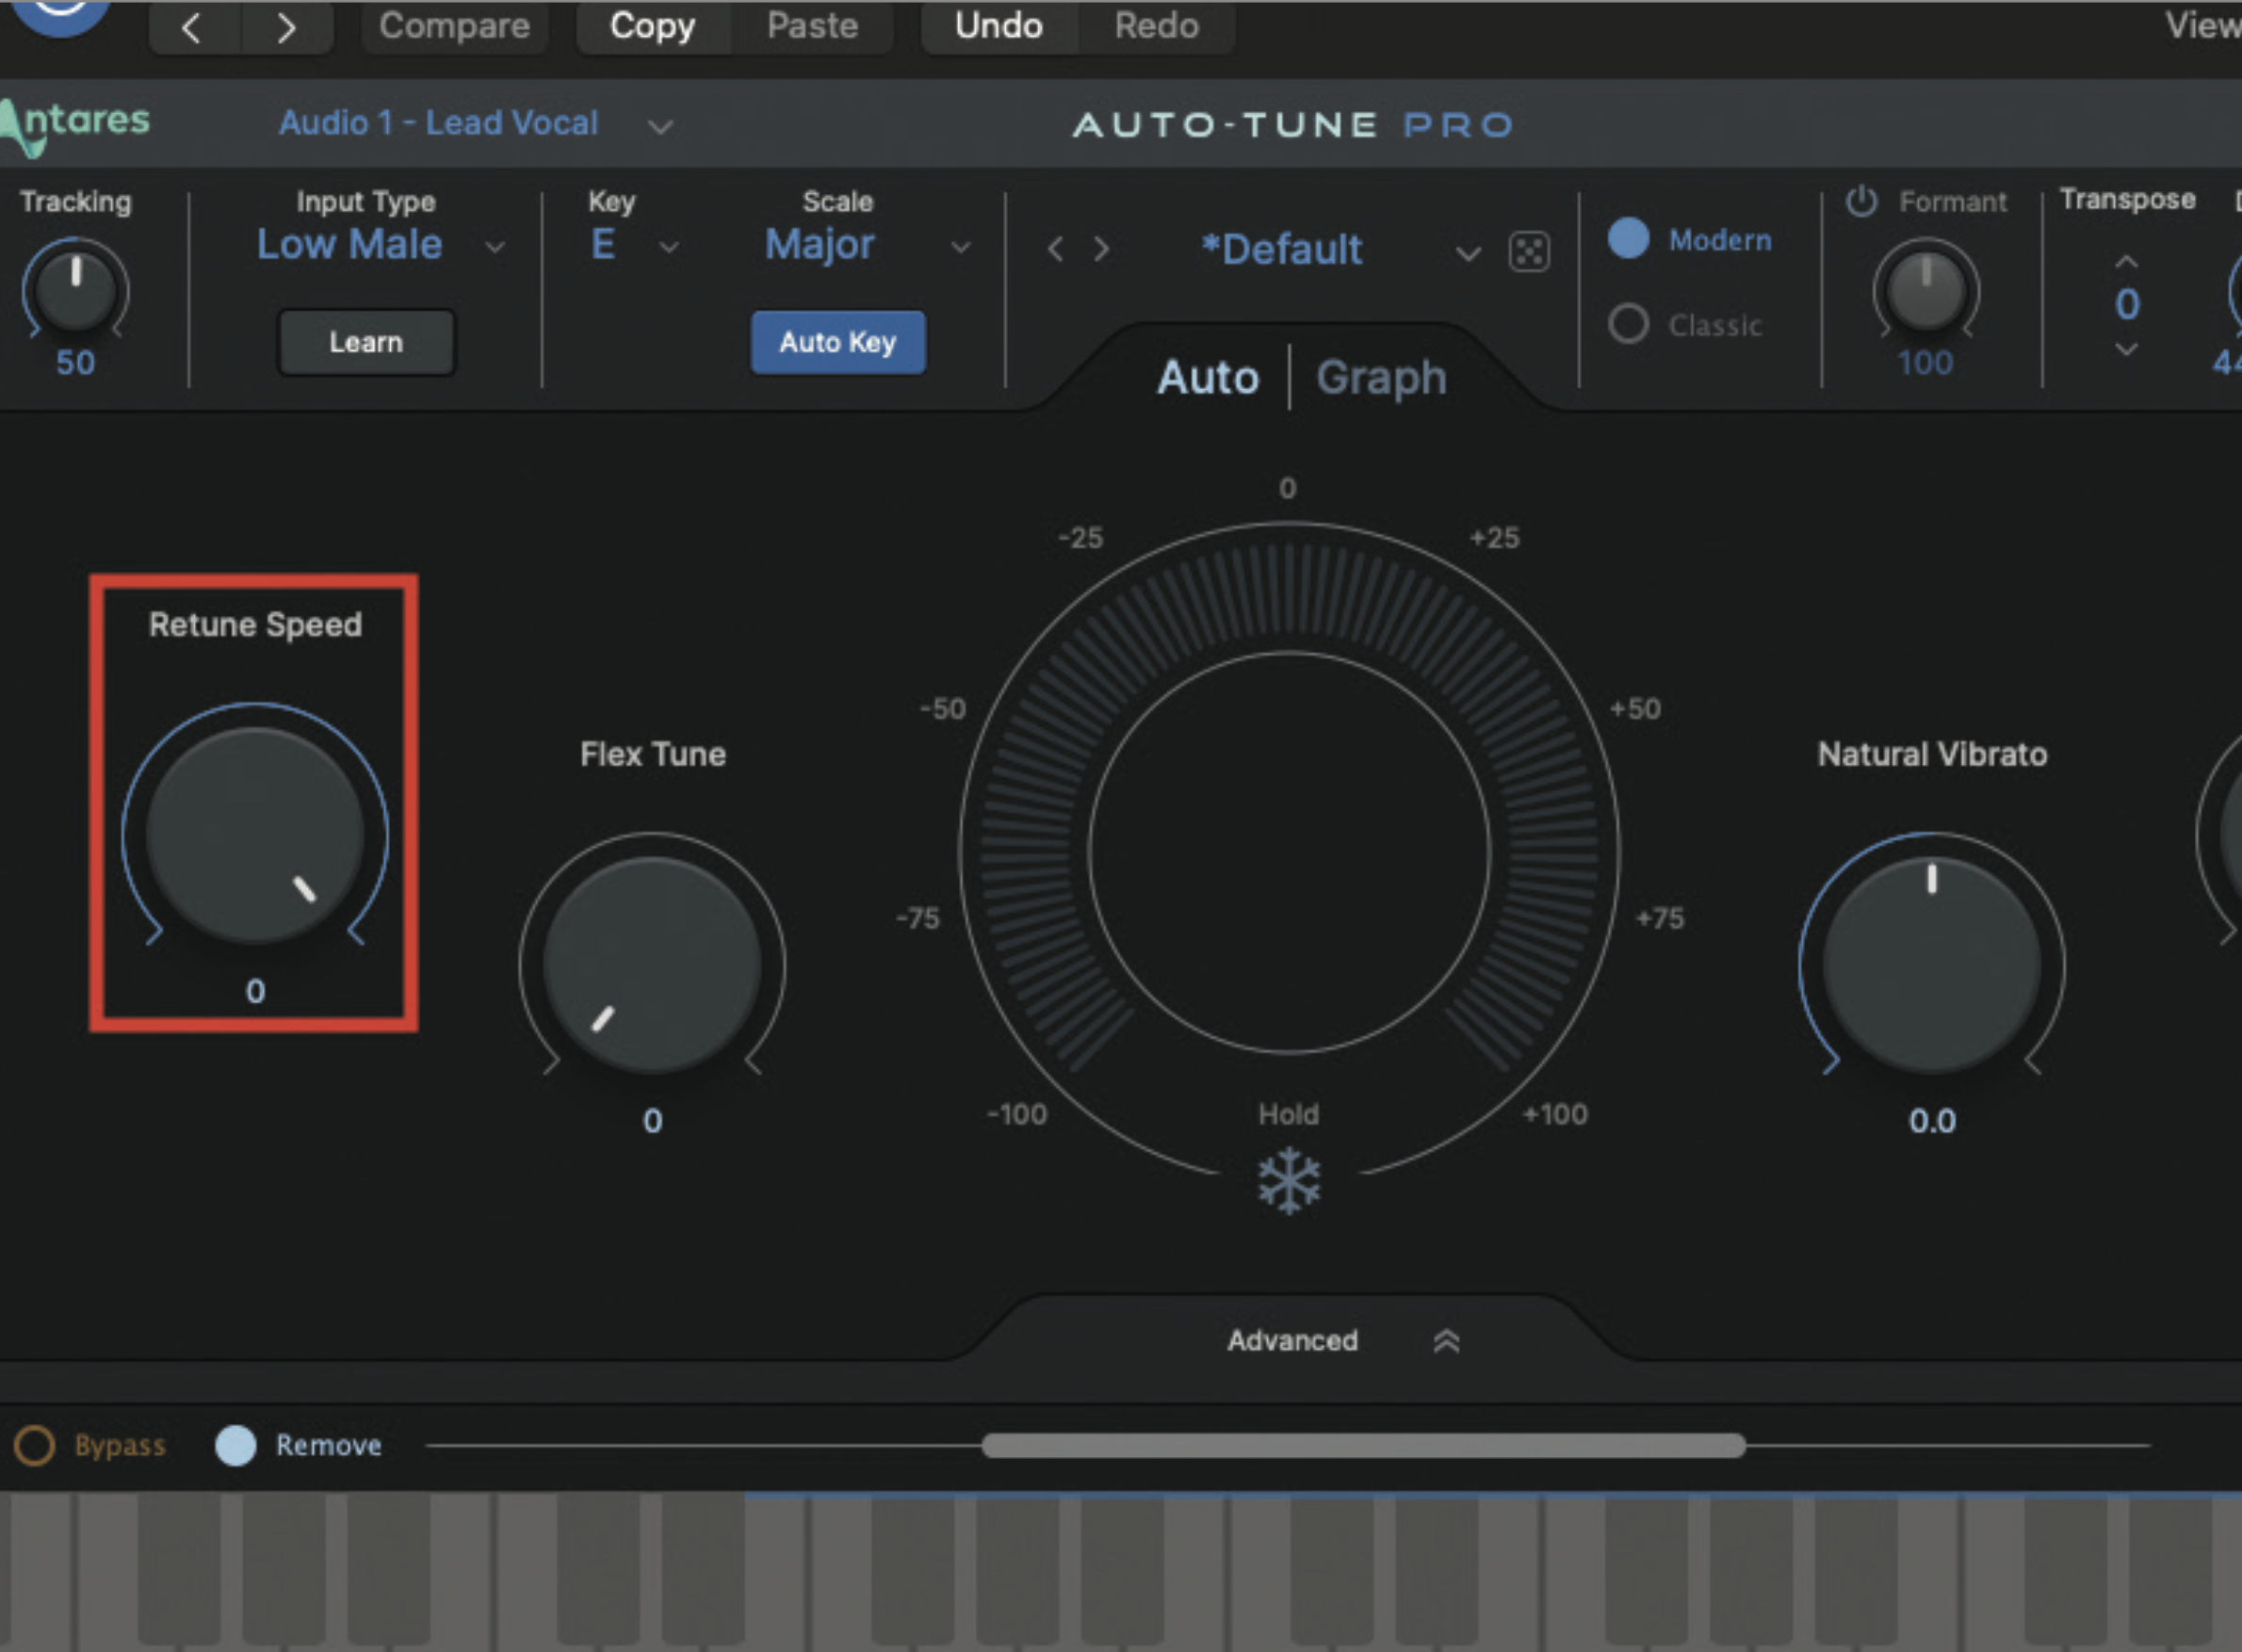
To create the Prismizer effect, you will need a vocal part with hard-tuning applied. In order to set this up, take a look at the previous tutorial. In essence, you are applying pitch correction, set to its fastest retune speed. The terminology may differ, if you are using a different pitch correction plugin.
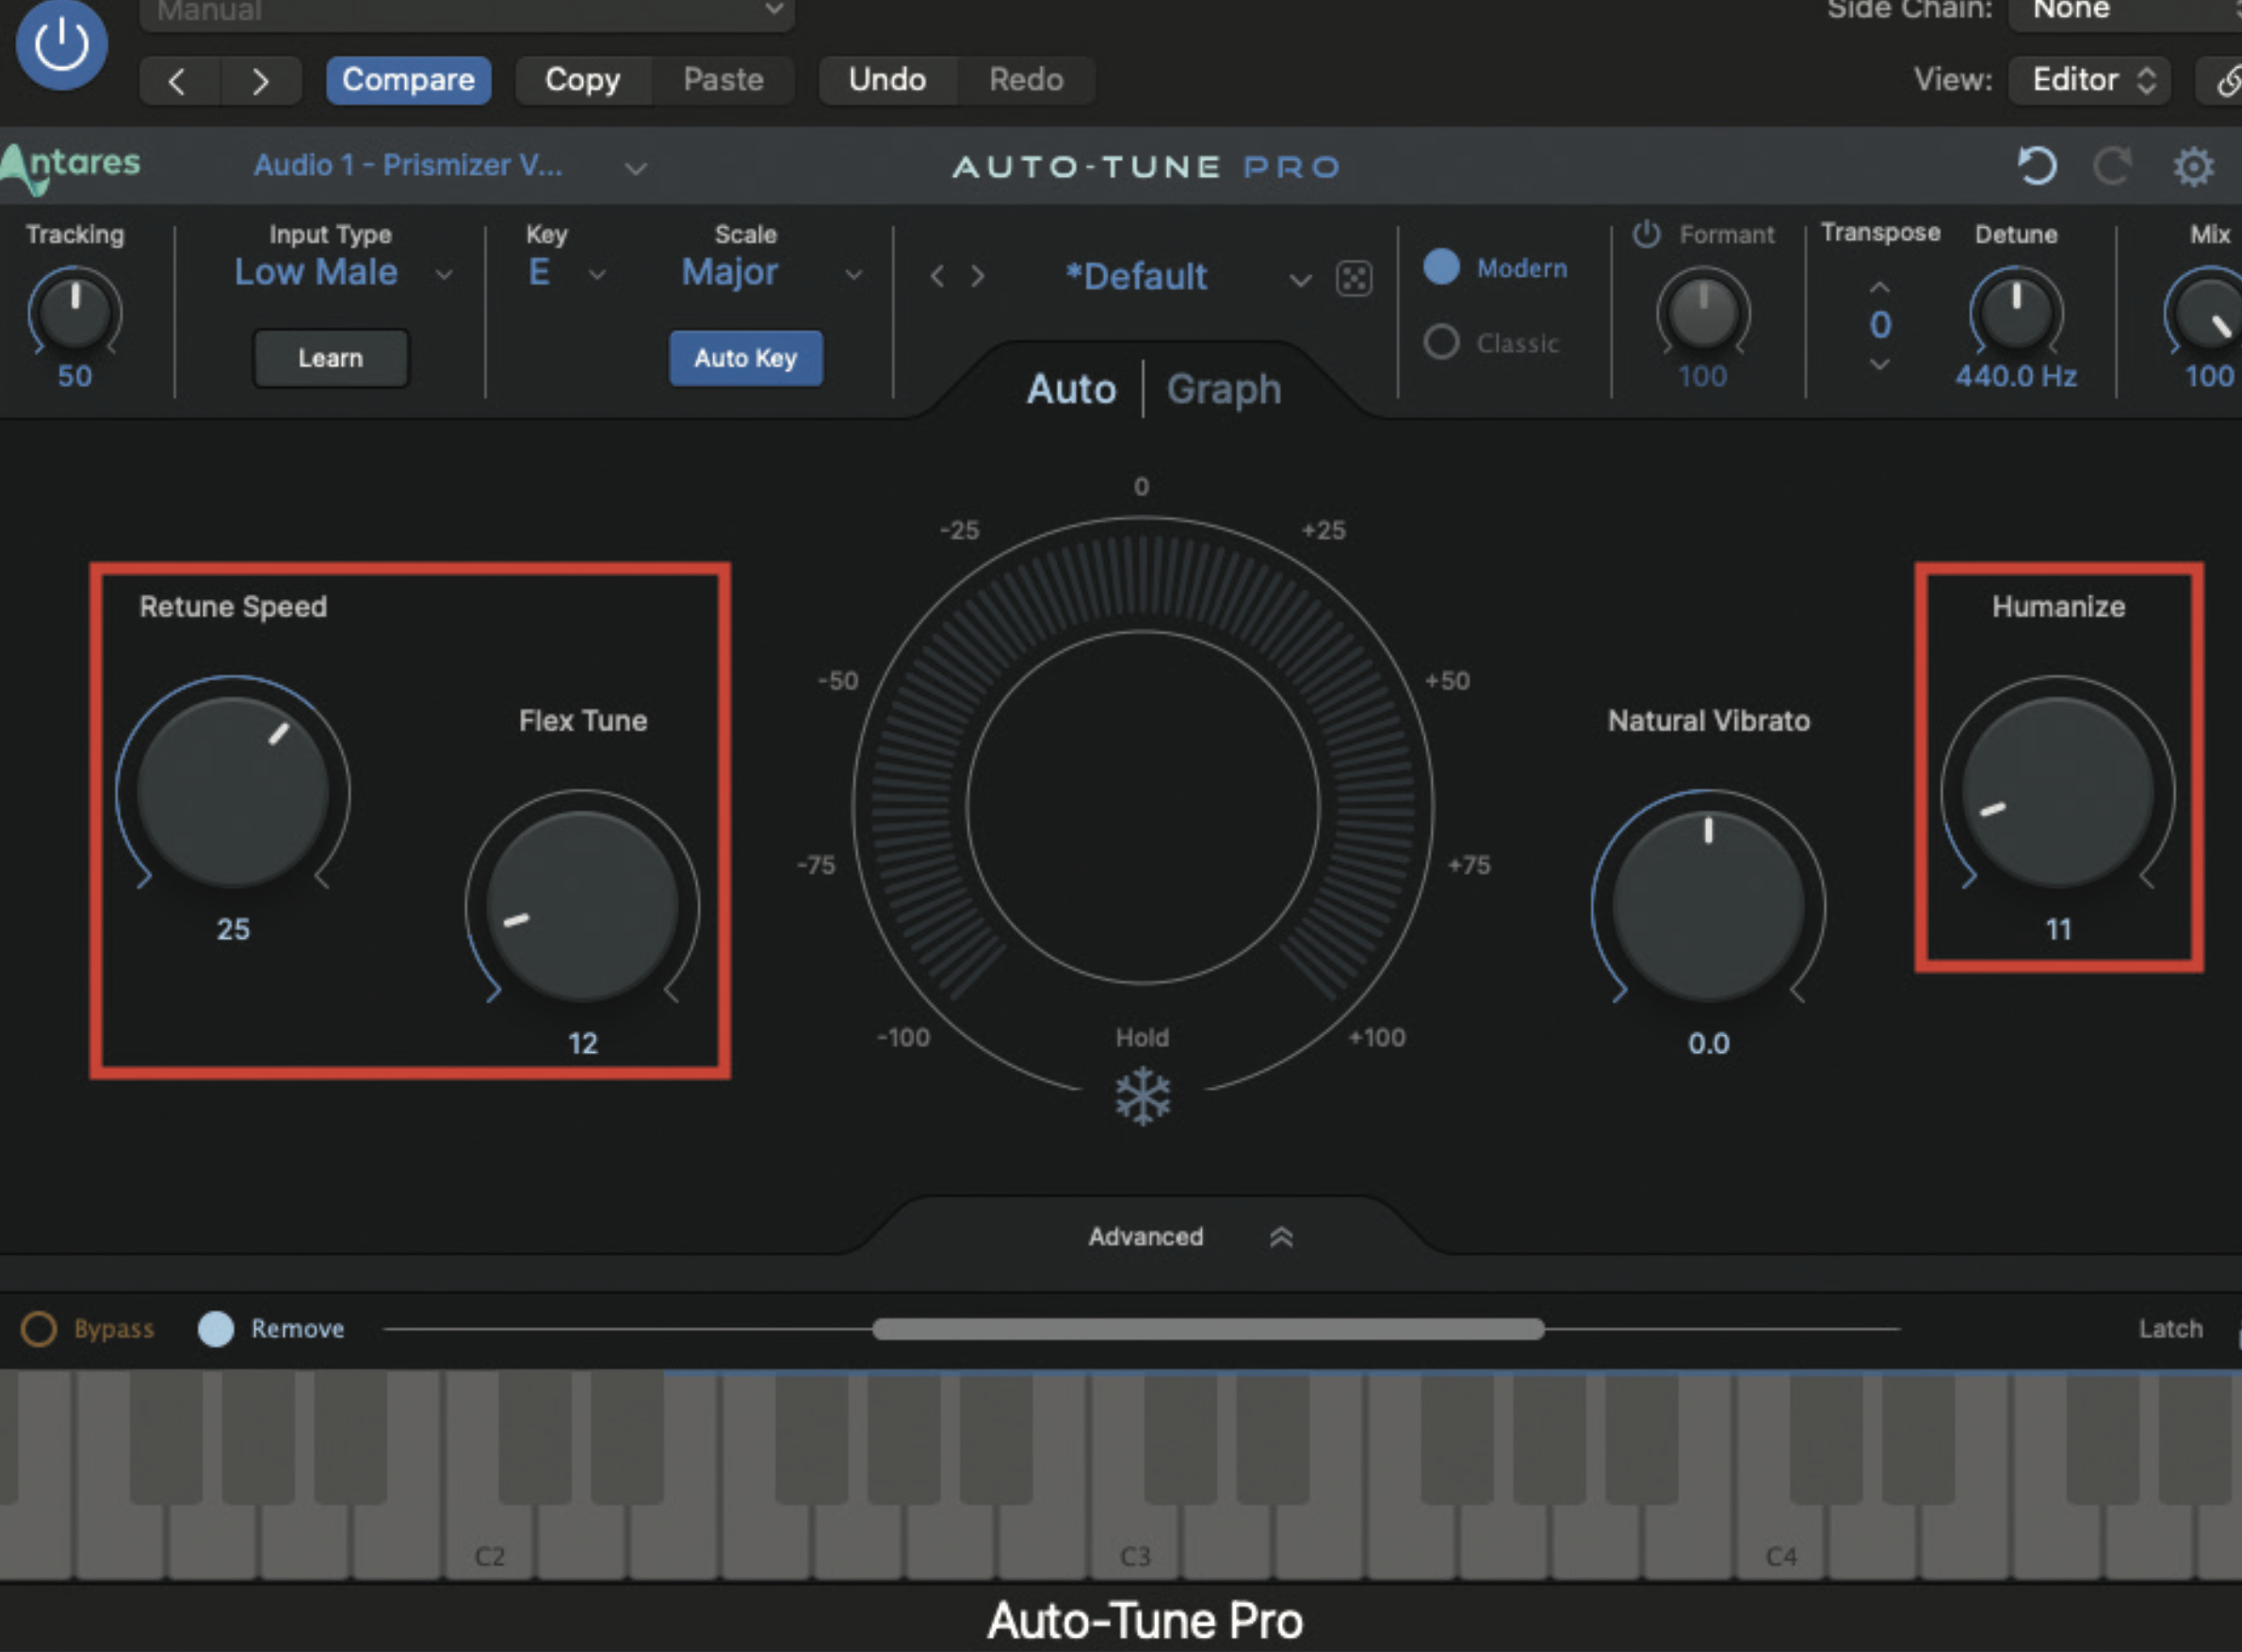
You may decide that you want your initial vocal to sound slightly less processed and more soulful. If this is the case, alter your settings using your pitch correction plugin to be a little more forgiving to the incoming vocal line. Back off the retune speed/response time. This would be appropriate for an effect more akin to Imogen Heap’s Hide and Seek.
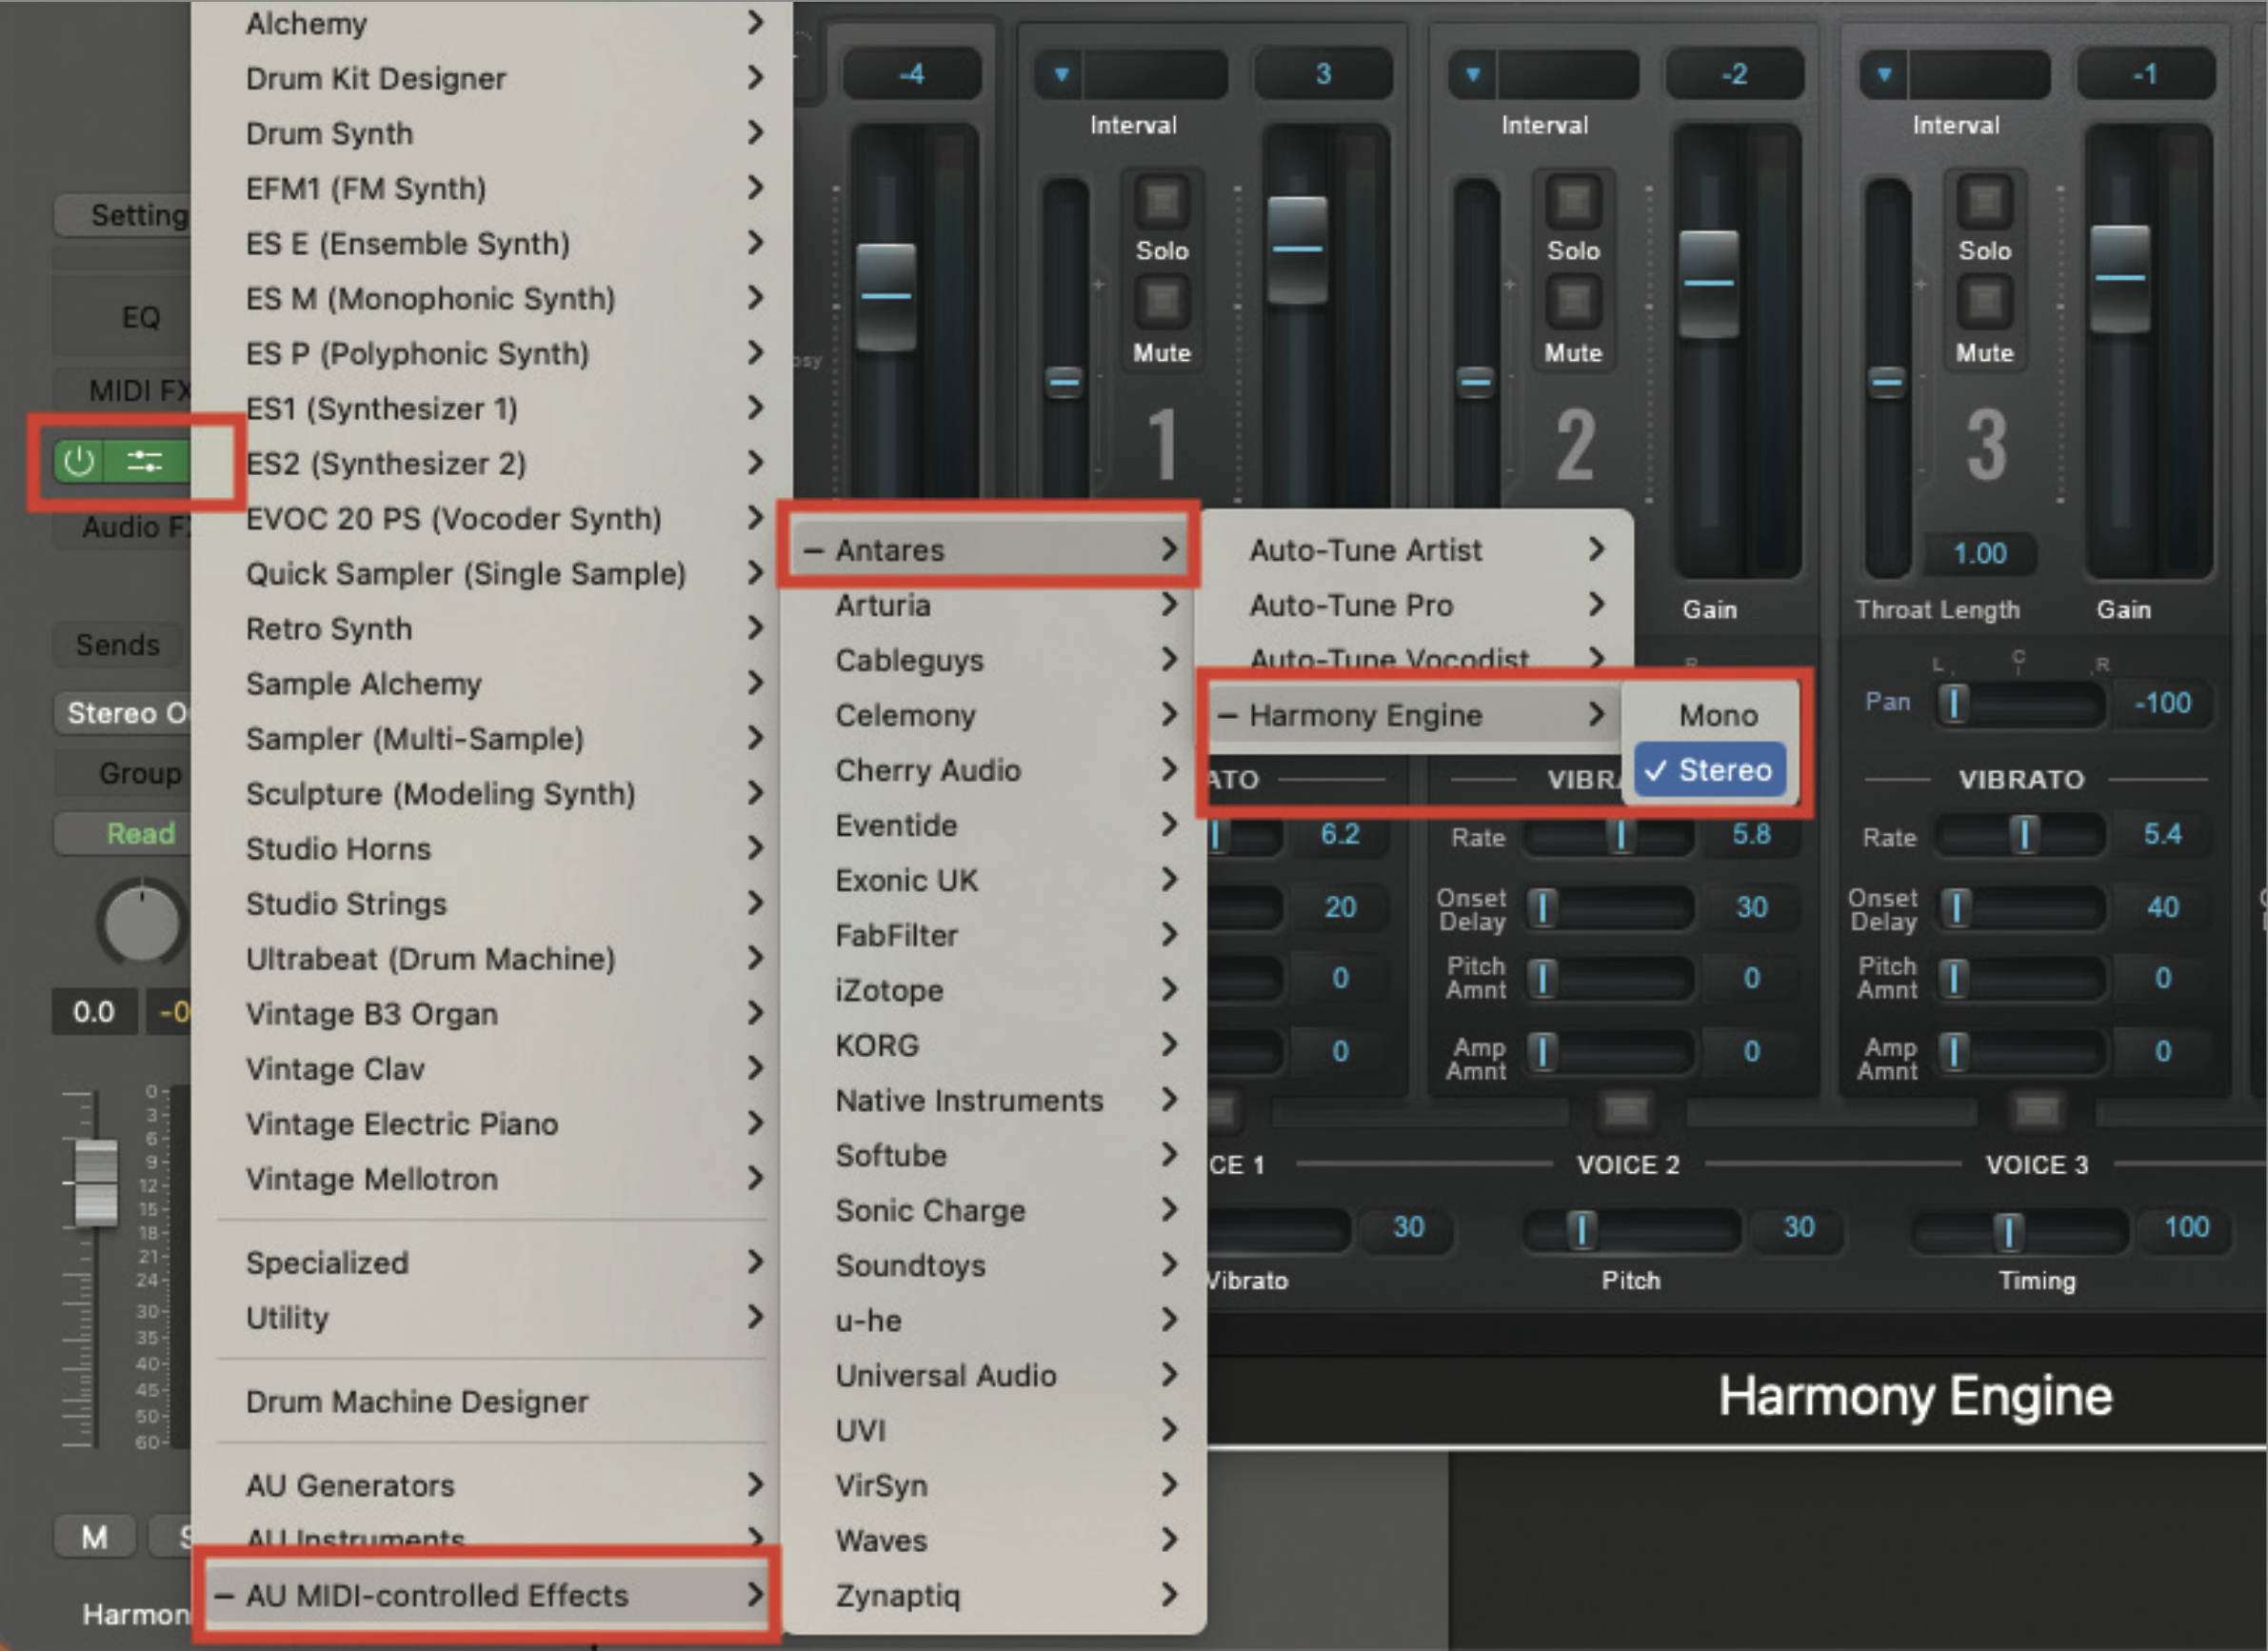
Create a software instrument track in your DAW, and load in the Antares Harmony Engine plugin. It is really vital to ensure that this is loaded as a MIDI Controlled Effect, which is normally accessed in the same way as loading a software or plugin instrument, rather than a conventional audio effect plugin.
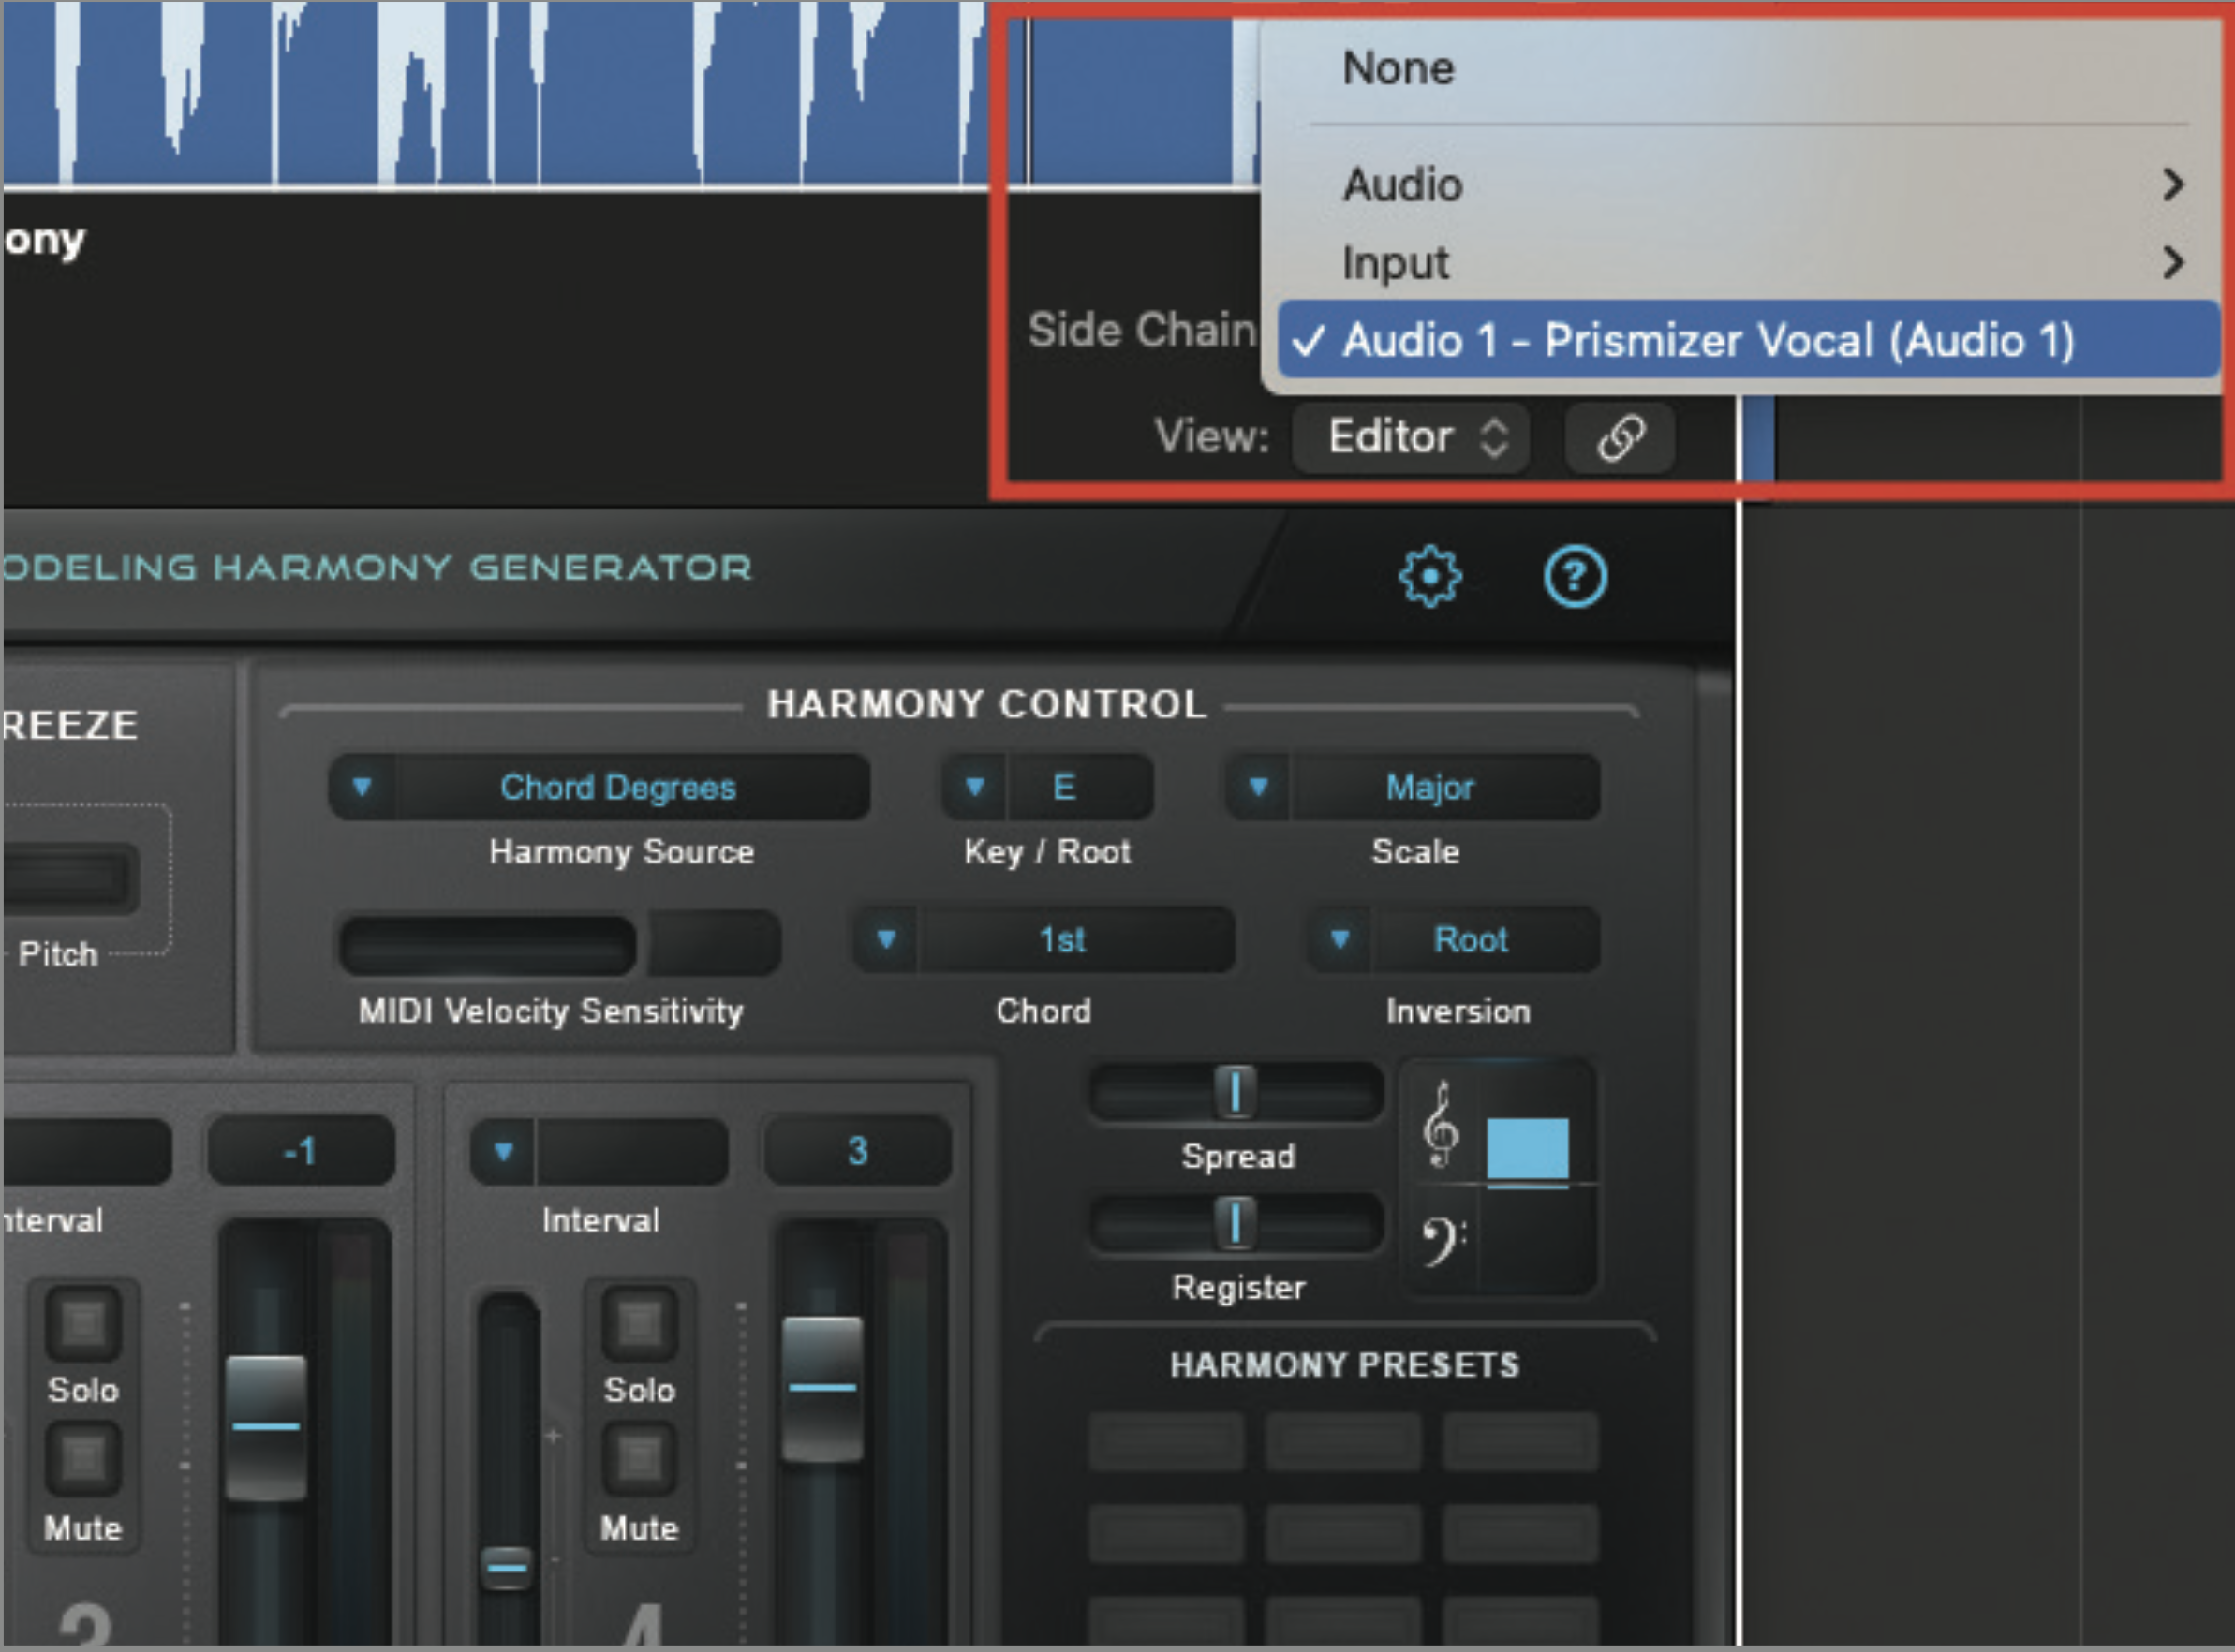
From the Side Chain menu, in the upper right-hand corner of the plugin window, select your chosen audio/vocal track that you intend to harmonise. If you intend to play live, you will need to select the appropriate microphone input channel instead.
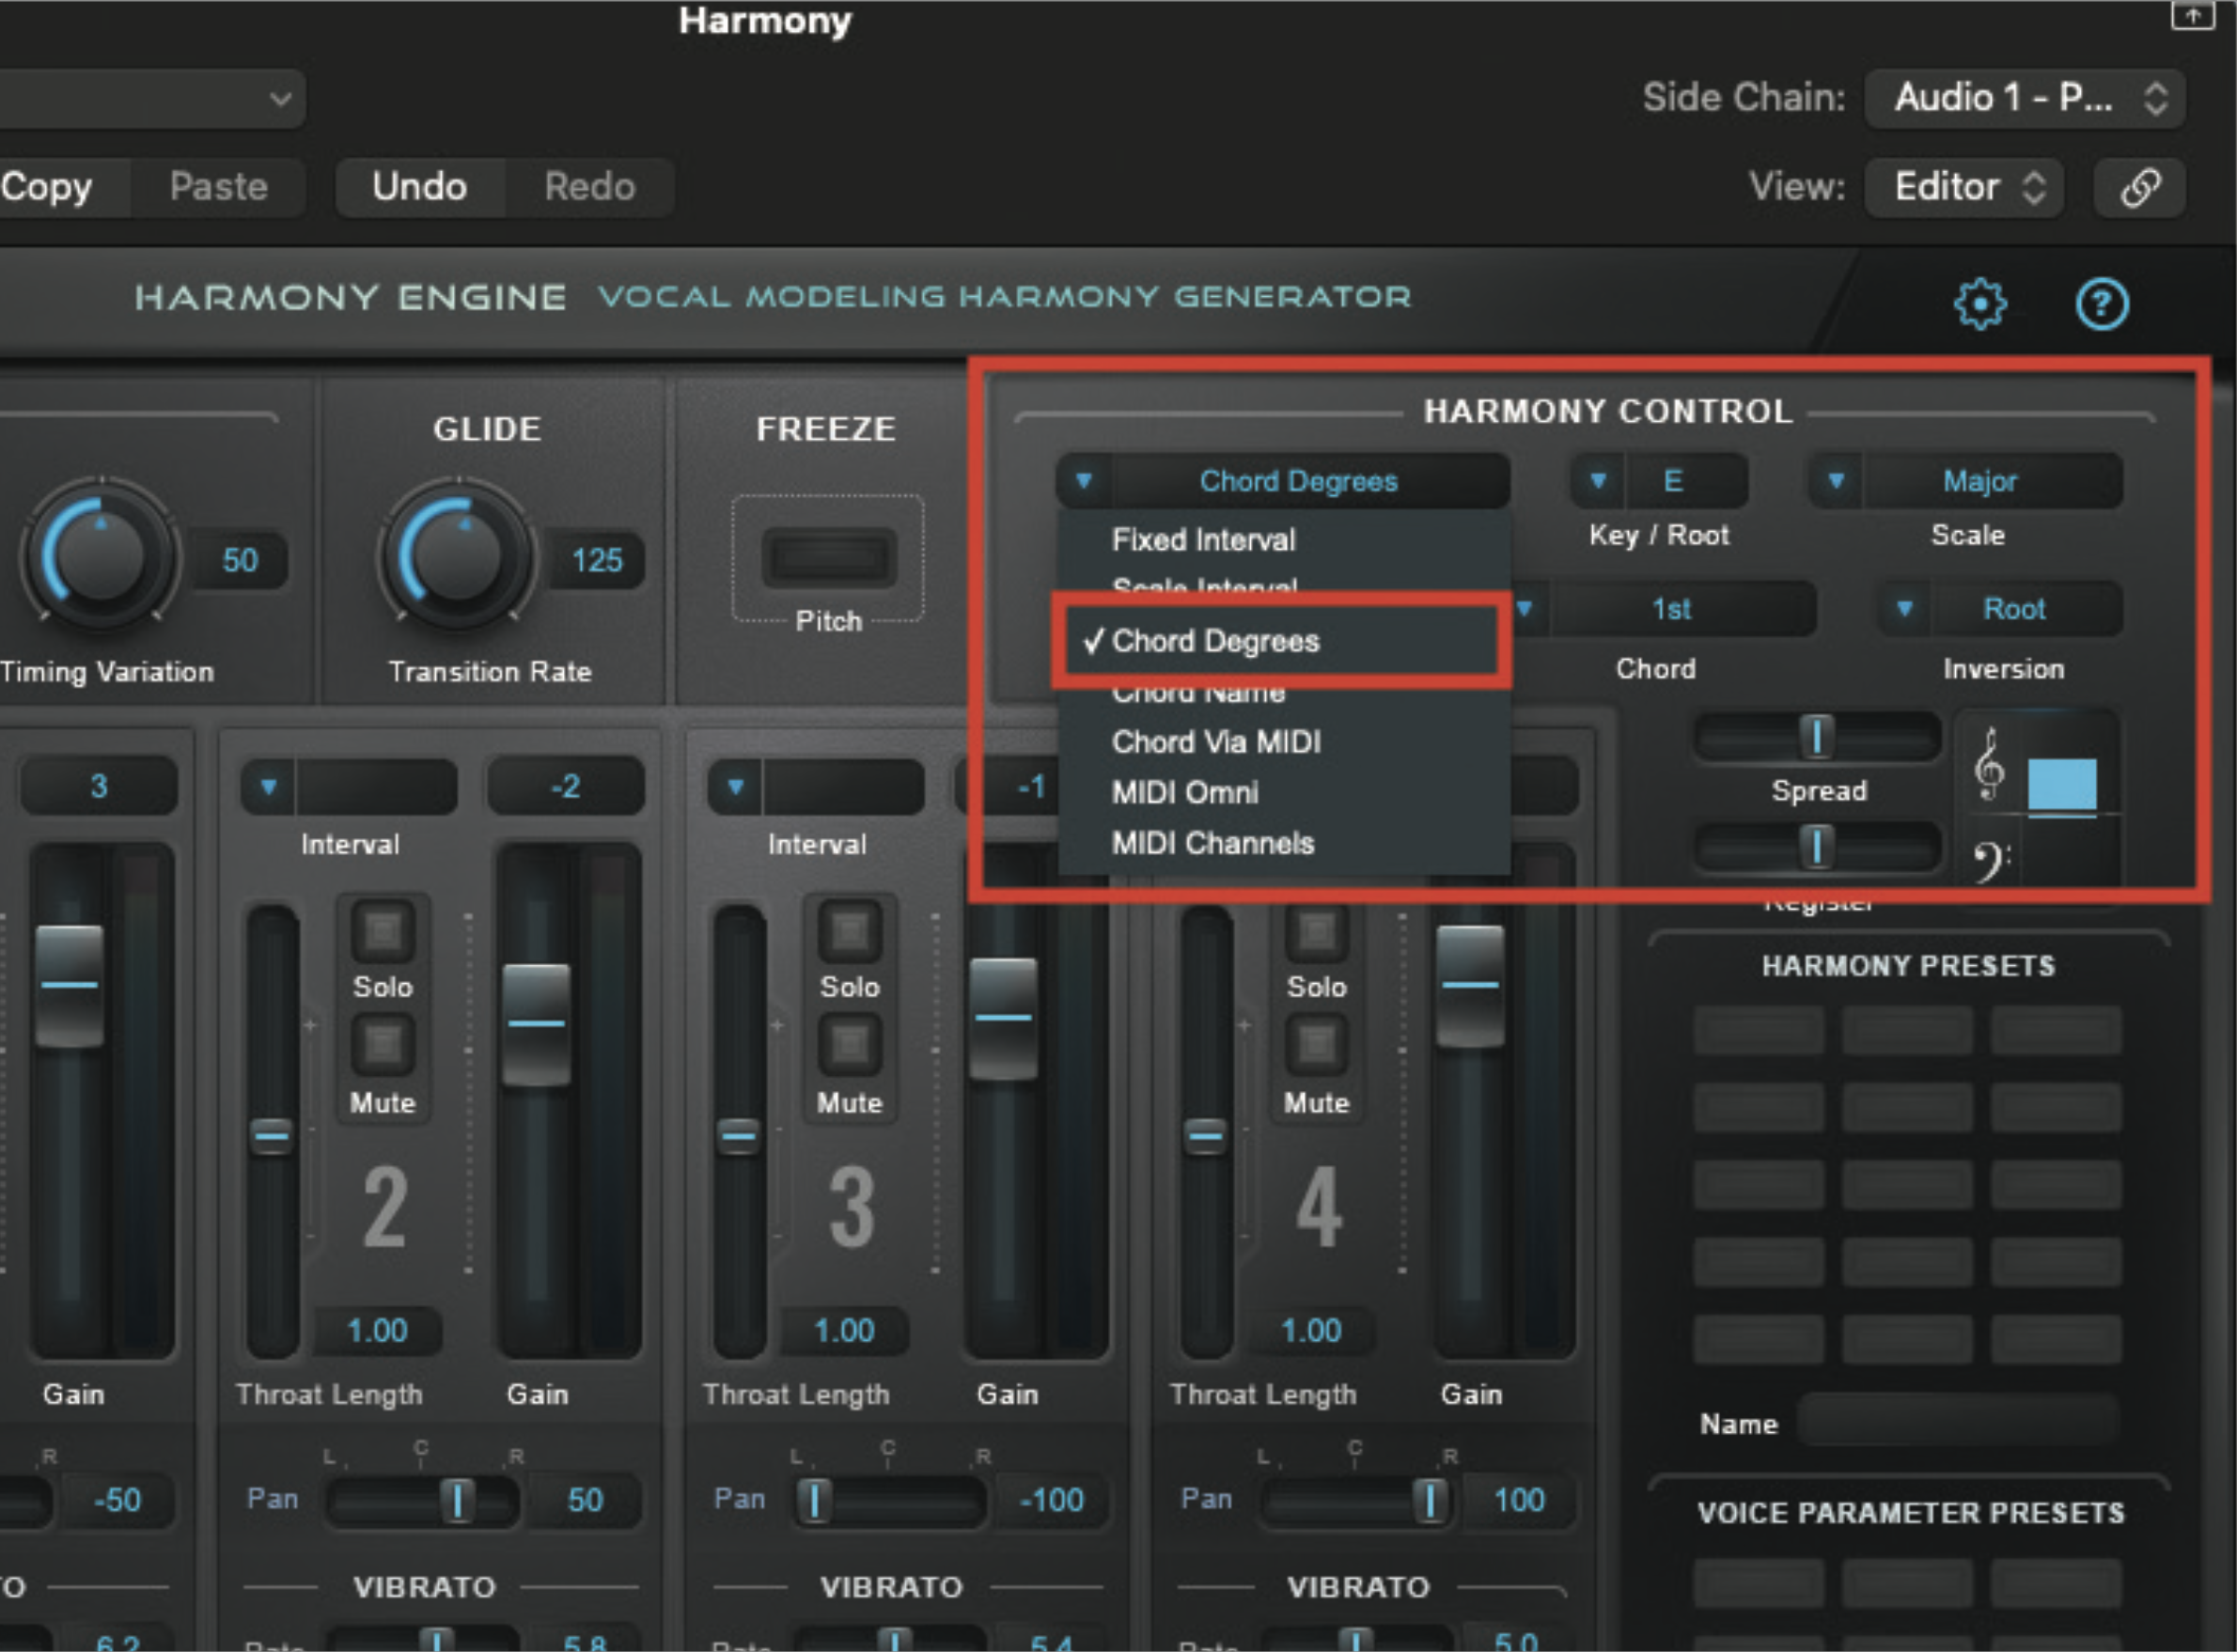
If you want your harmony to be fixed to a single chord but move and react to your lead vocal, alter the harmony control settings to reflect the key of your song. Here we want harmonies fixed to E major, but with chords that change as our vocal alters pitch. Experiment with the Harmony Source settings, as these will yield different degrees of harmonic movement, according to the vocal.

In its current state, Harmony Engine will provide some very gratifying harmonies, fixed around our specific key of E major. The next step, for either using live or for developing the harmonic additions in a track, is to use MIDI to dictate the chords you wish the plugin to adopt. Using the Harmony Source menu again, select Chord via MIDI from the dropdown menu.
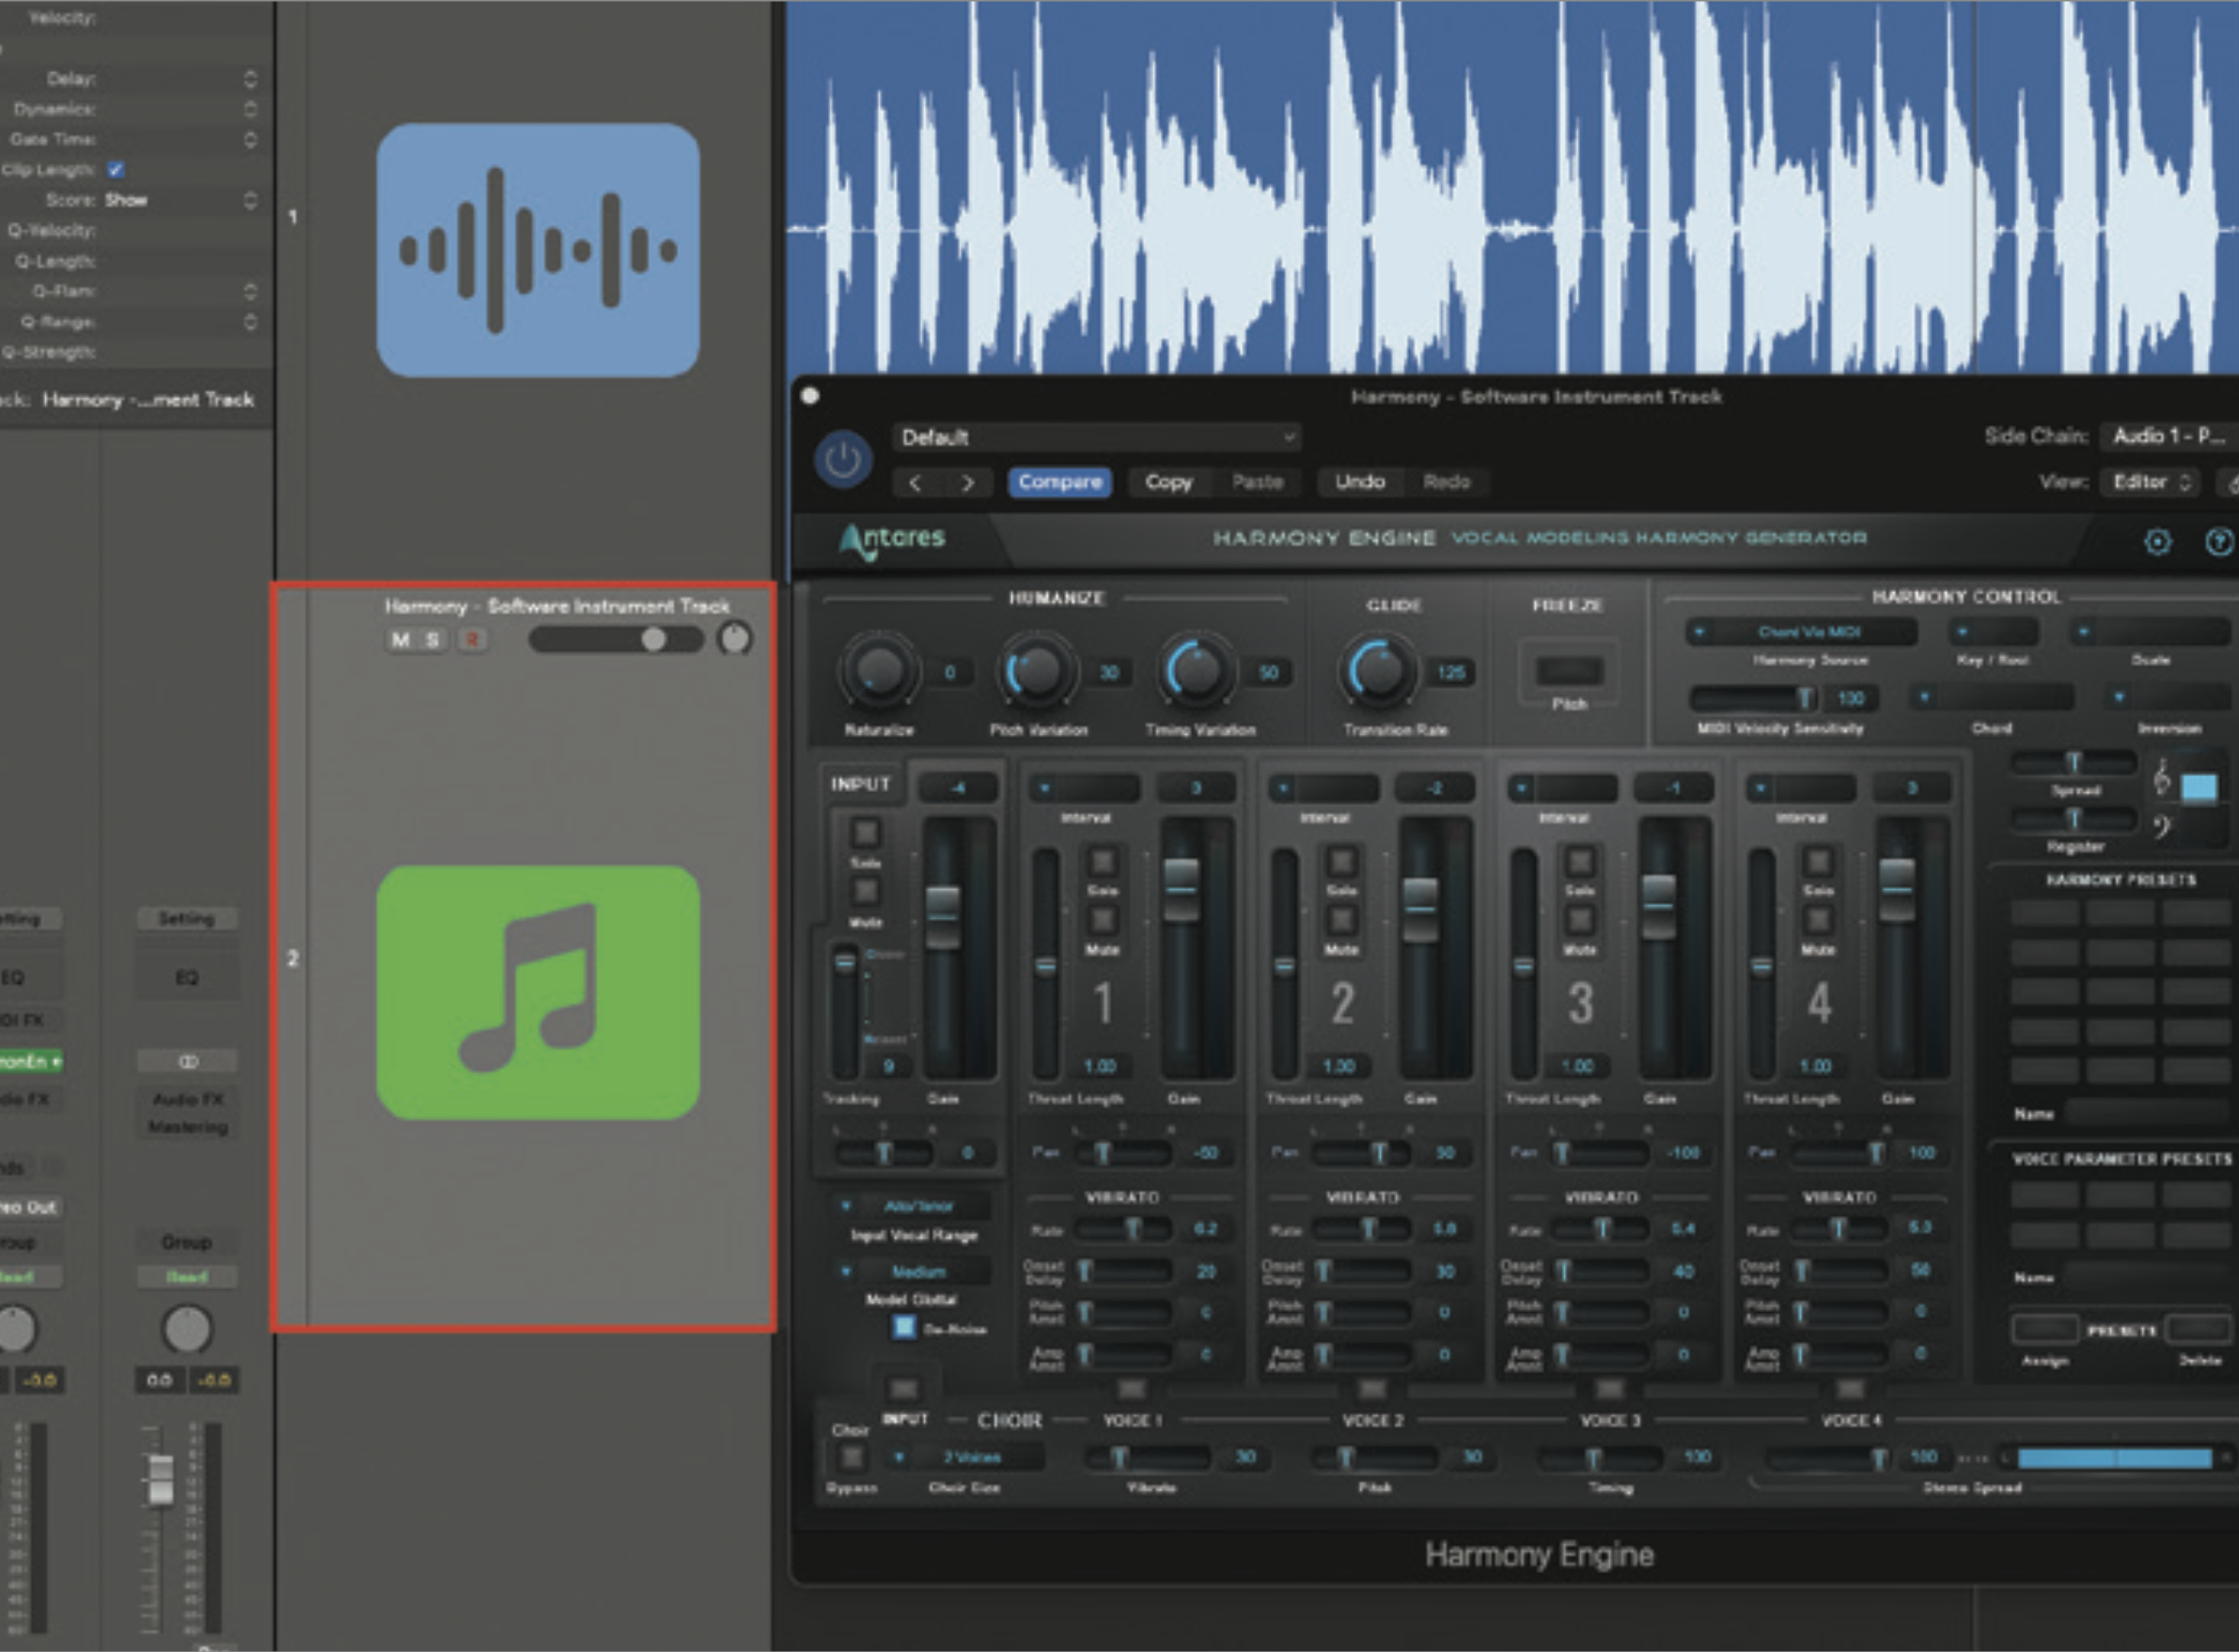
When you now play your MIDI keyboard, you will hear the plugin respond to the chords that you play. You must ensure that you have the software instrument track selected, and your vocal part will need to be playing to provide an incoming signal. If you are playing live, you’ll need to sing into your mic to provide an incoming signal. This will take practice, but the end result is worthwhile!